
Summary of Contents for Pathway connectivity solutions cognito
- Page 1 Quick Guide Version 3.16.13 1439 17 Ave SE Calgary AB T2G 1J9 403-243-8110 www.pathwayconnect.com © Pathway Connectivity, a division of Acuity Brands Lighting Canada 2013...
- Page 2 Additional Help Resources support@pathwayconnect.com http://forums.pathwayconnect.com By Phone: 403-243-8110 8am – 4:30pm MT Fixture Library Support fixtures@pathwayconnect.com New Software Releases www.pathwayconnect.com/downloads/cognito Subject to change Check the website for the latest version of this guide. Please report problems and questions to the forums http://forums.pathwayconnect.com...
-
Page 3: Table Of Contents
Table of Contents Finding Your Way Around ....................5 Top Panel ........................5 Rear Panel ........................6 What to Connect First ....................6 How to Turn the Console On ..................7 How to Turn the Console Off ..................7 How to get Help ......................7 Faders ......................... -
Page 5: Finding Your Way Around
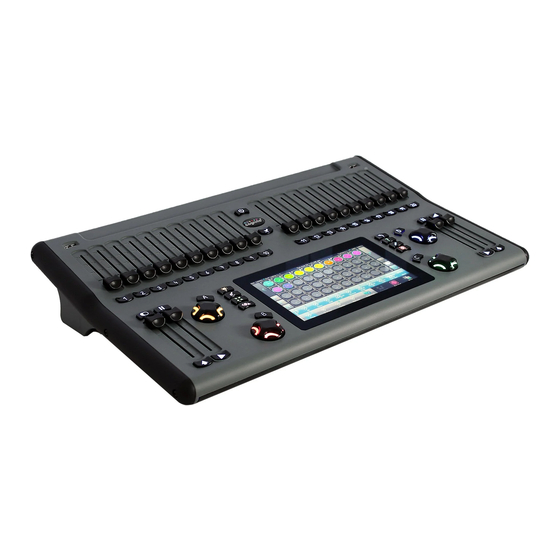
Finding Your Way Around Thank you for purchasing the Cognito™ lighting console. This document will guide you through the rich but easily-accessed features the console provides. With an interface based on ‘natural language control’, you’ll never look at a DMX chart again. -
Page 6: Rear Panel
You may connect both a DC supply and a PoE source at the same time. Data Connect DMX OUT A to the lights using Universe 1 (all Cognito models). A five- pin XLR cable is required. DMX OUT B is enabled on PRO1024 models, for Universe 2, and on PRO512 models, repeating Universe 1. -
Page 7: How To Turn The Console On
How to get Help Cognito provides two forms of built-in support. Press the Help button, to the right of the touch screen, to launch Hints. Hints are context-sensitive comments that overlay the contents of the screen. -
Page 8: Grand Master And Dead Black Out Button
times. See RECORD for more information. Faders play back Memories only when the PLAY Task is active. Grand Master and Dead Black Out Button Located at the bottom left of the console, the Grand Master controls the overall intensity of all lights at all times, regardless of how a light’s intensity has been set. Normally, the Grand Master is at full (the top of the fader’s travel). -
Page 9: Left And Right Playback
Left and Right Playback Cognito provides two Playbacks, one located beside the Grand Master and one beside the Memory Master. Each Playback consists of a Go button, a Playback Master, and a Pause/Back button. Any Playlist may be assigned to either Playback. A Playlist is a series of cues or ‘looks’... -
Page 10: Encoder Wheels And Buttons
Pin Button Located just below the Cognito badge between the fader banks, the Pin button provides a simple method of transitioning between lighting looks. With a lighting look activated by using the faders or manual control, press the Pin button to hold the look (i.e. -
Page 11: The Touch Screen
The Touch Screen The touch screen has four distinct displays, each corresponding to a specific programming task: SELECT, CONTROL, RECORD and PLAY. Each task is shown on the Task Bar at the bottom of the screen. Enter a task screen by touching its icon. SELECT CONTROL RECORD... -
Page 12: Screen Navigation
Screen Navigation Across the top of the touch screen is the status bar, which shows the level (in percentage) of the Grand Master and Memory Master, and the label of the current cue in each of the Right and Left Playlists. On either side of the display are navigation icons. -
Page 13: Select And The Fixture Grid
SELECT and the Fixture Grid SELECT displays the Fixture Grid. The Grid consists of cells, each one representing a single light in the show. Within each cell is a large amount of information describing the current state of that light. 1: Fixture Number. -
Page 14: Select - Manual, Group, Recent, And Standard
Standard The Standard tool allows quick selection by certain customary rules, such as All Lights, No Lights or by fixture types. Cognito automatically creates Standard groups of identical lights, as lights are patched into the Fixture Grid. SELECT – Settings: Light Selection and DMX Patching The Settings tool allows you to assign specific lights (by model) to cells in the Fixture Grid, to set or change the lights’... -
Page 15: Control- Intensity, Color, Position And Shape
When adjusting a color mixing light if the level of a color continues to be raised after a particular color bar has reached 100%, Cognito will automatically lower the other colors until the desired color is reached. Color Different lights may have different or unique color abilities, such as color wheels or scrollers. -
Page 16: Record - Memory, Cue, Library And Group
quick access to standard positions. Wheels also allow the choice between Polar (normal arc) and Linear (direct path) movement. Advanced: Allows you to lock or ‘park’ the position attributes of selected lights. Also allows you to release recent position changes, or to set a light to its default position (when hung, typically straight down). - Page 17 Memory Page, touch the Add New icon. To rename or delete a Memory Page, press the Edit button to the right of the touchscreen. To delete, touch the Delete icon. A second Delete icon will appear. Touch the second Delete icon to confirm. To rename the Memory Page, touch the Memory Page’s current name.
- Page 18 Position Fade: Sets a time for a moving light’s repositioning. If no value is set, any repositioning will use the Fade time. Position Delay: Sets a delay time between pressing GO and starting the Position Fade. Color Fade: Sets a time for the color transition in a light. If no value is set, any color fade will use the Fade time.
-
Page 19: Play - Memory, Left/Right Playback And Mixed
Group Group allows you to record a specific selection of lights for quick recall during programming. After selecting lights in the Fixture Grid, enter RECORD. Touch the Group icon, then select a record location. Name the Group, if desired. Touch the Done icon to record, or the Cancel icon to start again. - Page 20 Below the cue list are several playback icons. The Green Arrow icon acts identically to the Playback Go button. The Yellow Arrow acts as a ‘back’ button, moving back to the previous cue in the list using a one second fade. The Release icon acts the same as the Shift button/Pause button combination, as described above, to release the current Playlist.
-
Page 21: Console Setup And Configuration
Universe 1 (mirroring the DMX output). But for installations with multiple Cognito consoles, setting the first console’s offset to 1 and the second console’s offset to 2, and so on, is desirable. When using Pro1024 models, ensure that the offsets do not overlap, or more than one console may accidentally control the same set of lights, with unpredictable results. - Page 22 IP address. Automatic: Cognito waits to be assigned an IP address by on on-line service such as a DHCP server. If no server is found, Cognito will use that last address assigned to it. Not editable.
-
Page 23: Preparing For A Show (Patching)
Cognito must be connected to the Internet to complete the upgrade process. Preparing for a Show (Patching) For Cognito to function properly, each light used in your show must be assigned a location, or cell, in the Fixture Grid. By default, each light in the Fixture Grid is a ‘dimmer’, which is simply a light that only allows control over its brightness (intensity) -
Page 24: How To Match Lights To Fixture Library Definitions
DMX footprint size. But if you are uncertain, there is no harm in guessing. If Cognito is using the wrong definition, the light will not behave as expected, or not work at all. Simply try a different definition from the library for that light. - Page 25 Desk Lock [Intensity/Color/Position/Shape]: When an attribute is Desk Locked, that attribute’s values are frozen or ‘parked’. Pressing the Release button will deselect the light, but the attribute will remain at the frozen level, and the letters “DL” will appear at the bottom of the light’s cell in the Fixture Grid.
-
Page 26: Shift Button Short Cuts And Extensions
Shift Button Short Cuts and Extensions The Shift buttons, located below the Grand Master and Memory Master faders, provide additional functions when used with other buttons on the console. Press and hold the Shift button (either one) then press the second button, from the list below, to access the desired action or function. -
Page 27: Show File Management
Choose ‘Open Previous Version of This Show’ to select from a list of internally saved show files. Cognito also saves shows to internal storage on an on-going basis and sometimes rolling back to a previous version is desirable. The files are shown organized by date. -
Page 28: Software And Fixture Library Updates
Software and Fixture Library Updates From time to time, updates will be issued for the Cognito, covering either software improvements or light fixture updates. A link to these update is posted on the Cognito product page on the Pathway Connectivity website (www.pathwayconnect.com) or on the Pathway product forums (forums.pathwayconnect.com). -
Page 29: Warranty
Warranty Limited Warranty Pathway Connectivity warrants to the original purchaser or retail customer that, for a period of two years from the date of shipment, its products will be free from defects in materials and workmanship under normal use and service. Pathway Connectivity’s sole responsibility under this warranty shall be to repair, replace or refund, at Pathway’s option, any units which are determined to be defective on Pathway’s inspection.
Need help?
Do you have a question about the cognito and is the answer not in the manual?
Questions and answers