
Related Manuals for Toro TX 420


Summary of Contents for Toro TX 420
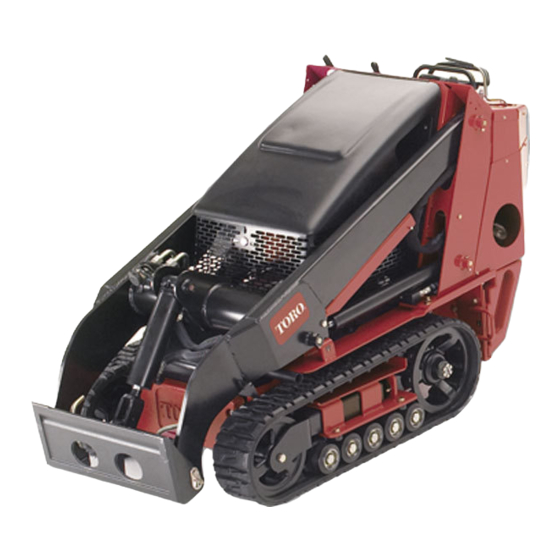
- Page 1 Form No. 3352-362 Dingo TX 420 and TX 425 Compact Utility Loader Model No. 22306—250000001 and Up Model No. 22307—250000001 and Up Operator’s Manual Original Instructions (EN) Register your product at www.Toro.com...
-
Page 2: Table Of Contents
Contents Thank you for purchasing a Toro product. Page All of us at Toro want you to be completely satisfied with your new product, so feel free to contact your local Introduction ....... . -
Page 3: Safety
or Service Representative provide exact information about Warning your specific product. The two numbers are stamped into a plate mounted under the hood near the belt drive. Engine exhaust contains carbon monoxide, an For your convenience, write the product model and serial odorless, deadly poison that can kill you. - Page 4 • Do not exceed the rated operating capacity, as the • Use only Toro-approved attachments. Attachments can traction unit may become unstable which may result in change the stability and the operating characteristics of loss of control.
- Page 5 • Park the machine on level ground. Never allow Make any necessary repairs before restarting. untrained personnel to service the machine. • Use only genuine Toro replacement parts to ensure that • Use jack stands to support components when required. original standards are maintained.
-
Page 7: Slope Chart
Slope Chart M 4402... -
Page 9: Safety And Instruction Decals
Safety and Instruction Decals Safety decals and instructions are easily visible to the operator and are located near any area of potential danger. Replace any decal that is damaged or lost. 106-9305 100-6140 108-5599... - Page 10 107-9309 1. Warning—read the Operator’s Manual for information on charging the battery; contains lead; do not discard. 2. Read the Operator’s Manual. 80-8040 100-6101 105-8432 100-6132 100-6135 80-8290 100-6141 104-2837 100-6136 104-2838 100-6138...
- Page 11 104-2844 93-9084 1. Lift point 2. Tie-down point...
-
Page 12: Setup
Setup Charging the Battery Warning Warning Charging the battery produces gases that can explode. CALIFORNIA Never smoke near the battery and keep sparks and flames away from battery. Proposition 65 Warning Battery posts, terminals, and related accessories 4. When the battery is fully charged, disconnect the contain lead and lead compounds, chemicals charger from the electrical outlet and from the known to the State of California to cause cancer... -
Page 13: Specifications
These attachments allow you to to perform many notice. different functions with the traction unit such as hauling materials, digging holes, grading, and more. Contact your Toro dealer for a list of all approved attachments and TX 420, Model 22306 accessories. Width... -
Page 14: Stability Data
Example: If the attachment installed on a TX 420 traction unit has a Front Uphill rating of B, a Rear Uphill rating of D, and a Side Uphill rating of C, then you could drive forward up a 20°... -
Page 15: Before Operating
Before Operating Important Do not use methanol, gasoline containing methanol, or gasohol containing more than 10% ethanol because the fuel system could be damaged. Do not mix oil Before operating, check the fuel and oil level, and remove with gasoline. debris from the traction unit. -
Page 16: Removing Debris From The Traction Unit
6. Clean any debris build-up on the engine and in the oil cooler fins with a brush or blower. Important It is preferable to blow dirt out, rather than washing it out. If water is used, keep it away from electrical items and hydraulic valves. -
Page 17: Operation
Operation Traction Unit Overview Figure 5 contains a front and back view of the traction unit. Familiarize yourself with all of the traction unit components listed in Figure 5. m-4732 m-7670 Figure 5 1. Track 5. Loader arms 9. Mount plate 12. -
Page 18: Key Switch
Key Switch Loader Arm/Attachment Tilt Lever The key switch, used to start and stop the engine, has To tilt the attachment forward, slowly move the lever to three positions: off, run, and start. the right (Fig. 8). To start the engine, rotate the key to the start position. To tilt the attachment rearward, slowly move the lever to Release the key when engine starts and it will move the left (Fig. -
Page 19: Starting And Stopping The Engine
m–5918 m-5238 Figure 11 Figure 9 1. Loader valve lock 2. Loader arm/attachment tilt To release the brake, pull the lever rearward and right, out lever of the notch, and then push it forward. Fuel Gauge Auxiliary Hydraulics Lever This gauge measures the amount of fuel in the fuel tank. To operate a hydraulic attachment in the forward direction, rotate the auxiliary hydraulics lever rearward and pull it down to the reference bar (Fig. -
Page 20: Stopping The Traction Unit
Moving a Non-functioning 4. Turn the ignition key to the start position. When the engines starts, release the key. Traction Unit Important Do not engage the starter for more than 10 Important Do not tow or pull the traction unit without seconds at a time. -
Page 21: Using Attachments
5. Lower the cylinder lock over the cylinder rod and secure it with the clevis pin and hairpin cotter Important Use only Toro-approved attachments. (Fig. 13). Attachments can change the stability and the operating characteristics of the traction unit. The warranty of the traction unit may be voided if used with unapproved attachments. - Page 22 Note: When you connect the attachment male connector Warning first, you will relieve any pressure build up in the attachment. If you do not fully seat the quick attach pins Warning through the attachment mount plate, the attachment could fall off of the traction unit, crushing you or bystanders.
-
Page 23: Securing The Traction Unit For Transport
Securing the Traction Unit for 3. Set the parking brake. Transport 4. Secure the traction unit to the trailer with chains or straps using the tie-down/lift loops (Fig. 5) to secure the rear of the traction unit and the loader arms/mount Important Do not operate or drive the traction unit on plate to secure the front of the traction unit. -
Page 24: Accessing The Engine And Internal Components
For severe duty or rental applications, change every 200 operating hours. Check the hydraulic fluid level before using the traction unit for the first time Important Refer to your engine operator’s manual for additional maintenance procedures. Note: After 50 hours and then every 100 hours thereafter (that is at 150, 250, 350, etc.) the screen displays CHG OIL to remind you to change the engine oil. - Page 25 Removing the Front Screen Caution If the engine has been running the heat shield will be very hot and could burn you. Allow the traction unit cool completely before touching the heat shield. 1. Open the hood and remove both side screens. m–7675 Figure 18 2.
-
Page 26: Adjusting The Controls
m–5921 m–7878 Figure 22 Figure 23 1. Nut 3. Front screen 1. Front of the control, out of 2. Reference bar 2. Oil cooler 4. Shoulder bolts alignment 8. When finished, install the front screen with the 4 bolts 4. If the front of the traction control does not rest square removed previously. - Page 27 Adjusting the Tracking of the Traction 1. Lift/support the traction unit so that both tracks are off of the ground. Control, Full Forward Position 2. Open the rear access cover; refer to Opening the Rear If the traction unit does not drive straight when you hold Access Cover, page 24.
-
Page 28: Servicing The Air Cleaner
2. Remove the three bolts securing the left control panel cover and remove the cover (Fig. 28). 3. Loosen the jam nut on the adjustment bolt (Fig. 28). m–7883 Figure 29 m–7882 1. Knob 6. Foam pre-filter Figure 28 2. Air cleaner cover 7. -
Page 29: Servicing The Engine Oil
USE THESE SAE VISCOSITY OILS 6. Inspect the paper filter for tears, an oily film, and damage to the rubber seal. 10W-30, 10W-40 Important Never clean the paper element with pressurized air or liquids, such as solvent, gas, or kerosene. Replace the paper element if it is damaged, or cannot be cleaned thoroughly (i.e., after approximately 5W-20, 5W-30 100 operating hours). -
Page 30: Servicing The Tracks
Servicing the Tracks 6. Remove the oil fill cap and slowly pour approximately 80% of the specified amount of oil in through the valve cover. Check the tracks for excessive wear and clean them periodically. If the tracks are worn, replace them. Check 7. - Page 31 11. Turn the tensioning screw counter-clockwise until the distance between the tension nut and the back of the fork tube (Fig. 35) is 2-3/4 inches (7 cm). Replacing the Tracks (TX 420, Model 22306) 12. Align the closest notch in the tension screw to the locking bolt hole and secure the screw with the locking When the tracks are badly worn, replace them.
- Page 32 Replacing the Tracks (TX 425, Model 12. Install the inner tension wheel and secure it with the nut removed previously (Fig. 38). 22307) 13. Torque the nut to 300 ft-lb (407 N⋅m). When the tracks are badly worn, replace them. 14.
-
Page 33: Servicing The Spark Plugs
Removing the Spark Plug 1. Lower the loader arms, stop the engine, and remove the key. 2. Open the hood; refer to Opening the Hood, page 24. 3. Pull the wires off of the spark plugs (Fig. 41). 4. Clean around the spark plugs. 5. -
Page 34: Greasing The Traction Unit
Installing the Spark Plug 5. Wipe up any excess grease. 1. Thread the spark plugs into the spark plug holes. Changing the Fuel Filter 2. Tighten the spark plugs to 20 ft-lb (27 N.m). Change the fuel filter after every 200 operating hours or 3. -
Page 35: Draining The Fuel Tank
Draining the Fuel Tank Danger In certain conditions, gasoline is extremely flammable and highly explosive. A fire or explosion from gasoline can burn you and others and can damage property. m–5920 • Drain gasoline from the fuel tank when the engine is cold. -
Page 36: Servicing The Battery
Note: The filler cap is behind the front screen. If you 12. Check the hydraulic fluid level and top it off if want to improve your access to it, remove the screen; necessary; refer to Checking Hydraulic Fluid, page 16. refer to Removing the Front Screen, page 25. -
Page 37: Cleaning The Chassis
Important Do not allow the electrolyte to get below Warning the plates. (Fig. 49). Charging the battery produces gases that can explode. Never smoke near the battery and keep sparks and flames away from battery. 1262 Cleaning the Chassis Figure 49 Over time, the chassis under the engine collects dirt and 1. -
Page 38: Storage
9. Place a clamp on the fuel line, 2 inches from where it 20. Slide the tank all the way into the traction unit. comes out of the fuel tank. Important The fuel line and wires must be away from 10. - Page 39 A. Add a petroleum based stabilizer/conditioner to fuel in the tank. Follow mixing instructions from stabilizer manufacturer. (1 oz. per US gallon). Do not use an alcohol based stabilizer (ethanol or methanol). Note: A fuel stabilizer/conditioner is most effective when mixed with fresh gasoline and used at all times.
-
Page 40: Troubleshooting
1. The parking brake is on. 1. Release the parking brake. 2. Hydraulic fluid level low. 2. Add hydraulic fluid. 3. The tow valves are open. 3. Close the tow valves 4. Hydraulic system is damaged. 4. Contact your Toro dealer. -
Page 41: Schematics
Schematics Electrical Schematic... - Page 42 Hydraulic Schematic...
-
Page 44: The Toro Dingo Product Line Warranty
If for any reason you are dissatisfied with your Distributor’s service or have difficulty obtaining guarantee information, contact the Toro importer. If all other remedies fail, you may contact us at Toro Warranty Company.
Need help?
Do you have a question about the TX 420 and is the answer not in the manual?
Questions and answers