Table of Contents
Advertisement
Advertisement
Table of Contents

Related Manuals for Avid Technology HD I/O


Summary of Contents for Avid Technology HD I/O
- Page 1 ® Pro Tools | HD I/O Guide...
- Page 2 Legal Notices Sundance Digital, SurroundScope, Symphony, SYNC HD, SYNC I/O, Synchronic, SynchroScope, Syntax, © 2014 Avid Technology, Inc., (“Avid”), all rights reserved. TDM FlexCable, TechFlix, Tel-Ray, Thunder, TimeLiner, This guide may not be duplicated in whole or in part without Titansync, Titan, TL Aggro, TL AutoPan, TL Drum Rehab, the written consent of Avid.
-
Page 3: Table Of Contents
Connecting Pro Tools | HD I/O ........ - Page 4 に つ い て Chapter 9. Pro Tools | HD I/O ........49 の...
-
Page 5: Chapter 1: Introduction
AES/EBU, TDIF DB-25, or Optical at sample • 16 x 16 digital in and out rates of 44.1 kHz, 48 kHz, 88.2 kHz, 96 kHz, 176.4 kHz, and 192 kHz with a Digital HD I/O You can also add or remove analog (ADC and card DAC) and digital cards for custom configurations. -
Page 6: What's Included
Avid can only assure compatibility and provide • External Clock input and output for synchroniz- support for hardware and software it has tested and ing HD I/O with external Word Clock devices approved. Expandability For complete system requirements and a list of •... -
Page 7: About This Guide
About This Guide All of our guides use the following conventions to This guide provides a basic overview of indicate menu choices and key commands: Pro Tools | HD I/O features and functionality. Convention Action For hardware installation instructions for your Pro Tools | HDX hardware, see the File >... -
Page 8: About Www.avid.com
About www.avid.com The Avid website (www.avid.com) is your best online source for information to help you get the most out of your Pro Tools system. The following are just a few of the services and features available. Register your purchase Product Registration online. -
Page 9: Chapter 2: Pro Tools | Hd I/O Overview
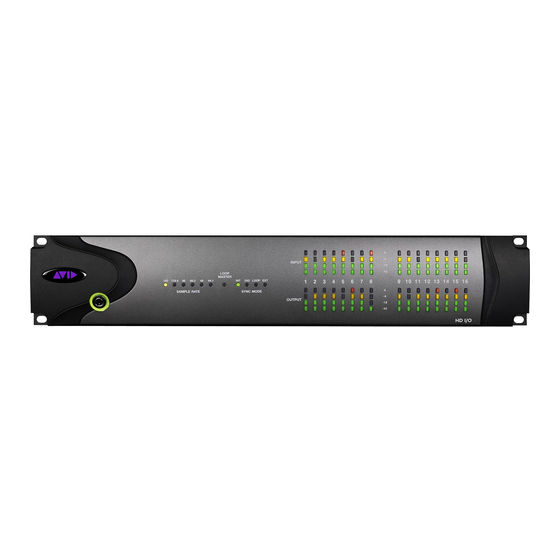
Chapter 2: Pro Tools | HD I/O Overview This chapter describes the front and back panel features of the Pro Tools | HD I/O. Pro Tools | HD I/O Front Panel HD I/O Front Panel Power Switch and LED Ring Sample Rate This button turns HD I/O on and off. - Page 10 However, for sample rates higher than 48 kHz, HD I/O generates a choice of 1x, 2x, or 4x of With HDX hardware, Loop Master defaults to the a base rate of 44.1 kHz or 48 kHz, as...
-
Page 11: Pro Tools | Hd I/O Back Panel
PRIMARY PORT Bay 4: Empty for Optional card Bay 2: Analog Out card HD I/O Back Panel, 8 x 8 x 8 configuration shown Input and Output Cards Although the HD I/O is a sixteen-channel audio in- terface, it has up to 94 inputs and outputs available... -
Page 12: Analog Output
Analog Input Analog Output The HD I/O Analog In card contains connectors The HD I/O Analog Out card contains a single for analog audio input with 24-bit, 192 kHz A/D DB–25 connector and Output Trims for eight converters. Input is provided through two discrete channels of analog audio output. - Page 13 192 kHz sample rates in single-wire mode up to eight channels. Dual-wire mode uses The right half of the back panel of HD I/O features two HD I/O physical I/O channels of AES/EBU a set of non-removable connectors that are I/O to carry each single stream of 176.4 kHz or...
- Page 14 88.2/96 kHz or 4 channels at 176.4/192 kHz. This port is only available when HD I/O is con- nected directly to an HDX, HD Native, or About Lightpipe-Compatible Devices Pro Tools|HD card. It is not available when the...
- Page 15 (www.avid.com). DigiLink Mini Cables WD CLOCK IN and OUT Use a DigiLink Mini cable to connect an HD I/O to The Word Clock I/O ports are standard BNC con- an HDX or HD Native card, or to other Avid HD nectors that receive and output word clock signal.
- Page 16 Pro Tools|HD audio interfaces and SYNC HD). AC Power This connector accepts a standard AC power cable. HD I/O is auto power-selecting (100V to 240V) and will automatically work with a standard mod- ular cable (IEC) to connect to AC power outlets in any country.
-
Page 17: Chapter 3: Connecting Pro Tools | Hd I/O
HD Native cooling. Do not block the sides of the unit or dis- HD I/O is connected to the HD Native card using a DigiLink Mini cable. You can connect additional connect the internal fan. If the units are rack-... -
Page 18: Connecting Pro Tools | Hd I/O To Pro Tools | Hdx Cards
16-channel HD I/O to an HDX card. Two of the interfaces connect directly to Dig- iLink Mini Ports 1 and 2, and the other two HD I/O connect to the Expansion ports on first two HD I/O. - Page 19 First HDX card Second HDX card Figure 2. Making DigiLink and Loop Sync connections with two HDX cards, one HD OMNI, and five HD I/Os Chapter 3: Connecting Pro Tools | HD I/O...
-
Page 20: Connecting Pro Tools | Hd I/O To A Pro Tools | Hd Native Card
Connecting Pro Tools | HD I/O to a Pro Tools | HD Native Card To connect HD I/O to an HD Native card: Connect the HD I/O Primary Port to DigiLink Mini Port 1 on the HD Native card using the included DigiLink Mini cable. - Page 21 If you are using two or more Pro Tools audio interfaces or a SYNC peripheral, Loop Sync must be connected to maintain proper clock synchronization among the devices. For examples that include a SYNC peripheral, see the SYNC HD Guide. For an example of connecting multiple Avid HD audio interfaces, see Figure 4 below.
-
Page 22: Connecting Pro Tools | Hd I/O To Pro Tools|Hd Cards
DigiLink cable (included with your Pro Tools|HD system) and a DigiLink Mini adapter. Do one of the following: • Connect the Primary Port of the second HD I/O to the Expansion Port on the first HD I/O with the included 18-inch DigiLink Mini cable. - Page 23 If you are using two or more Pro Tools audio interfaces or a SYNC peripheral, Loop Sync must be connected to maintain proper clock synchronization among the devices. For an example of connecting multiple Avid HD audio interfaces, see Figure 6 below. To make Loop Sync connections: Connect the Loop Sync Out of each interface to the Loop Sync In of the next interface with a BNC cable.
- Page 24 Pro Tools | HD I/O Guide...
-
Page 25: Chapter 4. Configuring Pro Tools | Hd I/O In Pro Tools | Hd Software
Selecting the default sample rate Click You can change the sample rate when creating a new Pro Tools session by selecting a different sample rate in the New Session dialog. Chapter 4: Configuring Pro Tools | HD I/O in Pro Tools | HD Software... -
Page 26: Clock Source
ADAT S/MUX 1–4 • (at 176.4 and 192 kHz) ADAT S/MUX 1–2 • (at 44.1 and 48 kHz) TDIF 1–8 • (at 44.1 and 48 kHz) Optical ADAT [Encl] • (at all sample rates) Word Clock Pro Tools | HD I/O Guide... -
Page 27: Configuring Hd I/O
Analog In 1–8 Repeat the above steps for each additional audio interface in your setup. HD I/O Hardware Setup, Analog In page Chapter 4: Configuring Pro Tools | HD I/O in Pro Tools | HD Software... - Page 28 Pro Tools audio interfaces to channel assignments in the Pro Tools mixer. HD I/O Hardware Setup, Digital page HD I/O Hardware Setup, Main page (8 x 8 x 8 shown) At session sample rates above 48 kHz, sample rate conversion for the TDIF and Optical...
- Page 29 Control-Alt-click to cascade all Input or For S/PDIF (Sony/Phillips Digital Interface For- Output settings. mat) compatibility with Tascam DA-30 DAT re- corders, select the option under S/PDIF Tascam Format. Chapter 4: Configuring Pro Tools | HD I/O in Pro Tools | HD Software...
- Page 30 HD I/O provides options for soft limiting on each lets you set the Reference Level for the physical of the available analog input channels. Select the analog inputs on HD I/O. You can also apply a lim- desired option from the corresponding pop- Limiter iter to each of the available analog inputs.
- Page 31 TDIF and Optical (ADAT) inputs on the HD I/O Digital card is automatically enabled on all eight inputs of the selected format—unless you are using Optical (ADAT S/MUX). Chapter 4: Configuring Pro Tools | HD I/O in Pro Tools | HD Software...
- Page 32 Enable this option for eight channels of ADAT 1–8 ADAT input. This is the only option available at sample rates of 44.1 kHz and 48 kHz. This option is not available at higher sample rates. Pro Tools | HD I/O Guide...
-
Page 33: Sample Rate Conversion
Digital Format ting in the Main page. SRC enabled for AES/EBU Input channels 1–2 and 3–4 at a Sample Rate of 96 kHz Chapter 4: Configuring Pro Tools | HD I/O in Pro Tools | HD Software... -
Page 34: Using Input Trims
If your mixer can handle up to 15.5V (RMS) in- puts, or has pads or attenuators on its inputs, then you can use the +4 dBu setting on the HD I/O. HD I/O is calibrated at the factory for 18 dB headroom at the +4 dBu setting. -
Page 35: Chapter 5: Adding Or Removing I/O Cards
(albeit with Removing the top cover screws reduced I/O capabilities). Lift off the top panel of the HD I/O and set it aside. Legacy 192 I/O AD, DA, and Digital Option cards are not supported with HD I/O. - Page 36 HD I/O. Place the card in a static-free bag and keep it in a safe place (if you are not sending it to Avid for service). Firmly grasp the 50-pin cable connector to the HD I/O chassis and gently pull to remove it (be sure to keep the cable in a safe place).
-
Page 37: Installing An Expansion I/O Card
Put the screws in a safe place. Lift off the top of the HD I/O and set it aside. If necessary, do one of the following: • Remove the screws on the cover over the empty bay where you want to install an Ex- pansion card. - Page 38 Be very careful not to bend any of the pins or to over-stress the card. Securing the I/O card to the back panel of the HD I/O Locate the raised ridge in the middle of the con- nector on one end of the 50-pin cable that con- nects the I/O card to the HD I/O chassis.
-
Page 39: Troubleshooting
Whenever a card is added or removed from a HD I/O, the routing in the Hardware Setup dialog reverts to the default assignments. If you have complex routing and or mirroring in... - Page 40 Pro Tools | HD I/O Guide...
-
Page 41: Chapter 6. Pinout Diagrams For The Db-25 Connectors
Chapter 6: Pinout Diagrams for the DB-25 Connectors Analog Output DB-25 Analog Input (+4 dBu) DB-25 +4" Analog Outputs CH1_HOT CH1_HOT CH1_COLD CH1_COLD CH1_GND CH1_GND CH2_HOT CH2_HOT CH2_COLD CH2_COLD CH2_GND CH2_GND CH3_HOT CH3_HOT CH3_COLD CH3_COLD CH3_GND CH3_GND CH4_HOT CH4_HOT CH4_COLD CH4_COLD CH4_GND CH4_GND... -
Page 42: Analog Input (-10Dbv) Db-25
CH3_GND CH56_RCV_GND CH4_HOT CH78_RCV_HOT CH4_COLD CH78_RCV_COLD CH4_GND CH78_RCV_GND CH5_HOT CH12_XMT_HOT CH5_COLD CH12_XMT_COLD CH5_GND CH12_XMT_GND CH6_HOT CH34_XMT_HOT CH6_COLD CH34_XMT_COLD CH6_GND CH34_XMT_GND CH7_HOT CH56_XMT_HOT CH7_COLD CH56_XMT_COLD CH7_GND CH56_XMT_GND CH8_HOT CH78_XMT_HOT CH8_COLD CH78_XMT_COLD CH8_GND CH78_XMT_GND NC_1 NC_1 Pro Tools | HD I/O Guide... -
Page 43: Tdif Db-25
TDIF DB-25 CH12_RCV_DATA GND1 CH34_RCV_DATA GND2 CH56_RCV_DATA GND3 CH78_RCV_DATA GND4 CH12_XMT_DATA GND5 CH34_XMT_DATA GND6 CH56_XMT_DATA GND7 CH78_XMT_DATA GND8 RCV_LRCK RCV_EMPHASIS CLK+CTRL RCV_FS1 RCV_FS0 XMT_LRCK XMT_EMPHASIS CLK+CTRL XMT_FS1 XMT_FS0 GND9 DB25F_RA_TDIF FB30 FB31 22PF 22PF GND_C GND_C GND_C GND_A GND_A Chapter 6: Pinout Diagrams for the DB-25 Connectors... - Page 44 Pro Tools | HD I/O Guide...
-
Page 45: Chapter 7. Hd I/O Calibration Mode Instructions
Chapter 7: HD I/O Calibration Mode Instructions Headroom Before you use Pro Tools | HD I/O, you may want to calibrate its input and output levels to the level The concept of headroom is slightly different for of your mixing console. -
Page 46: Calibrating The Hd I/O
For example, to have 12 dB of headroom above To create a session for calibrating your HD I/O: 0 VU with the HD I/O, you must align the incom- Launch Pro Tools and create a new session. ing 0 VU 1kHz tone to a level of –12 dBFS. For... - Page 47 Create an additional mono Auxiliary Input track Adjust the HD I/O input level trim pots with the for each input you want to calibrate. Set the in- same small flat-head screwdriver or tweaker. It put assignment for each of these Auxiliary In- is best to calibrate the inputs with the back of puts to its respective I/O input.
-
Page 48: Switching Jumpers On The Analog Output Card
Switching Jumpers on the Analog Output Card Each Analog Output card for HD I/O provides a jumper for each of the eight channels of output on the card to switch between a Hi and Lo output set- ting. The default setting for each jumper is Hi. This is what you want for working with professional gear that operates at +4 dBu levels. -
Page 49: 機 能
章 は じ め に I /O Pro Tools® | HD I/O Pro Tools® | HDX 、 、 ナ ロ グ P r o T o o l s ® | H D N a t i v e 、 お よ び... -
Page 50: • Pro Tools | Hd I/O
• Pro Tools | HD I/O • • AC • • DigiLink Mini 0.46m 18 • DigiLink Mini • • BNC 0.46m 18 ー ド ウ ェ ア の 保 証 • Pro Tools HD I/O • • Pro Tools | HD I/O イ ド... - Page 51 ガ イ ド で 使 用 さ れ る 表 記 規 則 こ の マ ニ ュ ア ル に つ い て HD I/O 記 法 ア ク シ ョ ン File > F ile フ ァ イ ル ]...
-
Page 52: Www.avid.com
サ ポ ー ト と ダ ウ ン ロ ー ド Success Pro Tools ト レ ー ニ ン グ と 教 育 Pro Tools A vid 品 と 開 発 者 A vid ニ ュ ー ス と イ ベ ン ト Pro Tools Pro Tools | HD I/O イ ド... -
Page 53: Pro Tools | Hd I/O
P ro Tools | HD I/O 章 の 概 要 Pro Tools | HD I/O Pro Tools | HD I/O : フ ロ ン ト パ ネ ル HD I/O : フ ロ ン ト パ ネ ル L ED 電... - Page 54 サ ポ ー ト L ED 同 期 モ ー ド 44.1kHz 44.1kHz ProTools 48kHz 48kHz 88.2kHz 88.2kHz I nternal 44.1kHz ( ) HD I/O 96kHz 96kHz 48kHz 176.4kHz 176.4kHz 44.1kHz 192kHz 192kHz 48kHz Pro Tools | HD I/O イ ド...
- Page 55 メ ー タ ー –42dB –18dB –6dB 0dB Pro Tools Pro Tools | HD I/O 第 章 の 概 要...
-
Page 56: バ ッ ク パ ネ ル
Pro Tools | HD I/O の バ ッ ク パ ネ ル Bay 1 A nalog In Bay 3 D igital I/O : カ ー ド : カ ー ド 同 梱 物 ANALOG INPUT DIGITAL I/O AES/EBU AES/EBU S/PDIF... - Page 57 HD I/O Analog In /192kHz A/D DB–25 DB–25 +4dBu –10dBV Pro Tools Limiter +4dBu +4dBu バ ラ ン ス 型 -10dBV +10dBV バ ラ ン ス 型 –10dBV –10dBV –10dBV Pro Tools | HD I/O 第 章 の 概 要...
- Page 58 ウ ト プ ッ ト ・ ト リ ム TDIF 6 DB-25 DB–25 AviddB-25 TDIF 7 HD I/O A DAT /2 4 プ テ ィ カ ル ( ) 48kHz S/PDIF S/PDIF ADAT Encl Pro Tools | HD I/O イ ド...
- Page 59 Encl S/PDIF Encl Loop Sync HD I/O ADAT HD Native Pro Tools|HD Avid HD A / D D / A S/MUX AES/EBU E ncl [ ] X L R AES/EBU 192kHz Pro Tools | HD I/O 第 章 の 概 要...
- Page 60 ョ ン に 対 す る 最 大 ⻑ ( 別 売 ) EXPANSION PORT • 100 ft 30.5m 88.2kHz 96kHz ン に 対 す る 最 大 ⻑ ( 別 売 ) EXPANSION PORT HD|HD EXPANSION PORT 17–32 Pro Tools | HD I/O イ ド...
- Page 61 Word Clock In/Out SYNC HD HD I/O 電 源 WD CLOCK IN Pro Tools HD I/O 100V 240V CLOCK OUT ア ク セ サ リ ー ・ ポ ー ト Pro Tools | HD I/O 第 章 の 概 要...
- Page 62 Pro Tools | HD I/O イ ド...
-
Page 63: Pro Tools | Hd I/O
P ro Tools | HD I/O 章 を 接 続 す る Pro Tools|HD Pro Tools|HD Pro Tools | HD I/O Pro Tools | HDX 、 HD I/O DigiLink Mini/DigiLink Pro Tools | HD Native P ro Tools|HD 、 Pro Tools|HD HD OMNI Pro Tools|HD... -
Page 64: Pro Tools | Hd I/O
Pro Tools | HD I/O Pro Tools | HDX を カ ー ド に 接 続 す る HD I/O DigiLink Mini HD I/O HD I/O H DX を カ ー ド へ 接 続 す る に は :... - Page 65 を 次 の イ ン タ − フ ェ ー ス の Loop Sync In Loop Sync Out 台 目 の イ ン タ − SYNC Loop Sync In Pro Tools | HD I/O 第 章 を 接 続 す る...
- Page 66 H D OMNI H D I/O D igiLink 図 つ の カ ー ド 、 つ の 、 つ の と の 接 続 と の ル ー プ ・ シ ン ク 接 続 Pro Tools | HD I/O イ ド...
-
Page 67: カ ー ド に 接 続 す る
Pro Tools | HD I/O Pro Tools | HD Native を カ ー ド に 接 続 す る HD I/O H D Native を カ ー ド へ 接 続 す る に は : DigiLink Mini HD I/O... - Page 68 Loop Sync Out 台 目 の イ ン タ − SYNC Loop Sync In 4. HD I/Os H D I/O D igiLink L oop Sync 図 と の 接 続 と 接 続 Pro Tools | HD I/O イ ド...
-
Page 69: Pro Tools | Hd I/O
Pro Tools | HD I/O Pro Tools|HD を カ ー ド に 接 続 す る HD I/O P ro Tools|HD を カ ー ド に 接 続 す る に は : DigiLink Pro Tools|HD DigiLink Mini HD I/O... - Page 70 P ro Tools|HD H D OMNI H D I/O D igiLink L oop Sync 図 つ の カ ー ド 、 つ の 、 つ の と の 接 続 と の 接 続 Pro Tools | HD I/O イ ド...
-
Page 71: Chapter 11. Pro Tools | Hd Software
サ ン プ ル レ ー ト ] デ フ ォ ル ト の サ ン プ ル レ ー ト を 選 択 す る Pro Tools ] Pro Tools | HD Software P ro Tools | HD I/O 第 章 で を 設 定 す る... - Page 72 Pro Tools ク ロ ッ ク ・ ソ ー ス を 選 択 す る ] S/PDIF Encl • ] Pro Tools Optical S /PDIF Encl • 96kHz ( ) ] AES/EBU Encl • ] Pro Tools | HD I/O イ ド...
-
Page 73: Hd I/O を 設 定 す る
] HD I/O の ハ ー ド ウ ェ ア 設 定 、 ア ナ ロ グ イ ン ] ペ ー ジ Pro Tools | HD Software P ro Tools | HD I/O 第 章 で を 設 定 す る... - Page 74 I /O と 表 ⺬ さ れ た [ 設 定 ] ダ イ 8 x 8 x 8 ア ロ グ の 出 力 ] ペ ー ジ ( を 表 ⺬ ) Pro Tools | HD I/O イ ド...
- Page 75 S o n y / P h i l l i p s D i g i t a l Control-Alt- Windows Interface Format S/PDIF Tascam ] Pro Tools | HD Software P ro Tools | HD I/O 第 章 で を 設 定 す る...
- Page 76 ワ ー ド 1 76.4kHz ( ) ク ロ ッ ク 4 4.1kHz ( ) 192kHz ワ ー ド ク ロ ッ ク ワ ー ド 1 92kHz ( ) ク ロ ッ ク 48kHz Pro Tools | HD I/O イ ド...
- Page 77 ソ フ ト ・ ク リ ッ プ ( ) 48kHz S/MUX HD I/O HD I/O TDIF ADAT S/MUX C urv カ ー ブ ( ) Pro Tools | HD Software P ro Tools | HD I/O 第 章 で を 設 定 す る...
- Page 78 HD I/O 1 92kHz の ハ ー ド ウ ェ ア 設 定 ] 、 で の デ ジ タ ル フ ォ ー マ ッ ト ] オ プ シ ョ ン Pro Tools | HD I/O イ ド...
- Page 79 S RC ( ) 9–16 ] ADAT TDIF 1-8 TDIF 88.2kHz 96kHz 44.1kHz 48kHz 1–8 S RC ( ) TDIF 88.2kHz 48kHz Pro Tools | HD Software P ro Tools | HD I/O 第 章 で を 設 定 す る...
- Page 80 デ ジ ADAT タ ル ・ フ ォ ー マ ッ ト TDIF ADAT ADAT S RC ( ) 48kHz デ ジ ADAT SRC タ ル ・ フ ォ ー マ ッ ト Pro Tools | HD I/O イ ド...
- Page 81 イ ン プ ッ ト ・ ト リ ム HD I/O +4dBu イ ン プ ッ ト ・ ト リ ム –10dBV HD I/O AD DB–25 Pro Tools | HD Software P ro Tools | HD I/O 第 章 で を 設 定 す る...
- Page 82 Pro Tools | HD I/O イ ド...
-
Page 83: カ ー ド を 取 り 外 す
I /O 章 カ ー ド を 追 加 す る 、 ま た は 取 り 外 す Pro Tools | HD I/O カ ー ド を 取 り 外 す I /O 拡 張 カ ー ド を 取 り 外 す に は :... - Page 84 カ ー ド を 固 定 し て い る ネ ジ を 取 り 外 す HD I/O Avid HD I/O HD I/O カ ー ド か ら ピ ン ・ ケ ー ブ ル ・ コ ネ ク タ ー を 取 り 外 す Pro Tools | HD I/O イ ド...
-
Page 85: カ ー ド を イ ン ス ト ー ル す る
I /O 拡 張 カ ー ド を イ ン ス ト ー ル す る I /O HD I/O 拡 張 カ ー ド を イ ン ス ト ー ル す る に は : HD I/O Pro Tools|HD HD I/O •... - Page 86 の バ ッ ク パ ネ ル へ 固 定 す る HD I/O ピ ン ・ ケ ー ブ ル ・ コ ネ ク タ ー を カ ー ド に 押 し 込 む Pro Tools | HD I/O イ ド...
- Page 87 HD I/O Analog In HD I/O 9–16 HD I/O HD I/O る 場 合 は 新 し カ ー ド が 正 し く 認 識 さ れ た 後 に イ ン プ ッ ト と ア ウ ト プ ッ ト を...
- Page 88 Pro Tools | HD I/O イ ド...
-
Page 89: コ ネ ク タ ー の ピ ン ア ウ ト 図
DB-25 章 コ ネ ク タ ー の ピ ン ア ウ ト 図 D B-25 + 4dBu ナ ロ グ ・ ウ ト プ ッ ト ナ ロ グ ・ イ ン プ ッ ト ( ) DB-25 +4" Analog Outputs CH1_HOT CH1_COLD CH1_HOT... -
Page 90: ア ナ ロ グ ・ ア ウ ト プ ッ ト ア ナ ロ グ ・ イ ン プ ッ ト ( ア ナ ロ グ ・ イ ン プ ッ ト ( Aes/Ebu Db-25
CH3_COLD CH78_RCV_HOT CH3_GND CH78_RCV_COLD CH4_HOT CH78_RCV_GND CH4_COLD CH12_XMT_HOT CH4_GND CH12_XMT_COLD CH5_HOT CH12_XMT_GND CH5_COLD CH34_XMT_HOT CH5_GND CH34_XMT_COLD CH6_HOT CH34_XMT_GND CH6_COLD CH56_XMT_HOT CH6_GND CH56_XMT_COLD CH7_HOT CH56_XMT_GND CH7_COLD CH78_XMT_HOT CH7_GND CH78_XMT_COLD CH8_HOT CH78_XMT_GND CH8_COLD NC_1 CH8_GND NC_1 Pro Tools | HD I/O Guide... -
Page 91: Tdif Db-25
TDIF DB-25 CH12_RCV_DATA GND1 CH34_RCV_DATA GND2 CH56_RCV_DATA GND3 CH78_RCV_DATA GND4 CH12_XMT_DATA GND5 CH34_XMT_DATA GND6 CH56_XMT_DATA GND7 CH78_XMT_DATA GND8 RCV_LRCK RCV_EMPHASIS CLK+CTRL RCV_FS1 RCV_FS0 XMT_LRCK XMT_EMPHASIS CLK+CTRL XMT_FS1 XMT_FS0 GND9 DB25F_RA_TDIF FB30 FB31 22PF 22PF GND_C GND_C GND_C GND_A GND_A DB-25 第... - Page 92 Pro Tools | HD I/O Guide...
- Page 93 H D I/O 章 の キ ャ リ ブ レ ー シ ョ ン ・ モ ー ド の 説 明 H eadroom Pro Tools | HD I/O ッ ド ル ー ム ( ) ナ ロ グ HDI/O +4dBu –10dBV...
-
Page 94: Hd I/O
) 初 期 設 定 ] ( ) O peration 操 作 ] ( ) –18dB ] T rack > N ew ト ラ ッ ク ] ( ) 新 規 ] ( ) Pro Tools | HD I/O イ ド... - Page 95 Windows Signal Generator 1000Hz 1000Hz 250Hz 500Hz Signal Generator HD I/O の イ ン プ ッ ト を キ ャ リ ブ レ ー ト す る に は : 1k Tone HD I/O HD I/O HDI/O • DB-25/DB-25 • DB-25/XLR O ptions >...
- Page 96 –1.1dB -16.5 –18dB +1.5dB O ptions > オ プ シ ョ ン ] ( ) キ ャ C alibration Mode リ ブ レ ー シ ョ ン モ ー ド ] ( ) Pro Tools | HD I/O イ ド...
- Page 97 • Lo –6dB DB-25 近 ア ウ ト プ ッ ト ・ カ ー ド の ピ ン の 向 き HD I/O 5 HD I/O 第 章 の キ ャ リ ブ レ ー シ ョ ン ・ モ ー ド の 説 明...
- Page 98 Pro Tools | HD I/O イ ド...
-
Page 99: Appendix A. Compliance Information
Appendix A: Compliance Information Proposition 65 Warning Environmental Compliance This product contains chemicals, including lead, Disposal of Waste Equipment by Users known to the State of California to cause cancer in the European Union and birth defects or other reproductive harm. Wash hands after handling. -
Page 100: Emc (Electromagnetic Compliance)
Australia and New Zealand EMC EMC (Electromagnetic Regulations Compliance) Avid declares that this product complies with the following standards regulating emissions and immunity: • FCC Part 15 Class A • EN55103-1 E4 Canadian Compliance • EN55103-2 E4 • AS/NZS CISPR 22 Class A •... -
Page 101: Safety Compliance
Replace only with the same or equivalent type. 4) Follow all instructions. 17) For products with a power switch: The main power switch is located on the front panel of the HD I/O. 5) Do not use this equipment near water. It should remain accessible after installation. - Page 102 Pro Tools | HD I/O Guide...
- Page 104 Avid Technical Support (USA) Product Information 280 N Bernardo Avenue Visit the Online Support Center at For company and product information, Mountain View, CA 94043 USA www.avid.com/support visit us on the web at www.avid.com...
Need help?
Do you have a question about the HD I/O and is the answer not in the manual?
Questions and answers