HP 39gs Quick Start Manual
Graphing calculator
Hide thumbs
Also See for 39gs:
- Master manual (366 pages) ,
- User manual (314 pages) ,
- Instruction manual (5 pages)

Related Manuals for HP 39gs


Summary of Contents for HP 39gs
- Page 1 HP 39gs Graphing Calculator Quick Start Guide Edition 1 HP Part Number: F2223-90201 HP 39gs Graphing Calculator Quick Start Guide...
- Page 2 HP 39gs Graphing Calculator HP 39gs Graphing Calculator Quick Start Guide...
-
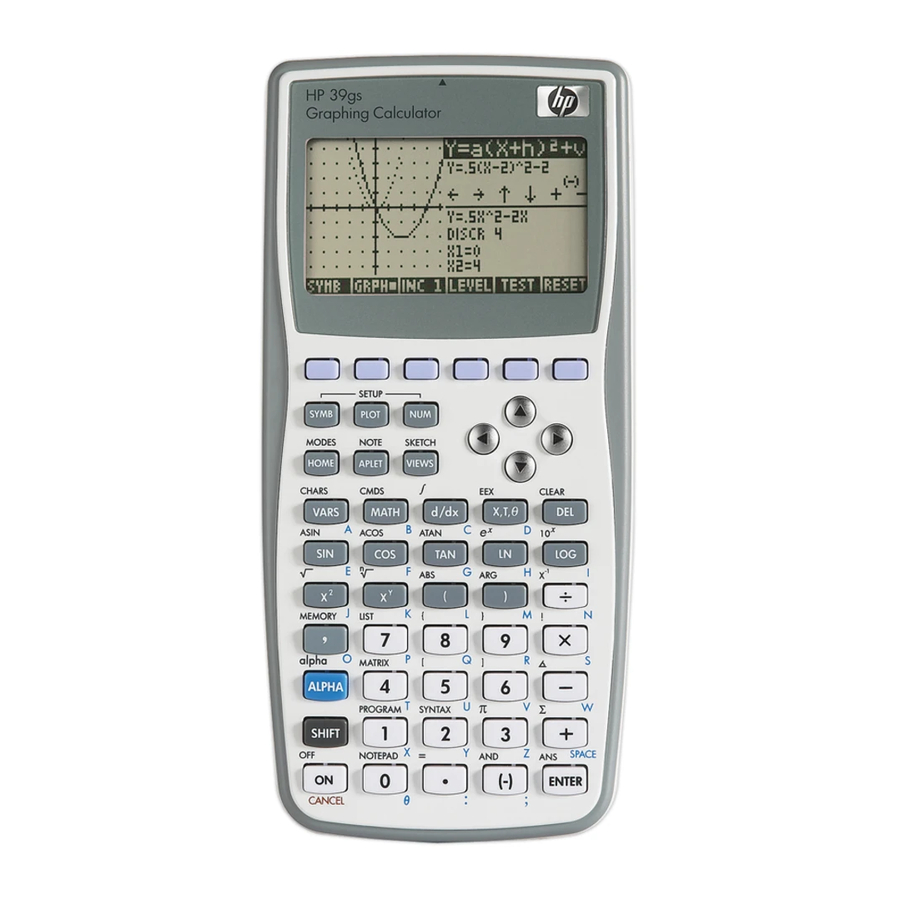
Page 3: Keyboard Map Legend
Wireless connectivity The table above and the photo on the previous page illustrate a few of the many features available on the HP 39gs Graphing Calculator. These topics, as well as other features of the calculator, are discussed in the following quick start guide. For a complete list of features of the HP 39gs Graphing Calculator, refer to the HP 39gs Graphing Calculator User’s Guide on the product CD, and Mastering the hp... -
Page 4: Legal Notices
Reproduction, adaptation, or translation of this manual is prohibited without prior written permission of Hewlett-Packard Company, except as allowed under the copyright laws. Hewlett-Packard Company 16399 West Bernardo Drive MS 66M-785 San Diego, CA 92127- 1 899 Printing History Edition 1, August 2009 HP 39gs Graphing Calculator Quick Start Guide... -
Page 5: Table Of Contents
Table of Contents HP 39gs Graphing Calculator ..........................ii Keyboard Map Legend ............................iii Legal Notices..............................iv Introduction ...............................1 The Home View ..............................1 Modes ................................2 Entering and Editing Expressions ..........................2 Menu Keys ................................2 Deleting and Clearing............................3 Last Answer ...............................4 Storing Values in Variables..........................4 HELPWITH.................................4... - Page 6 Explorer Aplets ..............................46 The Quadratic Explorer Aplet ..........................46 The Trig Explorer Aplet ............................. 49 Building Your Aplet Library ..........................52 Saving and Sharing Aplets..........................52 Downloading Aplets............................54 Backing Up Your Aplet Library........................... 54 Deleting Custom Aplets............................. 54 Tips and Tricks Summary ..........................
-
Page 7: Introduction
Aplet you're currently using and whether you are in degree (DEG) or radian (RAD) mode. Next comes the History of calcula- tions. Below that is the Entry Line. Finally, at the bottom is the Menu for the menu keys. The top row of keys on the HP 39gs keyboard has no labels. These are the context-sensitive menu keys. -
Page 8: Modes
Home Modes page, press the HOME key to return to the Home view. Entering and Editing Expressions To calculate the square root of -- - , enter the expression then press ENTER. The HP 39gs displays the results with 12 digits of accuracy (Figure 2). Figure 2 Menu Keys Now press the UP cursor key twice to highlight the expression you entered (see Figure 3). -
Page 9: Deleting And Clearing
Your display should look like Figure 4. Press the OK menu key when you are ready to continue. Figure 4 Deleting and Clearing Press the COPY menu key to see the expression pasted into the entry line as shown in Figure 5. If you had meant to enter -- - , you can fix it by moving the insert cursor over the 3 by pressing the LEFT cursor key... -
Page 10: Last Answer
Last Answer If you’d like to retrieve your last answer, you can using a feature called, Answer (ANS). Press SHIFT fol- lowed by ENTER (ANS). See Figure 6. Figure 6 Press ENTER once again to return your last answer to the calculation history, as shown in Figure 7. Figure 7 Storing Values in Variables Now let’s store our numeric approximation of... -
Page 11: Menu Keys, Choose Boxes, Input Fields And Check Boxes
Menu Keys, Choose Boxes, Input Fields and Check Boxes Menu Keys The bottom of the display contains a menu of up to six items. Use the blank menu keys located below the display to access these commands and functions. Figure 9 Choose Box To change the value in a Choose Box, press the CHOOS menu key, and a list of options appears. -
Page 12: The Function Aplet
The Function Aplet The HP 39gs comes from the factory with the Function Aplet as the default Aplet. Notice the current Aplet name is shown in the display header. The Func- tion Aplet contains all the features commonly used to explore functions, including plotting graphs of one or more functions, exploring tables of function val- ues, and finding points of interest (roots, extrema, intersections, etc.). - Page 13 Next, enter in F2(X) and press ENTER. Your completed Function Symbolic View should be the same -- - – as that shown in Figure 15. Note the CHK menu key. This menu key toggles each function definition on and off for graphing and table-building. The check mark indicates an item is selected. The EVAL menu key ⎛...
- Page 14 Before we continue, let's look at the default window settings. Press SHIFT followed by PLOT to open the Function Plot Setup, as shown in Figure 17. The HP 39gs has 131 pixel columns, allowing the cursor to make 130 steps from one vertical edge of the display to the other. The default setting for the horizontal range (XRNG) is [-6.5, 6.5], a distance of 13 units.
- Page 15 The HP 39gs uses the current cursor location for tasks such as finding roots, intersections, and slope at a point. To find the best numerical approximation to the root, press the MENU key to restore the menu, press the FCN menu key to see the list of options, and select the ROOT command (Figure 20). Press the OK menu key.
- Page 16 Press the Menu key to restore the menu and explore some of the other options in the Function Plot view. Refer to the HP 39gs Graphing Calculator User’s Guide on the product CD for more details. Figure 23 Function Numeric View The Function Numeric view provides a table of values for all active functions, as well as the tools needed to explore the table of values.
- Page 17 Remember that F1(X) has a root near x=3.5. You can use the DOWN cursor key to scroll to x=3.5, but there is an easier way to get to any x-value you wish. Simply move the highlight bar to any cell in the x- column and type in the value you wish to see.
- Page 18 39gs will supply x-values and function values in a table defined by the Function Numeric Setup view. The other option is Build Your Own. With this option, the HP 39gs presents a blank table. The user enters x- values of his/her choosing, and the calculator records those x-values and supplies the corresponding function values.
- Page 19 Delete restores the default value for any field, whether the value is numeric or an option from a list. Highlight the NUMSTART field and press DEL to see the default NUMSTART value of zero restored, as shown in Figure 31. Pressing SHIFT followed by DEL (CLEAR) restores all default values in a menu. Figure 31 Press SHIFT followed by DEL (CLEAR) to see all fields returned to their default values, as shown in Figure 32.
-
Page 20: Aplets
The key to working with HP Aplets is to understand that they were designed to have a similar structure. That structure is illustrated by a set of six keys, located in two rows of three keys each near the top left of the HP 39gs keyboard. The keys in the first row are SYMB, PLOT, and NUM; the keys in the sec- ond row are HOME, APLET, and VIEWS. -
Page 21: The Function Aplet
The Function Aplet lets you define up to ten functions in x, view their graphs, create tables of values, and find intersections, roots, and extrema. The Function Aplet is the default Aplet when the HP 39gs is shipped from the factory. Table 1- 1 summarizes the capabilities of this Aplet. Press APLET, scroll down to select the Function Aplet, and press the START menu key to get started. - Page 22 Table 1- 1 Function Aplet Summary Summary of Functionality View Name and Display Press PLOT to enter the Plot view and work with graphs of functions. The menu labels are: • ZOOM: enters the Zoom menu, with options to zoom in or out Function Plot View •...
- Page 23 Table 1- 1 Function Aplet Summary Summary of Functionality View Name and Display Press to enter the second page of the Plot Setup. In this view, each field is a toggle: Function Plot Setup Page 2 • SIMULT: draw multiple graphs simultaneously or sequentially •...
-
Page 24: The Solve Aplet
Table 1- 1 Function Aplet Summary Summary of Functionality View Name and Display Press SHIFT followed by NUM to enter the Numeric Setup. This view helps you manually control the appearance of the table. The fields are: Function Numeric Setup •... - Page 25 Table 1-2 Solve Aplet Summary Summary of Functionality Veiw Name and Display Press SYMB to return to this view at any time. Use this view to enter and edit up to ten Solve Symbolic View equations, each with as many variables as you like. The menu labels are: EDIT: edit the current equation •...
- Page 26 Table 1-2 Solve Aplet Summary Summary of Functionality Veiw Name and Display Press PLOT to enter the Plot view. In this view, the left side of the current equation and the Solve Plot View right side of the current equation are plotted as two separate graphs. The variable that is highlighted in the Solve Numeric View is taken as the independent variable for graphing purposes.
-
Page 27: The Sequence Aplet
Table 1-2 Solve Aplet Summary Summary of Functionality Veiw Name and Display Press to enter the second page of the Plot Setup. Page 2 of the Solve Plot Solve Plot Setup Page 2 Setup is the same as page 2 of the Function Plot Setup, with one exception. Since only one equation can be active at a time, there is no SIMULT option to select between drawing graphs simultaneously or sequentially. - Page 28 Table 1-3 Sequence Aplet Summary Summary of Functionality Veiw Name and Display Press SYMB to return to this view at any time. Use this view to enter and manage up to 10 Sequence Symbolic View sequence definitions in n. The first two terms of each sequence are entered numerically, and the nth term is defined either recursively or in terms of n.
- Page 29 Table 1-3 Sequence Aplet Summary Summary of Functionality Veiw Name and Display Press SHIFT followed by PLOT to enter the Plot Setup. Here you can manually set up the Sequence Plot Setup Page 1 graphing window and the appearance of the sequence graphs. The fields are: SEQPLOT: choose between Stairstep and Cobweb plots of each sequence •...
-
Page 30: The Statistics Aplet
Table 1-3 Sequence Aplet Summary Summary of Functionality Veiw Name and Display Press NUM to enter the Numeric view. This view is the same as the Function Numeric View, Sequence Numeric View except that it has an n-column first rather than an x-column. Furthermore, all n-values must be positive integers. - Page 31 Table 1-4 Statistics Aplet Summary Summary of Functionality View Name and Display Press NUM to return to this view at any time. This view contains a table with up to ten Statistics Numeric View columns of data. The menu items are: EDIT: edit the value in the current cell •...
- Page 32 Table 1-4 Statistics Aplet Summary Summary of Functionality View Name and Display With the 1VAR/2VAR menu key toggled to 1VAR, press PLOT to enter the 1Var Plot view. Statistics Plot View 1VAR This view displays histograms or box-and-whisker plots for active analyses. The menu is similar to the Function Plot View, with options for zooming and tracing.
- Page 33 Table 1-4 Statistics Aplet Summary Summary of Functionality View Name and Display Press the 1VAR/2VAR menu key to toggle it to 2VAR, then press SYMB to enter the 2VAR Statistics Symbolic View 2VAR Symbolic view. You can define up to 5 2-variable analyses (S1, S2, … S5) by choosing the independent and dependent columns of data involved in each analysis.
-
Page 34: The Inference Aplet
Table 1-4 Statistics Aplet Summary Summary of Functionality View Name and Display With the 1VAR/2VAR menu key toggled to 2VAR, press SHIFT followed by PLOT to enter Statistics Plot Setup Page 1 2VAR page 1 of the 2Var Plot Setup. This view is similar to page 1 of the Function Plot Setup, except that you can choose different marks for each scatter plot. - Page 35 Table 1-5 Inference Aplet Summary Summary of Functionality View Name and Display Press SYMB to return to this view at any time. The Inference Symbolic View contains settings Inference Symbolic Veiw to define a confidence interval or hypothesis test. The fields are: METHOD: choose between hypothesis test or confidence interval •...
-
Page 36: The Parametric Aplet
Table 1-5 Inference Aplet Summary Summary of Functionality View Name and Display Press PLOT to enter the Inference Plot View. This view displays the same results as the Inference Plot View Numeric view. Displaying the results graphically makes the mapping between the distribution variable (Z or T) and the random variable (X) clearer. - Page 37 Table 1-6 Parametric Aplet Summary Summary of Functionality View Name and Display Press SYMB to return to this view at any time. The Parametric Symbolic View contains Parametric Symbolic View definitions for up to ten parametric equations, each one defining x(t) and y(t) in terms of t. The menu items are the same as the Function Symbolic view, except here T replaces X as a typing aid.
- Page 38 Table 1-6 Parametric Aplet Summary Summary of Functionality View Name and Display Press to enter page 2 of the Parametric Plot Setup, which is similar to page 2 Parametric Plot Setup Page 2 of the Function and Sequence Plot setups. Press NUM to enter the Parametric Numeric view.
-
Page 39: The Polar Aplet
The Polar Aplet The Polar Aplet is similar in structure and functionality to the Function and Parametric Aplets. Table 1-7 lists the similarities and major differences among these three Aplets. Press APLET, scroll down to select the Polar Aplet, and press the START menu key to get started. The Polar Aplet starts in the Symbolic view. - Page 40 Table 1-7 Polar Aplet Summary Summary of Functionality View Name and Display Press SHIFT followed by PLOT to enter the Polar Plot Setup. This view is the same as page 1 Polar Plot Setup Page 1 of the Parametric Plot Setup, except that Polar has RNG and STEP instead of TRNG and θ...
-
Page 41: The Streamsmart Aplet
5,000 samples per second, displaying the incoming data as a stream in real time. Table 1-8 summarizes the function- ality of this Aplet. See the HP StreamSmart 400 User Guide for complete details. Press APLET, scroll down to select the StreamSmart Aplet, and press the START menu key to get started. - Page 42 Table 1-8 StreamSmart Aplet Summary Summary of Functionality View Name and Display Press PLOT to return to this view at any time. The StreamSmart Plot view displays the Plot View (during streaming) incoming data streams in real time at up to 5,000 samples per second. The top of the display shows the sensor ID and the width of the window in seconds.
- Page 43 Table 1-8 StreamSmart Aplet Summary Summary of Functionality View Name and Display Export Menu Page 1 Press the EXPRT menu key to open page 1 of the Export menu, with tools to zoom, pan, and crop to define a final data set to export to the Statistics Aplet. The menu items are: PAN/ZOOM: as above •...
- Page 44 Table 1-8 StreamSmart Aplet Summary Summary of Functionality View Name and Display Plot Setup Page 1 Press SHIFT followed by PLOT to enter the Streamer Plot Setup. This view contains a number of advanced features: XRNG: manually define the time interval represented by the width of the display •...
-
Page 45: Solvers
Table 1-8 StreamSmart Aplet Summary Summary of Functionality View Name and Display Other Views Press VIEWS to see the other views specific to the StreamSmart Aplet. Plot: opens the Plot view (option not shown) • • Multimeter: opens the Numeric view (option not shown) •... - Page 46 Table 1-9 Finance Aplet Summary Summary of Functionality View Name and Display The top page of the Finance Aplet lets you enter and solve TVM problems. The fields are: N: total number of periods or payments • • I%/YR: the nominal annual interest rate Financial TVM View •...
- Page 47 Table 1-9 Finance Aplet Summary Summary of Functionality View Name and Display Solution Example 1 Solution Highlight the PMT field and press the SOLVE menu key to view the results shown in the figure to the right. As shown, you will need to make monthly payments of $948.10. Negative values indicate payments you make, while positive values indicate payments made to you.
- Page 48 Table 1-9 Finance Aplet Summary Summary of Functionality View Name and Display Amortization Summary of Functionality Financial Amortization View Press the menu key. The second page of the Finance Aplet deals with amortization schedules. The fields are: Payments: the number of payments in the current batch to amortize •...
-
Page 49: The Linear Solver Aplet
Table 1-9 Finance Aplet Summary Summary of Functionality View Name and Display Solution Example 3 Solution Enter 120 as the number of payments (10 years x 12 payments per year). Then press the AMOR menu key to see that you will have repaid $22,835.81 in principle, another $90,936.43 in interest, and the balance due will be $127,164.19. - Page 50 Table 1- 1 0 Linear Solver Aplet Summary Summary of Functionality View Name and Display Use this view to enter values for the parameters of each linear equation and view the Linear Equation Solver solution results below the equations. The menu items are: EDIT: edit the value of a parameter •...
-
Page 51: The Triangle Solver Aplet
The Triangle Solver Aplet This Aplet solves many kinds of geometric and trigonometric problems involving triangles. Press APLET, scroll to Triangle Solver, and press the START menu key to open this Aplet's single view. Table 1- 1 1 summarizes the functionality of this Aplet. Table 1- 1 1 Triangle Solver Aplet Summary of Functionality View Name and Display... -
Page 52: Explorer Aplets
Table 1- 1 1 Triangle Solver Aplet Summary of Functionality View Name and Display Solution Solution 1 Press SHIFT followed by HOME (MODES) and change to degree angle measure. To start the Triangle Solver Aplet, press APLET, scroll to the Triangle Solver, and press the START menu key. - Page 53 Explorer Aplet starts in the Plot view. Table 1- 1 2 Quadratic Explorer Aplet Summary Summary of Functionality View Name and Display Quadratic Explorer Aplet Press PLOT (or the GRPH menu key) to return to this view at any time. In this view, you can translate and dilate the graph directly and see the resulting effects on the values of the equation parameters as you manipulate the graph.
- Page 54 Table 1- 1 2 Quadratic Explorer Aplet Summary Summary of Functionality View Name and Display Press SYMB (or the SYMB menu key) to enter the Symbolic view. In this view, you select a Quadratic Explorer Symbolic View parameter in a quadratic equation, then change its value to see the resulting effect on the shape of the graph.
-
Page 55: The Trig Explorer Aplet
Table 1- 1 2 Quadratic Explorer Aplet Summary Summary of Functionality View Name and Display The menu contains the following items: Quadratic Explorer Test View HARD: choose a difficult problem • • EASY: choose an easy problem • LEVEL: choose a type of quadratic equation (see LEVEL in Plot view above) •... - Page 56 Table 1- 1 3 Trig Explorer Aplet Summary Summary of Functionality View Name and Display Press PLOT to return to this view at any time. If needed, press the ORIG menu key to toggle it Trig Explorer with EXTR to EXTR. You can dilate the graph of sin(x) or cos(x) and see the effect on the equation parameter(s).
- Page 57 Table 1- 1 3 Trig Explorer Aplet Summary Summary of Functionality View Name and Display Trig Explorer Plot View The menu items remain the same in either mode of the Plot view. Press the SYMB key to enter the Symbolic view. You can select any parameter in the Trig Explorer Symbolic View sinusoidal equation, change its value, and see the result reflected in the shape of the graph.
-
Page 58: Building Your Aplet Library
Building Your Aplet Library As shown in the previous Aplet summaries, the HP 39gs comes with a set of 13 built-in Aplets. These Aplets are in Read-Only Memory (ROM) and cannot be deleted, so pressing the APLET key will always give you access to at least 13 Aplets. However, you can add and delete other Aplets from your Library. - Page 59 Physics Aplet is still available - just as you left it. The Fibonacci Aplet you have just created and shared is a very simple example of a custom Aplet based on one of the built-in HP Aplets. In fact, these custom Aplets can contain programs, notes, and sketches. Please see the HP 39gs Graphing Calculator...
-
Page 60: Downloading Aplets
Deleting Custom Aplets At some point, if you have loaded too many Aplets, the HP 39gs will run out of memory space. In this case, back up your Aplet Library to your PC using the HP 39gs Connectivity Kit and delete one or more of the Aplets on your HP 39gs. To delete an Aplet, select it from the Aplet Library and press the DELETE menu key. - Page 61 larger typing area and lets you see the whole expression. This approach is used consistently in all Aplets. Figure 40 Plot Setup Menu Figure 42 The New Value Figure 41 An Input Box Choose Boxes Some of the menus use Choose boxes to present you with different options for one or more fields in the menu. Figure 43 shows the Mode Menu with the ANGLE MEASURE field highlighted.
-
Page 62: Delete And Clear
Figure 46 Figure 47 Figure 48 Delete and Clear Display Description With the cursor at the end of an entry line: • DEL works like a backspace key, deleting the character to its left • CLEAR (and ON) deletes the entire line Figure 49 Cursor at the End of a Line With any field in a form highlighted: •... - Page 63 Display Description With the cursor over a character in an entry: • DEL deletes the character under the cursor • CLEAR (and ON) deletes the entire line Figure 51 Cursor over an Entry With any expression in a symbolic view or catalog (list, matrix, or program) highlighted: •...
-
Page 64: Advanced Features
Figure 54 You can always type in any command letter by letter, and the HP 39gs will accept it. The Physical Constants Menu Press the MATH key and then the PHYS menu key to see a list of physical constants, arranged by subject. -
Page 65: Lists, Matrices, And Programs
Figure 58 Empty List Type in the first number in the list and press the Enter key. The HP 39gs will enter 1:, followed by the value you entered. When you have completed the list you can return to the List Catalog and send the list to another HP 39gs. - Page 66 You can enter values row by row, or column by column; the GO menu key toggles through the options. As with lists, you can send them to another HP 39gs or receive them from another HP 39gs. In programs or the Home view, you can reference M1 to perform operations on your matrix.
- Page 67 Display Object Programs Press SHIFT+1 (PROGRAM) to enter the Program Catalog. Press the New menu key to start a new program and enter a name for your new program. Figure 63 Program Catalog You can type your program in letter by letter if you know the command names, or press SHIFT+MATH (CMDS) to enter the Program Commands Catalog and choose your commands.
-
Page 68: Replacing The Batteries
Display Object You can send your program to another HP 39gs or receive a program from another HP 39gs. Enter your program name in the Home view and press ENTER to run your program. Figure 66 Replacing the Batteries The calculator takes 4 AAA (LR03) batteries as a main power source and one CR2032 lithium battery for memory backup. When the low battery symbol is displayed, you need to replace the batteries as soon as possible. -
Page 69: Resetting The Calculator
Notwithstanding the above disclaimers, HP expressly warrants to you, the end-user customer, that HP hardware, accessories and supplies will be free from defects in materials and workmanship after the date of purchase, for the period specified above. If HP receives notice of such defects during the warranty period, HP will, at its option, either repair or replace products which prove to be defective. -
Page 70: Customer Care
Exclusions HP does not warrant that the operation of HP products will be uninterrupted or error free. If HP is unable, within a reasonable time, to repair or replace any product to a condition as warranted, you will be entitled to a refund of the purchase price upon prompt return of the product with proof of purchase. - Page 71 2730 2146 Malaysia 1800-88-8588 support support Martinica 0-800-990-01 1; 877- Mauritius www.hp.com/ Mexico 01-800-474-68368 Montenegro www.hp.com/ 219-8671 support (800 HP INVENT) support Montserrat 1-800-71 1-2884 Morocco www.hp.com/ Namibia www.hp.com/ Netherlands 020 654 5301 support support Netherland 001-800-872-2881 ; New Zealand...
- Page 72 Turkey www.hp.com/ support support Turks & Caicos 01-800-71 1-2884 www.hp.com/ United Kingdom 0207 458 0161 Uruguay 0004-054- 1 77 support US Virgin Islands 1-800-71 1-2884 800-HP INVENT Venezuela 0-800-474-68368 Vietnam +65-6272-5300 (0-800 HP INVENT) Zambia www.hp.com/ support Getting Started...
-
Page 73: Product Regulatory & Environment Information
For questions regarding this FCC declaration, write to: Hewlett-Packard Company P.O. Box 692000, Mail Stop 510101 Houston, TX 77269-2000 or call HP at 281-514-3333 To identify your product, refer to the part, series, or model number located on the product. -
Page 74: Getting Started
(e.g. Bluetooth). body number (used only if applicable- refer to the product label). Hewlett-Packard GmbH, HQ-TRE, Herrenberger Strasse 140, 71034 Boeblingen, Germany The official EU CE declaration of conformity for this device may be found at http://www.hp.com/go/certificates. Japanese Notice Getting Started... - Page 75 Chemical Substances HP is committed to providing our customers with information about the chemical substances in our products as needed to comply with legal requirements such as REACH (Regu- lation EC No 1907/2006 of the European Parliament and the Council). A chemical information report for this product can be found at: http://www.hp.com/go/reach...
- Page 76 Getting Started...