HP 39gII Quick Start Manual
Graphing calculator
Hide thumbs
Also See for 39gII:
- Product information (3 pages) ,
- User manual (355 pages) ,
- Quick start manual (5 pages)

Related Manuals for HP 39gII


Summary of Contents for HP 39gII
- Page 1 HP 39gII Graphing Calculator Quick Start Guide Edition 3 HP Part Number: NW249-90201...
- Page 2 The table and photo on the following page illustrate a few of the many features available on the HP 39gII Graphing Calculator. These topics, as well as other features of the calculator, are discussed in the following quick start guide. For a complete list of features of the HP 39gII Graphing Calculator, refer to the HP 39gII Graphing Calculator User’s Guide on the product CD.
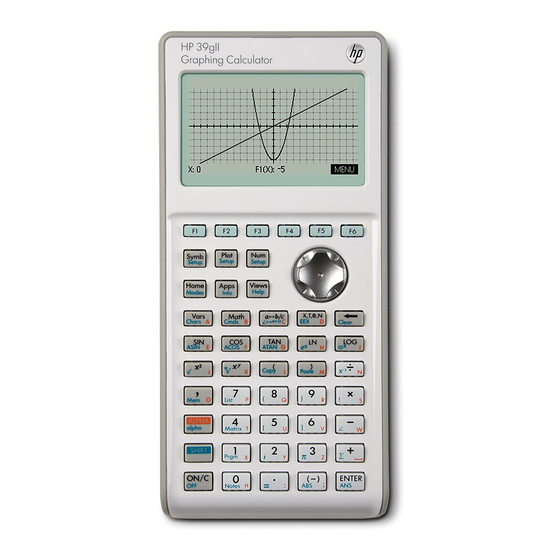
- Page 3 HP 39gII Keyboard Legend Number Feature Screen display 256 x 128 pixels Context-sensitive menu Context-sensitive menu keys HP Apps keys Modes Common math and science functions Shift keys On (cancel) Last Answer (ANS) Enter key Alphabetic entry List, matrix, program, and note editors...
-
Page 5: Table Of Contents
Table of Contents Getting Started ....................1 HP Apps and App Views..................7 HP App Summaries ..................13 HP Apps: Solvers and Explorers ................ 35 The Math Menus ..................... 51 Catalogs and Editors ..................53 Product Regulatory & Environment Information ............ 59... -
Page 7: Getting Started
This quick start guide covers basic tasks, such as entering and editing expressions, plotting graphs, and making tables of values. This guide also serves as an introduction to HP Apps. Finally, advanced topics, like working with lists or matrices, are also intro- duced. - Page 8 Installing the Batteries Please install the batteries according to the following procedure: Turn off the calculator. Slide up the battery compartment cover. Insert 4 new AAA (LR03) batteries into the compartment. Make sure each battery is inserted in the indicated direction. The calculator takes 4 AAA (LR03) batteries as a main power source.
- Page 9 The Home View Press the On key or Home to access the Home view. The HP 39gII Home view is divided into four parts, from top to bottom. There is a Header at the top, with the name of the HP App you're currently using and whether you are in degree (DEG) or radian (RAD) mode. Next comes the History of calculations.
- Page 10 Entering and Editing Expressions To calculate , enter the expression then press Enter. The HP 39gII displays the results with -- - 12 digits of accuracy. Now press the Up cursor key twice to highlight the expression you entered. Note that two additional menu labels are now displayed: COPY and SHOW.
- Page 11 At any time, you can press SHIFT Views (Help) to get help on the functionality in your current view. Once in the Help system, you can browse the entire list of topics and return to the current HP 39gII view at any time.
- Page 12 Understanding the Software Menu Keys The bottom of the display contains a menu of up to six items. Use the F1-F6 menu keys to access the menu items. Choose Boxes To change the value in a Choose Box, press the CHOOS menu key, and a list of options appears.
-
Page 13: Hp Apps And App Views
HP Apps Much of the functionality of the HP 39gII is partitioned into packages called HP Apps. The HP 39gII comes with 15 HP Apps; nine dedi- cated to mathematical topics or tasks, three specialized Solvers, and three function Explorers. These apps are listed in the tables below. - Page 14 These three views are supported by a set of three keys, located near the top left of the HP 39gII keyboard. These keys are Symb, Plot, and Num. Each of these three views has an additional setup view, accessed by pressing the SHIFT of the view's key.
- Page 15 Pressing Home always takes you to the calculator history, which is not part of any App, and thus not saved with any App. The table below summarizes the purpose of each of the six main views of HP Apps. The Function App is used to illustrate the views in the table.
- Page 16 The purpose of the Numeric Setup is to determine the appearance of the Numeric view and the type of table provided. This view is not used by the Solve app, nor is it used by the Solvers and Explorers. These latter apps have their Numeric views pre-defined by their scope. HP Apps and App Views...
- Page 17 One note is in order concerning the Plot view. The HP 39gII gives you three options for graphing. By default, the HP 39gII uses the Adaptive method, an advanced method that gives very accurate results. You can choose the more traditional method, called Fixed-Step Segments, which samples x- values, computes their corresponding y-values, and then plots and connects the points.
- Page 18 The next chapter summarizes the functionality of each of the 15 HP Apps and their views. HP Apps and App Views...
-
Page 19: Hp App Summaries
The Function App lets you define up to ten functions in x, view their graphs, create tables of values, and find intersections, roots, and extrema. The Function App is the default HP App when the HP 39gII is shipped from the factory. Table 4 summarizes the capabilities of this App. - Page 20 • YTICK: vertical tick mark spacing The menu keys in this view are: • EDIT: opens an input box to edit the chosen value • CHK: toggles the current setting on or off • : enters the second page of the view HP App Summaries...
- Page 21 • ZOOM: zooms in or out on a row in the table • BIG: toggles between small and large fonts • DEFN: displays the definition of each column in the table • WIDTHn: toggles between displaying one, two, three, or four function columns HP App Summaries...
- Page 22 The menu keys in this view are: • EDIT: opens an input box to edit the chosen value • : sets NUMSTART and NUMSTEP so that the table shows the same values as the tracing cursor in the Plot view HP App Summaries...
- Page 23 • INFO: supplies information about the nature of the solution found • DEFN: displays the current equation • ALT: displays additional solutions • SOLVE: uses the current value of the highlighted variable to solve for that variable HP App Summaries...
- Page 24 Solve Plot Setup Page 2 Press to enter the second page of the Plot Setup. Page 2 of the Solve Plot Setup is the same as page 2 of the Function Plot Setup. HP App Summaries...
- Page 25 • EDIT: opens an input box to edit the chosen value • CHK: toggles between making an analysis active or inactive for graphing and listing summary statistics • D: a typing aid for entering column names • SHOW: displays the fit equation using Textbook Format HP App Summaries...
- Page 26 Statistics 1-Var Plot Setup Page 2 contains further settings to control the appearance of the graphing window and the plots. This view is nearly identical to page 2 of the Function and Sequence Plot Setup, except that there is no Method field. HP App Summaries...
- Page 27 • TYPE: chooses a function type to fit to your data • FIT: the equation of your fit For the independent and dependent columns, you can enter mathematical expressions in terms of a column name (e.g. 2-C1). HP App Summaries...
- Page 28 1 of the Stats 1-Var Plot Setup, except that you can choose different marks for each scatter plot. Press to enter page 2 of the Statistics 2-Var Plot Setup. This view is the same as Statistics 2-Var Plot Setup Page 2 Page 2 of the Function Plot setup. HP App Summaries...
- Page 29 Statistics 1-Var or 2-Var Apps. Table 8 summarizes the Inference App functionality. One unique feature of this HP App is that the various confidence intervals and hypothesis tests contain default values that correspond to the online help sections in the App.
- Page 30 The Parametric App is quite similar in structure and functionality to the Function App. Table 9 lists the similarities and major differences between these two Apps. Press Apps, scroll down to select the Parametric App, and press the START menu key to get started. The Para- metric App opens in the Symbolic view. HP App Summaries...
- Page 31 Press SHIFT followed by Plot to enter the Parametric Plot Setup. This view is similar to the Parametric Plot Setup Page 1 Function Plot Setup, except that it contains TRNG and TSTEP to control the t-values used to generate the (x,y) ordered pairs for graphing. HP App Summaries...
- Page 32 Numeric view, with an additional t-column; here x and y are both columns dependent on t. Press SHIFT followed by Num to enter the Parametric Numeric Setup, which is the same as Parametric Numeric Setup the Function Numeric Setup. HP App Summaries...
- Page 33 Polar Symbolic View define up to ten polar equations, each one defining R in terms of θ Press Plot to enter the Polar Plot view. This view has the same functionality as the Parametric Polar Plot View Plot view. HP App Summaries...
- Page 34 Parametric Plot Setup. Press Num to enter the Polar Numeric view. This view is similar to the Function Numeric Polar Numeric View view, with a -column that is independent, followed by additional R-columns for each polar θ definition. HP App Summaries...
- Page 35 Table 10 Polar App Summary Summary of Functionality View Name and Display Press SHIFT followed by Num to enter the Polar Numeric Setup. This view has the same Polar Numeric Setup functionality as the Function and Parametric Numeric setups. HP App Summaries...
- Page 36 • TRACE: toggles the tracing cursor off and on • GOTO: takes the tracing cursor to the point on the sequence with a given value of n. • DEFN: displays the symbolic definition of the current sequence • MENU: toggles the menu off and on HP App Summaries...
- Page 37 • YRNG: the vertical graphing range • XTICK: horizontal tick mark spacing • YTICK: vertical tick mark spacing In addition, the menu items are: • CHOOS: opens the SEQPLOT choose box • : enters the second page of the view HP App Summaries...
- Page 38 Sequence Numeric View Press Num to enter the Numeric view. This view is the same as the Function Numeric View, except that it has an n-column first rather than an x-column. Furthermore, all n-values must be positive integers. HP App Summaries...
- Page 39 View Name and Display Sequence Numeric Setup Press SHIFT followed by Num to enter the Numeric Setup. This view is the same as the Function Numeric Setup, except NUMSTEP is fixed at 1 (any other value will be ignored). HP App Summaries...
- Page 40 HP App Summaries...
-
Page 41: Hp Apps: Solvers And Explorers
Solvers The Solver Apps each have only a single view. These HP Apps include the Finance App, the Linear Solver, and the Triangle Solver. Each is designed to solve problems of a particular type. The Finance App solves TVM and amortization problems, the Linear Solver finds solu- tions to systems of linear equations, and the Triangle Solver finds angles and side lengths in problems involving triangles. - Page 42 $180,000 and you make a down payment of $30,000. How much are the required monthly payments? Assume payments start at the end of the first period. The figure to the right shows the setup. HP Apps: Solvers and Explorers...
- Page 43 Use the cursor keys to scroll through the table. The menu keys are: • BIG: toggles the font size • TVM: returns to the TVM view HP Apps: Solvers and Explorers...
- Page 44 The solution statement at the bottom of the App changes in real time to reflect the current values of the parameters in each lin- ear equation. Table 13 summarizes the functionality of this App. Press Apps, scroll to the Linear Solver App, and press the START menu key to get started. HP Apps: Solvers and Explorers...
- Page 45 As you enter the values, the solution statement updates in real time. When you are done, the solution is shown as x=2 and y=- 1 . HP Apps: Solvers and Explorers...
- Page 46 This App solves many kinds of geometric and trigonometric problems involving triangles. Press Apps, scroll to the Triangle Solver app, and press the START menu key to get started. The Triangle Solver opens in the Numeric view. Table 14 summarizes the functionality of this app. Table 14- Triangle Solver HP App Summary of Functionality View Name and Display...
- Page 47 Table 14- Triangle Solver HP App Summary of Functionality View Name and Display Solution Solution 1 Press the Degrees/Radians menu key, if needed, to change to Degrees angle measure. Enter A=9, B=6, and =30, as shown in the figure to the right. Press the SOLVE menu key β...
- Page 48 If the LEV n menu key is set to LEV 1 (for y=ax), then the up- and down-cursor keys do not work and this is reflected in the set of active keys. Press the GRAPH menu key to return to this mode at any time. HP Apps: Solvers and Explorers...
- Page 49 The Quadratic Explorer App is a micro-world designed to explore the relationships among the various representations of quadratic func- tions. Press Apps, scroll to Quadratic Explorer, and press the START menu key to get started. HP Apps: Solvers and Explorers...
- Page 50 • Use the + and - keys to dilate the graph • Use the (-) key to reflect the graph over the x-axis Press the GRAPH menu key to return to this mode at any time. HP Apps: Solvers and Explorers...
- Page 51 Similar in concept to the Linear and Quadratic Explorers, the Trig Explorer App is a micro-world for exploring the relationship between the values of parameters in sine or cosine equations and the shapes of their graphs. The forms of the sinusoidal equations used are: ⋅ ⋅ HP Apps: Solvers and Explorers...
- Page 52 RAD/DEG menu key and the F6 menu key (either /n or n ). Press the GRAPH/EQ menu key toggle to return to this mode at any π ° time. HP Apps: Solvers and Explorers...
- Page 53 Managing the Apps Library As shown in the previous App summaries, the HP 39gII comes with a set of 15 built-in HP Apps. These Apps are in Read-Only Memory (ROM) and cannot be deleted, so pressing the Apps key will always give you access to at least 15 Apps. However, you can add and...
- Page 54 2. Press the Num key to see a table of values for the sequence. You can explore the sequences using the direction keys. With the highlight bar in the N column, you can also manually enter any counting number and the table will jump to that value. HP Apps: Solvers and Explorers...
- Page 55 Your Physics App is still available - just as you left it. The Fibonacci App you have just created is a very simple example of a custom App based on one of the built-in HP Apps. In fact, these custom Apps can contain programs and notes as well.
- Page 56 Backing Up Your App Library There are two ways to back up your App Library. The best way is to use the HP 39gII Connectivity Kit to copy your App Library to your PC periodically. In a pinch, you can also keep a second HP 39gII handy with a back-up of all your Apps.
-
Page 57: The Math Menus
Press the CATLG menu key to see an alphabetical list of all functions, commands, and variables that the HP 39gII has to offer. Select an entry and press the OK menu key to paste it to the cursor location, or press the CANCEL menu key to close the catalog. - Page 58 You can always type a command in letter-by-letter and the HP 39gII will accept it. The Math Menus...
-
Page 59: Catalogs And Editors
When you have completed the list you can return to the List Catalog and send the list to another HP 39gII. You can also receive a list from another HP 39gII. In programs or the Home view, you can reference your list by name (L1, L2, etc.) to perform operations on your new list. - Page 60 You can enter values row by row, or column by column; the GO menu key toggles through the options. As with lists, you can send them to another HP 39gII or receive them from another HP 39gII. In programs or the Home view, you can reference M1 to perform operations on your matrix.
- Page 61 Press SHIFT 1 (Prgm) to enter the Program Catalog and view the list of existing programs. For programs listed, you can edit, run, debug, or send programs to another HP 39gII. You can also rename or remove programs. If there are no programs listed in the catalog, press the NEW menu key to start.
- Page 62 Notes The HP 39gII has a notes catalog where you can build a library of notes. In addition, if you want to attach notes to an App, there is a similar editor for this purpose. Press Shift 0 (Notes) to enter the Notes Catalog. The menu items here are: •...
- Page 63 Press the FRMAT menu key to open the Formatting input form. Select the formatting options you want to use for your note. The text displayed in the box near the top of the menu reflects the current formatting options. Press the Check menu key to tick an option, or use the CHOOS menu key to select a font size, font color, or background color.
- Page 64 Catalogs and Editors...
-
Page 65: Product Regulatory & Environment Information
Product Regulatory & Environment Information Federal Communications Commission Notice This equipment has been tested and found to comply with the limits for a Class B digital device, pursuant to Part 15 of the FCC Rules. These limits are designed to provide reasonable protection against harmful interference in a residential installation. This equipment gen- erates, uses, and can radiate radio frequency energy and, if not installed and used in accordance with the instructions, may cause harm- ful interference to radio communications. - Page 66 Compliance with these directives implies conformity to applicable harmonized European standards (European Norms) that are listed in the EU Declaration of Conformity issued by HP for this product or product family and available (in English only) either within the product documentation or at the following web site: www.hp.eu/certificates (type the product number in the search field).
- Page 67 The compliance is indicated by one of the following conformity markings placed on the product: For non-telecommunications products and for EU harmonized telecommunications products, such as Bluetooth® within power class below 10mW. For EU non-harmonized telecommunications products (If applicable, a 4-digit notified body number is inserted between CE and !).
- Page 68 Chemical Substances HP is committed to providing our customers with information about the chemical substances in our products as needed to comply with legal requirements such as REACH (Regulation EC No 1907/2006 of the European Parliament and the Council). A chemical information report for this product can be found at: http://www.hp.com/go/reach...
- Page 69 Product Regulatory & Environment Information...
Need help?
Do you have a question about the 39gII and is the answer not in the manual?
Questions and answers