Table of Contents
Advertisement
1026
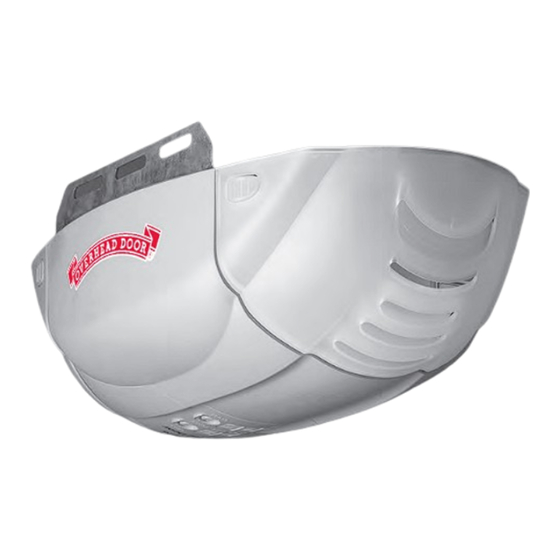
Standard Drive
Chain/Belt Openers
Includes:
®
(For the ultimate in safety!)
•
Safe-T-Beam
System must be
®
installed to close door.
•
For use only with sectional doors.
•
Homelink
and Car2U
®
•
Easy programming.
For Answers and Assistance
1.800.929.3667
or visit
www.OverheadDoor.com
Save this manual for future reference
© 2008 Overhead Door Corporation. Overhead Door and the Ribbon logo are registered trademarks of Overhead Door Corporation. Standard
Drive is a trademark of Overhead Door Corporation. All other trademarks are the property of their rightful owners. Consistent with our policy of
continuing product improvements, we reserve the right to change product specifications without notice or obligations. R900-746
Homelink
is a registered trademark of Johnson Controls Technology Company.
®
Car2U
is a registered trademark of Lear Corporation.
®
TM
Remote Control
compatible.
®
Installer: Leave this manual with homeowner.
Model 1026
GARAGE DOOR OPENER
PN# 3642136534,
2/26/2010 REV.1
Advertisement
Table of Contents
Troubleshooting

Related Manuals for Overhead door 1026


Summary of Contents for Overhead door 1026
-
Page 1: Remote Control
© 2008 Overhead Door Corporation. Overhead Door and the Ribbon logo are registered trademarks of Overhead Door Corporation. Standard Drive is a trademark of Overhead Door Corporation. All other trademarks are the property of their rightful owners. Consistent with our policy of continuing product improvements, we reserve the right to change product specifications without notice or obligations. -
Page 2: Safety Information
If you have questions or do not understand the information presented, contact Overhead Door Corporation or an authorized Overhead Door Dealer. The safety alert symbol and following signal words DANGER, WARNING, and CAUTION are used throughout this manual to call attention to and identify different levels of hazard and special instructions. -
Page 3: Table Of Contents
OPENER FEATURES ® Access Security System. ODGER An electronic access code system that enhances the security of the door opener by continuously changing the access code each time the remote control is used. The door opener responds to each new code only once. -
Page 4: Pre-Installation Check List
They are as follows: The Overhead Door Corporation recommends that you read and fully understand all information and instructions contained herein before choosing a "Do-it-yourself"... - Page 5 TYPICAL SECTIONAL DOOR INSTALLATION FOR HELP-1.800.929.3667 OR WWW.OVERHEADDOOR.COM Pg. 19 Pg. 13 Pg. 12-13 TYPICAL SUPPORT ADDED BRACKET HEADER BRACKET (NOT PROVIDED) MOUNTING BOARD BRACES POWER CORD (APPROX. 45 IN.) TO 120V GROUNDED OUTLET EXTENSION SPRING TORSION SPRING Pg. 14 NOTE: This opener is designed for use with SECTIONAL doors only.
-
Page 6: Recommended Tools
RECOMMENDED TOOLS FOR HELP-1.800.929.3667 OR WWW.OVERHEADDOOR.COM Pencil 3/16" Drill Bit Carpenter’s level Drill Wire strippers Adjustable wrench Ratchet Tape measure Safety Glasses Step ladder 1/4", 7/16", 3/8" and Hammer Phillips screwdriver 1/2" Sockets PARTS IDENTIFICATION - Not Shown Full Size . Child can be pinned under automatic garage door. - Page 7 FASTENERS - Shown Full size (See Parts List below for full description.) BAG NO. DESCRIPTION QUANTITY BOLT – 5/16''-18 x 1/2'' CLEVIS PIN, LONG – 5/16" x 3" Self-drilling Screw COTTER PIN 1/4"-20 x 3/4" HEADER BRACKET LAG SCREW – 5/16'' x 2'' HEX BOLT –...
-
Page 8: Key Illustrations
1-PIECE RAIL HARDWARE ASSEMBLED VIEW FOR HELP-1.800.929.3667 OR WWW.OVERHEADDOOR.COM PN# 3642136212, 02/26/2010 REV. 1... -
Page 9: Safety Installation Information
6. Locate the control button: Overhead Door Corporation or an authorized Overhead • Within sight of door, Door Dealer.) • At minimum height of 5 feet so small children are not 2. - Page 10 POWER HEAD & RAIL ASSEMBLY 5/16"-18 x 1/2" Assembly for CHAIN DRIVE OPENER Bolts NOTE: Handle carefully! Drive chain can slide out of rail. NOTE: For power head and rail assembly locate Bag 1 from Box 1. NOTE: Copy serial number from power head frame and record it on warranty page.
-
Page 11: Installation
INSTALLATION FOR HELP-1.800.929.3667 OR WWW.OVERHEADDOOR.COM b) - extend HEADER AND DOOR vertical line MOUNTING BRACKETS: 2-1/2" WARNING Header bracket must be fastened to garage d) - final c) - door at framing. Do NOT fasten to drywall, particle height mark board, plaster or other similar materials. - Page 12 MOUNTING THE OPENER: HEADER BRACKET 1. Getting started. • Position assembled rail on wall next to header bracket (Fig. 2-4). – Place material on floor under power head to protect from scratching. (A box, stool, or VIEW similar device may be needed to clear a FROM ABOVE torsion spring.) (not to scale)
- Page 13 Contact door manufacturer or distributor for a bracing kit. Centerline The Overhead Door Corporation is not even with or responsible for damage caused due to above top roller improperly braced door.
-
Page 14: Wall Button Installation
WALL BUTTON INSTALLATION FOR HELP-1.800.929.3667 OR WWW.OVERHEADDOOR.COM Wire from WARNING power head to Wall Button. Verify there is NO power to the opener before installing Wall Button wires and Wall Button. CAUTION Staples which are too tight can cut or pinch wires. Cut or pinched wires can cause the Wall Button to stop working. - Page 15 3. Securely fasten wires. Locking Clips Terminal • Securely fasten wires to ceiling and Holes wire guide wall using insulated staples provided. – Use insulated staples. – Staples should be snug only. Insulated • If rear cover is attached to power head, Staple remove it.
-
Page 16: Safe-T-Beam System Installation
– If not: bracket a) Mounting bracket extensions are available through an authorized Overhead Door dealer. FIG. 4-2 Mounting brackets b) Blocks of wood, etc. may be substituted for extensions. FIG. 4-3 Attach sensors to brackets •... - Page 17 3b. Wiring (pre-wired). • Route wire from wall to Safe-T-Beam ® sensors Wall Wall (Fig. 4-5b). Green • Splice pre-wiring to shortened sensor wire, match wire pairs dash-to-dash and Source Sensor plain-to-plain. - Trim sensor wire to approximately one foot (1 ft) from sensor.
-
Page 18: Connecting To Power
2. If the Safe-T-Beam ® is obstructed before the NOTE: Overhead Door Corporation is not garage door closes, the door will not close. responsible for charges resulting from work preformed by an independent electrician. 3. When the garage door is closing, if Safe-T-Beam ®... -
Page 19: Limit Switches & Force Adjustment
DOOR LIMITS FOR HELP-1.800.929.3667 OR WWW.OVERHEADDOOR.COM Limit Controls location WARNING on power head. • Severe injury or death can result if the door NOTE: Set Close Travel closing force is set too high. Limit before setting Open • Never increase the door closing force above the Travel Limit for unit to minimum required to move the door. -
Page 20: Carriage Lock
CARRIAGE LOCK DOOR The Carriage Lock can be manually engaged or disengaged. • To disengage Carriage Lock – Pull handle towards opener power head. • To engage Carriage Lock – Pull handle towards door. LOCK UNLOCK TO RECONNECT TO RELEASE PULL TOWARD PULL TOWARD DOOR... -
Page 21: Contact Reverse Test
UP/DOWN FORCE 1. By turning the "Down Force Control" clock- CLOSE Up Force wise, the DOWN force can be increased. By Control OPEN Adjustment turning the "Down Force Control" counter- CLOSE clockwise, the DOWN force can be decreased. Set the DOWN force level at the minimum force (Increasing Force) required to close door without reversing. -
Page 22: Programming Remote Controls
PROGRAMMING REMOTE CONTROLS WARNING A moving door can cause serious injury or death. 1. Keep people clear of opening while door is moving. 2. Do NOT allow children to play with opener, NOTE: To program a including Wall Button, remote control, or ®... -
Page 23: Battery/Visor Clip Installation
REMOTE CONTROL BATTERY REPLACEMENT AND VISOR CLIP INSTALLATION 1. Battery replacement. Slide out • To open gently push straight out on battery cover lock tab as shown. (Fig. 8-1). • Slide open battery cover. – Remove old battery. • Make sure new battery is facing proper direction (Match battery polarity with symbols inside battery cover) (Fig. -
Page 24: Safety Instructions
– Opener still fails other like items, and DO NOT OPERATE garage CONTACT OVERHEAD DOOR door automatically or manually if door is CORPORATION OR AN AUTHORIZED improperly balanced or springs are broken. -
Page 25: Wiring Diagram
CIRCUIT WIRING DIAGRAM FOR HELP-1.800.929.3667 OR WWW.OVERHEADDOOR.COM Opener circuit wiring diagram. This wiring diagram is for reference only. Diagrama del circuito del operador. Este diagrama es sólo para referencia. Schéma de câblage de l’ouvreur. Ce schéma de câblage est indiqué à titre de référence uniquement. Opening Cover May Cause Electric Shock. -
Page 26: Troubleshooting Guide - Opener
• Check "OPEN FORCE" adjustment (See section • WARNING: If you suspect a problem with the garage door hardware or springs, contact an authorized Overhead Door Dealer or a trained door system technician, or contact Overhead Door Corporation at 1.800.929.3667. Door will only run •... -
Page 27: Troubleshooting Guide - Power Head Led
• Door obstruction going down • Check for obstruction, remove • Door obstruction going up – Check door spring (See section – Contact Overhead Door Corporation at 1.800.929.3667 2 BLINKS, Pause • Limit Programming incomplete • Set UP LIMIT programming (Repeat) •... -
Page 28: Transmitter Compliance Statement
TRANSMITTER COMPLIANCE STATEMENT Transmitters comply with all United States and Canadian legal requirements as of the date of manufacture. No warranty is made that they comply with all legal requirements of any other jurisdiction. If transmitters are to be used in another country, the importer must determine compliance with any local laws and regulations which may differ from United States and Canadian requirements prior to use. -
Page 29: Warranty
Standard Drive Operator, Model 1026 (“Product”), subject to all of the terms and conditions hereof, that the Product and all components thereof will be free from defects in materials and workmanship for the following period(s) of time, measured from the date of installation: MOTOR- Seller warrants the motor for a period of FIVE (5) YEARS. - Page 30 This page left blank.
Need help?
Do you have a question about the 1026 and is the answer not in the manual?
Questions and answers
Where does lubrication get sprayed?