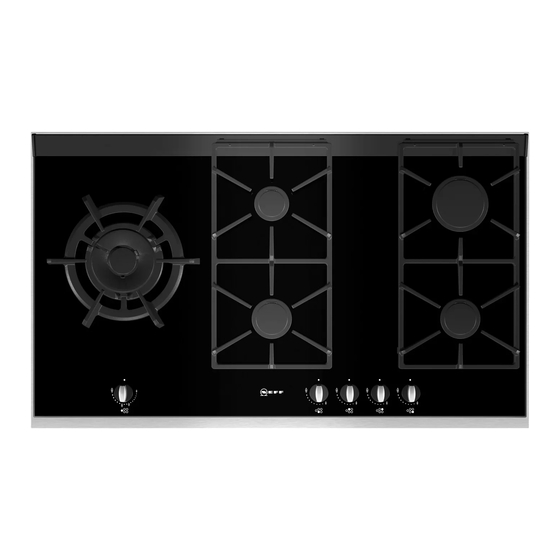
Table of Contents
Advertisement
Available languages
Available languages
Quick Links
Assembly instructions
en
please keep
Einbauanleitung
de
bitte aufbewahren
Notice de montage
fr
veuillez conserver
Istruzioni di Montaggio
it
si prega di conservarle
Instrucciones de montaje
es
por favor, guardar
1
.
-
~
.
43 53
~31
~60
~
Instruçoes de montagem
pt
por favor, guardar
Installatievoorschrift
nl
s.v.p. bewaren
Montaj talimatlarý
tr
lütfen saklayýnýz
Руководство по монтажу
ru
пожалуйста, сохраните данное руководство
Advertisement
Table of Contents

Summary of Contents for NEFF T69S86N0-II
-
Page 1: Instrucciones De Montaje
Assembly instructions Instruçoes de montagem por favor, guardar please keep Einbauanleitung Installatievoorschrift bitte aufbewahren s.v.p. bewaren Notice de montage Montaj talimatlarý veuillez conserver lütfen saklayýnýz Istruzioni di Montaggio Руководство по монтажу si prega di conservarle пожалуйста, сохраните данное руководство Instrucciones de montaje por favor, guardar 43 53... - Page 5 10 a...
-
Page 6: Safety Instructions
Preparation of kitchen unit Provide an omnipolar cut-off switch with a minimum contact separation of 3 mm (fig. 1-2) (except for plug connections, if the user Read the appliance's instructions before Make an appropriate size cut in the work has access to it). installing and using. -
Page 7: Sicherheitshinweise Zu Diesem Gerät
Sicherheitshinweise zu Changing the inner flame nozzle Montageanleitung und immer unter Berücksichtigung eines vertikalen (fig. 9b): diesem Gerät - Unscrew the part M3 from the threaded Mindestabstandes von 650 mm zum Alle Installations-, Regelungs- und Kochfeld geschehen. part M2; to do this, hold the threaded Umstellungsarbeiten auf eine andere Vorbereitung des part in the opposite direction. -
Page 8: Elektrischer Anschluss (Abb. 5)
werden, die verschlossen werden Zum Abnehmen des Komplexes aus Wenn Sie nicht an die Bypass- könnten. Glas und Profilen wie folgt vorgehen: Schrauben gelangen sollten, bauen Sie Wenn ein horizontaler Gasanschluss - Die Roste, Deckel und Brennerkörper die Einheit aus Glasscheibe und Profilen hergestellt werden soll, liefert Ihnen abnehmen. -
Page 9: Avant L'installation
Installation de l'appareil pas être installé dans des yachts ou des Les appareils munis d'une broche ne caravanes. La garantie ne sera valable peuvent être raccordés qu'à des boîtiers Les agrafes et le joint adhésif (bord que si l'usage pour lequel il a été conçu de fiche mâle dûment installés. -
Page 10: Prima Dell'installazione
- Visser le nouvel injecteur flamme Per installare il piano di cottura su un extérieure. Fig. a3-a4, selon le forno, verificare che quest'ultimo sia tableau II. dotato di ventilazione forzata. Leggere attentamente le istruzioni - Régler la distance L2 sur la douille de Verificare le dimensioni del forno nel dell'apparecchio prima di procedere régulation du débit d'air conformément à... -
Page 11: Regolazione Delle Chiavi
Nel caso in cui occorra realizzare il - Allentare le viti dei bruciatori, fig. 7c-7d, C: le viti di bypass devono essere raccordo del gas in orizzontale, presso il e rimuovere le manopole dai rispettivi sostituite da un tecnico autorizzato. nostro servizio tecnico si possono alloggiamenti. -
Page 12: Antes De La Instalación
Antes de la instalación - la conexión con un tubo flexible un sistema de fijación de clipaje. Para metálico (L min. 1 m - max. 3 m). En este retirar el conjunto cristal más perfiles Este aparato corresponde a la clase 3, caso es necesario intercalar el proceder del siguiente modo: según la norma EN 30-1-1 para... - Page 13 Desmontagem da placa de A: apretar los tornillos bypass a fondo. O cabo de alimentação deve ser fixo ao B: aflojar los tornillos bypass hasta la móvel para evitar que entre em contacto cozedura correcta salida de gas de los com as partes quentes do forno ou da Desligue o aparelho das tomadas quemadores:...
-
Page 14: Regulação Das Torneiras
- Mude os injectores usando a chave Retire os comandos das torneiras Dit apparaat is enkel ontworpen voor disponível através do nosso serviço de (fig. 10). huishoudelijk, het commercieel of professioneel gebruik hiervan is niet assistência técnica, com o código Inclui uma anilha de borracha flexível. -
Page 15: Elektrische Aansluiting
Vernis voor houten werkvlakken de gemakkelijk bereikbaar is voor de - Verwijder de inspuiter van de buitenste snijvlakken met een speciale lijm, om gebruiker). vlam door deze naar links te draaien. deze te beschermen tegen vocht. Apparaten die voorzien zijn van een Afb. -
Page 16: Güvenlik Önerileri
Mobilyanın hazırlanması Opgelet! Plaats ten slotte de sticker Herhangi bir gaz bağlantısı kurcalanma die het nieuwe gastype aanduidt, sonucu sızıntı yaptığı takdirde üretici (şekil 1-2) dichtbij het gegevensplaatje. firma sorumluluk kabul etmez. Çalışma yüzeyinin üzerine, belirtilen Elektrikli bağlantı (şekil. 5) ölçülerde bir kesik açınız. -
Page 17: Vanaların Ayarlanması
- Ana brülör ucuna kolayca erişmek için Данный прибор нельзя устанавливать над холодильниками, стиральными başlığı tersi yönde çevirerek serbest машинами, посудомоечными bırakıp bağlantı vidasını gevşetiniz. машинами и дугой подобной техникой. Перед началом монтажа и Şekil a1. Чтобы варочную панель можно было эксплуатации... -
Page 18: Подключение К Электросети (Рис. 5)
(034308), поставляемые с варочной B) Замена жиклеров на горелках Отрегулируйте минимальную панелью. Рис. 4a. величину пламени, повернув конфорок двойного пламени В этом случае необходимо исключить байпасный винт с помощью плоской (рис. 7): соприкосновение шланга с отвертки. Блок стекла с профилями фиксируется подвижными... - Page 20 distancia casquillo mbar Qn (kW) m3/h "Z" (mm) 0,105 0,105 0,122 0,122 G25.1 0,122 0,267 0,267 0,31 0,31 G25.1 0,31 0,181 0,181 0,211 0,211 G25.1 0,21 0,572 0,572 0,665 G25.1 0,642 G25.1 0,665 G20/20 G20/25 G25/20 G25/25 G25.1/25 G30/29 G30/37 G30/50 G31/37 G20/20 G20/25 G25/20...


Need help?
Do you have a question about the T69S86N0-II and is the answer not in the manual?
Questions and answers