Table of Contents
Advertisement
Available languages
Available languages
Quick Links
Advertisement
Table of Contents

Related Manuals for Unitron Remote Control


Summary of Contents for Unitron Remote Control
- Page 1 Unitron remote control guide Guide de la télécommande Unitron...
-
Page 2: Thank You
Thank you Thank you for choosing a Unitron remote control for your Unitron hearing aids. At Unitron, we care deeply about people with hearing loss. We work closely with hearing healthcare professionals to make advanced, purpose-driven solutions available to everyone. -
Page 3: Your Remote Control
Your remote control _____________ Hearing healthcare professional: ____________________________________ Telephone: __________________________________ Serial number: _______________________________ Replacement batteries: One AAA (1.5 Volt), standard or rechargeable Warranty: ___________________________________ Date of purchase: _____________________________ Battery size Changing batteries Low battery warning Light indicator changes to yellow... -
Page 4: Quick Reference
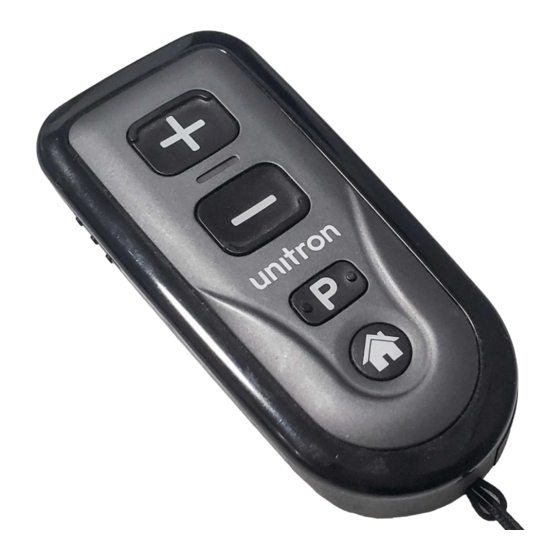
Quick reference 1 On/off switch 2 Indicator light 3 +/– buttons 4 Program change button 5 Home button 6 Battery compartment On/Off... - Page 5 Votre télécommande Audioprothésiste : _________________________________ _________________________________________________ Téléphone : _______________________________________ Numéro de série : __________________________________ Piles de remplacement : Une pile AAA (1,5 V), classique ou rechargeable Garantie : ________________________________________ Date de l'achat : ___________________________________ Type de pile Remplacement des piles Avertissement de pile faible Le voyant...
- Page 6 Aide-mémoire 1 Interrupteur Marche/Arrêt 2 Voyant lumineux 3 Boutons +/– 4 Bouton de changement de programme 5 Bouton d’accueil 6 Compartiment de la pile Marche/Arrêt marche arrêt...
-
Page 7: Table Of Contents
Your remote control at a glance ............2 Turning your remote control on and off ...........4 Replacing the battery ...............5 Operating instructions ..............7 Adjusting your hearing aids with your remote control ....9 Caring for your remote control ............13 Cleaning your remote control ............14 Troubleshooting guide ..............15 Warnings ..................17... -
Page 8: Your Remote Control At A Glance
Your remote control at a glance On-off switch - turn your remote control on or off and lock it to avoid sending unintentional commands Indicator light - will light up when you turn on the remote control or press any button... -
Page 10: Turning Your Remote Control On And Off
Turning your remote control on and off Your remote control has an On-Off switch located on the left side of the remote. • To turn the remote control on, slide the switch to the On or unlocked position, revealing a white dot. -
Page 11: Replacing The Battery
Replacing the battery The battery compartment is located on the back of the remote control. 1. Slide the battery cover in the direction of the arrow. 2. Grasp the old battery with your thumb and index finger and remove. 3. Insert the new... -
Page 12: Low Battery Warning
Low battery warning When the indicator light shines yellow instead of green, your remote control is warning you that the battery in your remote is low. You will see the warning every time you turn on your remote control or send a command to your hearing aids until you change the battery or the battery dies. -
Page 13: Operating Instructions
You do not have to point the remote at your hearing aids. Placing the remote control directly next to or too close to your hearing aids may decrease the remote’s effectiveness. - Page 14 This remote control uses low-power, digitally coded transmission to communicate to your hearing system. Although unlikely, interference with medical devices such as pacemakers is possible. Therefore pacemaker users must not keep this remote control in or near a breast pocket.
-
Page 15: Adjusting Your Hearing Aids With Your Remote Control
Adjusting your hearing aids with your remote control +/- buttons as comfort-clarity control The comfort-clarity control allows you to manage the levels of speech and background noise in your hearing aids and provides an additional fine tuning adjustment beyond a traditional volume control. - Page 16 +/- buttons as volume control Press + to increase the volume. Press – to decrease the volume. As the volume is adjusted, your hearing aids may beep. Please refer to your hearing aid guide for more information on your hearing aid volume beeps.
- Page 17 Program change button Press the program change button to change to the next listening program in your hearing aids. Please refer to your hearing aid guide to determine which programs are available to you and your program beep notifications. Home button Press the Home button to return your hearing aids and settings to their start-up program and the settings.
- Page 18 Accessories Your remote control can be used with a lanyard so that you can carry the remote around your neck. It can also be attached to a keychain. Attach the lanyard or keychain to the device, as illustrated below. Your remote control can also be carried in its pouch and attached to items like your belt or handbag.
-
Page 19: Caring For Your Remote Control
Caring for your remote control Open the battery compartment and remove the battery if the remote control will not be used for long periods of time. Do not use your remote control in the bath or shower or immerse it in water. -
Page 20: Cleaning Your Remote Control
Cleaning your remote control Do not use alcohol to clean your remote control. Use a damp cloth to clean the outside of the remote. -
Page 21: Troubleshooting Guide
Troubleshooting guide You can refer to the troubleshooting table below if you are experiencing problems with your remote control. For problems with your hearing aids, please consult your hearing aid guide. Cause Possible remedy Indicator light not working Not turned on Turn on Low/dead battery Replace battery... - Page 22 Cause Possible remedy Hearing aids not responding to remote control commands Holding the remote Move the remote control control too far away closer to you Holding the remote Move the remote control to control too close a maximum distance of one arm’s length...
-
Page 23: Warnings
Warnings Your remote control should only be used as directed by your hearing healthcare professional. Do not use your remote control in explosion hazard areas. Do not use your remote control in locations forbidden to use electronic devices, such as an airplane. - Page 24 Never put your remote control or batteries in your mouth. If a battery is swallowed, call a physician immediately. Precautions If your remote control fails to operate after you have correctly inserted a new battery, contact your hearing healthcare professional.
- Page 25 (60 centimeters) away to ensure proper operation. If your hearing aids do not respond to the remote control because of an unusual field disturbance, move away from the disturbing field.
- Page 26 Labeling The serial number and year of manufacture are located inside the battery compartment. Please fill out the contact information sticker provided with your new remote control and affix it to the inside of the battery door.
-
Page 27: Declaration Of Conformity
Declaration of conformity Hereby, Unitron Hearing declares that this device meets the requirements of the Medical Device Directive 93/42/EEC & the Radio and Telecommunications Terminal Equipment Directive 1999/5/EC. The full text of the Declaration of Conformity can be obtained from the addresses below. - Page 28 2) this device must accept any interference received, including interference that may cause undesired operation. Changes or modifications made to this device not expressly approved by Unitron Hearing may void the FCC authorization to operate this device. Australia: N15398 New Zealand:...
- Page 29 With the CE symbol, Unitron confirms that this Unitron product, including accessories, XXXX meets the requirements of the Medical Devices Directive 93/42/EEC as well as the R&TTE Directive 1999/5/EC on radio and telecommunications transmitters. The numbers after the CE symbol correspond...
- Page 30 Australian EMC and Radiocommunications compliance label in Australia. This device is designed such that it functions Operating conditions without problems or restrictions if used as intended, unless otherwise noted in these user guides. -10° – 55° Celsius and relative humidity of <95% (non condensing). During transport or storage, the temperature Transport and storage...
- Page 31 The symbol with the crossed-out garbage bin is to make you aware that this device may not be thrown away as normal household waste. Please dispose of old or unused device at waste disposal sites intended for electronic waste, or give your device to your hearing care professional for disposal.
-
Page 32: Votre Télécommande En Un Coup D'œil
Votre télécommande en un coup d'œil Interrupteur Marche/Arrêt - vous permet de mettre en marche et d'arrêter votre télécommande, ainsi que de la verrouiller pour éviter d'envoyer accidentellement des commandes Voyant lumineux- s'allume lorsque vous mettez la télécommande en marche ou lorsque vous appuyez sur n'importe quel bouton voyant vert = pile OK voyant jaune = pile faible... -
Page 34: Mise En Marche Et Arrêt De Votre Télécommande
Mise en marche et arrêt de votre télécommande Votre télécommande comporte un bouton Marche/Arrêt situé sur le côté gauche. • Pour mettre en marche la télécommande, faites glisser le bouton en position Marche ou déverrouillée, ce qui fera apparaître un point blanc. -
Page 35: Remplacement De La Pile
Remplacement de la pile Le compartiment de la pile est situé à l'arrière de la télécommande. 1. Faites glisser le couvercle du compartiment de la pile dans le sens de la flèche. 2. Saisissez la pile usée à l'aide du pouce et de l'index et retirez-la. - Page 36 Avertissement de pile faible Le voyant lumineux devient jaune pour vous avertir que la pile de votre télécommande est faible. Vous verrez cet avertissement chaque fois que vous mettrez votre télécommande en marche ou que vous enverrez un signal à vos aides auditives, jusqu'à...
-
Page 37: Consignes D'utilisation
Consignes d'utilisation Avant d'utiliser la télécommande, mettez vos aides auditives en marche pour vous assurer qu'elles en reçoivent bien les commandes. La télécommande a été conçue pour que vous la teniez facilement en main à la distance maximale d'une longueur de bras. Il n'est pas nécessaire de pointer la télécommande vers vos aides auditives. - Page 38 Interférence avec des appareils médicaux : Cette télécommande emploie des transmissions à code numérique et à faible puissance afin de communiquer avec vos aides auditives. Bien qu'improbables, des interférences avec des appareils médicaux, comme des stimulateurs cardiaques, sont possibles. Par conséquent, les utilisateurs de stimulateurs cardiaques ne doivent pas ranger la télécommande près de ou dans leur poche près du coeur.
-
Page 39: Réglage De Vos Aides Auditives À L'aide De Votre Télécommande
Réglage de vos aides auditives à l’aide de votre télécommande Boutons +/- pour le contrôle du confort et de la clarté Le contrôle du confort/de la clarté vous permet de régler le volume des paroles et des bruits de fond sortant de vos aides auditives. Il fournit également une option de réglage plus précis qui surpasse la commande de volume traditionnelle. - Page 40 Boutons +/- pour le contrôle du volume Appuyez sur + pour augmenter le volume des sons. Appuyez sur - pour réduire le volume des sons. Lors du réglage du volume, vos instruments auditifs peuvent émettre un bip. Veuillez consulter le manuel de vos aides auditives pour obtenir plus de renseignements sur les bips d'écoute et de volume.
- Page 41 Bouton de changement de programme Appuyez sur le bouton de changement de programme pour passer au programme d'écoute suivant. Veuillez consulter le manuel de vos aides auditives pour déterminer les programmes disponibles pour vous et leurs notifications par bip. Bouton d'accueil Appuyez sur le bouton d'accueil pour remettre vos aides auditives et les réglages au programme et aux réglages de démarrage.
- Page 42 Accessoires Votre télécommande peut être utilisée avec un cordon de manière à pouvoir la porter autour du cou. Elle peut aussi s'attacher à un porte-clés. Attachez le cordon ou le porte-clés à l'appareil, comme illustré ci-dessous. Votre télécommande peut également se porter dans sa pochette et s'attacher à...
-
Page 43: Entretien De Votre Télécommande
Entretien de votre télécommande Ouvrez le compartiment de la pile et retirez la pile si vous ne pensez pas utiliser la télécommande pendant une longue période. Ne pas utiliser votre télécommande dans le bain ou sous la douche et ne pas l'immerger dans l'eau. -
Page 44: Nettoyage De Votre Télécommande
Nettoyage de votre télécommande N'utilisez pas d'alcool pour nettoyer votre télécommande. Utilisez un chiffon humide pour nettoyer l'extérieur de la télécommande. -
Page 45: Guide De Dépannage
Guide de dépannage Vous pouvez consulter le tableau de dépannage ci-dessous si vous avez des problèmes avec la télécommande. Veuillez consulter le manuel de vos aides auditives pour les problèmes relatifs à vos aides auditives. Cause Solution possible Voyant lumineux ne fonctionne pas Pas en marche Mettre en marche Pile faible ou épuisée... - Page 46 Cause Solution possible Les aides auditives ne répondent pas à la télécommande La télécommande se situe Rapprocher la trop loin télécommande vers vous La télécommande se situe Éloignez la télécommande trop près à une distance maximale équivalente à la longueur d'un bras Pour tout autre problème ne figurant pas dans ce guide, communiquez avec votre audioprothésiste.
-
Page 47: Avertissements
IRM ou autres procédures é lectromagnétiques. Les changements ou modifications apportés à la télécommande qui n'ont pas été expressément approuvés par Unitron Hearing peuvent en annuler l'autorisation d'utilisation. Avertissements concernant la pile Ne laissez jamais votre télécommande ou les piles à... - Page 48 Ne mettez jamais votre télécommande ou les piles dans votre bouche. Si une pile est ingérée, appelez immédiatement un médecin. Précautions Si la télécommande ne fonctionne pas une fois la pile neuve correctement installée, contactez votre audioprothésiste. Apportez toujours la télécommande et vos aides auditives pour toute question de réparation.
- Page 49 d'un appareil de communication, comme un téléphone cellulaire numérique, ou d'un autre champ magnétique fort, vous devrez peut- être vous éloigner d'au moins 60 centimètres (24 po) pour que la télécommande fonctionne bien. Si vos aides auditives ne répondent pas à la télécommande à cause d'une perturbation inhabituelle due à...
-
Page 50: Déclaration De Conformité
Déclaration de conformité Unitron Hearing déclare par la présente que cet appareil est conforme aux exigences de la Directive 93/42/CEE relative aux appareils médicaux et à la Directive 1999/5/CE relative au matériel de terminaux de télécommunications. Le texte complet de la Déclaration de conformité peut être obtenu aux adresses ci-dessous. - Page 51 2) cet appareil doit accepter toute interférence reçue, incluant l’interférence pouvant nuire à son fonctionnement. Tout changement ou modification fait à cet appareil n’ayant pas été expressément approuvé par Unitron Hearing pourrait annuler l’autorisation de la FCC d’utiliser cet appareil. Australie : N15398 Nouvelle-Zélande : Z 1285...
- Page 52 Unitron confirme par le symbole CE que ce produit Unitron, y compris ses accessoires, XXXX est conforme aux exigences de la Directive sur les appareils médicaux 93/42/CEE, ainsi qu'à la Directive R&TTE 1999/5/CE en matière de transmetteurs d'appareils de radio et de télécommunications. Les numéros après le symbole CE correspondent...
- Page 53 Étiquette de conformité de l'Australian EMC and Radiocommunications en Australie. Cet instrument est conçu pour fonctionner Conditions d'utilisation sans aucun problème ou restriction s'il est utilisé aux fins pour lesquelles il a été prévu, à moins qu'il n'en soit indiqué autrement dans ces manuels.
- Page 54 Le symbole de la corbeille barrée vous informe que cet instrument ne doit pas être jeté dans une poubelle ordinaire. Veuillez disposer des instruments désuets ou non utilisés dans les sites d'élimination prévus pour les déchets électroniques ou donnez- les à votre audioprothésiste pour qu'il en dispose.
- Page 55 Unitron distributors/Distributeurs Unitron Corporate office/International 20 Beasley Drive, boîte postale 9017, Kitchener, ON N2G 4X1 Canada Australia/Australie Germany & European South Africa/ Representative/ Afrique du Sud Level 2, Norwest Quay, 21 Solent Circuit, Représentant Européen First Floor – Max-Eyth-Straße 20,...
- Page 56 Distributor/Distributeur www.unitron.com/ca 11-021 029-5896...
Need help?
Do you have a question about the Remote Control and is the answer not in the manual?
Questions and answers