
Related Manuals for Club Car Café Express Deluxe SE


Summary of Contents for Club Car Café Express Deluxe SE
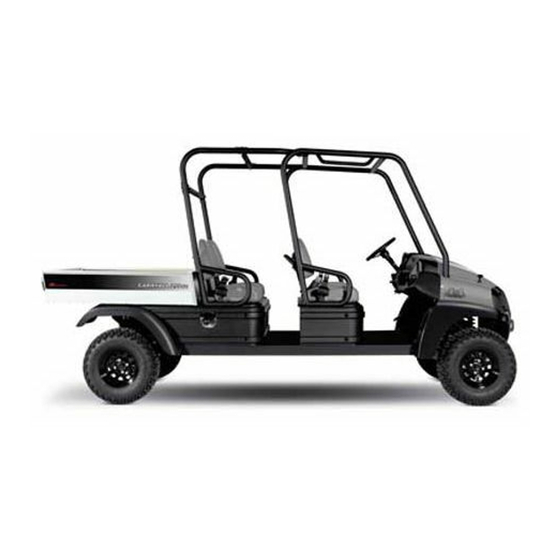
- Page 1 Café Express Deluxe SE Owner’s Manual Carryall 295 SE Gasoline [Refer to back cover for applicable build code range]...
- Page 3 Your authorized representative checked the vehicle before it was delivered to you and will provide you a copy of the completed vehicle warranty registration form. Club Car is not liable for errors in this manual or for incidental or consequential damages that result from the use of the material in this manual.
- Page 4 For the name and address of the authorized Club Car dealer or distributor nearest you, logon to our web site at www.clubcar.com or call 1-800-ClubCar (258-2227). If you would prefer to write to us, direct your letter to: Club Car, Attention: Marketing Services, P.O.
-
Page 5: Table Of Contents
TABLE OF CONTENTS Note to the Owner ..............................5 Safety Decal and Feature Identification ........................5 Practice Safety ..............................10 Proposition 65 Warning – State of California......................10 Safety Details ..............................11 General Warnings............................... 12 General Information ............................16 Model Identification............................. 16 Controls and Indicators ............................ - Page 6 Subsequent Owner Registration .......................... 54 Vehicle Specifications ............................54 Café Express Deluxe SE Refreshment Center Installation ..................56 Hot Food Box Operation and Care ........................69 Warranty ................................71 Page 4 Café Express Deluxe SE Owner’s Manual...
-
Page 7: Note To The Owner
Note to the Owner NOTE TO THE OWNER This utility vehicle, with standard equipment and authorized attachments, is intended for commercial or residential property, farm, ranch or recreational applications. Use only approved accessories and attachments designed for your vehicle. This Operator’s Manual does not include instructions for attachments. Read the manual(s) provided with the authorized attachment to learn safe maintenance and operation of the vehicle. - Page 8 Safety Decal and Feature Identification CAFÉ EXPRESS DELUXE SE VEHICLE Decal, Rotating/Hot Parts Warning (on frame, near 101547601 Decal, Gasoline Explosion Warning (at fuel fill) 102459501 battery) Decal, Ground and Excessive Speed Warning (on Decal, Rotating Parts Warning (on vehicle body, 101915201 102460201 frame, near battery)
- Page 9 Safety Decal and Feature Identification CAFÉ EXPRESS DELUXE SE VEHICLE Decal, Maximum Tongue Weight Notice (on Decal, Bed Lift Capacity Warning (right side of 1011553 102226901 receiver hitch) dash, above lift switch) Decal, Bed Latch Warning (on vehicle body, below 101609401 Decal, Crush Area Warning (on cargo bed) 102459301...
- Page 10 Safety Decal and Feature Identification CAFÉ EXPRESS DELUXE SE REFRESHMENT CENTER Decal, Food Safety Warning (on each side of 1011962 refreshment center) Decal, Riding in Cargo Box Warning (rear of 101553901 refreshment center) Decal, Pin Removal Warning (on frame next to 102160601 pins) Decal, Proper Use Notice (on each side of...
- Page 11 Safety Decal and Feature Identification CAFÉ EXPRESS DELUXE SE REFRESHMENT CENTER SVPP289901 Decal, Vehicle Loading (left side refreshment unit) Consumable Ice Compartment Decal, Rollover Warning (left side dash, left side SVPP290101 Trash Compartment refreshment unit) SVPP290301 Decal, Young Driver Warning (left side dash) Drain Holes (3) (valves inside trash compartment) Dry Snack Compartment Cold Storage Compartment...
-
Page 12: Practice Safety
CAUTION statements and procedures it contains, along with the safety decals that are affixed to your vehicle. Prior to operating the vehicle, all operators should go to the Club Car web site and view the vehicle safety video. To locate the video, go to www.clubcar.com, and search for “safety video.”... -
Page 13: Safety Details
Safety Details SAFETY DETAILS WARNING • This owner’s manual should be read completely before attempting to drive or service the vehicle. The safety video provided with the Café Express vehicle should also be viewed by all operators of the vehicle. Failure to heed the warnings or follow the instructions in this manual and the safety video could result in property damage, severe personal injury or death. -
Page 14: General Warnings
General Warnings GENERAL WARNINGS The following safety statements must be heeded whenever the vehicle is being operated, repaired, or serviced. See Safety Decal and Feature Identification on page 5. Other specific safety statements appear throughout this manual and on the vehicle. DANGER •... - Page 15 General Warnings WARNING • To avoid unintentionally starting the vehicle, disconnect battery and spark plug wires. See Disconnecting the Battery – Gasoline Vehicles on page 13. • Frame ground – Do not allow tools or other metal objects to contact frame when disconnecting battery cables or other electrical wiring.
- Page 16 General Warnings (–) 1. Remove negative battery cable. 2. Remove positive battery cable. Connect battery cables in reverse order. Figure 2 Battery Cable Removal Figure 3 All-Wheel Drive Warning CONNECTING THE BATTERY – GASOLINE VEHICLES Connect the battery cables, positive (+) cable first. Tighten battery terminals to 80 in-lb (9 N·m).
- Page 17 General Warnings 1403 Figure 4 Dispose of Lead-acid Batteries Properly INTERNATIONAL SAFETY SYMBOLS ON BATTERIES Anyone using, repairing, or servicing the vehicle must understand and heed the safety symbols on the vehicle battery or batteries. 1. Shield eyes. 3. No smoking, no open flames, no sparks. 5.
-
Page 18: General Information
General Information GENERAL INFORMATION This manual is designed to include information on Café Express Deluxe SE vehicles. All operating procedures, maintenance, and regular servicing are identical in all vehicles unless otherwise noted. If any of these differ between vehicles, it will be noted for that specific procedure. MODEL IDENTIFICATION The serial number of each vehicle is printed on a bar code decal mounted either below the passenger side cup holder or above the accelerator or brake pedal (Example: PH0901-583947) (Figure 6). - Page 19 Model Identification SERIAL NUMBER PH0901-123456 BC54679 ASSEMBLED IN USA 1400 Figure 6 Serial Number Decal with the Vehicle Build Code Figure 7 Gasoline Engine Serial Number Location 2703 Figure 8 Differential Serial Number Location Café Express Deluxe SE Owner’s Manual Page 17...
-
Page 20: Controls And Indicators
Controls and Indicators CONTROLS AND INDICATORS See General Warnings on page 12. WARNING • Before allowing anyone to drive the vehicle, make sure the driver is familiar with all controls and operating procedures. • Do not shift the Forward/Reverse handle while the vehicle is in motion. •... - Page 21 Controls and Indicators To start the vehicle, place the Forward/Reverse handle in the NEUTRAL position and turn the key to the START position, and hold it there until the engine starts. Activate the choke (14) as necessary. If the engine does not start after 10 to 15 seconds, release the key and repeat the procedure.
- Page 22 Controls and Indicators WARNING • The park brake has multiple locking positions and should be firmly locked to prevent the vehicle from rolling. Figure 10 Park Brake Release STEERING ADJUSTMENT LOCK The steering wheel position is adjustable. To adjust the steering wheel position, press down on the steering adjustment lock lever (5), then move the steering wheel to the desired position (Figure 9).
-
Page 23: Seat Latch And Adjustment
Seat Latch and Adjustment CAUTION • Failure to add oil immediately when the low oil warning light stays on may result in permanent engine damage. FUEL GAUGE/HOUR METER The fuel gauge and hour meter (8) are housed together on the right side of the instrument panel (Figure 9). The fuel gauge operates when the key switch is in the ON position and allows the operator to monitor the fuel level in the vehicle. -
Page 24: Pre-Operation And Daily Safety Checklist
See General Warnings on page 12. Each Club Car vehicle has been thoroughly inspected and adjusted at the factory; however, upon receiving your new vehicle(s), you should become familiar with its controls, indicators, and operation. Carefully inspect each vehicle to ensure that it is in proper working condition before accepting delivery. -
Page 25: Vehicle Operation
Use the following checklist, in conjunction with the Pre-Operation and Daily Safety Checklist on page 22, as a guide to inspect the vehicle and check daily for proper operation. Any problems should be corrected by a Club Car distributor/dealer or a trained technician. - Page 26 The Café Express Deluxe SE vehicle is often driven in the opposite direction of play. This exposes the driver to the hazard of flying golf balls. WARNING • A Club Car vehicle with a Café Express Deluxe refreshment center installed must be equipped with the one-piece windshield supplied with this kit to reduce the hazard of flying golf balls. LOADING When stocking the Café...
-
Page 27: Driving Instructions
Driving Instructions WATER DRAIN VALVES The three drain valves, located in the trash compartment of the base unit, are used to drain the ice compartments. See following WARNING. • The valve on the passenger side of the base unit drains the passenger side consumable ice compartment. •... - Page 28 Driving Instructions WARNING • Avoid stopping a loaded vehicle on a hill. If a loaded vehicle must be stopped on a hill, avoid sudden starts or rolling backwards and stopping suddenly. Failure to heed this warning could result in the vehicle overturning.
- Page 29 Driving Instructions WARNING • Operator must control vehicle speed when going downhill. • Never shift vehicle out of the FORWARD position while going downhill. If you do, you will not be able to shift into the REVERSE position or back into the FORWARD position until stopped. •...
-
Page 30: Refreshment Center
Refreshment Center REFRESHMENT CENTER See General Warnings on page 12. LOADING When stocking the Café Express Deluxe refreshment center, make sure the load weights are approximately equal in all lower (cold storage) compartments containing ice and/or beverages. WARNING • An unevenly distributed load can cause vehicle instability. REFRESHMENT CENTER COMPARTMENTS Cold Storage Compartments The cold storage compartments are designed to carry canned beverages and cooling ice. - Page 31 Refreshment Center WARNING • All three drain valves must always be open while the Café Express Deluxe refreshment center vehicle is in service. Leaving them closed will allow water from melting ice to collect in storage and beverage compartments. This water level will increase over time and the shifting weight of the water, when making turns, can cause reduced vehicle stability.
-
Page 32: Electric Bed Lift And Safety Catch
Electric Bed Lift and Safety Catch ELECTRIC BED LIFT AND SAFETY CATCH See General Warnings on page 12. SAFETY CATCH The safety catch is located at the rear of the underside of the bed. Use the following steps to engage the safety catch. See following WARNING and CAUTION. -
Page 33: Loading And Unloading Cargo
Loading and Unloading Cargo Figure 11 Safety Catch – Engaged Figure 12 Safety Catch – Disengaged LOADING AND UNLOADING CARGO See General Warnings on page 12. WARNING • Firmly engage park brake before loading vehicle. • Do not allow riders on the refreshment center. •... -
Page 34: Vehicle Load Capacities
Vehicle Load Capacities VEHICLE LOAD CAPACITIES Occupant Capacity The occupant capacity is the maximum allowable weight for occupants (operator and passengers) to operate the vehicle safely. Cargo Capacity The cargo capacity is the maximum amount of load that the vehicle can haul in the cargo bed and includes the weight of vehicle accessories and trailer tongue weight. -
Page 35: Towing With The Vehicle
• For use on public roads, the trailer must meet all federal, state, and local requirements such as taillights, brake lights, etc. • Never tow a Club Car vehicle behind a passenger vehicle or truck on a public road unless it is on an approved trailer. - Page 36 Storage WARNING • Turn the key switch to the OFF position, remove the key, and leave the Forward/Reverse handle in the NEUTRAL position during storage. This is to prevent unintentionally starting the vehicle or a fire hazard. • Turn fuel shut-off valve to the closed (OFF) position (Figure 14). •...
- Page 37 Storage 4.2. Following the manufacturer’s directions, add a commercially available fuel stabilizer (such as Sta-Bil ® ). Run the engine in a well-ventilated area to allow treated fuel to replace untreated fuel in the carburetor. 4.3. Disconnect the fuel vent line from the fuel tank vent nipple (Figure 28). 4.4.
-
Page 38: Maintenance
Any vehicle not functioning correctly should not be used until it is properly repaired. This will prevent further damage to the vehicle and help prevent injury to occupants resulting from unsafe conditions. Contact your local Club Car dealer/distributor for repairs and semiannual and annual periodic service. REFRESHMENT CENTER The door latches and locks will require periodic tightening and adjusting. -
Page 39: Periodic Service Schedules
Periodic Service Schedules PERIODIC SERVICE SCHEDULES WARNING • Service, repairs, and adjustments must be made per instructions in the appropriate maintenance and service manual. • If any problems are found during scheduled inspection or service, do not operate vehicle until repairs are made. - Page 40 Periodic Service Schedules PERIODIC SERVICE SCHEDULE REGULAR INTERVAL SERVICE Clean terminals and wash dirt from casing; Battery check electrolyte level. Add distilled water if necessary. See page 49. Check and adjust if necessary. See Steering Front wheel alignment and toe-in and Front Suspension Section in the appropriate maintenance and service manual.
-
Page 41: Periodic Lubrication Schedules
Periodic Lubrication Schedules PERIODIC LUBRICATION SCHEDULES PERIODIC LUBRICATION SCHEDULE LUBRICATION REGULAR INTERVAL SERVICE RECOMMENDED LUBRICANT POINTS First change 10 hours; additional change every 100 1 qt. and 19 oz (1.5 L) with filter See Oil Change engine oil and oil filter hours of operation or annually, Viscosity on page 45. -
Page 42: Brake Fluid Reservoir
Brake Fluid Reservoir BRAKE FLUID RESERVOIR 1. Full Level 2. Safe Level 3. Low Level 2693 Figure 16 Brake Fluid Reservoir The brake fluid reservoir (1) is located under the hood. Raise the hood to check the brake fluid level. During the brake fluid level inspection, also inspect the following: •... -
Page 43: Engine Oil
Engine Oil ENGINE OIL Even though the low oil warning light on the instrument panel should illuminate if the oil level becomes low, the engine oil level should be checked daily. The vehicle should be on a level surface when the oil is checked. Do not overfill the engine with oil. - Page 44 Engine Oil 1. Full Level 2. Safe Level 3. Low Level Figure 17 Engine Oil Level Check ENGINE OIL AND FILTER CHANGE Engine oil and oil filter should be changed after the first 10 hours of operation. After that, the oil should be changed every 100 hours of operation or annually, whichever comes first.
- Page 45 Engine Oil Figure 18 Engine Oil Drain Plug and Pan Figure 19 Replace Engine Oil Filter Engine Oil Filter Change Drain the engine oil. See Engine Oil Draining on page 42. Place the oil drain pan under the engine oil filter (2) (Figure 19). Remove the engine oil filter.
- Page 46 Engine Oil Use a clean rag to wipe the oil filter mounting bracket surface clean where the oil filter gasket seats. Coat filter gasket with clean engine oil (Figure 21). Install the new oil filter (gas: CC P/N 103887901). See following NOTE.
-
Page 47: Gearcase Lubrication
Gearcase Lubrication OIL VISCOSITY Choose the viscosity according to the temperature as shown in the appropriate oil viscosity chart (Figure 23). See following NOTE. NOTE: Use engine oil with API classification SJ for gasoline vehicles. Gasoline Vehicles Only: Below 40 °F (4 °C), the use of SAE 30 may result in hard starting. Gasoline Vehicles Only: Above 80 °F (27 °C), the use of 10W-30 may cause increased oil consumption. - Page 48 Gearcase Lubrication the metal particles generated from the gear break in process. This is an established process and is not detrimental to gear service life. Dispose of used oil according to the environmental laws and regulations for your area. Figure 24 Transmission Lubrication Level Figure 26 Rear Differential Fill and Drain Plugs (2012 and Figure 25 Rear Differential Lubrication Level (2009 to newer vehicles)
-
Page 49: Air Intake System
Remove the air filter cartridge (1). See following NOTE. NOTE: The air filter cartridge is specifically designed for this engine. It only fits into the canister one way. Use only the Club Car part (CC P/N 102498601) designed for this engine. Café Express Deluxe SE Owner’s Manual... -
Page 50: Fueling Instructions
Fueling Instructions Figure 27 Air Filter Cartridge Air Filter Installation Push the new air filter cartridge onto the nozzle inside the canister. Place the canister cap, marked TOP, on the top center of the canister. Secure the canister cap with both tab locks. FUELING INSTRUCTIONS See General Warnings on page 12. -
Page 51: Battery
Battery CAUTION • Gasoline vehicles: Use unleaded gasoline only. • Whenever possible, avoid using oxygenated and blended fuels. • Do not use any fuel with an alcohol content that exceeds 10% by volume (such as E15 and E85). Ethanol is an alcohol that readily absorbs moisture causing corrosion of fuel system components. It also damages neoprene and other plastic and rubber components. - Page 52 Battery WARNING • Wear safety glasses or approved eye protection when servicing the vehicle. • Follow all instructions carefully when working with batteries. • When jumping from a booster battery make final (negative) connection at engine frame. • Do not jump start or charge a frozen or damaged battery. Unplug charger before connecting or disconnecting cables to the battery.
-
Page 53: Using A Booster Battery (Jump Starting)
Using A Booster Battery (Jump Starting) WARNING • If battery wire terminals are damaged or corroded, replace or clean them as necessary. Failure to do so may cause them to overheat during operation and could result in a fire, property damage, or personal injury. -
Page 54: Cleaning The Vehicle And Refreshment Center
To remove oxidation or discoloration from aluminum, use a commercially available aluminum cleaner paste and fine grade (No. 00) steel wool. Club Car does not recommend any type of pressure washing or steam cleaning. Such a process will expose electrical components to moisture. Moisture entering electrical components can result in water damage and subsequent component failure. -
Page 55: Accessories
There is a complete line of accessory equipment available from Club Car and our dealers/distributors. You can obtain the name and phone number of your closest Club Car contact by visiting our web site at www.clubcar.com and clicking the “Dealer Locator” link. -
Page 56: Subsequent Owner Registration
This will enable us to contact you if the need arises. VEHICLE SPECIFICATIONS NOTE: Club Car, LLC reserves the right to change specifications and design of its vehicles at any time without notice and without obligation to make these changes on units previously sold. - Page 57 Vehicle Specifications CAFÉ EXPRESS SPECIFICATIONS DELUXE SE DIMENSIONS/WEIGHT NOTE: Items marked with an asterisk (*) indicate approximate values. *Overall length (box bed configuration, without brush guard): 154 in. (391.2 cm) Overall width: 58.5 in. (148.5 cm) *Overall height 80.3 in. (203.8 cm) Wheelbase 114 in.
-
Page 58: Café Express Deluxe Se Refreshment Center Installation
Café Express Deluxe SE Refreshment Center Installation CAFÉ EXPRESS DELUXE SE REFRESHMENT CENTER INSTALLATION GENERAL INFORMATION Review the following instructions and safety precautions before beginning installation procedures. NOTE: Installation of the upper cabinets, canopy frame and canopy will require the aid of an assistant. Observe the following DANGER and WARNING statements and procedures. - Page 59 Café Express Deluxe SE Refreshment Center Installation REFRESHMENT CENTER KIT Tools Required 3/8-Inch Hand Drill 1/2-Inch Drill Bit 7/32-Inch Drill Bit 4-Inch Long 3/8-Drive Extension 5/16-Inch Drill Bit Rubber Mallet 1/2-Inch Open-End Wrench 7/16-Inch, 1/4-Inch Drive Socket 7/16-Inch Open-End Wrench 1/2-Inch, 3/8-Inch Drive Socket Ratchet #3 Large Phillips-Head Screwdriver...
- Page 60 Café Express Deluxe SE Refreshment Center Installation Parts in Kit 102160901 19th Hole Retaining Pin #10-24 x 3/4 Phillips-Head Machine Screw #8-32 x 1/2 Phillips-Head Stainless Steel Machine 1/4-20 x 1-1/2 Phillips, Stainless Steel Truss-Head Screw Machine Screw 1/4-20 x 3/4 Truss-Head Stainless Steel Machine #10-24 Nylon Locknut Screw Figure 33...
- Page 61 Café Express Deluxe SE Refreshment Center Installation 103336401 Canopy Frame Splice Bar 8233 Locknut, 1/4-20 Nylon Insert 1/4-20 x 1-1/2 Hex-Head Cap Screw Figure 35 Canopy Assembly Parts Cambro Beverage Container #10-24 x 3/4 Phillips-Head Machine Screw Cambro Mounting Tray #10-24 Nylon Locknut Figure 36 Cambro Installation Parts...
- Page 62 Café Express Deluxe SE Refreshment Center Installation 1014441 Channel, Black Windshield 103336002 Support, Passenger-Side Windshield 103321101 Windshield 96715552 Bolt, M10 x 1.50 103336001 Support, Driver-Side Windshield Figure 37 Windshield and Windshield Frame Installation Parts CABINET AND BASE INSTALLATION There are two upper cabinets and one base assembly. The base and upper cabinets have track strips that interlock as the upper cabinets slide from rear to front.
- Page 63 Café Express Deluxe SE Refreshment Center Installation Figure 38 Upper Cabinets and Base Assembly Position the front edge of the rear upper cabinet so that the track strips on both levels of the base assembly interlock with the cabinet track strips, then slide the cabinet up next to the front cabinet. Locate the two side plates and use sixteen #8-32 x 1/2-inch truss-head machine screws.
- Page 64 Café Express Deluxe SE Refreshment Center Installation CAUTION • Do not overtighten screws. TPC front cabinet only: Position the sliding humidor tray (7) (included with upper cabinet SVP193202) to the passenger-side rear upper cabinet as shown (Figure 38). Fully extend the tray slides and align the two holes in each slide with the threaded inserts on the bottom panel of the cabinet.
- Page 65 Café Express Deluxe SE Refreshment Center Installation Set the Cambro containers onto the trays with the spigots to the outside of the vehicle and the back of the Cambro containers to the back edge of the trays. Cinch the Cambro strap buckles half way from top to bottom. Adjust the straps by pulling on the loose ends of the straps until desired tightness is achieved.
- Page 66 Café Express Deluxe SE Refreshment Center Installation Figure 40 Canopy Frame Installation WINDSHIELD FRAME INSTALLATION NOTE: Make sure to install the driver-side and passenger-side windshield supports on the correct side of vehicle. The mounting hole in the top bracket (6) should be closer to the middle of the vehicle (Figure 40). Insert windshield supports into existing holes in front body (Figure 41).
- Page 67 Café Express Deluxe SE Refreshment Center Installation Figure 41 Secure Windshield Frame CANOPY FRAME VELCRO INSTALLATION Make sure the frame surfaces are dry, clean, and free of grease. Apply the velcro strip (2) all around the outside surface of the canopy frame (1) (Figure 42). Align the bottom edge of the velcro to the bottom edge of the tubing as shown.
- Page 68 Café Express Deluxe SE Refreshment Center Installation WINK MIRROR ASSEMBLY INSTALLATION Use the following procedure for the installation of the wink mirror assembly. Locate hole drilling points along the inside flange of each canopy channel at the front of the vehicle. Drill 9/32-inch holes, 2-1/4 inches from the front cross channel and 3/8-inch up from the bottom edge through the inside flange only (Figure 43).
- Page 69 Café Express Deluxe SE Refreshment Center Installation CANOPY COVER INSTALLATION Spread the canopy cover (1) out over the canopy frame with the velcro strip to the inside toward the canopy frame (Figure 45). Starting at one corner, align the bottom edge of the velcro strip on the cover with the bottom edge of the velcro strip on the frame.
- Page 70 Café Express Deluxe SE Refreshment Center Installation WINDSHIELD INSTALLATION Install the two rubber bumpers (2) to the frame side of the windshield (Figure 46). Install the two mounting channels (1) onto the windshield as shown. Push both channels onto the frame evenly until the channels are firmly attached to the frame.
-
Page 71: Hot Food Box Operation And Care
Hot Food Box Operation and Care HOT FOOD BOX OPERATION AND CARE NOTE: The hot food box operates on 120 VAC and 12 VDC and must be pre-heated before operation. The product must be pre-cooked and wrapped and placed into the pre-heated hot food box at 200 °F (93.3 °C). PRE-HEATING Remove shipping band securing the hot food box to the vehicle. - Page 72 Hot Food Box Operation and Care Place excess wire from 12-volt power cord (5) between the hot food box and the vehicle storage cabinet (Figure 48). Place the pre-cooked, wrapped products in the hot food box. See following CAUTION and NOTE. CAUTION •...
-
Page 73: Warranty
4 YEARS EXCLUSIONS Excluded from any CLUB CAR warranty is damage to a vehicle or component resulting from a cause other than a defect including poor maintenance, neglect, abuse, accident and collision, maintenance adjustments, unreasonable or unintended strain or use, improper installation of accessories, installation of parts or accessories that are not original equipment including Club Car approved or non-approved GPS systems, non-approved alteration and acts of God. - Page 74 10. Use of gasoline containing more than 10% ethanol. Without limiting the generality of the foregoing in any way, and as part of its limited warranty exclusion, CLUB CAR does not warrant that its vehicle or components such as batteries, computer, controller or electrical device are suitable for use in any application other than in its products.
- Page 75 To make a warranty claim under this limited warranty, you must present the vehicle or defective component with evidence of proof of purchase date and number of energy units (if applicable) to an authorized CLUB CAR dealer. For warranty-related communication, contact Warranty Services, Club Car, 4125 Washington Rd., Evans, GA 30809, USA, 706.863.3000.
- Page 76 CLUB CAR recommends that you retain all receipts covering maintenance on your vehicle engine, but CLUB CAR cannot deny warranty solely for the lack of receipts or for your failure to ensure the performance of all scheduled maintenance.
- Page 77 CLUB CAR will not be liable to warrant failures of warranted parts caused by the use of a non-exempted add-on or modified part.
- Page 78 Warranty Page 76 Café Express Deluxe SE Owner’s Manual...
- Page 80 BC56471 Publication Part Number 103472523 Edition Code 0708E0613D...
Need help?
Do you have a question about the Café Express Deluxe SE and is the answer not in the manual?
Questions and answers