Table of Contents
Advertisement
Advertisement
Table of Contents

Related Manuals for Karel IP111


Summary of Contents for Karel IP111
-
Page 2: User Guide
IP TELEPHONE USER GUIDE DECEMBER 2011... - Page 4 16.12.2011 / AAB IP111 User Guide-Ver. AAB–16.12.2011 KAREL reserves the right to make modifications in product features mentioned in this document for development and improvement purposes, without prior notice. Individual products may possess characteristics different from those that have been mentioned in this...
- Page 5 5) Do not make any connection other than the extension connection of the KAREL telephone system. 6) There is no part that you can repair or maintain in your device; therefore call the authorized technical service in case of any malfunction.
- Page 6 IP111...
-
Page 7: Table Of Contents
TABLE OF CONTENTS GETTING STARTED ........................ 1 PACKING LIST ........................1 ASSEMBLING THE PHONE ....................3 CONFIGURATION AND REGISTRATION ................4 Configuring via Web Page ....................4 Configuring via keypad ..................... 5 OVERVIEW ..........................6 KEYPAD INSTRUCTION ..................... 6 LED INSTRUCTION ......................7 ICON INSTRUCTION ...................... - Page 8 3-way Conference ......................29 Voicemail ........................29 USING THE ADVANCED PHONE FUNCTIONS ..............31 ACCOUNT SETTING ......................31 TLS ..........................31 NETWORK SETTING ......................32 PC Port Setting ....................... 32 VLAN Setting ........................33 HTTPS ..........................33 MAINTENANCE TASKS ....................34 Administrator Mode ......................
-
Page 9: Getting Started
GETTING STARTED PACKING LIST The following components are included in your package: • Enterprise IP Phone • Phone Stand... - Page 10 • Power Adapter • Handset & Handset Core • Ethernet Cable • Quick Installation Guide & Quick Reference (this component may not be included) • CD Content Check this list before installation to ensure that you have received each item. If you are missing any items, contact your IP phone reseller.
-
Page 11: Assembling The Phone
ASSEMBLING THE PHONE This section introduce how to assemble the phone with the components in the packing list: • Attach the stand; • Connect Handset and Headset; • Connect Network and Power. 1) Attach the Stand, as shown below: 2) Connect Handset and Headset, as shown below: Note: Headset is not provided in the packing list. -
Page 12: Configuration And Registration
Note: 1. If inline power is provided, do not install AC adapter. Make sure the Ethernet cable and switch/hub are PoE compliant. 2. The Internet Port can be also connected to Hub/Switch/IP PBX or other internet devices. The phone can also share the network connection with other network devices such as PC. Connect the phone’s PC port and computer’s Network Port together using an Ethernet cable, shown as below: CONFIGURATION AND REGISTRATION... -
Page 13: Configuring Via Keypad
Static IP Address: If your phone cannot contact a DHCP Server for any reason, you need to enter the network settings manually via Static IP Address. Please contact your internet administrator for more details. PPPoE: If you are using the xDSL Modem, you can connect your phone to the internet via PPPoE mode. -
Page 14: Overview
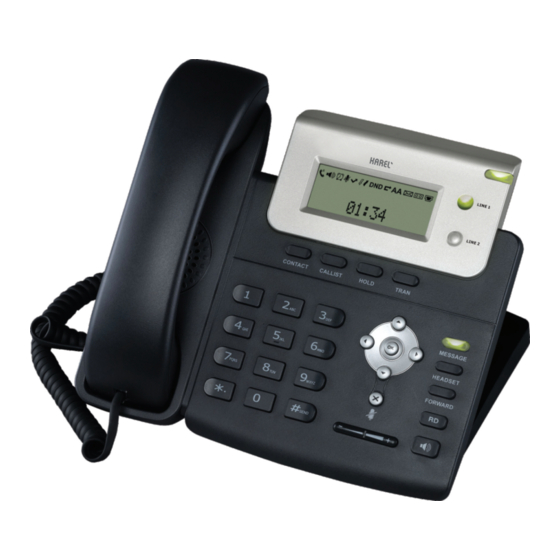
OVERVIEW KEYPAD INSTRUCTION You can check the following list which introduces the IP phone’s keypad in details: Power Indication LED It will show the power status, it will be on if the phone is powered, off if the phone is not powered,and blink when someone calls in or there is a call on mute. -
Page 15: Led Instruction
Audio Device Control Keys Use the audio device control keys to perform the following actions depending on your phone type: 1):Adjust the volume of the handset, headset, speaker and ring tone; 2) Allows for hands-free communication during calls; Press to switch to the Group Listening mode. 3) Place and receive calls through an optionally connected headset;... - Page 16 Table 3 Power Indication LED LED Status Description Steady green Power on Blinking green There is incoming call to the device, or there is a call on mute Power off...
-
Page 17: Icon Instruction
ICON INSTRUCTION The IP Phone displays different kinds of icons on its LCD, you can refer to the following table for their meanings: Icon Description Flashes when the internet is disconnected Missed calls Call in Call out Input Method: all letters and numbers Input Method: numbers Input Method: multi-lingual letters in lower case Input Method: multi-lingual letters in upper case... -
Page 18: User Interface
USER INTERFACE There are two ways to customize specific options on your phones: 1. Using keypad and display on the phone. 2. Using Web user interface in an Internet browser from your PC; please refer to “Configuration and Registration” to get into the Web interface. In many instances, it is possible to use both the user interfaces to operate the phone and change settings;... - Page 19 --Language √ --Time & Date √ √ --Ring Tone √ --Phone Volume √ Advanced Phone Functions √ --Accounts √ --Network √ √ --Keypad Lock √ --Reset Factory √ --Set AES Key √ --Set admin PWD --Voice --Upgrade Other Features --Messages √...
-
Page 20: Customizing Your Phone
CUSTOMIZING YOUR PHONE GENERAL SETTINGS Phone Status You can view the status of your phone using the Phone interface or the Web interface. This option allows you to review: - IP; - MAC; - Firmware; - Network: MAC, WAN, LAN, Gateway, DNS, etc; - Phone: Product Name, Hardware, Firmware, Product ID and MAC;... -
Page 21: Time And Date
4) Press MENU key to return to the previous screen. Time and Date The time and date appears on the idle screen of the IP phone. If the phone can not obtain a time and date from the call server, please contact your system administrator if the time or date is incorrect. -
Page 22: Keypad Lock
3) Choose Automatic. There is a table named as AutoDST.xml has been saved in the configuration file, If the table includes daylight saving time of your time zone, it will show the Fixed Type: By Date or By Week. And the daylight saving time is unchangeable, unless to update the AutoDST.xml via auto provision. -
Page 23: Audio Settings
1) Press MENU key, you are prompted for the password. 2) Enter the password, and then press OK button, the phone is unlocked. 3) If you choose Lock&Answer, you have to enter MENU->Settings->Advanced-> Keypad Lock interface to disable this option. To enable keypad lock via Web interface: Choose Phone->Preference to do the relating changes. - Page 24 1) Press MENU->Settings->Basic. 2) Scroll to Ring Tone, and press OK button. 3) Use the navigation keys to highlight the specific one. 4) Press OK button to save the contrast change or MENU to cancel. To adjust the volume via Phone interface: 1) Press MENU->Settings->Basic->OK.
-
Page 25: Codec Selection
rate (monophony). Blank or other special characters can not be included in the file name. Codec Selection The IP phone supports the following voice codecs: G.722, G.723_53, G.723_63, G.726-16, G.726-24, G.726-32, G.726-40, G.729, PCMU, and PCMA. You can enable/disable the desired codecs via Web interface. Please contact your System Administrator for more details about the codecs. -
Page 26: Import/Export Contact List
3) Make the desired changes, press OK button, or press MENU return to previous menu. To add/delete/edit the contact list via the Web interfaces: Choose Contacts and then do the relating changes. Please refer to the instruction above for the parameters’ detail. Import/Export Contact list Import/Export Contact List via Web interface: 1) Choose Contacts->Local Phone Book. -
Page 27: Hot Line
2) Highlight the specific one in the pull-down menu, then click confirm button to save the change. Hot Line To set the hot line number via the IP phone interface: 1) Press MENU->Features->Hot Line->OK to enter the configuration page. 2) Enter the hot line number and set the HotLine Delay time (for example, 20 seconds), then press the OK button to save the changes. -
Page 28: Auto Redial
will send information to the server, and the server will enable/ disable the rejection anonymous call function for your IP phone automatically. Note: This configuration is only available for the current default account. 7) Press the OK button to save the changes. Auto Redial Auto redial is a telephone feature that redials a busy number in a fixed number of times before giving up. -
Page 29: Missed Call Log
2) Use the navigation keys to enable or disable the auto answer function. The default is Disable. 3) Press the OK button to save the changes. To set Auto Answer via Web interface: 1) Choose Account->Basic->Auto Answer option. 2) Choose Enabled or Disabled in the pull-down menu, click Confirm button to save the change. -
Page 30: Dial Now
For example if you set the Prefix as 0 and Replace as 0086 (Chinese country code), when you dial 05702000 out, the number will be replaced by 00865702000 automatically. To set a Dial Plan via the Web interface: 1) Choose Phone->Dial Plan->Replace Rule. 2) Enter the desired Prefix and Replace. -
Page 31: Block Out
2) Enter the Code, set the Min Length and the Max Length option, and then click the Confirm button to save. Block Out The specific phone numbers can be forbidden to be call out from your IP phone. 1) Choose Phone->Dial Plan->Block Out. 2) Enter the phone number and click Add button to save the changes, or choose the specific one in the list, click Del button to delete the record. -
Page 32: Call Completion
Call Completion Have encountered such a situation? When you call a contact, but the other side is busy on a call. Do you want the server to inform you immediately when the contact end the call, in order to establish a conversation with each other in time? Call Completion can help you to solve this problem. -
Page 33: Call Forward
2) Use the navigation keys to choose Enable/Disable. 3) Press the OK button to save the changes. 4) Pick up the handset/press the Speaker button/press the registered line key to deactivate DND mode. You can also set DND function by the DND Code: 1) Go to MENU->Features->DND Code to enter the configuration interface. -
Page 34: Intercom
4) If you want to realize this function by server, please enter the On Code and Off Code option, then when you choose to enable the call forward function via your IP phone, it will send message to the server, and the server will turn on the function immediately. When there is call to the extension, the server will forward it to the set number automatically based on the forward type. -
Page 35: During An Active Call
6) Choose and set the different options by navigation keys. 7) Press the OK button to save your changes. DURING AN ACTIVE CALL Mute This function allows you to mute the microphone of the active audio device during a call; you can not be heard by the other party. -
Page 36: Call Waiting
Call Waiting This call feature allows your phone to accept other incoming calls to the extension no matter under which circumstances. To enable/disable Call Waiting via Phone interface: 1) Press MENU->Features->Call Waiting->OK button. 2) Use the navigation keys to active/inactive call waiting. 3) Use the navigation keys to enable/disable the Play Tone option. -
Page 37: 3-Way Conference
To Attended Transfer via phone interface: 1) A and B is on an conversation, A press TRAN Button to put B on hold, then A can dial the third telephone number C and press the OK or SEND button to call out. 2) After C answered it, A and C can have a private conversation without B hearing it, then A press the TRAN button to complete the transfer. - Page 38 - The MESSAGE button will be lighted. To configure the Voicemail code via Phone interface: 1) Press MESSAGE button to Voice Mail. 2) Use the navigation keys to highlight the Line you want to set, enter the code which the phone uses to connect to your system.
-
Page 39: Using The Advanced Phone Functions
USING THE ADVANCED PHONE FUNCTIONS ACCOUNT SETTING Please refer to the previous part “Configuration and Registration” for the basic account setting information. The following table lists the instruction of the field about the advanced Account Setting. Field Name Description UDP Keep-alive Defines whether to active the phone UDP Keep-alive Message mechanism. -
Page 40: Network Setting
Go to Account->Basic, choose Transport option, in the pull-down menu, you can choose the TLS option, then click the Confirm button to save the change. NETWORK SETTING PC Port Setting Please refer to the previous part “Configuration and Registration” for the basic Network WAN setting information. -
Page 41: Vlan Setting
Choose Network->PC Port to do the relating configuration, you can set the starting and end IP address only via Web interface. You can consult your system administrator for more information. VLAN Setting VLAN is a group of hosts with a common set of requirements that communicate as if they were attached to the Broadcast domain, regardless of their physical location. -
Page 42: Maintenance Tasks
Go to Network->Advanced, choose WebServer option, in the pull-down menu of Type field, choose the transmission mode, then click the Confirm button to save the changes. Note: For more details of the HTTPS, you can consult with your system administrator. MAINTENANCE TASKS Administrator Mode The phone allows two modes to configure the phone:... -
Page 43: Reboot
3) Press OK button to confirm the change, or MENU to return to previous menu. To change the administrator password via Web interface: Choose Security, enter the current password, new password and confirm password, choose Confirm button to save the changes, or Cancel button to cancel the changes. Reboot You should reboot the phone when you are challenged, e.g. -
Page 44: Firmware Update
5) It will take a few minutes to reset, please do not power off during resetting, or it will cause flash memory error. To reset to factory via Web interface: 1) Choose Upgrade->Basic. 2) Click Reset button. Note: If you confirm all current setting changes including contact list, call history, account settings, etc will be lost, you need to export the configuration first if you still want to import the old configurations after reset. - Page 45 server IP address and port. Check You can specific the period that your phone checks the new config firmware from the server: Power on, Repeatedly, Weekly, Power on + Repeatedly, Power on + Weekly and Disabled. Scheduling You can specific the period in days which the phone checks and updates the new firmware, the range is 1-30 days.
-
Page 46: Decryption
Decryption This IP phone can support y000000000007.cfg and mac.cfg files encryption and decryption for user authentication to realize security usage. If there are any encrypted y000000000007.cfg or mac.cfg files on the server, users can open the webpage of your IP phone. -
Page 47: 802.1X
802.1X IEEE 802.1X is an IEEE Standard for port-based Network Access Control (PNAC). It is part of the IEEE 802.1 group of networking protocols. It provides an authentication mechanism to devices wishing to attach to a LAN, either establishing a point-to-point connection or preventing it if authentication fails. -
Page 48: Speed Dial
To assign the key as Line: Choose Phone->DSS Key->Line Key, choose one of the link key you want to make the assignment, there is a pull-down menu in the Type field, choose Line from the list, press Confirm button to save the changes. Speed Dial You can configure the key as a simplified speed dial key. -
Page 49: Url Record
Please refer to “LED Instruction” for more details about the LED status in different situation. Note: In the Web interface, you can also set the pickup number to active the pickup function. For example, if you set the BLF number as 212, and the pickup number is *83, then when there is an incoming call to 212, press the BLF key, it will call out the *83 automatically to pickup the incoming call on 212. -
Page 50: Forward
Forward If the key is configured as Forward key, press this key under the idle status, the IP phone will turn to the Always Forward page and you can set the Forward to number, then when there is any call to the extension number will be forwarded to the set number automatically. To assign the key as Forward: 1) Choose Phone->DSS Key->Line Key, choose one of the keys you want to make the assignment, there is a pull-down menu in the Type field, choose KeyEvent from the list, then... -
Page 51: Call Return
To assign the key as Redial: 1) Choose Phone->DSS Key->Line Key, choose one of the key you want to make the assignment, there is a pull-down menu in the Type field, choose KeyEvent from the list, then in the Mode field, open the pull-down menu and choose Redial from the list. 2) Press Confirm button to save the changes. -
Page 52: Group Listening
Group Listening When the key is configured as Group Listening key, you are allowed to enable the Speakerphone and Handset/Headset mode at the same time. It is suitable for the group conversation which has more than one person at one side. You are able to speak and listen using handset/headset;... -
Page 53: Record
1) Choose Phone->DSS Key->Line Key, choose one of the keys you want to make the assignment, there is a pull-down menu in the Type field, choose KeyEvent from the list, then in the Mode field, open the pull-down menu and choose Group Pick Up option from the list. 2) In the "Line"... -
Page 54: Voice
2. If the frequency is set as 0, it means silence. Voice To edit the Voice filed via Web interface: 1)Choose Phone->Voice. 2) Set the following parameters shown in the table. Parameter Description Echo canceller Defines whether to enable the echo canceller. -
Page 55: Trouble Shooting
4) Click the Confirm button to save the changes. TROUBLE SHOOTING I can not register to the server? 1) Check the IP address. If you set your WAN port in DHCP mode, please make sure that your DHCP server is on. 2) Check your gateway. - Page 56 Select and Upgrade Firmware” at the bottom of the page. 2) Select the file to update, then click the Upgrade button. Note: Make sure the firmware you choose is provided by your service provider, or the devicewill probably crash after the update. How to auto provision? Consult the auto provision server address with your ISP.
Need help?
Do you have a question about the IP111 and is the answer not in the manual?
Questions and answers