Table of Contents
Advertisement
ALERT
Your new spa's GFCI will trip.
A Ground Fault Interrupter (GFCI) Trip Test must occur to
allow proper spa function.
Spas that come with MXBP20 and MXBP501 control sys-
tems come with special instructions for the installer/
electrician. If they have not already advised you on what
to do or expect from the GFCI Trip Test, please contact
them for instructions.
If the GFCI breaker connected to your spa trips, this is
normal behavior. Please reset the breaker and enjoy
your spa. The trip test has been completed successfully.
If your spa was not wired to a GFCI breaker or your
breaker fails the GFCI Trip Test, the spa will repeatedly
attempt (at preset intervals) to trip the breaker in the fu-
ture until such time that it triggers a GFCI Trip. If a GFCI
does not trip properly, your spa's display will show an
error message.
GFCI breakers are important safety devices required by
code for your hot tub. For more information, refer to the
MXBP20 and MXBP501 sections of this manual or your
local dealer.
1
Owner's Manual
Advertisement
Table of Contents

Subscribe to Our Youtube Channel
Related Manuals for MAAX 300 Series


Summary of Contents for MAAX 300 Series
-
Page 1: Gfci Alert
ALERT Your new spa’s GFCI will trip. A Ground Fault Interrupter (GFCI) Trip Test must occur to allow proper spa function. Spas that come with MXBP20 and MXBP501 control sys- tems come with special instructions for the installer/ electrician. If they have not already advised you on what to do or expect from the GFCI Trip Test, please contact them for instructions. -
Page 2: Important Safety Warnings
IMPORTANT SAFETY WARNINGS SAVE THESE INSTRUCTIONS WARNING: WARNING: Children should not use spas or hot tubs Water temperature in excess of 100°F (38°C) without adult supervision. may be injurious to your health. WARNING: WARNING: Do not use spas or hot tubs unless all suction Before entering the spa or hot tub, measure guards are installed to prevent body and hair the water temperature with an accurate... -
Page 3: Table Of Contents
TABLE OF CONTENTS GFCI Alert.............1 Temperature Controls........23 Modes of Operation..........23 Important Safety Warnings.......2 Preset Filter Cycles..........24 Changing Filter Cycles........24 Table of Contents..........3 Setting the Time...........24 Light................24 Important Safety Instructions......5 501 Control Panel..........25 Dos and Don’ts............7 Hyperthermia............7 Operating Instructions........25 User’s Pads.............26 Spa Installation............8 Temperature Controls........26 European Spas............8... - Page 4 Common Hardware Problems......61 Time-of-Day............43 Adjusting Filtration..........44 Restricting Operation.........44 Spa Soaking Guidelines........63 Unlocking..............44 Wi-Fi Connectivity..........44 300 Series System Wiring Diagram....64 GFCI Test Feature..........45 501 Series System Wiring Diagram....65 Auxiliary Panel............45 Therapy Sequencer..........45 504 Series System Wiring Diagram....66 WiFi Connectivity..........48 Smart Device WiFi Spa Controls.....48 MXBP20 System Wiring Diagram....67...
-
Page 5: Important Safety Instructions
IMPORTANT SAFETY INSTRUCTIONS READ AND FOLLOW ALL INSTRUCTIONS 1. WARNING - To reduce the risk of injury, metal surface is permanently connected do not allow children to use spa unless by a minimum 6 AWG (5.15 mm ) solid they are closely supervised at all times. copper conductor to the wire connector 2. - Page 6 SAVE ALL INSTRUCTIONS NOTE: Check with your state/local code enforcement officer to determine electrical code requirements and compliance. Use a qualified licensed electrician to complete all final spa electrical connections. Caution: Risk of electrical shock. Read and follow all instructions. TO AVOID RISK OF ELECTRICAL SHOCK: 1.
-
Page 7: Dos And Don'ts
DOS AND DON’ TS OF SPA CARE Hyperthermia • Save these instructions! The causes, symptoms, and effects of • Replace the cover immediately after use. hyperthermia may be described as follows: • Keep the cover locked when spa is not hyperthermia occurs when the internal in use. -
Page 8: Spa Installation
SPA INSTALLATION The electrical supply for this product must Outdoor Installation, Consider the following: include a suitably rated switch or circuit 1. Local codes pertaining to fencing. breaker to open all ungrounded supply 2. Local electrical and plumbing codes. conductors to comply with Section 422-20 3. -
Page 9: Spa System Components
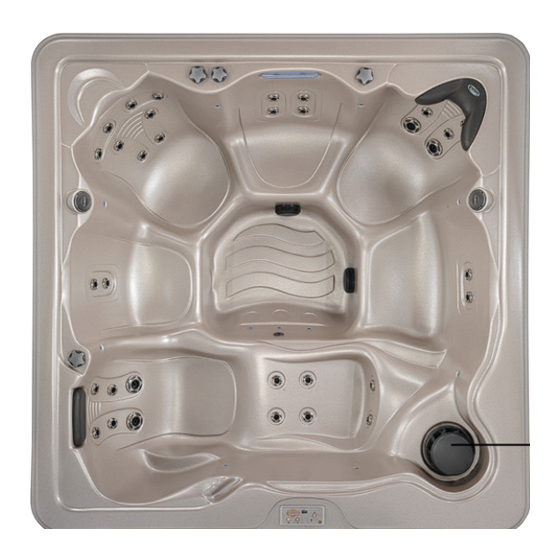
SPA SYSTEM COMPONENTS (Filter Skimmer) A. Filter Skimmer/Weir: Removes E. Drain Access: (Adjacent to the equipment floating debris from the water surface, service panel) Spa drain faucets. provides a water return path to equipment, and houses water filter element. F. Digital/Fiber Optic Lighting: Lighting system that displays multiple coloured B. -
Page 10: Spa Components
SPA COMPONENTS Reference only. Equipment is not always as shown. A. Pumps (one pump or more, D. Electrical Connections: Electrical inputs/ depending on model): Low speed for wires for the unit connect here. efficient water circulation during filtration and heating; high speed for maximum E. -
Page 11: Jets And Air Controls
JETS AND AIR CONTROLS Jets Rotating Jets All spa jets are individually engineered • Rotate the jet face left and right to provide a unique hydro-massage. • Return face plate to full open position Depending on the model, your spa will have a •... -
Page 12: Air Controls
Air Controls The intensity of the jet action can be controlled by altering the amount of air injected with water through the jets. Your spa has one or more air controls located on the lip of the spa. Each control activates air to specific jets in the spa allowing you to create various combinations and levels of jet action to suit individual preferences. -
Page 13: Electrical Information
ELECTRICAL INFORMATION Important Safety Instructions All electrical connections to this spa package Caution: Risk of electrical shock. MUST be done by qualified licensed electrician Read and follow all instructions. in accordance with National Electrical Code (NEC) and with state/local electrical codes in effect at the time of installation. - Page 14 Spas installed for 240 volt, 60 Hz, single phase operation require a 4-wire, 60, 50, 40 or 30 amp., 240 volt sub-feed in non-metallic pipe to the spa equipment compartment (line 1, line 2, neutral and ground). A green colored terminal (or wire connector marked “G”, or “GR”, or “Grounding”) is provided in the control box.
-
Page 15: Voltage/Amperage Charts
IN STR UC T IO N S: Find your spa listed within the charts on pages 16-20 of this manual then refer to the key below to determine what electrical service your spa requires. 240 Volt Installation Units 120 Volt Installation Units Electrical Requirements Electrical Requirements Letter... - Page 16 DEDICATED 240V UNITS WITHOUT BLOWER Model 240V/60A 240V/50A 240V/40A 240V/30A 9000 8500 8000 7500 7000 5600 5400 5300 5200 5100 (240V) 4600 4400 4200 4100 See page 15 for explanation of corresponding letters and numbers. Owner’s Manual...
- Page 17 DEDICATED 240V UNITS WITHOUT BLOWER (continued) Model 240V/60A 240V/50A 240V/40A 240V/30A Amour Cabaret Chateau Elegant Envie Fontaine Grand Intrigue Joli Monarque Mystique Nuage Prestige Rendezvous Trio See page 15 for explanation of corresponding letters and numbers. Owner’s Manual...
- Page 18 DEDICATED 240V UNITS WITH BLOWER Model 240V/60A 240V/50A 240V/40A 240V/30A 9000 8500 8000 7500 7000 5600 5400 5300 5200 5100 (240V) 4600 4400 4200 4100 See page 15 for explanation of corresponding letters and numbers. Owner’s Manual...
- Page 19 DEDICATED 240V UNITS WITH BLOWER (continued) Model 240V/60A 240V/50A 240V/40A 240V/30A Amour Cabaret Chateau Elegant Envie Fontaine Grand Intrigue Joli Monarque Mystique Nuage Prestige Rendezvous Trio See page 15 for explanation of corresponding letters and numbers. Owner’s Manual...
- Page 20 CONVERTIBLE UNITS WITHOUT GFCI CORD Model 120V/40A 120V/20A 240V/50A 240V/40A 5100 (120V) Cirque NOTE: If you order the 5100 as a 120V model it leaves the factory as a 120V unit and can be converted up to 240 Volts. The 102, 103 and Cirque leave the factory as 240V units and can be converted down to 120 Volts.
-
Page 21: Start Up Procedures
START UP PROCEDURES Follow recommendations for site location Priming Your Spa and electrical connection. The water line on When filling your spa for the first time or the weir door is the level at which the water after draining and refilling the spa, you should be maintained. -
Page 22: 300 Control Panel
Note: In event of a power outage or failure, • Activate therapy pump the 300 Series Control System may retain • Set duration of filter cycles settings. If settings are lost, re-program per the instructions in this manual. -
Page 23: Temperature Controls
Temperature Controls 1 touch = Low therapy jets The maximum set temperature is 104°F (40°C) 2 touches = High therapy jets and the minimum set temperature is 80°F 3 touches = Off (26°C). The current water temperature or, if The low speed operation of Pump 1 is timed the pump has not been running, two dashes, to automatically turn off after two hours will show on the display. -
Page 24: Preset Filter Cycles
When in Standard mode, the letters ‘ST’ hour increments of 1- 8. For example, a 2 are displayed beiefly, followed by the water hour cycle will complete once every 12 hours temperature. When in Economy mode, the for a total of 4 hours per day. The amount of letters ‘EC’... -
Page 25: 501 Control Panel
501 CONTROL PANEL If your Topside Control looks like this, your spa has the following features: • Internal Lights • 1 Pump 2 speed If your Topside Control looks like this, your spa has the following features: • Internal Lights •... -
Page 26: User's Pads
User’s Pads Temperature controls User’s Pads are the buttons located on the The maximum set temperature is 104°F (40°C) topside control panel and are used to program and the minimum set temperature is 80°F various spa functions (i.e., turn on spa light, set (26°C). -
Page 27: Jets
JETS The selected mode will be displayed in the Touch the ‘JETS’ pad to activate the primary LCD window of the control panel. filtration pump. The sequence of the jet action is: When in Standard mode, the letters ‘ST’ are 1 touch = Low therapy jets displayed, followed by the water temperature. - Page 28 Changing Filter Cycle Duration The duration of a filter cycle can be set in hour increments of 2, 4, 6, 8, or continuous. For example, a 2 hour cycle will complete once every 12 hours for a total of 4 hours per day. The amount of time needed to filter your spa will depend on usage and ambient conditions.
-
Page 29: 504 Control Panel
504 CONTROL PANEL NOTE: The look of your topside control panel design and buttons will vary according to brand and features available on your spa. See table on next page for pictures and explanation of 504 Control Panel button functions. Note: In event of a power outage or failure, The 504 Series Control Panel offers you the 504 Series Control Panel should retain... -
Page 30: User's Pads
User’s Pads increased or decreased at any time using the te (VL701S) ay Template (VL701S) User’s Pads are the buttons located on the ‘UP’ or ‘DOWN’ pads. When either of these topside control panel and are used to program pads is touched, the set temperature will be various spa functions (i.e., turn on spa light, set displayed in the LCD window. -
Page 31: Light
Note: Pump 1 will automatically operate the LCD window when this mode is selected. in low speed whenever the spa calls for a The heater will also come on when the heater filtration cycle or heat. When this automatic housing temperature drops below 45°F activation occurs, the low speed of Pump 1 (7,2°C). -
Page 32: Changing Filter Cycles
Changing Filter Cycle Start Time spa is in a filtration cycle, it will take effect The start/stop times of the filter cycle immediately. If the change is made outside a correspond to 6 minutes after the spa set filtration cycle, it will take effect at the start of time is established. - Page 33 - Because of the temperature differential between the warm spa cabinet interior and cooler surroundings outside, moisture is a distinct possibility inside built-in niches. Be sure to wipe these areas out with a dry cloth before connecting any portable electronic device, and do not leave the device inside the niche after exiting the spa.
-
Page 34: Tp600 Control Panel
TP600 CONTROL PANEL NOTE: The look of your topside control panel design and buttons will vary according to brand and features available on your spa. See table below for pictures and explanation of TP600 Control Panel button functions. MA IN ME NUS BUTTON NAME FUNCTION Jets 1... -
Page 35: Filling Your Spa
FILL ING YO UR SPA IMPORTANT: A pump should not be allowed to run without priming for more than 2 minutes. PREPARATION AND FILLING Under NO circumstances should a pump be Fill the spa 5-6” below the lip of the spa. Open allowed to run without priming beyond the all valves and jets in the plumbing system end of the 4-5 minute priming mode. -
Page 36: Temperature And Temp Range
Circulation Pump Modes minutes after the pump or blower is The circ pump (if your spa is equipped with turned off or times out. The pump and the one) operates continuously (24 hours) with ozone generator will run for 30 minutes or the exception of turning off for 30 minutes at a more, depending on the system. -
Page 37: Mode - Rest And Ready
SHOW & S E T TI ME- O F-DAY M O DE - RE S T A ND RE A DY In order for the spa to heat, a pump needs to Setting the time-of-day can be important circulate water through the heater. The pump for determining filtration times and other that performs this function is known as the background features. -
Page 38: Restricting Operation
R E ST RI C TI N G OPER AT ION what time your filter cycle will start and press the Light button to make your choice. “RUN” The control can be restricted to prevent un- “HRS” will be on the display next. Again, scroll wanted use or temperature adjustments. -
Page 39: Tp800 Control Panel
TP800 CONTROL PANEL NOTE: The look of your topside control panel design and buttons will vary according to brand and features available on your spa. See table below for pictures and explanation of TP800 Control Panel button functions. BUTTON NAME FUNCTION BUTTON NAME FUNCTION... -
Page 40: The Main Screen
T HE MA I N SC REEN MESSAGES At the bottom of the screen, messages may SPA STATUS appear at various times. Some of these Important information about spa operation messages must be dismissed by the user. can be seen quickly from the Main Screen. The most important features, including Set PRESS-AND-HOLD Temperature adjustment, can be accessed... -
Page 41: The Settings Screen
ONE-PRESS ACTIVATION Screen in the upper right corner of the display. The Shortcut Screen requires no navigation. These ranges can be used for various reasons, Each button is fixed on a specific fuction and with a common use being a “ready to use” set- can be used as a very simple user interface for ting vs. -
Page 42: Filling Your Spa
READY-IN-REST MODE PRIMING THE PUMPS READY/REST appears in the display if the spa is As soon as the Priming Mode screen appears in Rest Mode and the Jets 1 Button is pressed. on the panel, select the “Jets 1” button once to It is assumed that the spa is being used and start Pump 1 in low-speed and then again to will heat to set temperature. -
Page 43: Spa Behavior
S PA B EH AVI OR FREEZE PROTECTION If the temperature sensors within the heater PUMPS detect a low enough temperature, then On the Spa Screen, select a “Jets” button the water devices automatically activate to once to turn the pump on or off, and to shift provide freeze protection. -
Page 44: Adjusting Filtration
navigating down from there will allow the user when Filter Cycle 2 is programmed to begin. to cancel the pending change. Pressing the “Select” button will save or cancel the changes RE STR IC TIN G OPE R ATI ON and go back to the previous screen. -
Page 45: Gfci Test Feature
G FCI T E ST F E AT URE THE R APY S EQUENCE R The Ground Fault Circuit Interrupter (GFCI) is Certain models are equipped with a Jet an important safety device and is required Sequencer System that opens and closes a equipment on a hot tub installation. - Page 46 Sequencing Speeds When first energized, the sequencing program will automatically go to the default speed, or ‘S1’. To change the sequencing speed, push the ‘SPEED’ button once. The LCD will momentarily display the selected speed (S1, S2, or S3), and then alternately display the current program and the sequencing speed.
- Page 47 Owner’s Manual...
-
Page 48: Wifi Connectivity
or the iTunes store. Once you ® example it is BWGSpa_0E608F an your phone you are ready to password is needed. WiFi CONNECTIVITY t tub. below to take you directly to Smart Device WiFi Spa Controls page. Certain spas come factory equipped with a WiFi transceiver that allows them to connect wirelessly with select smart devices (Android™, iPad or iPhone®). -
Page 49: Connecting To Wifi Network
Connecting to WiFi Network Once you are connected to your spa, you can then connect your spa to your home WiFi network in order to control your spa from 2. Setting Screen anywhere your smart device has access to the internet. -
Page 50: Application Functions
Application Functions You will be brought to the below main screen each time you start the app. The following options are available to you from the main screen: Settings (top right) Controls (top left) Setting Time of Day From the Settings menu, choose the Time of Day clock icon. -
Page 51: Setting Filter Cycles
Setting Filter Cycles Controls From the Settings menu choose the Filter From the main screen, choose Controls on Cycles icon. From there you will have the op- the top left corner. You will be led to a screen tion to set one or two filter cycles, the time of which allows you to control the jets, blower day each starts and the duration of each cycle. -
Page 52: Equipment Safety Features
EQUIPMENT SAFETY FEATURES Accessory Mode Shuts off in... Automatic Time Outs Pump 1 2 hours Your Spa is equipped with an automatic Time Pump 1 High 15 minutes Out feature designed to protect both the Pump 2 High 15 minutes equipment and the user. -
Page 53: Common Lcd Messages
If the LCD Indicates... What happens... Possible cause... Corrective Action... displays... Water flow Heater will shut down - Plugged filter - Remove filter and clean problem while spa continues - Low water - Add water - Persistent to function normally - Contact dealer flow problem - Open all jets... -
Page 54: Maintenance
MAINTENANCE Water Chemistry important for the effectiveness of your Water chemistry is critical in a spa system. sanitizer, for user comfort, and to prevent Chemicals are used to sanitize the water and corrosion of the spa equipment. Caution: Never mix two chemicals together. control the pH balance. -
Page 55: Sanitizing With Ozone
Sanitizing with Ozone water evaporation, body oils, perfumes, and Spas vary in size, and frequency and conditions other contaminants may accumulate in the of use. For this reason you will need to establish spa and cannot be filtered out. your sanitizing program based upon your own personal use. -
Page 56: Filter Maintenance
NOTE: Do NOT attempt to use the degreaser, available from your Elite Spa pump to drain the spa. dealer, per manufacturer’s instructions. NOTE: Close and replace caps on Hose out filter cartridge or replace with all drains prior to refilling the spa. new cartridge, if needed. -
Page 57: Spa Cabinet Care
Spa Surface Care and Cleaning 1. Turn off all electrical power to the spa. 2. Drain spa and hoses of all water using the Your spa shell surface is made of acrylic. A directions for Draining Your Spa. minimum amount of care and cleaning will Open all unions, and remove drain plugs keep your spa looking new for years. -
Page 58: Common Water Problems
COMMON WATER PROBLEMS Problem Usual Cause Solution Cloudy Water - Inadequate filtration/ - Check to make sure the filter is running dirty filter properly; clean filter with a filter cleaner - Excessive oils/organic of degreaser matter - Shock the spa with a chlorine or bromine - Improper sanitation/ sanitizer, or other shock treatment product bacteria... - Page 59 Problem Usual Cause Solution Musty Odor - Bacterial or - Shock spa with a chlorine or bromine sanitizer/ algae growth shock, of equivalent shock treatment product. If problem is visible, drain, clean, refill and balance spa Foaming/ Scum - Build up of body oils, - Skim foam off using your leaf net or Ring Around lotion and chemicals...
- Page 60 Problem Usual Cause Solution Sanitizer - Excessive organics in - Increase shock dosage; add sanitizer; Dissipating water shower before entering spa Too Rapidly - Temperature too high - Reduce temperature - Low pH - Raise pH with sodium bicarbonate product - Low pH corrosion of - Use chelating agent if metals are present.
-
Page 61: Common Hardware Problems
COMMON HARDWARE PROBLEMS Problem Usual Cause Solution System not - House circuit breaker tripped or - Reset circuit breaker on house operating in OFF position breaker panel Heater not - Water level too low - Add water to reach fill line operating - Heater mode not selected on Weir door... - Page 62 Problem Usual Cause Solution No water flow - Pump not primed - See Priming section from jets - Adjustable jets turned off - Turn on jets - House circuit breaker tripped, - Reset circuit breaker at no power to system house panel - Faulty pump or motor - Low water.
-
Page 63: Spa Soaking Guidelines
SPA SOAKING GUIDELINES 1. Persons with heart disease, diabetes, 6. Soaking for too long may cause some blood pressure or circulatory users to feel nauseous, dizzy, or abnormalities, a serious illness, or light-headed. If you wish to soak in high pregnant women should not enter a temperature water (104°F, 40°C), leave the spa without prior consultation with... -
Page 64: Series System Wiring Diagram
300 SERIES SYSTEM WIRING DIAGRAM Wiring Configuration and DIP Settings Setup 1 (As Manufactured) Black jumper required. Ozone must be same voltage as Pump 1. Do not remove. Ozone runs with Pump 1 low-speed. FUSE 3A 250V CLASS G FUSE 30A... -
Page 65: Series System Wiring Diagram
501 SERIES SYSTEM WIRING DIAGRAM Wiring Configuration and DIP Settings Setup 4 (As Manufactured) • 240V Pump 1, 2-Speed • 120V AV (Hot) • 120V Ozone • 240V 5.5kW Heater • 12V Spa Light • Duplex Main Panel PCBA Rev D & E only. Ozone and Circ Pump must be same voltage. -
Page 66: Series System Wiring Diagram
504 SERIES SYSTEM WIRING DIAGRAM Owner’s Manual... -
Page 67: Mxbp20 System Wiring Diagram
MXBP20 SERIES SYSTEM WIRING DIAGRAM Owner’s Manual... -
Page 68: Mxbp501 System Wiring Diagram
MXBP501 SERIES SYSTEM WIRING DIAGRAM Owner’s Manual... -
Page 69: Safety Sign
MAAX Spas Industries Corp. provides a limited warranty to our customers. It applies to the spa structure, surface, plumbing, pumps, heater, blower, and controls. The limited warranty does not cover damage resulting from improper maintenance, improper installation, misuse, abuse, accident, fire, normal wear and tear, or improper water maintenance. -
Page 70: Copyrights And Trademarks
Disclaimer: The information in this manual is accurate to the best of MAAX Spas Industries Corp. ’ s knowledge. However, MAAX Spas Industries Corp. assumes no responsibility for errors or omissions. Nor is any liability assumed for damages resulting from use of the information contained herein. -
Page 71: Notes
NOTES Owner’s Manual...
Need help?
Do you have a question about the 300 Series and is the answer not in the manual?
Questions and answers
PUMP MUST BE TURNED ON MANUALLY TO HEAT HOT TUB
The MAAX 300 Series hot tub pump needs to be turned on manually to heat because the spa enters Priming Mode when powered up. During this 4-minute mode, pumps can be turned on and off to remove air from the plumbing lines and heater. Proper water flow must be verified before heating can begin. Additionally, maintaining full water flow is necessary for the heater to function effectively.
This answer is automatically generated