Table of Contents
Advertisement
Quick Links
Advertisement
Table of Contents

Related Manuals for Draytek VigorSwitch G1260


Summary of Contents for Draytek VigorSwitch G1260
- Page 2 VigorSwitch G1260 24 Gigabit Port Web Smart Switch User’s Guide Version: 1.0 Firmware Version: V1.21 Date: 22/10/2013 VigorSwitch G1260 User’s Guide...
-
Page 3: Copyright Information
Owner http://www.draytek.com. Firmware & Tools Due to the continuous evolution of DrayTek technology, all devices will be regularly Updates upgraded. Please consult the DrayTek web site for more information on newest firmware, tools and documents. http://www.draytek.com VigorSwitch G1260 User’s Guide... - Page 4 This equipment has been tested and found to comply with the limits for a class A computing device pursuant to Subpart J of part 15 of FCC Rules, which are designed to provide reasonable protection against such interference when operated in a commercial environment VigorSwitch G1260 User’s Guide...
-
Page 5: Table Of Contents
3.2.1 System Information and IP Configuration............... 41 3.3 Port............................44 3.3.1 Port Configuration......................44 3.4 VLANs ........................... 46 3.4.1 VLAN Mode ........................46 3.4.2 VLAN Group – Tag-based ....................48 3.4.3 VLAN Group - Port-based....................52 VigorSwitch G1260 User’s Guide... - Page 6 3.17 Warm Restart ........................74 3.18 Factory Default........................74 3.19 Firmware Upgrade ......................75 3.20 Configuration File Transfer....................76 3.21 Logout ..........................77 Trouble Shooting..................79 4.1 Resolving No Link Condition....................79 4.2 Q & A ............................. 79 VigorSwitch G1260 User’s Guide...
-
Page 7: Introduction
IEEE 802.3z and 1000Base-SX/LX standards. 1000Mbps Single Fiber WDM (BiDi) transceiver is designed with an optic Wavelength Division Multiplexing (WDM) technology that transports bi-directional full duplex signal over a single fiber simultaneously. VigorSwitch G1260 User’s Guide... -
Page 8: Features
It could efficient to save the switch power and reduce the power consumption. The VigorSwitch G1260, a standalone off-the-shelf switch, provides the comprehensive features listed below for users to perform system network administration and efficiently and securely serve your network. -
Page 9: Packing List
1000Mbps BiDi SC, type 1, SM 20km, SFP Fiber WDM transceiver (SFP.0BS.621.201) 1000Mbps BiDi SC, type 2, SM 20km, SFP Fiber WDM transceiver (SFP.0BS.621.202) 1000Mbps LC, SM 10km, SFP Fiber transceiver with DDM (SFP.DLC.212.10) VigorSwitch G1260 User’s Guide... -
Page 10: Led Indicators And Connectors
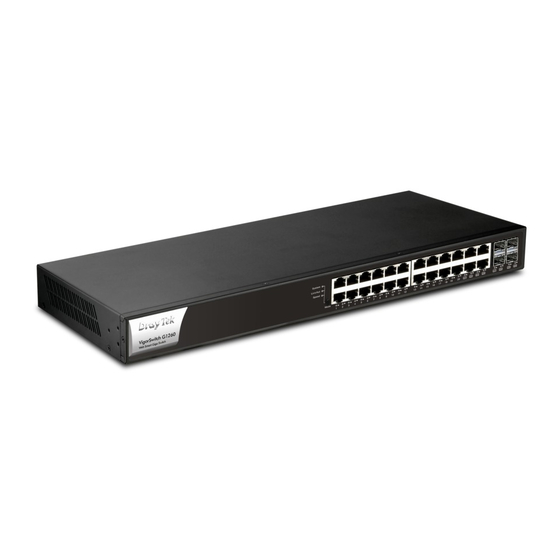
Press and hold for 3~5 seconds to reboot the router. Press until all the LEDs light on for returning to factory default settings. LAN P1 – P24 Giga Ethernet Port. SFP (21 – 24) SFP Fiber Port. VigorSwitch G1260 User’s Guide... -
Page 11: Hardware Installation
After the power is on, all LED indicators will light up immediately and then all off except the power LED still keeps on. This represents a reset of the system. VigorSwitch G1260 User’s Guide... -
Page 12: Installing Optional Sfp Fiber Transceivers To The Switch
To help ensure a successful installation and keep the network performance good, please take a care on the cabling requirement. Cables with worse specification will render the LAN to work poorly. For Fast Ethernet TP network connection VigorSwitch G1260 User’s Guide... - Page 13 Media Access Control (MAC) and PHY, and timer from some OSI layer 2 protocols such as 802.1d, 802.1q, LACP and so on. The fiber, TP cables and devices’ bit-time delay (round trip) are as follows: 1000Base-X TP, Fiber 100Base-TX TP/100Base-FX Fiber Round trip Delay: 4096 Round trip Delay: 512 VigorSwitch G1260 User’s Guide...
- Page 14 Here VLAN area is defined by what VLAN you are using. The switch supports both port-based VLAN and tag-based VLAN. They are different in practical deployment, especially in physical location. The following diagram shows how it works and what the difference they are. VigorSwitch G1260 User’s Guide...
- Page 15 VLAN1 members could not access VLAN2, VLAN3 and VLAN4 members. VLAN2 members could not access VLAN1 and VLAN3 members, but they could access VLAN4 members. VLAN3 members could not access VLAN1, VLAN2 and VLAN4. VigorSwitch G1260 User’s Guide...
- Page 16 VLAN4 members could not access VLAN1 and VLAN3 members, but they could access VLAN2 members. Case 4: The same VLAN members can be at different switches with the same VID (*The switch image is sample only.) VigorSwitch G1260 User’s Guide...
-
Page 17: Configuring The Management Agent Of Switch
Users can monitor and configure the switch through the following procedures. Configuring the Management Agent of VigorSwitch G1260 through the Ethernet Port There are two ways to configure and monitor the switch through the switch’s Ethernet port. They are Web browser and SNMP manager. We just introduce the first type of management interface. -
Page 18: Ip Address Assignment
IP address range between 192.0.0.0 and 223.255.255.255. Each class C network has a 24-bit network prefix followed 8-bit host address. There are 2,097,152 (2^21)/24 networks able to be defined with a maximum of 254 (2^8 –2) hosts per network. VigorSwitch G1260 User’s Guide... - Page 19 They are the addresses with all zero’s and all one’s host number. For example, an IP address 128.1.2.128, what IP address reserved will be looked like? All 0s mean the network itself, and all 1s mean IP broadcast. VigorSwitch G1260 User’s Guide...
- Page 20 For assigning an IP address to the switch, you just have to check what the IP address of the network will be connected with the switch. Use the same network address and append your host address to it. VigorSwitch G1260 User’s Guide...
- Page 21 192.168.1.x must be set on your PC. Second, Subnet Mask: as shown above, enter “255.255.255.0”. Any subnet mask such as 255.255.255.x is allowable in this case. Note: The DHCP Setting is enabled in default. VigorSwitch G1260 User’s Guide...
-
Page 22: Typical Applications
Central Site/Remote site application is used in carrier or ISP The switch image is sample only It is a system wide basic reference connection diagram. This diagram demonstrates how the switch and the various devices form the network infrastructure in a large-scale network. VigorSwitch G1260 User’s Guide... - Page 23 Peer-to-peer application is used in two remote offices The switch image is sample only.) Office Network Connection The switch image is sample only.) VigorSwitch G1260 User’s Guide...
- Page 24 This page is left blank. VigorSwitch G1260 User’s Guide...
-
Page 25: Basic Concept And Management
(MAC), and physical layer. The first two comprises Data link layer, which performs splitting data into frame for transmitting, receiving acknowledge frame, error checking and re-transmitting when not received correctly as well as provides an error-free channel upward to network layer. VigorSwitch G1260 User’s Guide... - Page 26 Information. The DSAP address field identifies the one or more service access points, in which the I/G bit indicates it is individual or group address. If all bit of DSAP is 1s, it’s a global address. The SSAP address field identifies the specific services indicated by C/R bit VigorSwitch G1260 User’s Guide...
-
Page 27: Media Access Control (Mac)
In OSI model, each layer provides its own mean to identify the unique address in some form, for example, IP address in network layer. VigorSwitch G1260 User’s Guide... - Page 28 The SFD pattern is 10101011. Destination address (DA) - The DA field is used to identify which network device(s) should receive the packet. It is a unique address. Please see the section of MAC addressing. VigorSwitch G1260 User’s Guide...
- Page 29 After the frame is assembled, when transmitting the frame, the preamble (PRE) bytes are inserted and sent first, then the next, Start of frame Delimiter (SFD), DA, SA and through VigorSwitch G1260 User’s Guide...
- Page 30 Actually, the practice Gigabit Ethernet chips do not feature this so far. They all have their chips supported full-duplex mode only, as well as all network vendors’ devices. So this criterion should not exist at the present time and in the future. The switch’s Gigabit module supports only full-duplex mode. VigorSwitch G1260 User’s Guide...
- Page 31 What will it be if receiving device is busy and a frame is coming at the same time? Can it use “backpressure” to tell the source device? A function flow control is introduced in the full-duplex operation. VigorSwitch G1260 User’s Guide...
-
Page 32: Flow Control
When the times of collision is increased, the backoff time is getting long until the collision times excess 16. If this happens, the frame will be discarded and backoff time will also be reset. VigorSwitch G1260 User’s Guide... - Page 33 VLAN ID, which are explained respectively in the following table. Bits 15-13 User Priority 7-0, 0 is lowest priority Bit 12 CFI (Canonical Format Indicator) 1: RIF field is present in the tag header 0: No RIF field is present VigorSwitch G1260 User’s Guide...
-
Page 34: How Does A Switch Work
As per the description in the section of “What’s the Ethernet”, Ethernet utilizes CSMA/CD to arbitrate who can transmit data to the station(s) attached in the LAN. When more than one station transmits data within the same slot time, the signals will collide, referred to as VigorSwitch G1260 User’s Guide... - Page 35 There is no need the access contention (e.g. Collision). They have their own access domain. But, collision still could happen between the host and the switch port. When performing the full duplex, the collision vanishes. The host owns a dedicated bandwidth of the port. VigorSwitch G1260 User’s Guide...
- Page 36 Due to the size of the MAC address limited, MAC address aging function is applied. When the MAC address has resided and keeps no update in the table for a long time, this means VigorSwitch G1260 User’s Guide...
-
Page 37: Virtual Lan
MAC address and so on. In other words, they can communicate with each other between separated small physical LANs within a LAN but can not be between any two separated logical LANs. The switch image is sample only.) VigorSwitch G1260 User’s Guide... - Page 38 The traffic will not disturb among these logical networks. The users 1x (x denotes a ~ d) are members of VLAN 1. Any traffic within VLAN 1 does not flow to VLAN 2 and VigorSwitch G1260 User’s Guide...
- Page 39 VLAN-tagged frame: An Ethernet frame, carrying VLAN tag field, contains VLAN identification without the value of 0 and 4095, and priority information. Priority-tagged frame: An Ethernet frame, carrying VLAN tag field, contains VLAN identification with the value of 0 and priority information. VigorSwitch G1260 User’s Guide...
- Page 40 An egress list is used to make the tagging and forwarding decision on an outgoing port. It specifies the VLANs whose packets can be transmitted out and specifies if the packet should be tagged or not. It can be configured for port’s VLAN membership, and tagged or VigorSwitch G1260 User’s Guide...
- Page 41 VLAN exists. If VLAN does not exist, then drop the packet, and if both DA and VLAN do not exist, forwards the packet. If just knows VLAN existed, then floods the packet to all the ports the VLAN covers. VigorSwitch G1260 User’s Guide...
-
Page 42: Link Aggregation
And what’s more, you can avoid worrying about the interoperability issue. Applying LACP in your network, you will not only gain benefits below to improve the performance of your network but also have these investments usable to future new products. VigorSwitch G1260 User’s Guide... - Page 43 Dynamic Port Trunk: When physical links are changed, LACP takes over and automatically reconfigure. Administrator does not have to do anything and may see the trap message of LACP changed in NMS. VigorSwitch G1260 User’s Guide...
- Page 44 VigorSwitch G1260 User’s Guide...
-
Page 45: Operation Of Web-Based Management
Web Smart Switch supports a simplified user management function which allows only one administrator to configure the switch at one time. To optimize the display effect, we recommend Microsoft IE and 1024x768 display resolution. VigorSwitch G1260 User’s Guide... -
Page 46: Web Management Home Overview
As to the function names in normal type are the sub-functions. When clicking it, the function is performed. The following list is the main function tree for web user interface. VigorSwitch G1260 User’s Guide... -
Page 47: System
IP address, host MAC address, active subnet mask, active gateway, and DHCP server. Set device name, uncheck DHCP setting, IP address, subnet mask, default gateway, management VLAN, password and auto logout. Parameter description: System description Display what the device’s description. VigorSwitch G1260 User’s Guide... - Page 48 It is shown in the following figure. This reduces the total IP number of a network able to support, by the amount of 2 power of the bit number of subnet number (2^(bit number of subnet number)). VigorSwitch G1260 User’s Guide...
- Page 49 Auto Logout Set the auto-logout timer. The valid value is 0, 60 ~ 10000 in the unit of minute and a decimal point is not allowed. The value OFF means auto-logout timer is disabled. Default: OFF VigorSwitch G1260 User’s Guide...
-
Page 50: Port
Function description: Port Configuration is applied for the settings of the ports (TP Ports and Fiber Ports) on the switch. By this function, you can set or reset the values for Mode and Flow Control. Parameter description: VigorSwitch G1260 User’s Guide... - Page 51 PAUSE frame to the transmitting device(s) if the receiving port is too busy to handle. When it is set Disable, there will be no flow control in the port. It drops the packet if too much to handle. Default: Disable VigorSwitch G1260 User’s Guide...
-
Page 52: Vlans
2&3&4. If you are on the port 5, then you cannot talk to them. Each port-based VLAN you built up must be assigned a group name. This switch can support up to maximal 8 port-based VLAN groups. Tag-based – Tag-based VLAN identifies its member by VID. This is VigorSwitch G1260 User’s Guide... - Page 53 The switch supports supplement of 802.1q. Each tag-based VLAN you built up must be assigned VLAN name and VLAN ID. Valid VLAN ID is 1-4094. User can create total up to 64 Tag VLAN groups. VigorSwitch G1260 User’s Guide...
-
Page 54: Vlan Group - Tag-Based
Add a VLAN which depends on the VLAN mode you choose in VLAN mode function. Please input the VLAN ID first, then click on <Add > to create a new Tag-based VLAN with the ID specified. VigorSwitch G1260 User’s Guide... - Page 55 Delete - Just press the <Delete> button to remove the selected group entry from the Tag-based group table. VLAN Port Configuration Press the < Port Configuration > button to open the following page to configure tag-based VLAN group in VigorSwitch G1260 User’s Guide...
- Page 56 VID. Private VLAN contains switch ports that cannot communicate with each other but can access another network. It appears only in tag-based and Double-tag mode. Role It is an egress rule for the port. Choose Access, Trunk or Hybrid. VigorSwitch G1260 User’s Guide...
- Page 57 VID of the outgoing packets with tag is the same as the one in the field of Untag VID of this port. Untag VID Valid range is 1~4094. It works only when Role is set to Hybrid. VigorSwitch G1260 User’s Guide...
-
Page 58: Vlan Group - Port-Based
Add a VLAN which depends on the VLAN mode you choose in VLAN mode function. Please input the VLAN ID first, then click on <Add > to create a new Port-Based VLAN with specified VLAN name. VigorSwitch G1260 User’s Guide... - Page 59 Modify - Just press the <Modify> button to edit the selected group entry. Delete - Just press the <Delete> button to remove the selected group entry from the Tag-based group table. Refresh – Just press it to refresh current page. VigorSwitch G1260 User’s Guide...
-
Page 60: Vlan Isolation
A check box is provided for each port of a private VLAN. When checked, port isolation is enabled on that port. When unchecked, port isolation is disabled on that port. By default, port isolation is disabled on all ports. VigorSwitch G1260 User’s Guide... -
Page 61: Aggregation
Normal - Set up the ports that do not join any aggregation Group \ Port trunking group. Group 1 -8 - Group the ports you choose together. Up to 12 ports can be selected for each group. VigorSwitch G1260 User’s Guide... -
Page 62: 802.1X
The overview of operation flow for the Figure above is quite simple. When Supplicant PAE issues a request to Authenticator PAE, Authenticator and Supplicant exchanges authentication message. Then, Authenticator passes the request to RADIUS server to verify. Finally, RADIUS server replies if the request is granted or denied. VigorSwitch G1260 User’s Guide... - Page 63 Above figure shows the procedure of 802.1x authentication. There are steps for the login based on 802.1x port access control management. The protocol used in the right side is EAPOL and the left side is EAP. VigorSwitch G1260 User’s Guide...
- Page 64 802.1x port setting. Here Entry Authorized means MAC entry is authorized. Port Mode Port Control Authentication Port Status Disable Don’t Care Don’t Care Port Uncontrolled Enabled Auto Successful Port Authorized VigorSwitch G1260 User’s Guide...
- Page 65 It is a string with the length 1 – 15 characters. The character string may contain upper case, lower case and 0-9. It is character sense. It is not allowed for putting a blank between any two characters. Default: None VigorSwitch G1260 User’s Guide...
- Page 66 Statistics - Choose the port which you want to show of 802.1X statistics, the screen include Authenticator counters, backend Authenticator counters, dot1x MIB counters and Other statistics. Press the <Refresh> button will fresh the screen and see the newer counters. VigorSwitch G1260 User’s Guide...
-
Page 67: Igmp Snooping
After IGMP Enabled function start up then user can tick the check box ( ) to enable this function. Default: enable IGMP Querying Enabled: After IGMP Enabled function start up then user can tick the check box ( ) to enable this function. Default: enable VigorSwitch G1260 User’s Guide... -
Page 68: Mirroring
802.1p Priority and DSCP Priority functions. In this function, you can enable/disable QoS Mode and set Priority Control, such as: 802.1p and DSCP. The switch only supports Strict Priority. High priority queue is always passed first. VigorSwitch G1260 User’s Guide... - Page 69 Priority, and All High Priority. The QoS setting would apply to all ports on the switch if one of the following values is selected: All Low Priority, All Normal Priority, All Medium Priority, or All High VigorSwitch G1260 User’s Guide...
- Page 70 Priority, and All High Priority. The QoS setting would apply to all ports on the switch if one of the following values is selected: All Low Priority, All Normal Priority, All Medium Priority, or All High Priority. VigorSwitch G1260 User’s Guide...
-
Page 71: Loop Detection
“Unlock port” and click on “Apply” to turn on the locked ports. Parameter description: Mode Controls whether Loop Detection is enabled (as a whole). VigorSwitch G1260 User’s Guide... -
Page 72: Broadcast Storm Protection
If the broadcast traffic is still higher than, the port will be closed for a period of time again. If the broadcast traffic is under the threshold, the port will re-open and forward the packets normally. Parameter description: Mode Controls whether Broadcast Strom Protection is enabled (as a whole). VigorSwitch G1260 User’s Guide... -
Page 73: Snmp
SNMP. A SNMP manager must pass the authentication by identifying both community names, then it can access the MIB information of the target device. So, both parties must have the same community name. Once completing the setting, click <Apply> button, the setting takes effect. VigorSwitch G1260 User’s Guide... - Page 74 System Event There are two events (Cold Boot or Warm Boot) offered here for you to set. When VigorSwitch is boot by “cold boot” or “warm boot”, it will send notification to SNMP server to inform VigorSwitch G1260 User’s Guide...
-
Page 75: Statistics Overview
The number of received and transmitted bytes per port. Tx Frames / Rx Frames The number of received and transmitted frames per port. Tx Errors / Rx Errors The number of frames received in error and the number of incomplete transmissions per port. VigorSwitch G1260 User’s Guide... -
Page 76: Detailed Statistics
Number of Tx packets classified as high priority. Tx Low Priority Packets: Number of Tx packets classified as low priority. Tx Broadcast: Show the counting number of the transmitted broadcast packet. Tx Multicast: Show the counting number of the transmitted multicast packet. VigorSwitch G1260 User’s Guide... - Page 77 Tx Collisions: Number of collisions transmitting frames experienced. Tx Drops: Number of frames dropped due to excessive collision, late collision, or frame aging. Tx Overflow: Number of frames dropped due to the lack of transmitting buffer. VigorSwitch G1260 User’s Guide...
-
Page 78: Igmp Status
It Calculate the number of times of IGMPV3 report. V2 Leaves: When a host leaves a group, it sends a leave group membership message to multicast routers on the network, VigorSwitch G1260 User’s Guide... -
Page 79: Ping
Four type numbers can choose, there are 1,5,10 and 20. Default: 1 Target IP address Show the active target IP address. Status Show the result of the ping status. Received replies: Show the received replies number of times. VigorSwitch G1260 User’s Guide... -
Page 80: Warm Restart
Factory Default provides the function to retrieve default settings and replace current configuration. Except the IP address setting, all settings will be restored to the factory default values when “Factory Default” function is performed. If you want to restore all VigorSwitch G1260 User’s Guide... -
Page 81: Firmware Upgrade
You must press the “Mode” button over 3 seconds to restore the factory default setting. Function name: Firmware Upgrade Function description: You can just click Browse button to retrieve the file you want in your system to upgrade your switch. VigorSwitch G1260 User’s Guide... -
Page 82: Configuration File Transfer
With this function, user can back up or reload the configuration files of Save As Start or Save As User via TFTP. Parameter description: Import: Import a configuration file stored in the flash. Export: Export the current configuration on switch from Flash. VigorSwitch G1260 User’s Guide... -
Page 83: Logout
If you do not logout and exit the browser, the switch will automatically have you logout. Besides this manually logout and implicit logout, you can set up the parameter of Auto Logout Timer in system configuration function to explicitly ON/OFF this logout function. VigorSwitch G1260 User’s Guide... - Page 84 This page is left blank. VigorSwitch G1260 User’s Guide...
-
Page 85: Trouble Shooting
DHCP server setting. When the switch is assigned an IP address, use IE and type the obtained IP address to connect to 24 Gigabit with RJ45 network line. Finally, the login screen will appear at once. VigorSwitch G1260 User’s Guide...
Need help?
Do you have a question about the VigorSwitch G1260 and is the answer not in the manual?
Questions and answers