Table of Contents
Advertisement
Advertisement
Table of Contents

Related Manuals for VisionDrive VD-1500MG/1500MB


Summary of Contents for VisionDrive VD-1500MG/1500MB
- Page 1 User Manual ® Ver. VD1500 1.1E CAR BLACK BOX VD-1500MG/1500MB...
-
Page 2: Table Of Contents
INDEX 1. Before Use 2. Caution 3. Components 4. Part Names 5. Product Speci cations 6. Installation Precautions 7. Installation Sequence 8. Installation Procedure 9. Product Use 10. Analysis Program Use 11. Warranty... -
Page 3: Before Use
Before Use Thank you for choosing VisionDrive . The following contents describe the scope of the warranty service covered by us and product cautions. Warranty Service and Responsibility We shall not be held responsible for damage caused by errors or data loss of this product, as well as any damages or losses derived from the device not operating normally. -
Page 4: Caution
Caution The micro SD card is the only usable Micro SD card for this product. In case of a lost or stolen SD card, please contact your local retail shop to purchase a replacement. If a damaged or a non-authentic SD card is used, the recorded data maybe damaged or will not record and/or replay due to difference in quality. - Page 5 Caution Do not use chemicals or detergents to clean the device. This can result in malfunctioning of the product. Accumulation of impurities on the camera lens or the window surface near the camera may result in video distortion and reduced clarity of recorded data.
- Page 6 Caution Dropping or causing an impact on the product during operation can cause defects or fire. Do not keep the product in extreme temperatures or in humid areas. Being under extreme heat in summer days or freezing cold in winter days may result in defection of the product.
-
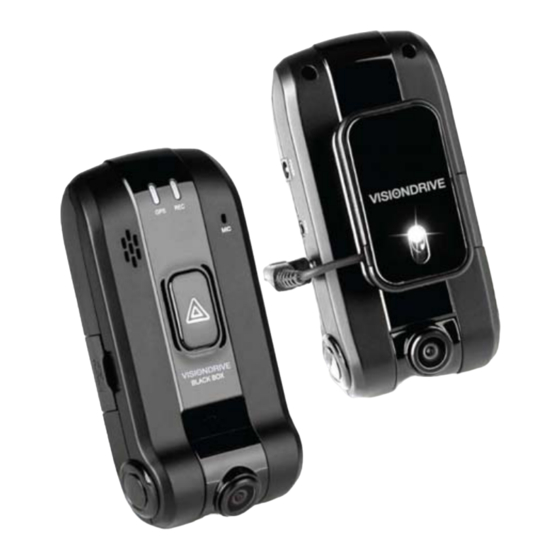
Page 7: Components
Components Main Unit Attachment Bracket Wire holders Micro SD Card Cigar Power (1500MG : with GPS module and Adapter Adaptor / 1500MB : without GPS module) (VD Analyzer Software & User Manual PDF) !! Components are subject to change without prior notice. -
Page 8: Part Names
Part Names SHOT BUTTON SD CARD SLOT CAMERA POWER PORT Video-out PORT GPS PORT BRACKET ATTACHED TO THE UNIT’S BODY Attachment Bracket Security LED... -
Page 9: Product Speci Cations
Product Speci cation Model VISIONDRIVE VD-1500MG/1500MB 1 Camera Camera ( 1/3.6" 1.5M pixcel CMOS digital camera ) Resolution 640x480(VGA mode) 30fps Max. Recording 24Hr Loop Recording / Manual & Emergency Recording button Lighting Environment Min. 1 Lux Camera Angle 120°... -
Page 10: Installation Precautions
SD cards with the VisionDrive . products. (The VisionDrive programs are installed in the SD card for the product to function properly.) Install the product after parking your vehicle in a bright and safe area. -
Page 11: Installation Sequence
Installation Sequence 1. Connect the bracket and the main unit 2. Insert SD card into the unit 3. Connect cable and attach on windshield 4. Connect to power source and turn on the unit 5. Adjust the camera angle 6. Check LED lamps 7. -
Page 12: Installation Procedure
Installation Procedure 1. Connect the bracket and the main unit Place the bracket inside the groove of the unit then turn the bracket to click on. (To remove the unit from the bracket, turn the unit in the opposite direction.) -
Page 13: Insert Sd Card Into The Unit
Installation Procedure 2. Insert SD card into the unit Insert the SD card as shown in the picture. When ejecting the SD card from the unit, turn off the main power completely, and then push in the SD card. The SD card will pop out when pushed in. -
Page 14: Connect Cable And Attach On Windshield
Installation Procedure 3. Connect cable and attach on windshield Clean the area on the windshield where the unit will be installed. For the placement of the unit, it is better to place the unit closer to the center of the vehicle. If the unit is installed on the right side of the back mirror, make sure there is room to detach the unit if needed. -
Page 15: Connect To Power Source And Turn On The Unit
Installation Procedure 4. Connect to power source and turn on the unit Insert the cigarette jack into an appropriate outlet then turn on the engine. When the power is on, the LEDs will turn on and a voice notification will be announced. Blinking of LED lamps notifies that the system booting has succeeded. - Page 16 Installation Procedure 5. Adjust the camera angle Move the camera top to bottom to fix it to a recordable position.
- Page 17 Installation Procedure Windshield Bracket Unit Camera Vehicle Exterior Vehicle Interior (Driver’s Side) When the unit is attached, set the camera to face the front direction of the vehicle. 210 degree Camera is adjustable and can be rotated 210 degrees to cover front to rear recording.
- Page 18 Installation Procedure For better images and operation of the analysis program, ensure that over 1/2 of the vehicle hood area is included in the recorded data.
-
Page 19: Check Led Lamps
Installation Procedure 6. Check LED lamps The GPS lamp is red when the GPS signal is not received and blue when it is received. The GPS connection may take a couple of seconds to several minutes, depending on the location of your vehicle. The REC lamp is blue when it is recording. -
Page 20: Arrange Wires Using Wire Holders
Installation Procedure 7. Arrange wires using wire holders Use the enclosed wire holders to organize the cable line. 8. Connect to an external display using V-out port You can view the video which is currently being recorded by connecting to an external display. Video playback is not supported on the external display. -
Page 21: Product Use
Product Use Start up - Turn off the engine and remove the key from ignition. - Check to see if the SD card is inserted into the unit. - Turn on the engine - When the engine is turned on, the system booting starts with the program installed in the SD card and a voice notification will be announced. - Page 22 Product Use Normal Recording and Event Recording - While the power is on, the normal recording is on as well. The REC lamp will be blinking blue. - In normal recording mode, files will be recorded as 1 minute files, and stored in the (NORMAL) folder.
- Page 23 Product Use Manual (event) Recording - When the [SHOT] button is pressed, the alarm will sound and the recorded data will be saved in the (EVENT) folder. - Even though impacts cause the system to automatically record event files, the [SHOT] button can also be used to record scenes of other accidents or to record great scenery you may want to save while driving.
- Page 24 Product Use Automatic Parking Surveillance Mode - When “Automatic Parking Mode” in the configuration setting is on, the system registers you car’s movement status and automatically activates the Parking Mode if there’s no movement for more than 10 minutes. - The system will automatically reboot initializing 320x240 mode, which records 3-minutes long files to save SD memory card and thus to record more hours.
- Page 25 Also, the provided SD card is tested and certified by the manufacturer while other SD cards may not match the performance and specifications that authentic VisionDrive SD cards can offer. - To eject the SD card from the product, the engine has to be turned off and the key should be removed from the ignition.
- Page 26 Product Use Automatic System Check and Safe Rebooting Function - This product is programmed to automatically check and reboot the system, if the product is in a non-functional status. By rebooting the system, the product can notify to the user while it is processing that such action is being taken place.
-
Page 27: Analysis Program Use
PC Analysis Program Use *** The skin used for the analysis program may differ by the version *** Program Start Up - After the SD card is connected to the PC, open up the VDAnalyzer.exe file in the SD. - Page 28 PC Analysis Program Use How to play the les - To play a certain file, select a file from the list located on the right-hand side and double click on it. - The most recent data will be listed on the top. - The (EVENT) folder will be the default folder to show up when you first open the program.
- Page 29 PC Analysis Program Use Positioning on the map - With the GPS data, the map shows the location of the vehicle while playing the recorded data. - The Google map is viewable only whilst your PC is connected to the Internet .
- Page 30 PC Analysis Program Use PLAY / PAUSE / PREVIOUS FRAME / LATTER FRAME - When the play button is pressed, it will replay the video file listed on the screen. After selecting a file from the list, double click the file from the list to play the file.
- Page 31 PC Analysis Program Use Shock Sensor Graph - The graph below shows impacts on the x-y-z axis of the vehicle. X-axis : measures and records impacts from the front and back of the vehicle ( 0G ~ 3G is registered) Y-axis: measures and records impacts from the left and right sides of the vehicle ( 0G ~ 3G is registered)
- Page 32 PC Analysis Program Use Con guration - The video resolution and quality settings can be modified. - If the resolution is high, the file size also becomes larger and will take more memory on the SD card. - The sensor can be configured. If the number is larger on the sensor, the sensor becomes less sensitive.
- Page 33 PC Analysis Program Use Con guration - You can type in your car information, which will be shown in the video during playback. - When set to a defined number, the system will alert you to over speeding. - You can select your location and time zone and the GPS will register your local time with your video.
- Page 34 PC Analysis Program Use Con guration - You can select your local speed type as Km/h or mile/h in the tap. - If you buy the VD-1500MB, it has no GPS module to register system time. If you press this button, the VD-1500MB system’s time will be initialized and synchronized to your PC’s current time to register your time information onto the recorded video from now on.
-
Page 35: Warranty
Warranty The warranty is 1 year from date of purchase. If the product malfunctions under normal use within the warranty period, you can claim repair of product. To apply for warranty, register your product serial number with your local reseller. Only registered products will be accepted for repair or service. - Page 36 Warranty Certi cate Warranty Certificate Product Name Model Name VISIONDRIVE Purchase Date Serial Number Retail Shop Warranty Period If the product malfunctions after the 1 year warranty period expires, no service is provided under warranty. If the certificate does not have the date of purchase, the 1 year warranty is calculated by the serial number’s...
- Page 37 Operatiipment in a residential area is likely to cause harmful interference in which case the user will be required to correct the interference at his own expense. www.visiondrive.co.kr...
Need help?
Do you have a question about the VD-1500MG/1500MB and is the answer not in the manual?
Questions and answers