Table of Contents
Advertisement
Quick Links
Advertisement
Table of Contents

Related Manuals for Husqvarna Viking Viking Royale


Summary of Contents for Husqvarna Viking Viking Royale
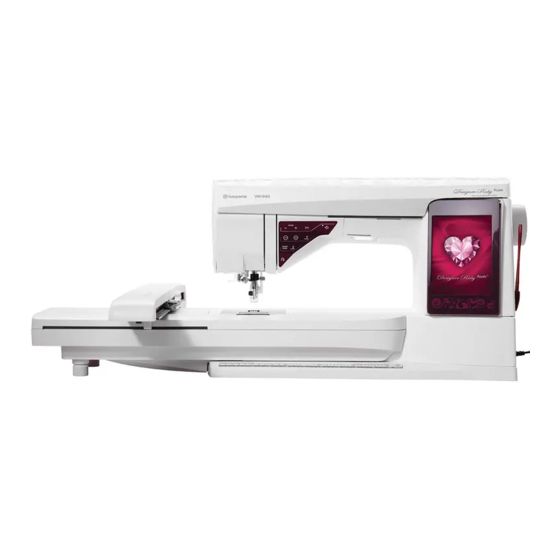
- Page 1 User’s Guide K E E P I N G T H E W O R L D S E W I N G ™...
-
Page 2: Important Safety Instructions
This household sewing machine is designed to comply with IEC/EN 60335-2-28 and UL1594. IMPORTANT SAFETY INSTRUCTIONS When using an electrical appliance, basic safety precautions should always be followed, including the following: Read all instructions before using this household sewing machine. Keep the instructions at a suitable place close to the machine. - Page 3 FOR EUROPE ONLY: This appliance can be used by children aged from 8 years and above and persons with reduced physical, sensory or mental capabilities or lack of experience and knowledge if they have been given supervision or instruction concerning use of the appliance in a safe way and understand the hazards involved.
-
Page 4: Table Of Contents
TABLE OF CONTENTS & F ETTINGS UNCTIONS ETTING TO KNOW YOUR MACHINE LARGE INTERACTIVE SCREEN MACHINE OVERVIEW COMMON ICONS/FUNCTIONS ................1:8 TOOLBAR Needle Area ..............1:8 SEWING/EMBROIDERY MODE Accessory Tray ..............1:9 QUICK HELP Parts of the Embroidery Unit ........1:9 RUBY MENU ACCESSORIES STITCH MENU Included Accessories ............1:9 ............3:3... - Page 5 EWING MBROIDERY SEWING MODE - OVERVIEW OF ICONS EMBROIDERY UNIT OVERVIEW EXCLUSIVE SEWING ADVISOR EMBROIDERY HOOP OVERVIEW ™ ...............4:3 CONNECT THE EMBROIDERY UNIT REMOVE THE EMBROIDERY UNIT ............4:4 SLIDE ON/OFF THE HOOP ........4:4 ™ TO HOOP THE FABRIC SELECT A STITCH BUILT-IN DESIGNS STITCH SETTINGS Royale...
- Page 6 MBROIDERY STITCH ILE MANAGER TO ENTER EMBROIDERY STITCH-OUT FILE MANAGER EMBROIDERY STITCH-OUT - OVERVIEW OF ICONS 8:2 FILE MANAGER - OVERVIEW OF ICONS SMART SAVE AVAILABLE MEMORY CORNER CHECK FILE FORMATS MOVE HOOP BROWSE FILE MANAGER PREFERENCES ORGANIZE ZOOM OPTIONS FILE MANAGER POP-UP MESSAGES FOLD OUT TOOLBAR 10:1...
-
Page 7: Getting To Know Your Machine
GETTING TO KNOW YOUR MACHINE... -
Page 8: Machine Overview 1:8
MACHINE OVERVIEW Pre-Tension Thread guide Thread tension discs Thread take-up lever Thread slots Thread tension disc for bobbin winding Thread cutter LED-lights Needle plate 10. Bobbin cover 11. Button ruler and built-in tape measure 12. Base plate 14. Main spool pin 15. -
Page 9: Accessory Tray
ACCESSORY TRAY The accessory tray features special compartments for presser feet and bobbins, plus space for needles and other easily accessible. 36. Removable presser feet and bobbin holder PARTS OF THE EMBROIDERY UNIT 38. Embroidery arm 39. Embroidery hoop attachment 40. -
Page 10: Accessories Included - Not In The Picture
ACCESSORIES INCLUDED - Not in the Picture • Classic Collection to download • • • • Power cord • • Needles • Embroidery thread • Pieces of fabric and stabilizer Royale ™ • User’s Guide PRESSER FEET Utility Foot A zigzag stitching with a stitch length longer than 1.0. - Page 11 Edging Foot J This foot is used for overcasting and seam/overcasting, with stitches that have a stitch width fabric. Quilter’s 1/4” Piecing foot P Embroidery/Darning Foot R Side Motion Foot S This foot is used for side-motion/Omnimotion stitches. Decorative Stitch Foot B Transparent Sensor One-Step Buttonhole Foot Self-Adhesive Glide Plates plastic-coated fabrics, leather, etc.
-
Page 12: Stitches 1:12
STITCHES A – Utility Stitches Presser Stitch Stitch description Foot A1, A2, A3 – Straight Stitch, left, center and right needle position positions. A4, A5, A6 – Stretch Stitch, left, center and right needle position A7, A8, A9 – Reinforced Straight Stitch, left, center and right needle position positions. - Page 13 Presser Stitch Stitch description Foot A25 – Woven Blind Hem Stitch Blind hems in medium and heavy woven fabrics. A26 – Shell Edge Stitch A27 – Elastic or Smocking Stitch A28 – Bridging Stitch A29 – Bartack Stitch Reinforce pockets, shirts openings, belt loops as well as at lower end of a zipper. A30 –...
- Page 14 B - Buttonhole Stitches Different styles of buttonholes, eyelets and button sewing. Stitch Stitch description Presser Foot B1 – Wide Bartack Buttonhole Sensor Buttonh. Foot /C B2 – Bartack Buttonhole Sensor Buttonh. Foot /C B3 – Round-End Buttonhole Sensor Buttonh. Foot /C B4 –...
- Page 15 C - Pictogram Stitches D - Heirloom Stitches Pictogram satin elements to program original satin stitch designs. on lace and trims. E - Quilt Stitches 1:15 ETTING TO KNOW YOUR MACHINE...
- Page 16 G - Children Stitches F - Appliqué Stitches children’s clothes and projects. effects. H - Scallop Stitches J - Vintage Stitches with beautiful scallop stitches. 1:16...
- Page 17 K - Omnimotion Stitches Program these stitches into an unlimited number of stitch width can be up to 40 mm wide or more. L - Decorative Stitches M - Crafting Stitches crafts. 1:17 ETTING TO KNOW YOUR MACHINE...
- Page 18 N - Fashion Stitches S - 4-way Stitches and accessories. using the free arm. T - 8-way Stitches U - My Stitches stitch in eight different directions favorite stitches and stitch programs. without turning the fabric. 1:18...
- Page 19 X - Specialty Stitches and edging. Extra accessories may be needed. Use Quick Help for detailed information. Y - Dimensional Stitches Z - Decorative Tapering Stitches Decorative stitches with tapering. 1:19 ETTING TO KNOW YOUR MACHINE...
- Page 20 Block Alphabet Outline Block Alphabet Brush Line Alphabet Script Alphabet Cyrillic Alphabet Hiragana Alphabet 1:20...
-
Page 21: Set Up
SET UP... -
Page 22: Unpacking 2:2
UNPACKING machine carrying case. Lift your machine out of the box and remove the outer packaging. Remove all other packing material and the plastic bag. Note: Your Royale ™ sewing and embroidery machine is adjusted to provide the best stitch result at normal room temperature. -
Page 23: Free Arm 2:3
FREE ARM it and use the free arm. Use the free arm to facilitate sewing trouser legs and sleeve hems. To replace the accessory tray, slide SPOOL PINS main spool pin and an auxiliary spool pin. The spool pins are designed for all types of thread. -
Page 24: Threading The Upper Thread
THREADING THE UPPER THREAD Make sure that the presser foot is raised and the needle is in the up position. Place the thread on the spool pin and the spool cap on the spool as described on page 2:3. Spool pin in horizontal position: Bring the thread over and behind the pre-tension Spool pin in vertical position: Instead of bringing the thread into the pre-tension... -
Page 25: Threading For Twin Needle
THREADING FOR TWIN NEEDLE Replace the sewing needle with a twin needle. Make sure the presser foot is raised and the needle is in the up position. Lift the spool pin up and all the way to the right. Lock the spool pin in the vertical position by slightly pressing it down. -
Page 26: Bobbin Winding 2:6
Once the bobbin begins to wind, cut the excess thread. Note: It is important that you cut the thread end close to the bobbin. Note: When using earlier version of HUSQVARNA VIKING ® When the bobbin is full, the bobbin winder lever will bobbins that do not have a hole, wind several turns of thread on the move back and the winding will stop automatically. -
Page 27: Thread Sensor 2:7
BOBBIN WINDING WHILE EMBROIDERING OR SEWING Raise the auxiliary spool pin. Place the large spool cap, felt pad and thread spool on the spool pin. Bring the bobbin thread around the thread tension Guide the thread through the hole in the bobbin from the inside to the outside. -
Page 28: Inserting The Bobbin 2:8
INSERTING THE BOBBIN Remove the bobbin cover by sliding it towards you. Place the bobbin in the bobbin case. It drops in only one way with the logo facing up. The thread unreels from the left of the bobbin. The bobbin will then rotate counter-clockwise when you pull the thread. -
Page 29: Changing The Needle 2:9
CHANGING THE NEEDLE Use the hole in the multipurpose tool to hold the needle. Loosen the needle screw. Remove the needle. Insert the new needle using the multipurpose tool. from you until it will go no further. Tighten the needle screw. NEEDLES The sewing machine needle plays an important role in needles of system 130/705H. -
Page 30: Threads 2:10
THREADS STABILIZERS There are many threads on the market today developed for Tear-Away Stabilizers different purposes. Tear-away stabilizers are used with stable woven fabrics. Place underneath fabric for decorative stitching or hoop All Purpose Sewing Thread with the fabric when embroidering. Tear away excess All purpose sewing thread is made of synthetic, cotton or stabilizer after stitching. -
Page 31: Usb Ports 2:11
USB PORTS sewing machine to your computer, and one to connect optional mouse. Note: Make sure that the USB stick you use has the format FAT32. USB EMBROIDERY STICK between the computer and sewing machine. CONNECT TO AND REMOVE FROM THE USB PORT do not force them into the ports! cable should be used in this port. -
Page 32: Complimentary Software
COMPLIMENTARY SOFTWARE (PC) A PC software package is available for your Royale ® ™ sewing and embroidery machine. It adds the following features: • Communication module allows you to connect the • embroidery fonts from most TrueType ® and OpenType ®... -
Page 33: Settings & Functions
SETTINGS & FUNCTIONS... -
Page 34: Large Interactive Screen 3:2
This section of the User’s Guide will guide you through the basic settings and functions of your machine. Learn how to navigate the functions and settings on the Large Interactive Screen, and how to use the function buttons on the machine sewing head. Detailed descriptions of the icons and functions found on the Large Interactive Screen in Sewing Mode, Embroidery Mode and File Manager are described in separate chapters. -
Page 35: Quick Help 3:3
QUICK HELP Touch the Quick Help icon in the upper right corner of is active. Touch the icon and the area on the screen you want information about. A pop-up message gives a short explanation. Touch OK to close the pop-up message and exit Quick Help. -
Page 36: Design Menu
DESIGN MENU File Manager (Only active in Embroidery Mode) Design Menu EMBROIDERY ADVISOR™ SET Menu SELECTING A DESIGN scroll bar to browse through additional designs. Note: When a design is selected, the machine will automatically switch to Embroidery Mode and the design will be loaded into Embroidey Edit. - Page 37 SET MENU Screen Settings Sound Settings Machine Settings Sewing Settings Touch the icons to activate a function or open a list of Stitch Settings which is always set to Auto when turning on the machine off the machine. STITCH SETTINGS (only active in Sewing mode) pressure and balance a stitch or buttonhole.
- Page 38 SEWING SETTINGS Twin Needle Touch the Twin Needle icon to open a list for twin needle width selections. When a twin needle size is selected, the width of all stitches is limited for the selected twin needle size to prevent needle breakage. The setting is kept until you deselect the twin needle width.
- Page 39 Automatic Jump Stitch Trim This machine features Automatic function saves you time trimming after the embroidery is completed. The default setting is on. As you embroider, the machine will trim the top jump stitch thread and pull the thread end to the underside of the fabric. Note: The machine will also cut the thread after you have changed to a new color.
- Page 40 MACHINE SETTINGS The settings that are made on the screen will be retained when the machine is turned off. Language desired language by touching it. Owner’s Name Touch the Owner’s Name icon to open a screen that allows you to enter your name. Timer The timer displays of the total sewing and embroidery time of your machine.
- Page 41 Tension/Thread Portioning for all stitches and/or embroidery. Default setting is Normal. Once you have increased or decreased the value in the Portioning control icon will change to red. Note: Contact you authorized HUSQVARNA VIKING retailer ® if you experience Thread Tension/Thread Portioning problems that cannot be helped with the Tension/Portioning Compensations.
- Page 42 Sensor Q-foot for embroidery when you turn on the machine. When embroidering, using When using another type of foot, e.g., the R-foot, deLuxe ™ Thread Portioning. deLuxe™ Stitch System The deLuxe needle thread: Thread Tension and Thread Portioning. When activated, the machine will automatically use Thread Portioning if possible.
- Page 43 SOUND SETTINGS function you want to change. Then select the sound you a preview of the sound when you touch the sound icon. Each alert function can have a different sound. Close the pop-up with the OK icon. Audio Repeat When active, the signal for some warning alerts or attention pop-up messages is repeated in intervals until it is cancelled.
-
Page 44: Information Menu 3:12
INFORMATION MENU Use the Information menu to easily get Help topics and information. The Info menu is a built-in, abridged version of the User’s Guide. When you touch the Info menu icon on the Extended toolbar, you have four options to select from: Index, Category, My Info and Text. -
Page 45: Function Buttons 3:13
FUNCTION BUTTONS (Embroidery Mode functions are in brackets) Selective Thread Cutter Speed - and + Needle Stop Up/Down (Trim Position) STOP (Monochrome) Sensor Foot Up and Extra Lift (Baste) Start/Stop Sensor Foot Down and Pivot Reverse SPEED - AND + FIX (BASTE) All stitches in your machine and each hoop size have a pre- Sewing Mode... - Page 46 Selective Thread Cutter Speed - and + Needle Stop Up/Down (Trim Position) STOP (Monochrome) Sensor Foot Up and Extra Lift (Baste) Start/Stop Sensor Foot Down and Pivot Reverse SELECTIVE THREAD CUTTER SENSOR FOOT UP AND EXTRA LIFT Sewing Mode Sewing Mode cuts the top and bobbin threads, raises the presser foot and second time and the presser foot will raise to Extra Lift, and the feed teeth are lowered automatically to make it easy...
- Page 47 SEWING...
-
Page 48: Sewing Mode - Overview Of Icons
Sewing Mode to create your own stitch programs. Read more about how to program stitches in the Program chapter. SEWING MODE - OVERVIEW OF ICONS Stitch Menu Font Menu File Manager Ruby Menu Quick Help Sewing/Embroidery Mode Stabilizer Recommendation Needle Recommendation Stitch Selected Presser foot recommendation... -
Page 49: Exclusive Sewing Advisor ™
EXCLUSIVE SEWING ADVISOR ™ Your new sewing machine has the HUSQVARNA VIKING ® Exclusive SEWING ADVISOR feature. It is always active ™ and is located at the bottom of the Large Interactive Screen. When beginning a sewing project, touch your fabric type and weight, then touch the technique you desire. -
Page 50: Select A Stitch
SEWING TECHNIQUES : sews two pieces of fabric together. SEAM : overcast fabric edges to prevent them from OVERCAST : sews the seam and overcasts the edge all SEAM OVERCAST at one time. BASTE gathering and marking. : creates an invisible hem on garments. Is not BLIND HEM recommended for light weight fabric or for leather/vinyl. -
Page 51: Stitch Settings
Load a Stitch From Another Location Load stitches that you have saved in STITCH SETTINGS What is a Stitch? A stitch either consists of a single stitch as in a straight stitch, or as two individual stitches e.g in a zigzag. it’s made up by the total of the individual stitches in the stitch, such as a 3 step zigzag or a decorative stitch. - Page 52 Stitch Length a zigzag stitch or a decorative stitch, the entire stitch will be longer. If lengthening a satin stitch where the density can be adjusted, the entire stitch will be longer but the density will remain the same. Note: The set stitch width and the stitch length are shown between the + and -. When trying to exceed minimum or maximum settings for width and length, a Stitch length - Stitch length +...
-
Page 53: Free Motion Floating
FREE MOTION TECHNIQUE will appear allowing you to choose between two options: Free Motion Floating for presser foot R, or if using one of the optional free motion feet. The feed teeth will lower automatically. Presser Foot Height will raise and lower with each stitch to hold the fabric on the needle plate while the stitch is being formed. -
Page 54: Raise And Lower The Presser Foot
Selective Thread Cutter RAISE AND LOWER THE PRESSER FOOT To lower the presser foot, place the fabric under the presser Sensor Foot step on the foot control. To raise the presser foot, press Up and Extra Lift Thread Cutter to cut needle and bobbin thread and raise the foot. -
Page 55: Deluxe ™ Stitch System
deLuxe STITCH SYSTEM ™ The deLuxe ™ needle thread: Thread Tension and Thread Portioning. The deLuxe ™ between needle thread and bobbin thread. It will automatically use Thread Portioning when possible, to get the best result. Thread Portioning automatically and continuously measures the fabric thickness to portion the correct amount of thread for the selected stitch. -
Page 56: Sewing Techniques
SEWING TECHNIQUES SEAM A seam sews two pieces of fabric together with a seam allowance that will usually be pressed open. In most cases, stitch before sewing the seam. stretch stitch makes a stretchy seam that is suitable for sewing together pieces of light stretch fabric. : Woven medium, cut in two. -
Page 57: Overcast
OVERCAST Overcast fabric edges to prevent fraying and to help is sewn together. Presser foot J is recommended for light and medium weight fabric to prevent puckering along the feature will select the ™ best stitch length and stitch width for the fabric weight and recommend the presser foot and needle. - Page 58 SEAM AND OVERCAST the edges all at one time. There are a number of different feature will select the best one for ™ your fabric and make all adjustments automatically. FABRIC SELECT ™ feature. : Presser foot J and size 75 stretch needle as recommended.
-
Page 59: Baste
BASTE and marking. ™ feature automatically sets a long stitch length and reduces the tension so the threads are easy to remove or to pull for gathering. : Woven medium, cut in two. FABRIC : Woven medium fabric and Baste. SELECT : Presser foot A and size 80 needle as recommended. - Page 60 ™ feature will select the visible or topstitch hem stretch fabrics, stitches that stretch are selected. Jeans Hem When sewing over seams in extra heavy fabric or a blue jeans hem, the foot can tip as it rides over the seam. The needle can hit the tipped foot and break.
- Page 61 PERFECTLY BALANCED SENSOR ONE-STEP BUTTONHOLE feature will select the ™ should be interfaced and/or stabilized where buttonholes are to be sewn. Buttonhole Menu B. : Woven medium and stabilizer. FABRIC : Woven medium fabric and Buttonhole. SELECT Sensor One-Step Buttonhole Foot socket needle area.
-
Page 62: Manual Buttonhole
When sewing buttonholes without satin stitches or when Note: If you are sewing buttonholes in a very narrow area, snap on the standard foot C and sew your buttonhole according to the instructions below. 2. Sewing direction for buttonholes without satin stitches or satin stitch buttonholes sewn with presser foot C MANUAL BUTTONHOLE To sew a manual buttonhole, use buttonhole foot C. -
Page 63: Bartacks
BARTACKS corners with the same look as ready-to-wear. : Woven heavy. FABRIC : Woven heavy, and stitch A2:29. SELECT : Presser foot B and size 90 needle as recommended. • Place fabric under the presser foot. • To lower the presser foot, step on the foot control and stitch. - Page 64 4-WAY STITCHES - MENU S The 4-way mending stitch allows you to stitch several sturdy perfect for the weight and type of fabric you are using. This is especially helpful when patching trouser legs on a free and stitch width. : Woven heavy, two pieces, one a patch.
- Page 65 8-WAY STITCHES – MENU T There are two different stitches, straight and reinforced straight stitch, in the T menu. Touch the arrows to select direction of the stitch, use the stitch width and stitch length icons. Straight stitch right Note: The stitch length and width icons no longer adjust the length Straight stitch left and width of the stitch.
- Page 66 SAVE TO MY STITCHES If you have made changes to a stitch and want to save open the U-menu with 12 different spaces on each page to save personalized stitches. Touch a space below a number where you want the stitch to be saved. All your previously saved stitches will be shown.
- Page 67 SPECIAL SEWING TECHNIQUES feet and accessories. This is indicated by the optional presser foot icon. TAPER SATIN STITCH The taper stitch automatically tapers the satin stitch for corners and points and can be used for satin stitch lettering. stabilized fabric. SELECT : The stitch will automatically taper from a point to the •...
- Page 68 DIMENSIONAL STITCHES- MENU Y stitches will give different decorative effects depending on which stitch is selected and what type of fabric you choose. Appliqué stitches doesn’t fray too much. foot. Place your fabric under the presser foot and activate to select the needle down position.
-
Page 69: Sewing Pop-Up Messages
SEWING POP-UP MESSAGES System Busy An hour glass is shown when the machine is loading, Bobbin Thread Low When the bobbin thread is running low, a pop-up message appears giving you an advanced notice that you’ll soon need to change the bobbin. This gives you an opportunity to plan when you want to change your bobbin. - Page 70 Stitch Width Safety message appears when you turn on the machine or choose Machine needs to rest If the machine stops and this pop-up appears on the screen, the machine needs to rest. When the OK icon is enabled you can resume sewing/embroidering. The sewing/embroidery results will not be affected.
-
Page 71: P Rogram
PROGRAM... -
Page 72: Program - Overview Of Icons
PROGRAM Note: If Sewing Mode is active and your stitch program is ready to be create stitch programs. Combine various decorative stitches sewn, you can also close the active function by pressing the foot control, or by pressing the Start/Stop button. Not all stitches are available and stitch fonts from the machine or from an external to program. -
Page 73: To Program In Sewing Mode
TO PROGRAM IN SEWING MODE • To enter the Program window, touch the PROG icon. • Stitch Menu font you wish to use. Font Menu • The active position is marked by a cursor and the selected stitch or letter will be marked in red. Inserted stitches will be placed at the cursor. -
Page 74: Edit Your Stitch Or Lettering Program
EDIT YOUR STITCH OR LETTERING PROGRAM Insert a Stitch or Letter Move the cursor where you want to add a stitch or letter. at the cursor. Adjust Text and Stitches Duplicate density of the selected stitch, in the same way as when in Delete Delete a Stitch or Letter If you want to delete a stitch, move the cursor to the stitch... -
Page 75: Adjust The Entire Program
ADJUST THE ENTIRE PROGRAM To adjust the entire program, return to the stitch view by touching the OK icon. Adjustments made here will affect the whole program. STITCH PROGRAM COMMANDS thread cut commands into the stitch program. These commands will be included in the stitch program and will always be performed when sewing it. -
Page 76: To Save A Stitch Program
TO SAVE A STITCH PROGRAM Save to “My Stitches” program will be loaded to Embroidery Edit, and can then Mode can be loaded manually into Embroidery Edit. SAVE TO “MY STITCHES” can step between using the arrows at the bottom of the screen. -
Page 77: Important Program Mode Information
SAVE YOUR PROGRAM IN “MY FILES” Save to “My Files” name. If you want to change the name touch the Rename icon. IMPORTANT PROGRAM MODE INFORMATION Mode. A stitch program created when Embroidery Mode is active will become an embroidery design when saved and will not be available when opening Program mode after activating Embroidery Mode and vice versa. -
Page 78: Program Pop-Up Messages
PROGRAM POP-UP MESSAGES Not a Programmable Stitch for example buttonholes and four direction stitches. Stitch Program Out of Range The stitch you are trying to add will make the stitch program too long. program exceeds the maximum length this pop-up message will let you know. - Page 79 EMBROIDERY SET UP...
-
Page 80: Embroidery Arm
EMBROIDERY UNIT OVERVIEW 38. Embroidery arm 39. Embroidery hoop attachment 40. Level adjustment feet 41. Embroidery unit socket EMBROIDERY HOOP OVERVIEW Embroidery hoop connector Outer hoop Inner hoop D Quick release Retaining screw G Center marks When removing the embroidery unit the shipping brace on the underside of the embroidery unit has been removed. -
Page 81: Connect The Embroidery Unit
CONNECT THE EMBROIDERY UNIT There is a covered socket at the back of the machine. Turn the cover to the right to open it. The embroidery unit plugs into the socket. use the level adjusting feet so that the machine and embroidery unit are even. -
Page 82: To Hoop The Fabric
TO HOOP THE FABRIC beneath the fabric. When hooping stabilizer and fabric make sure that they are smooth and securely hooped. the lower right. There is a small arrow in the center of the lower edge of the hoop which will line up with a small arrow on the inner hoop. -
Page 83: Getting Started Embroidering
GETTING STARTED EMBROIDERING result. Read more about attaching the presser foot on page 2:8. After attaching the embroidery unit and embroidery foot, insert a bobbin with bobbin thread. Touch the Designs Menu on the toolbar to open the designs. Touch the design you want to stitch out and it will load to Embroidery Edit. - Page 84 accommodate movement of the embroidery arm and the hoop. Hold the needle thread and press the embroidering. Note: This machine features Automatic Jump Stitch Trim. When activated the machine trims the top jump stitch threads and pulls the thread ends to the underside of the fabric. The default setting is on. To turn it off, go to the SET Menu, Sewing Settings and deselect Automatic Jump Stitch Trim.
-
Page 85: E Mbroidery E Dit
EMBROIDERY EDIT... -
Page 86: Embroidery Edit - Overview Of Icons
EMBROIDERY EDIT Embroidery Edit will be opened when you toggle Embroidery Edit when you turn your machine on with the embroidery unit attached. In Embroidery Edit do not need to have the embroidery unit connected EMBROIDERY EDIT - OVERVIEW OF ICONS Step Through Designs Select All... -
Page 87: Main Functions In The Embroidery Edit Toolbar
MAIN FUNCTIONS IN THE Designs Menu EMBROIDERY EDIT TOOLBAR Stitch Menu Font Menu Ruby Menu Press the function you want to activate. Touch the File Manager Ruby Menu icon to open the Extended toolbar. LOAD A DESIGN To load a design, touch the Designs Menu icon to shown in the menu. -
Page 88: Ruby Menu
RUBY MENU Designs Menu Stitch Menu Touch the Ruby Menu icon to open the Extended Font Menu Ruby Menu toolbar. The contents of the Extended toolbar will File Manager change depending on which mode you are in. Here and the ™... -
Page 89: Fold Out Toolbar
FOLD OUT TOOLBAR In Embroidery Mode several of the functions can be Ruby Menu HOW TO SELECT DESIGNS Step Through When loading designs into Embroidery Edit, the last Designs design loaded is selected by default. Select All Select one Design To select one design you can either touch the design Duplicate select one of the designs on your screen if you wish... -
Page 90: Advanced Selection
ADVANCED SELECTION Selection Modes There are three different ways a design can be chosen on the screen. This gives you the opportunity to select a subset of the loaded designs and apply changes only to those designs. 1. Selected Design(s) have a red box around them. -
Page 91: Duplicate
DUPLICATE Touch the Duplicate icon to make a copy of the icon and a pop-up window will open where you can enter the desired number of copies. Duplicate deselecting designs. Mirror End-to-End Mirror Side-to-Side MIRROR END-TO-END AND Delete SIDE-TO-SIDE Move to Hoop To mirror a design horizontally, touch the Mirror End- to-End icon. -
Page 92: My Hoops
MY HOOPS To select the correct hoop size, touch the My Hoops icon. A pop-up will appear with the hoop choices, including hoops that are available to purchase from retailer. ® After selecting your hoop size, the pop-up message will close automatically. Note: Only your selected hoops will be available in the My Hoops List. -
Page 93: Zoom Options
ZOOM OPTIONS Zoom In Zoom Out Touch the Zoom Options icon to open a pop up where you can choose to Zoom to All, Zoom to Hoop or Zoom to Box. Zoom to All embroidery combination. Zoom to Hoop the selected hoop. Zoom to Box the screen to create a box. -
Page 94: Touch Functions
TOUCH FUNCTIONS A selected design has a red box around it. A selected embroidery font text has a blue box around it. To select a design Position When Position is active, you can move the selected numbers next to the Control show, in millimeters, the designs current horizontal and vertical position from the center of the hoop. -
Page 95: Save To My Designs
SAVE TO MY DESIGNS Touch the design or design combination. In the window that My Designs, external device. Designs saved in My Designs are available through the Designs Save to Undo Redo Menu on the Toolbar. My designs UNDO Touch the arrow pointing left to undo your latest design adjustment. -
Page 96: Resize
RESIZE times smaller than the original design or increase it up to eight times larger than the original design. The machine recalculates the number of stitches in the design so the original stitch density remains. Note: To reduce or increase the design less than 20%, use Scale function. -
Page 97: Important Resize Information
IMPORTANT RESIZE INFORMATION important to consider the following information about Resize. Always embroider a test sample of your resized design before embroidering on a project. • Resize is always proportional. If you reduce a • Depending on how much you resize a design and design 30%, it will be 30% smaller in both length how many stitches it contains, the resize process and width. -
Page 98: Color Edit
COLOR EDIT THREAD COLOR CHANGE In Thread Color Change you can edit the colors in your design. Each color block is described in the Color Block list on the right hand side of the screen. Example: 1:2, 2504 RaRa 40, means the second thread color Anton 40 weight. -
Page 99: Edit Stitch Program
EDIT STITCH PROGRAM If you want to edit a stitch program that you have created Program icon. The Program window will open to let you stitches. If you have programmed stitches in Embroidery Mode, you can save the stitches as a part of a design, and they can only be stitched in embroidery mode. -
Page 100: Basic Design Appliqué
BASIC DESIGN APPLIQUÉ Shapes different shapes to choose from when creating your There are three different decorative stitches to choose • • • shape. The decorative stitches will cover the raw edges of the stitched outline. The second color block will sew Candlewicking Stitch (wide) the stitching line as possible. -
Page 101: Embroidery Edit Pop-Up Messages
EMBROIDERY EDIT POP-UP MESSAGES Exceeded maximum number of stitches The design combination you are trying to make can have a maximum of approximately 500,000 stitches. Embroidery combination is too complex This pop-up message appears for one of the following reasons: •... - Page 102 7:18...
-
Page 103: E Mbroidery Stitch - Out
EMBROIDERY STITCH-OUT... -
Page 104: To Enter Embroidery Stitch-Out
TO ENTER EMBROIDERY STITCH-OUT Embroidery Edit window. The embroidery unit must be connected and the correct hoop attached when the machine EMBROIDERY STITCH-OUT - OVERVIEW OF ICONS Quick Help Color Block List Color Block Cursor Zoom Out/Zoom In Presser Foot Zoom Options Recommendation Preferences... -
Page 105: Smart Save
SMART SAVE If you want to stop embroidering and save your current Smart Save can now turn the machine off. adjustments and you can continue to embroider later. Load Smart Save Note: If you have chosen Auto Smart Save in the SET Menu, the Smart Save icon will be disabled. -
Page 106: Preferences
PREFERENCES Grid Touch the Grid icon to activate/deactivate a grid on combining or placing designs. The distance between the reduces to 10mm and 5mm, indicated with lighter lines. 2-dimensional/3-dimensional view toggle In 2-dimensional view, the designs load faster on the screen and it is easier to see the color blocks in the design. -
Page 107: Color Block List
FOLD OUT TOOLBAR Color Block Scroll bar right to access these functions. To hide the functions touch Color Block List unfolded by default. COLOR BLOCK LIST they will be embroidered. Each listed color shows color order and design number. Also shown are the thread manufacturer, thread weight and color number. -
Page 108: Baste In Hoop
BASTE IN HOOP Basting enables you to secure your fabric to a hooped stabilizer. It is especially useful when the fabric to be embroidered cannot be hooped. Basting provides support for stretchy fabrics. Touch the Baste in hoop icon to add a basting stitch around the design. -
Page 109: Design Positioning
DESIGN POSITIONING Set cursor point icons Touch the Design Positioning icon to open the Design Positioning screen. Design Positioning allows you to place a design on an exact location on your fabric. When adding one design to a previously embroidered design, or when matching a design to a patterned fabric, Design Positioning is very useful. - Page 110 HOW TO USE DESIGN POSITIONING Design Positioning icon to position the next design. Design Positioning Wizard Touch the numbered Design Positioning icons to position touch Quick Help and the numbered icon. 1. To select a Locking Point on Screen Touch number 1 to select a locking point. Place the red cursor where you would like the locking point to be in your embroidery.
-
Page 111: Design Positioning Exercise
DESIGN POSITIONING EXERCISE upper left corner of the hoop. Touch number 1. Use the stylus or Control Arrows to move the cursor to the upper left corner of the design. Touch Zoom to Cursor to maximize the zoom so that you will be able to move the design on the screen without moving the cursor. -
Page 112: Number Of Stitches In Embroidery Combination
NUMBER OF STITCHES IN EMBROIDERY COMBINATION The current stitch position in the design or combination is Number of stitches in the total number of stitches in the design or combination. embroidery combination NUMBER OF STITCHES IN CURRENT Number of stitches in current color block COLOR BLOCK The current stitch position in the current color block is... -
Page 113: Return To Embroidery Edit
deLuxe STITCH SYSTEM ™ The deLuxe ™ needle thread, Thread Tension and Thread Portioning. The deLuxe ™ will automatically use Thread Portioning when possible to get the best result. Thread Portioning automatically and continuously measures the fabric thickness to portion the correct amount of thread for embroidery. -
Page 114: Function Buttons In Embroidery Stitch-Out
FUNCTION BUTTONS IN EMBROIDERY STITCH-OUT Selective Thread Cutter Speed - and + Needle Stop Up/Down (Trim Position) STOP (Monochrome) Sensor Foot Up and Extra Lift (Baste) Start/Stop Sensor Foot Down and Pivot Reverse SPEED - AND + SELECTIVE THREAD CUTTER All stitches in your machine and each hoop size have a pre- and raises the presser foot. -
Page 115: Embroidery Stitch-Out Pop-Up Messages
EMBROIDERY STITCH-OUT POP-UP MESSAGES Embroidery Unit Calibration When the embroidery unit is attached, a pop-up message asks you to slide off the hoop and clear the machine Note: It is very important to remove the hoop, otherwise the hoop or the embroidery unit may be damaged while calibrating. - Page 116 Check Needle Thread The machine stops automatically if the needle thread runs out or breaks. Re-thread the needle thread, close the pop- Embroidery Is Finished Touch OK to get back to your design and stay in Change to Cutwork Needle (optional accessory) ®...
-
Page 117: F Ile Manager
FILE MANAGER... -
Page 118: File Manager - Overview Of Icons
FILE MANAGER FILE MANAGER - OVERVIEW OF ICONS Quick Help List view Drop down menu Selection Area My Designs Move up one folder My Fonts Open folder My Files folder Create new folder Built-in Designs External Devices Paste Copy Delete AVAILABLE MEMORY up message shows how much memory is available. -
Page 119: Browse File Manager
BROWSE FILE MANAGER toolbar. File Manager Within the built-in memory there are four folders: My The external device folder icon is only available when a device is connected to the machine. Touch any of these icons to display their contents in the selection area. - Page 120 Drop down menu Move up one folder level Open folder External Devices External Device The external device icon is only active when a device is Embroidery your computer. Load designs or other Computer connect more devices at one time. Touch the devices to types here.
-
Page 121: Organize
ORGANIZE Create a New Folder Touch the create new folder icon to create a new folder. A pop-up message opens where you can enter a name for your folder. Rename a File or Folder To change the name of a folder, touch the folder then folder. -
Page 122: File Manager Pop-Up Messages
FILE MANAGER POP-UP MESSAGES Delete File or Folder deleting anything by mistake. Folder Already Exists as another folder on the same level. Create your folder elsewhere or enter a different name for the folder. Available Memory is low the memory is full, you can move them to an external device by using the Cut and Paste functions. -
Page 123: M Aintenance
MAINTENANCE... -
Page 124: Cleaning The Machine
Put the bobbin case and the bobbin case holder back in place. Note: Do not blow air into the bobbin case area. The dust and lint will be blown into your machine. Note: When using the optional accessory HUSQVARNA VIKING ® Embroidery Cutwork Needles, it is neccessary to clean the bobbin area after each embroidered design/project. -
Page 125: Troubleshooting
TROUBLESHOOTING retailer who will be happy to help you. ® Have Your Sewing Machine Serviced Regularly by your Local Authorized Retailer! If you have followed this troubleshooting information and still have problems, take your sewing machine to your retailer. your retailer. A sewing sample will often give much better information than words. General Problems Bobbin alarm does not work? VIKING... - Page 126 The Machine Skips Stitches Did you insert the needle properly? Insert needle correctly as described in chapter 2. Did you insert a wrong needle? Use needle system 130/705 H. Is the needle bent or blunt? Insert a new needle. Did you thread the machine properly? Check how the machine is threaded.
-
Page 127: Index
INDEX 2-dimensional/3-dimensional view toggle ....7:8, 8:4 Built-In Needle Threader ..........1:8, 2:4 ............1:18, 4:18 Button ..................4:4 ............1:18, 4:19 Buttonhole ..............4:4, 4:15 Embroidered ................4:16 Load .................... 7:3 Manual ..................4:16 Accessories ................1:9 ..............1:10 Accessory Tray ...............1:9 ........1:11 Add a letter into a text ............7:15 ............1:8... -
Page 128: Embroidery Hoop Attachment
Embroidery Unit Calibration ..........8:13 ........1:8 ..............1:11 Embroidery Unit Overview ..........6:2 .............1:17 Embroidery Unit Release Button ....... 1:9, 6:2 ............1:10 ..........1:9, 6:2 ......1:11 ......7:4 ........1:19, 4:21 ...... 3:5, 3:14 Delete ........4:20, 5:2, 7:2, 7:5, 7:7, 9:2, 9:5 ......4:2, 4:3 ............9:5 Extended Embroidery Edit toolbar ........7:3 Delete a letter ...............7:15... -
Page 129: Multipurpose Tool/Button Reed 53 54 55
Hoop overview ..............6:2 Move to bobbin position ...........8:13 ..............3:8 Move to Hoop ............... 7:2, 7:7 Hoops Included ..............1:9 Move up one folder ............9:2, 9:4 Hoop the fabric ..............6:4 Multipurpose tool ........1:9, 2:9, 4:14, 4:16 Horizontal position ...............2:6 My Designs ............7:11, 9:2, 9:3 Horizontal Preview ...............5:2 ..............7:11, 9:2, 9:3 Horizontal spool pin ............. -
Page 130: Pictogram™ Pen
...4:15 Rotate ..................7:12 ..............1:15 Rotate Design ................8:8 PICTOGRAM™ Pen ........1:9, 2:10, 4:15 Ruby Menu ..............3:3, 7:4 Polarized plug ................2:2 Pop-up messages Embroidery Edit ..............7:17 .............. 1:10, 6:4 ............8:13 ..........5:6, 7:15 ................9:6 ............. 7:2, 7:11 Program ..................5:8 ..............5:2 .................. - Page 131 ............. 3:5, 3:10 Thread guide ............2:4, 2:6, 2:7 ..............1:19 Threading ..............2:3 Needle ..................2:4 ................3:13, 8:12 Twin Needle ................2:5 ..........2:3, 2:4, 2:5, 2:6, 2:7 Upper thread ................2:4 ................ 2:3, 2:7 Threading the needle ..............1:10, 2:10 Manually ..................
- Page 132 ............2:10 Winding Bobbin ..............2:6 ..........2:6 Wing Needles ..............2:4, 2:9 Woven ..................4:3 Woven heavy ................4:3 Woven light ................4:3 Woven medium ..............4:3 ..............1:10 Zoom In ............7:2, 7:9, 8:2, 8:4 Zoom Options ..........7:2, 7:9, 8:2, 8:4 Zoom Out ...............7:2, 7:9, 8:4 Zoom to All ............5:4, 7:9, 8:4 Zoom to Box ..............
-
Page 133: Intellectual Property
regularly release software updates, it is possible that there may be some differences between the machine software and the software described in the User’s Guide. retailer, and be sure to ® and the User’s Guide. the product. INTELLECTUAL PROPERTY Patents protecting this product are listed on a label positioned underneath the Please note that on disposal, this product must be safely recycled in accordance with relevant National legislation relating to electrical/electronic products. - Page 134 ww w.h u s qv a r n av ik i ng . c o m...
Need help?
Do you have a question about the Viking Royale and is the answer not in the manual?
Questions and answers