Table of Contents
Advertisement
Advertisement
Table of Contents

Related Manuals for Husqvarna Viking Viking H Class 100Q


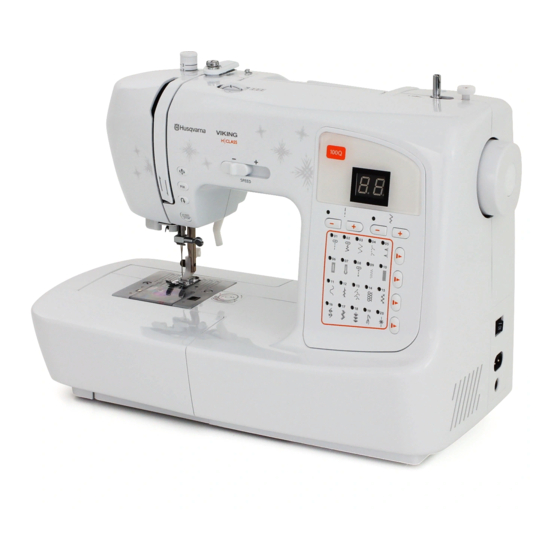
Summary of Contents for Husqvarna Viking Viking H Class 100Q
-
Page 2: Important Safety Instructions
This houshold sewing machine is designed to comply with IEC/EN 60335-2-28 and UL1594 IMPORTANT SAFETY INSTRUCTIONS When using an electrical appliance, basic safety precautions should always be followed, including the following: Read all instructions before using this household sewing machine. DANGER - To reduce the risk of electric shock: •... -
Page 3: Table Of Contents
TABLE OF CONTENTS GET TO KNOW YOUR MACHINE 3 MACHINE FUNCTIONS Machine overview ..........3 Speed Control Slide ........21 Accessories ............4 Foot Control ............ 21 Presser feet ............4 Machine Sound ..........21 Stitches ..............5 Function buttons ..........22 START/STOP button ....22 SET UP Reverse button ........22... - Page 4 BASIC SEWING TECHNIQUES Seam ..............25 ZigZag ..............25 Three-Step ZigZag ........25 Seam and Overcast ........26 Edge/Quilting Guide ........26 Satin Stitch ............26 Blind Hem ............27 Sewing Zippers ..........28 Inserting Zippers ......28 Center Zippers ........28 Buttonholes ............
-
Page 5: Get To Know Your Machine
GET TO KNOW YOUR MACHINE MACHINE OVERVIEW 1. Thread tension dial 2. Bobbin winder tension disc 3. Presser foot pressure dial 4. Speed control slide 5. Needle stop up/down 6. FIX button 7. Reverse button 8. START/STOP button 9. Thread cutter 10. -
Page 6: Accessories
ACCESSORIES 1. INSPIRA™ needles 2. Bobbins 3. Seam Ripper/brush 4. Auxiliary spool pin 5. Edge/Quilting guide 6. Spool cap large 7. Felt pad 8. Screwdriver 9. Hard cover (not in picture) PRESSER FEET Utility Foot A Attached on the machine upon delivery. This foot is used mainly for straight stitching and zigzag stitching with a stitch length longer than 1.0. -
Page 7: Stitches
STITCHES On the following pages you will nd information about the stitches included in your sewing machine. Next to each stitch you can nd information about the stitch number and pre-set values (default) for stitch width and length. Also provided are the recommended thread tension setting and presser foot for each stitch. - Page 8 STITCH LENGTH (mm) WIDTH (mm) THREAD PRESSER TENSION FOOT Default Min-Max Default Min-Max 0.75 0.75-3 0.5-7 10-21 1.5-7 4-10 9-14 5-10 10-21 8-12...
-
Page 9: Set Up
SET UP UNPACKING Place the machine on a sturdy, at surface, remove the packaging and lift off the cover. The machine is delivered with an accessory bag, a main cord, a foot control cord and a hard cover. Wipe the machine, particularly around the needle and needle plate to remove any oil before sewing. -
Page 10: Pack Away After Sewing
PACK AWAY AFTER SEWING 1. Press the power switch to OFF (O). 2. Unplug the cord from the wall socket and then from the machine. 3. Unplug the foot control cord from the machine. 4. Place all accessories in the accessory tray. Slide the tray onto your machine around the free arm. -
Page 11: Changing The Needle
CHANGING THE NEEDLE Turn off the main switch Loosen the needle screw. Remove the needle. Insert the new needle and push upwards with the at side away from you until the needle will go no further. Tighten the needle screw. PRESSER FOOT LIFTER The presser foot is lowered or raised with the presser foot lifter. -
Page 12: Needles
NEEDLES The sewing machine needle plays an important role in successful sewing. To ensure you will get a quality needle, we recommend INSPIRA™ needles of system 130/705H. Below, nd a description of the most frequently used needles for sewing on woven and stretch fabrics. -
Page 13: Spool Pins
SPOOL PINS Your sewing machine has two spool pins, a main spool pin and an auxiliary spool pin. The main horizontal spool pin (A) is used for sewing with normal threads. The auxiliary vertical spool pin (B) can be used for large spools of thread or specialty threads. -
Page 14: Threading The Upper Thread
THREADING THE UPPER THREAD Make sure the presser foot is raised and the needle is in the highest position. It is important to thread correctly to minimize several sewing problems. Turn off the main switch. 1. Lightly lift up the spool pin. Place the thread on the spool pin. - Page 15 4. Bring the thread down between the thread tension discs (D). 5. Continue threading the thread around the check spring holder (E). 6. Bring the thread from right to the left through the slot on the take-up lever (F) and then downwards again. 7.
-
Page 16: Needle Threader
Needle Threader The needle must be in the highest position to use the built-in needle threader. We also recommend lowering the presser foot. Turn off the main switch. 1. Use the handle to pull the needle threader down, catching the thread under the guide (A). -
Page 17: Threading For Twin Needle
THREADING FOR TWIN NEEDLE Turn off the main switch 1. Insert a twin needle. 2. Thread the machine as explained under “Threading the upper thread” (page 12), and thread the left needle. 3. Place the auxiliary vertical spool pin in the hole for auxiliary spool pin and place the large spool cap on the spool pin. -
Page 18: Wind The Bobbin
WIND THE BOBBIN 1. Place the thread and a spool cap on the spool pin. For smaller spools of thread, place the spool cap with the smaller side next to the thread (A). 2. Snap the thread into the thread guide (B). 3. - Page 19 5. Push the bobbin to the right (E). 6. When the bobbin winder spindle is pushed to the right, the InfoDisplay will blink on and off displaying “SP“ (F). 7. Hold the thread end and press the foot control (or press START/STOP button) to start the bobbin winding (G).
-
Page 20: Place The Bobbin In The Machine
Place the Bobbin in the Machine Turn off the main switch 1. Make sure that the needle is fully raised before inserting or removing the bobbin. Open the bobbin cover by moving the release button to the right (A). Remove the cover (B). -
Page 21: Lower The Feed Teeth
LOWER THE FEED TEETH To lower the feed teeth you need to remove the accessory box. The feed teeth lever is located on the back of the machine at the base of the free-arm. Slide the lever to the right (A) to lower the feed teeth. -
Page 22: Raise The Bobbin Thread
RAISE THE BOBBIN THREAD 1. Hold the upper thread with the left hand. Turn the handwheel towards you counterclockwise to lower the needle and keep turning counterclockwise to raise the needle (A). 2. Gently pull the upper thread to bring the bobbin thread up through the needle plate hole. -
Page 23: Machine Functions
MACHINE FUNCTIONS SPEED CONTROL SLIDE With the speed control slide, you can change the maximum sewing speed to suit your SPEED needs. The slide limits how fast you can sew. To increase the sewing speed, slide the bar to the right. To reduce the sewing speed, slide the bar to the left. -
Page 24: Function Buttons
FUNCTION BUTTONS START/STOP button (A) Touch this button to start and stop sewing START without using the foot control. Touch STOP START/STOP button to begin and touch again to stop. You can increase and decrease the sewing speed by sliding the Speed Control Slide to the right and to the left. -
Page 25: Needle Stop Up/Down
Needle Stop Up/Down (D) Press this button to choose between two options for the needle position when sewing: 1. The needle will always be lowered when you release the foot control or press START/STOP button to stop sewing. 2. The needle will always be raised up when you release the foot control or press START/STOP button to stop sewing. -
Page 26: Warning Messages/Sound
ON/OFF switch to the OFF position and then ON again. Note: If the problem is still not solved, please contact your local Authorized HUSQVARNA VIKING ® Dealer. Bobbin Winding Position When the bobbin winder spindle is pushed to the right, "bobbin winding position", the... -
Page 27: Basic Sewing Techniques
BASIC SEWING TECHNIQUES SEAM A seam is formed when two pieces of fabric are stitched together with a seam allowance that usually will be pressed open. In most cases edges of the seam allowance are nished with an overcast stitch before sewing the seam. -
Page 28: Seam And Overcast
SEAM AND OVERCAST The Seam/Overcast stitch sews the seam and overcasts the edge all at one time. Your machine has a stretch seam overcast stitch. EDGE/QUILTING GUIDE The Edge/Quilting Guide is used for wide seam allowances, topstitching, or channel quilting. Slide the guide into the clip on the ankle. -
Page 29: Blind Hem
BLIND HEM The blind hem creates an invisible hem on garments. Fold the fabric as illustrated. Make sure the folded edge of the fabric follows the inside of the right “toe” of Blind Hem Foot D. Lower the presser foot and step on the foot control. -
Page 30: Sewing Zippers
SEWING ZIPPERS The Zipper Foot E can be snapped on either the right or the left of the needle, making it easy to sew both sides of the zipper from the same direction. To sew the other side of the zipper, reposition the Zipper Foot. - Page 31 3. Place fabric under the foot right side up. Begin stitching across the bottom, turn the fabric and stitch the right side of the zipper to the top. 4. To avoid fabric shifting, sew the left side of the zipper in the same direction. Snap on the Zipper Foot E so the needle is on the right side of the foot.
-
Page 32: Buttonholes
BUTTONHOLES Use the Buttonhole foot. Buttonhole stitch 6 is for thin and medium fabric and buttonhole stitch 7 is for suits or overcoats. 1. Insert a button in between tab A and tab B. 2. Buttonholes can be sewn to match the size of the button. - Page 33 7. Position the fabric under the presserfoot so that the centerlines mark is align with the center of the buttonhole foot. 8. While holding the top thread, start the machine. Sewing will be completed automatically in the following order: 9. When sewing is nished, raise the presser foot and buttonhole lever.
-
Page 34: Corded Buttonholes
Corded Buttonholes Finger When sewing buttonholes in stretch fabrics we recommend cording the buttonhole to increase the stability and to keep the buttonhole from stretching out. Loop a piece of heavy thread or pearl cotton over the nger at the back of the buttonhole foot. -
Page 35: Decorative Sewing
DECORATIVE SEWING Use Decorative Stitch Foot B. 10 different types of decorative stitches are available on your machine. You can use other stitches in the same way. • You should test sew on a scrap piece of the fabric being sewn, to check the stitch pattern to be used. -
Page 36: Quilting
QUILTING A quilt usually consists of three layers; two layers of fabric with a layer of batting sandwiched between. Piecing a Quilt Block Select Straight Stitch (01). Snap on the Quilter’s 1/4” Piecing Foot. Align the edges of the two fabric pieces with the right hand edge of the foot. -
Page 37: Free-Motion - Machine Set Up
When sewing free-motion, it is necessary to use an Open Toe Free-Motion Spring Foot. This foot is not included with this machine, but is available for purchase at your Authorized HUSQVARNA VIKING® Dealer. 1. Lower the feed teeth as explained in chapter 2. -
Page 38: Helpful Techniques
HELPFUL TECHNIQUES Sewing corners Stop the sewing machine when you reach a corner. Lower the needle into the fabric by turning the handwheel or pressing the Needle Stop Up/Down button once. Raise the presser foot. Use the needle as a pivot and turn the fabric. -
Page 39: Care Of Your Machine
CHANGING THE LIGHT BULB Only use light bulbs of a type as indicated on the front of the machine (12V, 5W). They are available at your authorized HUSQVARNA VIKING® dealer. Turn off the main switch 1. Remove the plug (A) and loosen the screw (B) on the left side of the sewing head. -
Page 40: Clean The Bobbin Area
CLEAN THE BOBBIN AREA Turn off the main switch 1. Remove the presser foot, the bobbin cover and bobbin. 2. Clean the feed teeth with the brush. Cleaning Under the Bobbin Area Turn off the main switch After sewing several projects or any time you notice an accumulation of lint in the bobbin case area, the area under the bobbin case must be cleaned. -
Page 41: Trouble Shooting
TROUBLE SHOOTING If you have followed the below trouble shooting information and still are having sewing problems, take the sewing machine to your Authorized HUSQVARNA VIKING® Dealer. Non-Original Parts and Accessories The warranty does not cover any defect or damage caused by use of non-original accessories or parts. - Page 42 Does the thread feed smoothly and not catching? • Use quality thread. For special threads such as metallic, etc, please consult your Authorized HUSQVARNA VIKING® Dealer for special needle recommendations. • Rethread top and bobbin threads - check for correct threading.
-
Page 43: Intellectual Property
Design, H|CLASS and INSPIRA are trademarks of KSIN Luxembourg II, S.ar.l. HUSQVARNA and the “crowned H-mark” are trademarks of Husqvarna AB. All trademarks are used under license by VSM Group AB. Please note that on disposal, this product must be safely recycled in accordance with relevant National legislation relating to electrical/electronic products. - Page 44 w w w .h u s q varn av i king. com...