Table of Contents
Advertisement
Advertisement
Table of Contents

Related Manuals for Soyal AR-721HV3


Summary of Contents for Soyal AR-721HV3
- Page 1 RFID CONTROLLER BUILD IN READER MANUAL AR-721HV3 AR-721HV3-1356 2005/06/01...
-
Page 2: Table Of Contents
Front Panel Indicators ----------------------------------------------------------------------- Access Mode -------------------------------------------------------------------------- User can select one of the following access modes ----------------------------- AR-721HV3/1356 --------------------------------------------------------------------- Duress function --------------------------------------------------------------------- 9 Force on/off Code (4 sets, 4 digits) ----------------------------------------------- 9 7 Function Default Value ---------------------------------------------------------------------- 11 8 Wiring... -
Page 3: Introduction
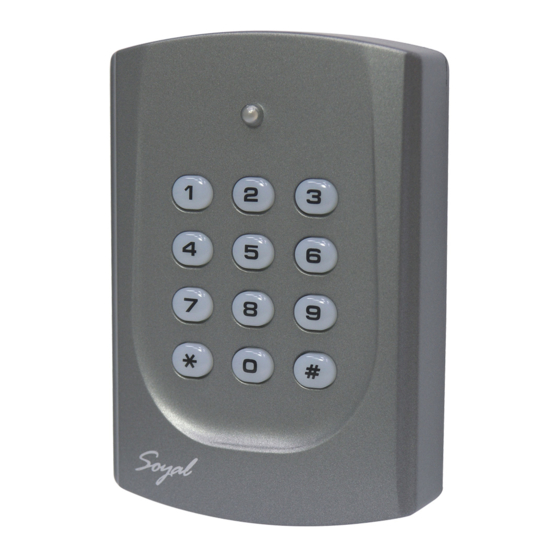
1. INTRODUCTION Getting to know your SOYAL Proximity Reader…. The AR-721HV3 & AR-721HV1356 are smart single door controller. It built-in a 6” RF reader and an external reader port for exit or anti-pass-back use. It can work standalone including 1000 cardholders with anti-pass-back function. Or connect with multi-door networking controller to provide 15,000 cardholders with multi door anti-pass-back access control. -
Page 4: Specification
3. Specification Mode Description: MODE Card Holder 1024 65536 1024 Card Code 32 bits 16 bits 32 bits Lift Control Anti-Pass-back 1024 1024 Connect to 716EV2 Access Mode Transaction Buffer 1200 1200 Access Mode A: Card only, Card + PIN, PIN + Code Access Mode B: Card only, PWD only, Card + PWD Access Mode C: Card Only, Card + PIN, PIN only How to get the Mode Status... -
Page 5: Installation Notice
4. Installation Notice Drawing 1 Reader Lock Separate installation Drawing 2 Reader Lock In the same pipe... - Page 6 AR-721HV3 / 1356 RS-232: The distance between PC and converter (AR-801CM) can not be more than 2 meters RS-485: The distance between converter (AR-801CM) and the farthest controller (or reader) can not be more than 300 meters. Wiegand: The distance between RS-485 reader (or controller) and Wiegand reader can not be more than within 3 to 5 meters.
- Page 7 We suggest that the customer use ”Shield Twisted Pair” and avoid Star wiring for good communication when installation. We suggest using the following cable in RS-485 communication. Please use the following installation method, it is correct. 801CM Controller Controller Reader c.
-
Page 8: Front Panel Indicators
The Difference of Cables Cable Types and Distances Wire Application Cable Type Description From Power Supply 2-cond, 18-22 AWG From Locking Device and power 2-cond. See Mfr’s Specifications n/a supply or gate operator From external alarm system’s Doo 2-cond, 18-22 AWG 100 m Monitor Switch (for shunting) From Exit Button... -
Page 9: Access Mode
---5678 Door Access User Code (network/standalone) ---1234 Arming and Disarming (network/standalone) User can select one of the following access modes AR-721HV3 /1356 Card only User can access the door by flashing card on the unit. Arming / Disarming: After flashing card ok, press Then the unit will trigger the arming/disarming mode. -
Page 10: Duress Function
Duress function This function could help users to send a message to the computer asking for help. Only available in networking state, running 701 Server and setting 4 sets of Duress code on PC. (Anyone of these 4 sets is workable.) This function is not available for CARD ONLY and USER CODE ONLY (AR-721H8) access. - Page 11 After access OK, press following order to turn on / off its connected equipment. Access mode ON/Off Order Flashing card¡ Ï Force code¡ Ï Code¡ Ï ¢ ¯ ¡ Ï ¡ - Card only Flashing card¡ Ï Force code¡ Ï Code¡ Ï ¢ ° ¡ Ï ¡ - Flashing card¡...
-
Page 12: Function Default Value
Before installing, complete the Parameters setting by calculating each controller value according to their designated functions. [Command 20] is used to enter [Designated Functions Setting Table] value. The default factory setting value is 016. 7.1 For AR-721HV3/ 1356 Designated Functions Setting Table Functions Optional... -
Page 13: Wiring
8. Wiring Table 1 - Connector P1 Color Coding Wire Application Wire Color Description Blue White (N.O.)DC24V1Amp Door Relay Purple White (N.C.)DC24V1Amp White (COM)DC24V1Amp Door Sensor Orange Negative Trigger Input Exit Switch Purple Negative Trigger Input Grey Transistor Output Alarm Output (Open Collector Active Low ) Power Thick Red DC Power 12V... -
Page 14: Installation Diagram
9. Installation diagram 9.1 Magnetic lock The installation of 721H and magnetic lock Lock (+12VDC ) Power Supply Magnettic Lock 12VDC 2A AR-721H Standalone Controller 721H 7AC2 Push Button DOOR EXIT SOYAL Power Supply 12VDC 500mA... - Page 15 9.2 Electric bolt lock The installation of 721H and electric bolt lock Lock(+12VDC ) Electric Bolt Lock Power Supply Lock( -GND ) 12VDC 2A 721H 7AC2 Push Button DOOR EXIT SOYAL Power Supply 12VDC 500mA...
- Page 16 9.3 Electric strike The installation of 721H and electric strike Lock (+12VDC ) Electric Strike Power Supply 12VDC 2A AR-721H Standalone Controller 721H 7AC2 Push Button DOOR EXIT SOYAL Power Supply 12VDC 500mA...
- Page 17 9.4 Magnetic door contacts and alarm system The installation of 721H magnetic door contacts and alarm system Power Supply 12VDC 2A AR-721H Standalone Controller 721H 7AC2 Gray ( ALM. ) SOYAL Alarm System Power Supply 12VDC 500mA...
- Page 18 9.5 Wiegand reader 9.5.1 AR-721U...
- Page 19 9.5.2 AR-661U...
- Page 20 9.5.3 AR-737U...
- Page 21 9.5.4 AR-721K...
- Page 22 9.6 Networking installation Black Green Blue Blue Blue Green Green Blue Blue Green Green...
- Page 23 9.7 Lift controller 9.7.1 AR-721R32 installation...
- Page 24 9.7.2 AR-401RO16 installation AR-401RO16 Wire Description: Red: +12V Black: GND AR-821L485 Yellow: TX White: RTS Orange: RX Diagram for AR-721H7 and AR-821L485 AR-721H7 AR-821L485 Black Black Gray Yellow AR-721H7...
-
Page 25: Installation
10. Installation INSTRUCTIONS: 1. Use the screwdriver to screw the mounting plate on the wall. 2. Pull cable ends through the access hole in the mounting plate. Connect plug P1 to socket CN1 on the AR-721H circuit board. Connect plug P2 to socket CN2 on the AR-721H circuit board. Connect plug P3 to socket CN3 on the AR-721H circuit board. -
Page 26: Warranty
God (such as floods, fire, etc.). SOYAL shall, at its option, either repair or replace product(s) which prove to be defective within the warranty period. -
Page 27: Mode 4 Easy Guide
14. Mode 4 Easy Guide Either way to enter the programming mode 1. Press (all new units are preprogrammed with the master code 123456) 2. Flash master card and then press within 2 seconds. The LED will flash green rapidly to show that the unit is in the programming mode. The unit will time out and return to the reading mode in 30 seconds if no key is pressed. - Page 28 Add one Transponder (Card / Key Tag) to the system Step1: Press and master code fallow an Step2: Enter User Number Quantity Present the transponder near the unit. (Set random transponder one by one). A green light and beep means that the transponder was accepted. Step3: Press Add a series of Transponders (Card / Key Tag) to the system Step1: Press...
- Page 29 Add a User Code to the system Step1: Press and master code fallow an Step2: Enter User Number User Code The user number 00001 can access the door by just either flash card or entering the user number 00001, then entering 2081#. Enter User Number User Code...
- Page 30 Delete all Transponders Step1: Press and master code fallow an Step2: Enter The LED flash red during 10 seconds to mean that the system is deleting all transponders / user codes. Then a green light and beep means that all transponder / user codes were deleted.
-
Page 31: Mode 8 Easy Guide
15. Mode 8 Easy Guide Add one Transponder (Card / Key Tag) to the system Step1: Press and master code fallow an Step2: Enter User Number Quantity Present the transponder near the unit. (Set random transponder one by one). A green light and beep means that the transponder was accepted. Step3: Press Add a User Code to the system Step1: Press... -
Page 32: Mode 6 Easy Guide
16. Mode 6 Easy Guide Enter the programming mode Press (all new units are preprogrammed with the master code 123456) The LED will flash green rapidly to show that the unit is in the programming mode. The unit will time out and return to the reading mode in 30 seconds if no key is pressed. Add one Transponder (Card / Key Tag) to the system Step1: Press and master code fallow an... - Page 33 Add the common Code to the system Step1: Press and master code fallow an Step2: Enter Common Code All users can access the door by only entering common code (Default value: 4321) on the unit. Enter Common Code This function is disable. All users cannot access the door by only entering common code.
-
Page 34: Mode 7 Easy Guide
17. Mode 7 Easy Guide To exit the programming mode Press -- exit the programming mode and return to the reading mode. Set a user number arrive one floor Step1: Press and master code fallow an Step2: Enter User Number Access 31 floor A green light and beep means that the setting was accepted. - Page 35 Set a AR-721R32 node address (AR-401RO16 don’t need to set this command. It is set by DIP switch on the device) Step1: Press and master code fallow an Step2: Enter AR-721R32 node address A green light and beep means that the setting was accepted. Step3: Press Set the Relay time for push button and present card input of an elevator controller...
-
Page 36: Special Design
18. Special Design 18.1 How to set anti-pass-back? Card and on-line reader (or standalone controller) must be both set anti-pass-back. Set card to have anti-pass back checking Step1: Press and master code fallow an (all new units are preprogrammed with the master code 123456) Step2: Enter SSSSS: Starting User Number EEEEE: Ending User Number... - Page 37 AR-721H do anti-pass-back with 2 pcs of AR-661U Y e l l o w i t e P u r p l e G r e e B u l Blac k G r e e n B l u e R e d Yellow Wh ite...
- Page 38 When the distance between 2 pcs 661U is less than 6 meter (suggestion value), we can use the following ways to solve in order to avoid interference with each other to result in reading distance decrease. AR-661U Partial drawing Single Reader (RF always ON) SYNL Two AR-661U Reader WIRING (RF switching) SYNL...
-
Page 39: Transponder Record Table
19. Transponder Record Table 19.1 For AR-721H4, AR-721H7 and AR-721H8 Be sure to record the user number, the user name, the card ID number (site code: card code), and the user code and keep this information in a secure place. A black user log form has been included for purpose. -
Page 40: For Ar-721H6
19.2 For AR-721H6 Be sure to record the user number, the user name, the card ID number (card code), and the user code and keep this information in a secure place. A black user log form has been included for purpose. Do not write on this form; use it as a photocopy master. User no. -
Page 41: Faq
20. F.A.Q. Q : How to input Duress Code in your SOYAL reader? Step1. Setting the Duress : Press * button into Editing mode. When in editing mode, enter 1 You can enter 4 numbers to be as Duress Code. - Page 42 This function is good for using together with auxiliary reader. AR-721 HV3 and auxiliary reader open different door. Note that this function cannot use with Arming function at the same time. Q : How to delete all Transponders in your SOYAL reader ? In edit mode, press then the data will be erased in your system.
- Page 43 Q : How to function the Arming & Disarming? Press to set 4-digit function code. Function code followed with to Arm or Disarm the system. Default setting : is 1234. Q : How to add Transponder ( Card / Key tag) to the system ? In edit mode, please press the buttons as below: Q : How to set Door-bell system ? Alarm output used with Relay is the formal type of this function.
Need help?
Do you have a question about the AR-721HV3 and is the answer not in the manual?
Questions and answers