Table of Contents
Advertisement
Quick Links
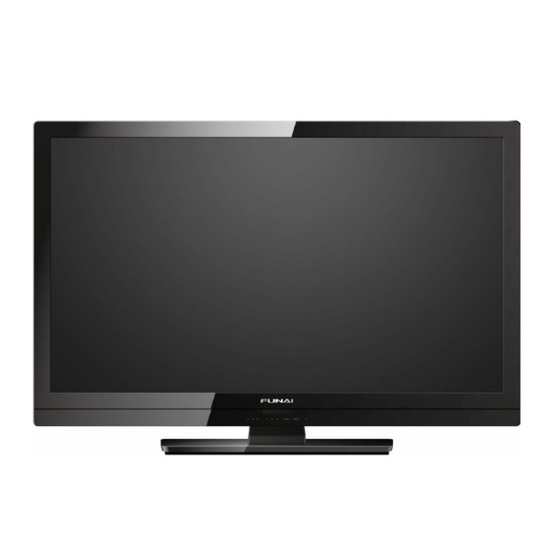
98cm(38.6 inch) 1080p LCD HD Television
Funai India Pvt Ltd
39FW702
INDEX
SAFETY INFORMATION...................................... 2
SUPPLIED ACCESSORIES ................................. 3
INSTALLING THE BATTERIES ........................... 3
ATTACHING THE BASE ...................................... 4
SET-UP FOR ANTENNA ...................................... 5
SET-UP FOR AC PLUG ....................................... 5
TURN ON THE UNIT ............................................ 6
AUTO TUNING ..................................................... 6
SELECTING A CHANNEL ................................... 7
ADJUSTING THE VOLUME................................. 7
HOOK-UP FOR HDMI .......................................... 8
HOOK-UP FOR PC............................................... 8
HOOK-UP FOR YPbPr......................................... 9
HOOK-UP FOR COMPOSITE .............................. 9
HOOK-UP FOR COAXIAL ................................. 10
HOOK-UP FOR HEADPHONE........................... 10
UNIT INFORMATION ......................................... 11
OPERATIONS .................................................... 13
Watching a TV Programme ............................. 13
Favorite ........................................................... 13
Sleep Timer ..................................................... 13
Switching the Input Mode ................................ 13
Picture Format................................................. 13
Playback Mode................................................ 14
DETAIL SETTINGS ............................................ 18
Channel Settings ............................................. 18
Screen Settings ............................................... 19
Picture Adjustment .......................................... 19
Sound Adjustment ........................................... 20
Timer Settings ................................................. 20
Setup Adjustment ............................................ 21
OTHER INFORMATION ..................................... 22
Trademark Information .................................... 22
Cabinet Cleaning............................................. 22
Panel Cleaning ................................................ 22
Servicing.......................................................... 22
TROUBLESHOOTING GUIDE ........................... 23
SPECIFICATIONS .............................................. 24
MULTIMEDIA FORMAT ..................................... 26
Advertisement
Table of Contents

Related Manuals for FUNAI 39FW702


Summary of Contents for FUNAI 39FW702
-
Page 1: Table Of Contents
DETAIL SETTINGS ..........18 Channel Settings ..........18 Screen Settings ..........19 Picture Adjustment .......... 19 Sound Adjustment ........... 20 Funai India Pvt Ltd Timer Settings ..........20 Setup Adjustment ..........21 OTHER INFORMATION ........22 Toll free telephone : 1-800-419-6708 Trademark Information ........ -
Page 2: Safety Information
SAFETY INFORMATION CAUTION A Note about Recycling This unit’s packaging materials are recyclable 1. Do not attempt to open the cabinet. There are no user serviceable parts inside. Refer all servicing to qualified and can be reused. Please dispose of any service personnel. -
Page 3: Supplied Accessories
SUPPLIED ACCESSORIES • Recommended batteries : AAA, 1.5V x 2 Installation of Wall Mount (Optional) The Wall Mount Kit can help install the TV on the wall. For more information about wall mounting, please refer to the instructions provided along with the Wall Mount Kit. -
Page 4: Attaching The Base
ATTACHING THE BASE MOUNTING THE UNIT ON YOUR FURNITURE Screw this unit on your furniture tightly using wood screw (not supplied) in the hole at the back of the base as shown. • Recommended screw dimension : 5.1 x 20 mm... -
Page 5: Set-Up For Antenna
SET-UP FOR ANTENNA HDMI YPbPr VGA AUDIO D-SUB(VGA) ANTENNA input jack SET-UP FOR AC PLUG... -
Page 6: Turn On The Unit
TURN ON THE UNIT • After plugging in the unit, just press (on the remote or the TV) to turn it on. AUTO TUNING You have to setup channels to watch TV. Press MENU to display the setup menu. to select [CHANNEL] in the setup menu. to select [Auto Tuning] in the Channel menu, and press OK to start tuning to setup channels. -
Page 7: Selecting A Channel
SELECTING A CHANNEL ADJUSTING THE VOLUME Volume... -
Page 8: Hook-Up For Hdmi
HOOK-UP FOR HDMI HDMI YPbPr VGA AUDIO D-SUB(VGA) HDMI input jack HOOK-UP FOR PC HDMI YPbPr VGA AUDIO D-SUB(VGA) VGA AUDIO input jack D-SUB (VGA) input jack... -
Page 9: Hook-Up For Ypbpr
HOOK-UP FOR YPbPr HDMI YPbPr VGA AUDIO Audio (L/R) input jacks D-SUB(VGA) YPbPr (Component video) input jacks HOOK-UP FOR COMPOSITE Composite video input jack HDMI YPbPr VGA AUDIO D-SUB(VGA) Audio (L/R) input jacks... -
Page 10: Hook-Up For Coaxial
HOOK-UP FOR COAXIAL HDMI Coaxial digital audio output jack YPbPr VGA AUDIO D-SUB(VGA) HOOK-UP FOR HEADPHONE HDMI YPbPr VGA AUDIO D-SUB(VGA) Headphone audio output jack... -
Page 11: Unit Information
UNIT INFORMATION (Power) (p. 6) Press once to turn the unit on and press it once more to put the unit into standby mode. S MODE “[Sound Mode]” (p. 20) P MODE “[Picture Mode]” (p. 19) “Favorite” (p. 13) Number buttons (p. 7) Selects the desired channel in TV mode. - Page 12 21. USB terminal (p. 14) • Data input from USB flash memory only. • User should not connect any devices to the USB terminal such as digital camera, keyboard, mouse, etc. (because these will not work.) • The software update is, in most cases, handled by an authorised service person or in some circumstances the user may be asked to do the software update themselves.
-
Page 13: Operations
OPERATIONS Press EXIT to exit. Read this first Sleep Timer These operations are accessible by remote control. The sleep timer can be set for the unit to go to the Some may also be accessible by controls on the main standby mode after an incremental period of time. -
Page 14: Playback Mode
Playback Mode This unit can play JPEG picture, MP3 music and video files from USB flash drive. Return Setup for playback You must connect the USB flash memory to USB terminal of this unit (shown below). Delete • The check box is displayed at the right bottom by pressing the OK. - Page 15 [MUSIC] Operation in Playback Press OK or DISPLAY to display the menu. to select [MUSIC] and press OK to enter. Press to play or pause the music playback. Press to rewind or fast-forward the music playback. USB2.0 Press to skip backward or forward a music file. Press to stop the music playback.
- Page 16 [MOVIE] Operation in Playback Press OK or DISPLAY to display the menu. to select [MOVIE] and press OK to enter. Press to play or pause the video playback. Press to rewind or fast-forward the video playback. USB2.0 Press to skip backward or forward a video file. Press to stop the video playback.
- Page 17 • It is not guaranteed that all USB flash memory can be supported on this unit. • FUNAI cannot be held responsible if your USB flash memory is not supported, nor will FUNAI accept any liability for damage or loss of stored data.
-
Page 18: Detail Settings
DETAIL SETTINGS Read this first [ATV Manual Tuning] Before adjust each setting, press MENU to display the You can search channels manually in your area. menu. To exit the menu, press EXIT. to select [ATV Manual Tuning], then press OK. Channel Settings to select [Current CH], then use You can edit the channel settings. -
Page 19: Screen Settings
Screen Settings [Picture Mode] You can edit the screen settings in PC mode. to select [Picture Mode], then press to select [SCREEN]. to select [Dynamic], [Standard], [Mild] or [Personal], then press OK. Auto Adjust • You can change picture mode easily using P MODE on the H-Offset V-Offset Remote Control. -
Page 20: Sound Adjustment
Sound Adjustment [Surround Sound] You can adjust the sound settings according to your You can set to the sound modes for more spatial or personal preferences. surround sound reproduction. to select [SOUND]. to select [Surround Sound], and then select [On] or [Off] using [SPDIF Mode] Sound Mode Standard... -
Page 21: Setup Adjustment
[Auto Standby] [Aspect Ratio] You can set the time to turn off the display power You can change TV Screen Display mode. automatically. to select [Aspect Ratio], then press In spite of this setting, the unit goes into standby mode automatically if there is no signal input from the to select the display mode you want, antenna terminal and no user operation for 15 minutes. -
Page 22: Toll Free Telephone : 1-800-419-6708
Servicing • Should your unit become inoperative, do not try to correct the problem of your own. There are no user- serviceable parts inside. Funai India Pvt Ltd Toll free telephone : 1-800-419-6708 Email ID : customer.care@funai-india.com Website : www.funai-india.com... -
Page 23: Troubleshooting Guide
TROUBLESHOOTING GUIDE Sometimes a performance problem can be easily solved by checking seemingly apparent but often overlooked possibilities. Before arranging for service, check these items. It could save you time and money. Problem Possible Remedy • Is the unit plugged in? •... -
Page 24: Specifications
SPECIFICATIONS Panel details Screen size 38.6 inches Resolution 1920 x 1080 Contrast ratio(Typical) 3000:1 Brightness Viewing angle 176/176 Picture mode 4 modes Aspect ratio 4:3/16:9/ Zoom1/Zoom2/Just Scan Audio Audio output 2 x 10W Bass adjustment Treble adjustment Sound mode 5 modes Connectivity RF input AV IN (Composite) - Page 25 Value added features Comb filter 3D NR Sleep timer HDTV Compatible(YPbPr) 480p, 720p, 1080i, 1080p PC resolution standards Up to Full HD, 1920 x1080 OSD Language English Built in tuner Power Power supply AC 100-240V (50/60Hz) + 10% / -10% Power consumption 135 W (standby: less than 1 W) Accessories...
-
Page 26: Multimedia Format
MULTIMEDIA FORMAT PHOTO File Ext. Codec Remark Progressive JPEG Max Resolution: 1024 x 768 .jpg/.jpeg Baseline JPEG Max Resolution: 15360 x 8640 Max Resolution: 9600 x 6400 .bmp Pixel Depth: 1/4/8/16/24/32 bpp Non-interlaced Max Resolution: 9600 x 6400 .png Interlaced Max Resolution: 1200 x 800 MUSIC File Ext. - Page 28 Printed in China A2UT1PH 1EMN30119 * 1 E M N 3 0 1 1 9 *...
Need help?
Do you have a question about the 39FW702 and is the answer not in the manual?
Questions and answers