
Related Manuals for Akai P80D20EP-S1


Summary of Contents for Akai P80D20EP-S1
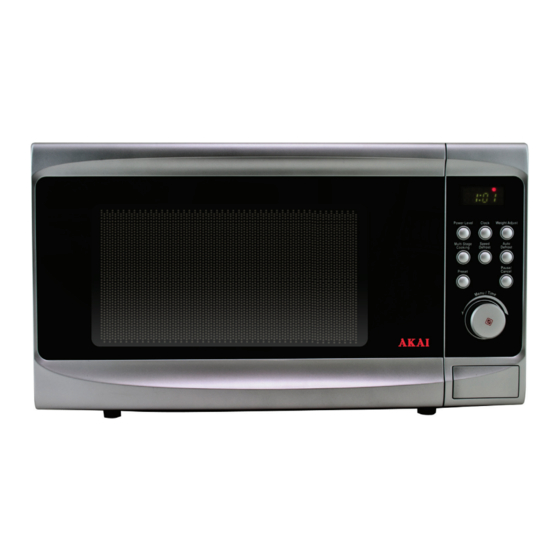
- Page 1 20L Digital Microwave Oven P80D20EP-S1 Instruction Manual AFTER SALES SUPPORT NZ: 0800 836 761 N13275 AU: 1300 886 649...
-
Page 2: Table Of Contents
Content Precautions to Avoid Possible Exposure to Excessive Microwave Energy Important Safety Instructions Installation Radio Interference Principles of Microwave Cooking Grounding Instructions Utensils Guide Know your Parts Control Panel How to Set the Oven Controls Clean & Care Instructions Troubleshooting... -
Page 3: Precautions To Avoid Possible Exposure To Excessive Microwave Energy
Precautions to Avoid Possible Exposure to Excessive Microwave Energy Do not attempt to operate this oven with the door open since open door operation can result in harmful exposure to microwave energy. It is important not to defeat or tamper with the safety interlocks. -
Page 4: Important Safety Instructions
Important Safety Instructions Please keep this instruction manual in a safe place for future reference, along with your warranty card, purchase receipt and packaging box. When correctly adhered to, these safety instructions reduce the risk of fire, electric shock and injury or exposure to excessive microwave energy: Read all instructions before using the appliance. - Page 5 16. This product is a Group 2 Class B ISM equipment. The definition of Group 2 which contains all ISM (Industrial, Scientific and Medical) equipment in which radio-frequency energy is intentionally generated and/or used in the form of electromagnetic radiation for the treatment of material, and spark erosion equipment.
-
Page 6: Installation
Installation Make sure that all the packing materials are removed from the inside of the door. WARNING: Check the oven for any damage, such as misaligned or bent door, damaged door seals and sealing surface, broken or loose door hinges and latches and dents inside the cavity or on the door. -
Page 7: Principles Of Microwave Cooking
Principles of Microwave Cooking Arrange food carefully. Place thickest areas towards outside of dish. Watch cooking time. Cook for the shortest amount of time indicated and add more as needed. Food severely overcooked can smoke or ignite. Cover foods while cooking. Covers prevent spattering and help foods to cook evenly. -
Page 8: Utensils Guide
Utensils Guide The ideal material for a microwave utensil is transparent to microwave, it allows energy to pass through the container and heat the food. Microwave cannot penetrate metal, so metal utensils or dishes with metallic trim should not be used. Do not use recycled paper products when microwave cooking, as they may contain small metal fragments which may cause sparks and/or fires. -
Page 9: Know Your Parts
Metal Rack Aluminum Foil & Foil Containers Know your Parts PART NAMES Door Safety Lock System Oven Window Turntable Roller Control Panel Wave Guide Glass Tray Door Release Button... -
Page 10: Control Panel
Control Panel CONTROL PANEL MENU ACTION SCREEN Cooking time, power, action indicators, MENU ACTION SCREEN and clock time are displayed. Cooking time, power, action indicators clock time are displayed. POWER LEVEL POWER LEVEL Touch this button a number of times to ... -
Page 11: How To Set The Oven Controls
How to Set the Oven Controls Each time a button is touched, a beep will sound to acknowledge the touch. SETTING DIGITAL CLOCK With the oven ready for input, touch the CLOCK button to set the digital clock in 24 hours cycle. - Page 12 AUTO DEFROST The oven allows the defrosting of meat, poultry, and seafood. The time and the defrosting power are adjusted automatically once the weight is programmed. FOR EXAMPLE: Suppose you want to defrost 600g of shrimp. Place the shrimp to be defrosted into the oven. Press AUTO DEFROST button.
- Page 13 MULTI- STAGE COOKING The oven can be programmed for up to 2 automatic cooking sequences. The oven has the ability to be programmed to do several consecutive functions. Suppose you want set the following cooking program: 1st stage: Cook for 5 minutes at 100%; 2nd stage: Cook for 10 minutes at 60%.
- Page 14 Code Food/cooking mode Turn MENU/TIME dial to indicate category of food. Press WEIGHT ADJUST to select weight. Milk/coffee (200ml/share) The result of auto cooking depends on factors Rice (g) such as fluctuation of voltage, the shape Spaghetti (g) and size of food, your personal preference of certain foods and even how well you happen Potato (230g/each) to place food in the oven.
-
Page 15: Clean & Care Instructions
Clean & Care Instructions Turn off the oven and remove the power plug from the wall socket before cleaning. Keep the inside of the oven clean. When food splatters or spilled liquids adhere to oven walls, wipe with a damp cloth. Mild detergent may be used if the oven gets very dirty. -
Page 16: Troubleshooting
Troubleshooting If the oven fails to operate: Check to ensure that the oven is plugged in securely. If it is not, remove the plug from the outlet, wait 10 seconds, and plug it in again securely. Check for a blown circuit fuse or a tripped main circuit breaker. If these seem to be operating properly, test the outlet with another appliance.
Need help?
Do you have a question about the P80D20EP-S1 and is the answer not in the manual?
Questions and answers