
Subscribe to Our Youtube Channel
Related Manuals for Akai P90N30AP-S3


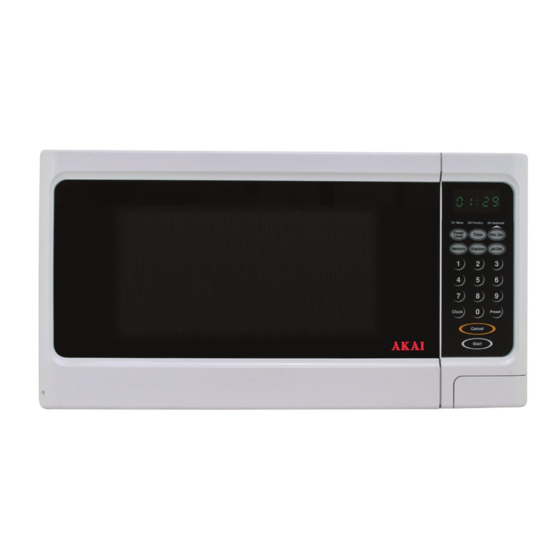
Summary of Contents for Akai P90N30AP-S3
- Page 1 30L Digital Microwave Oven P90N30AP-S3 Instruction Manual AFTER SALES SUPPORT NZ: 0800 836 761 N13275 AU: 1300 886 649...
-
Page 2: Table Of Contents
PRECAUTIONS TO AVOID POSSIBLE EXPOSURE TO EXCESSIVE MICROWAVE ENERGY IMPORTANT SAFETY INSTRUCTIONS SPECIFICATIONS INSTALLATION RADIO INTERFERENCE MICROWAVE COOKING PRINCIPLES GROUNDING INSTRUCTIONS BEFORE YOU CALL FOR SERVICE UTENSILS GUIDE KNOW YOUR PARTS CONTROL PANEL HOW TO SET THE OVEN CONTROLS Setting The Clock Setting Cooking Times And Power Levels Preset Express... -
Page 3: Precautions To Avoid Possible Exposure To Excessive Microwave Energy
Precautions to Avoid Possible Exposure to Excessive Microwave Energy Do not attempt to operate this oven with the door open since open door operation can result in harmful exposure to microwave energy. It is important not to defeat or tamper with the safety interlocks. -
Page 4: Important Safety Instructions
Important Safety Instructions When using electrical appliance basic safety precautions should be followed, including the following: WARNING: To reduce the risk of burns, electric shock, fire, injury to persons or exposure to excessive microwave energy: The appliance is not intended for use by persons (including children) with reduced physical, sensory or mental capabilities, or lack of experience and knowledge, unless they have been given supervision or instruction concerning use of the appliance by a person responsible for their safety. -
Page 5: Specifications
16. Utensils should be checked to ensure that they are suitable for use in microwave oven. 17. WARNING: It is hazardous for anyone other than a trained person to carry out any service or repair operation which involves the removal of any cover which gives protection against exposure to microwave energy. -
Page 6: Installation
Installation Make sure that all the packing materials are removed from the inside of the door. WARNING: Check the oven for any damage, such as misaligned or bent door, damaged door seals and sealing surface, broken or loose door hinges and latches and dents inside the cavity or on the door. -
Page 7: Grounding Instructions
Principles of Microwave Cooking Arrange food carefully. Place thickest areas towards outside of dish. Watch cooking time. Cook for the shortest amount of time indicated and add more as needed. Food severely overcooked can smoke or ignite. Cover foods while cooking. Covers prevent spattering and help foods to cook evenly. Turn foods over once during microwave cooking to speed cooking of such foods as chicken and hamburgers. -
Page 8: Before You Call For Service
Before you call for a service If the oven fails to operate: Check to ensure that the oven is plugged in securely. If it is not, remove the plug from the outlet, wait 10 seconds, and plug it in again securely. Check for a blown circuit fuse or a tripped main circuit breaker. -
Page 9: Know Your Parts
Know your Parts Cancel Door Safety Lock System Oven Window Turntable Roller Shaft Door Release Button Control Panel Wave Guide Glass Tray... -
Page 10: Control Panel
Control Panel DISPLAY Cooking time, power, indicators and present time are displayed. POWER LEVEL Use to set power level and to check power level during cooking. TIME Use to set cooking time. WEI. DEF. Use to defrost frozen meat, poultry and seafood by weight. -
Page 11: How To Set The Oven Controls
How to Set the Oven Controls Each time a button is touched, a beep will sound to acknowledge the touch. SETTING DIGITAL CLOCK With the oven ready for input, touch the CLOCK button to set the digital clock in 12 hours cycle. FOR EXAMPLE: Suppose you want to set the oven clock time to 8:30. -
Page 12: Preset
B - Two-stage Cooking Some recipes require different stages of cooking at different temperatures. SET STAGE 1: Follow steps 1 and 2 in “One-stage Cooking”. DO NOT TOUCH START PAD. SET STAGE 2: Touch MEMORY pad then enter proper cooking time and (lower) power level. (Most 2-stage recipes use lower power for second stage.) Touch START pad. -
Page 13: Setting "Jet Defrost
SETTING “JET DEFROST” Touch JET DEF. pad. Enter desired defrosting time by touching correct number pads. Touch START pad. NOTE: The maximum time you can set is 99 minutes and 99 seconds. SETTING “WEIGHT DEFROST” Suppose you want to defrost 600g shrimp. Touch WEI. -
Page 14: Setting "Safety Lock
The oven has the ability to be programmed to do several consecutive functions. Suppose you want to set the following cooking program: (1) JET DEFROST; (2) 1st stage: Cook for 5 minutes at 100%; (3) 2nd stage: Cook for 10 minutes at 50%. Steps: Touch CANCEL pad. - Page 15 Clean & Care Instructions Turn off the oven and remove the power plug from the wall socket before cleaning. Keep the inside of the oven clean. When food splatters or spilled liquids adhere to oven walls, wipe with a damp cloth. Mild detergent may be used if the oven gets very dirty. Avoid the use of spray and other harsh cleaners as they may stain, streak or dull the door surface.
-
Page 16: Troubleshooting
Troubleshooting If the oven fails to operate: Check to ensure that the oven is plugged in securely. If it is not, remove the plug from the outlet, wait 10 seconds, and plug it in again securely. Check for a blown circuit fuse or a tripped main circuit breaker. If these seem to be operating properly, test the outlet with another appliance.
Need help?
Do you have a question about the P90N30AP-S3 and is the answer not in the manual?
Questions and answers