
Related Manuals for Sony MHC-V3


Summary of Contents for Sony MHC-V3
- Page 1 4-534-717-12(1) HOME AUDIO Getting Started SYSTEM Disc/USB Playback USB Transfer Operating Instructions Tuner Bluetooth Sound Adjustment Other Operations Additional Information MHC-V3...
- Page 2 Bluetooth SIG, Inc. and any use of such marks by Sony Corporation is under license. Other trademarks and trade names are those of their respective owners. This appliance is classified as a CLASS 1 •...
- Page 3 • iPhone and iPod touch are trademarks of Apple Inc., registered in the U.S. and other countries. App Store is a service mark of Apple Inc. • “Made for iPod” and “Made for iPhone” mean that an electronic accessory has been designed to connect specifically to iPod or iPhone, respectively, and has been certified by the developer to meet Apple...
-
Page 4: Table Of Contents
Table of Contents Guide to parts and controls..5 Sound Adjustment Adjusting the sound ....21 Getting Started Creating your own sound Hooking up the system effect .......... 21 securely........8 Creating a party atmosphere Setting the clock ......9 (DJ EFFECT)...... -
Page 5: Guide To Parts And Controls
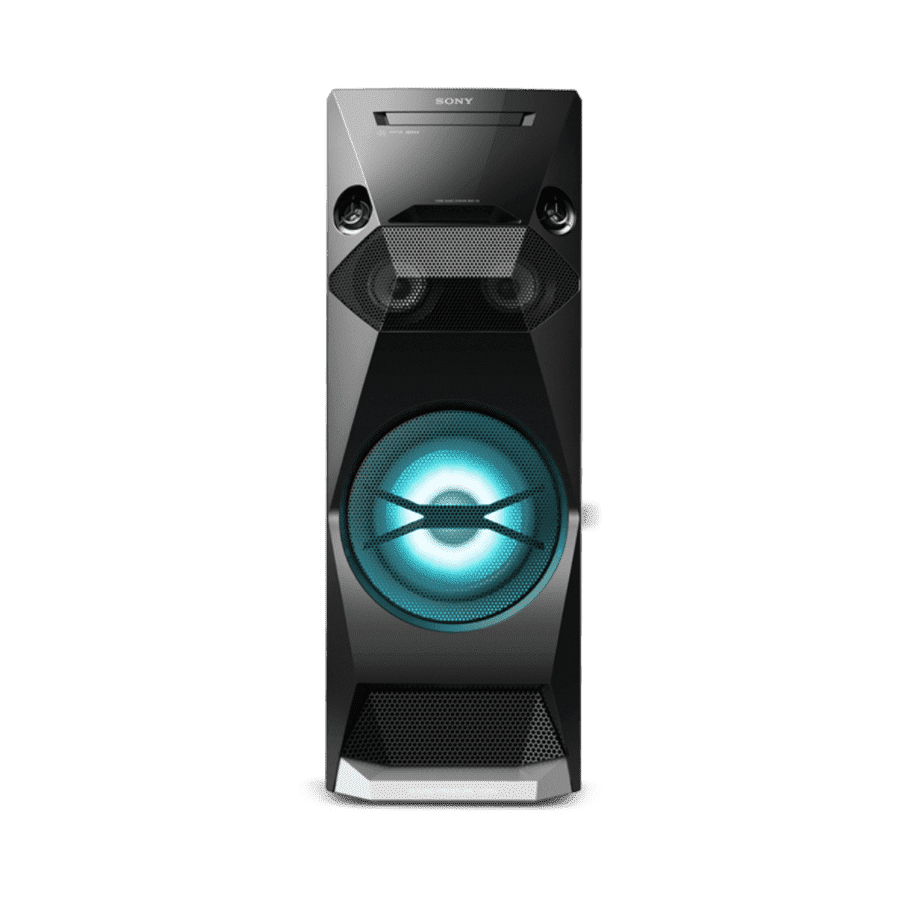
Guide to parts and controls This manual mainly explains operations using the remote control, but the same operations can also be performed using the buttons on the unit having the same or similar names. Unit Note When pressing the buttons on the unit, press on the printings of the buttons. - Page 6 Remote control RM-SCU37B Unit: l/L (go back/go forward) Remote control: ./> (go back/go forward) Select a track or file. Unit: TUNING +/– Remote control: +/– (tuning) Tune to the station you want during TUNER function. +/– (select folder) Select a folder on an MP3 disc or a USB device.
-
Page 7: Disc Tray
I ENTER TUNER/BAND Enter the settings. Select the TUNER function. J REC TO USB V TUNER MEMORY (page 15) Transfer music from a disc to the Preset the radio station. connected USB device. W PLAY MODE/TUNING MODE K EQ (page 21) Select the play mode of an AUDIO Select the preset sound effect. -
Page 8: Getting Started
Getting Started Hooking up the system securely Extend the FM wire antenna horizontally Audio cord (not supplied) To the wall outlet A FM ANTENNA jack C Power Find a location and an orientation that Connect the AC power cord (supplied) to the system, then plug it into a wall socket. -
Page 9: Setting The Clock
Inserting batteries Changing the display mode Insert the two supplied R6 (size AA) batteries, matching the polarities as shown below. The demonstration appears in the display panel once you plug the AC power cord into a wall socket. Press DISPLAY repeatedly while the system is turned off. -
Page 10: Disc/Usb Playback
Before using a USB Disc/USB Playback device with this system Playing a disc Check the information on the website about compatible USB devices (page 25). Press CD. Press Z on the unit. To select the playback source or transfer destination (USB Memory Load a disc with the label side Select) facing up on the disc tray. -
Page 11: Playing A Usb Device
Playing a USB device Using play mode The audio formats that can be played back Playing in original order by this system are as follows: – MP3: file extension “.mp3” (Normal Play) – WMA: file extension “.wma” – AAC: file extension “.m4a”, “.mp4” or Press PLAY MODE repeatedly when “.3gp”... -
Page 12: Program Play
To delete the last step from the Creating your own program program list (Program Play) Press CLEAR when playback is stopped. You can make a program of up to 25 steps To cancel Program Play in the order you want them to be played When playback is stopped, press PLAY back. -
Page 13: Usb Transfer
• 128 KBPS: encoded MP3 files have USB Transfer smaller file size and lower audio quality. • 256 KBPS: encoded MP3 files have Transferring music bigger file size but higher audio quality. You can transfer music from a disc To exit the options menu, press (AUDIO CD or MP3 disc only) to a USB OPTIONS. - Page 14 For Synchronized Transfer: Folder and file generation rules When the transfer is completed, the disc and the USB device stop When transferring to a USB device, a automatically. “MUSIC” folder is created directly below “ROOT”. Folders and files are generated For REC1 Transfer: within this “MUSIC”...
-
Page 15: Tuner
Presetting radio stations Tuner You can store up to 20 FM stations as Listening to the radio your favorite stations. Tune to the station you want. Press TUNER/BAND to select FM band. Press TUNER MEMORY. For automatic scanning: Preset number Press TUNING MODE repeatedly to select “AUTO”. -
Page 16: Bluetooth
Setting the Bluetooth Bluetooth audio codecs About the Bluetooth You can receive data in AAC codec wireless technology format from a Bluetooth device. Use the buttons on the unit to perform this Bluetooth wireless technology is a short- operation. range wireless technology that enables wireless data communication between Press BLUETOOTH to select digital devices. -
Page 17: Connecting A Smartphone With One Touch (Nfc)
• Depending on your smartphone, you can Connecting a use the NFC function without installing the app. In this case, the operations and smartphone with one specifications may differ. For details, refer to the operating instructions of your touch (NFC) smartphone. -
Page 18: Play Music From Smartphone
Touch the smartphone to the N-Mark on For details, refer to the operating the system again. instructions of your Bluetooth device. Select “SONY:MHC-V3”on the display of the Bluetooth device. Listening to music If passkey is required on the Bluetooth wirelessly on a device, enter “0000”. -
Page 19: Setting The Bluetooth Standby Mode
To disconnect the Bluetooth device Playing music from a Press BLUETOOTH on the unit. Bluetooth device “BT AUDIO” appears in the display panel. You can operate a Bluetooth device by Depending on the Bluetooth device, the connecting the system and the Bluetooth Bluetooth connection may be canceled device using AVRCP. -
Page 20: Setting The Bluetooth Signal
Using “SongPal” via Press V/v repeatedly to select “ON” or “OFF”, then press Bluetooth ENTER. Press "/1 to turn off the system. About App When the Bluetooth standby mode is A dedicated app for this model is set to on, the system waits for a available on both Google Play and App Bluetooth connection even when the Store. -
Page 21: Sound Adjustment
Sound Adjustment Press V/v repeatedly to adjust the equalizer level, then press ENTER. Adjusting the sound Frequency band Equalizer level Do this Reinforce the Press BASS BAZUCA on bass and create the unit. a more powerful sound Repeat step 3 to adjust the level of other frequency bands and Reduce the bass Hold down BASS... -
Page 22: Other Operations
To turn off the effect Other Operations Press DJ EFFECT repeatedly to select “DJ OFF”. Viewing information in Notes the display panel • The DJ EFFECT is automatically turned off when you turn off the system or change the function. •... -
Page 23: Using The Timers
Using the timers Press ./> repeatedly to select the sound source you want, then press ENTER. The system offers two timer functions. If you use both timers, the Sleep Timer has Press "/1 to turn off the system. priority. Note Sleep Timer If the system remains on, the timers will not take effect. -
Page 24: Deactivating The Buttons On The Unit (Child Lock)
Note Press V/v repeatedly to select The system may enter standby mode “AutoSTBY”, then press ENTER. automatically if the volume level of the connected equipment is too low. Adjust the Press V/v repeatedly to select volume level of the equipment. To turn off “ON”... -
Page 25: Additional Information
• Discs of non-standard shape (e.g., heart, devices and Bluetooth devices. square, star, etc.) For customers in Latin America: • Discs that have adhesive tape, paper, or <http://esupport.sony.com/LA> sticker attached to them For customers in other countries/regions: • Rental or used discs with attached seals <http://www.sony-asia.com/support>... -
Page 26: Troubleshooting
“LOCKED” appears in the display (page 9) and timer (page 23) again. panel. There is no sound. • Consult your nearest Sony dealer or • Adjust the volume. local authorized Sony service facility. • Check the connection of the optional The disc tray does not close. - Page 27 Z on the unit to eject again. the disc. • If the transfer and erase operations are • Consult your nearest Sony dealer. repeated multiple times, the file Playback does not start. structure within the USB device •...
- Page 28 USB device that is being used, files may not device. If this display pattern persists, be played back. contact your nearest Sony dealer. • The system can play back to a depth of 8 folders only. Erroneous display.
- Page 29 Tuner The sound skips or fluctuates, or the connection is lost. • The system and the Bluetooth device are There is severe hum or noise, or too far apart. stations cannot be received. (“ST” • If there are obstacles between the flashes in the display panel.) system and your Bluetooth device, •...
-
Page 30: Messages
OFF TIME NG Messages The on time and off time of Play Timer are the same. One of the following messages may PROTECT appear or flash in the display panel during The USB device is write-protected. operation. PUSH STOP CANNOT PLAY You tried to perform an operation that can A disc that cannot be played back was be performed only when the playback is... - Page 31 TV, wait 15 to 30 minutes, and turn communication using Bluetooth technology. it back on. If there is no improvement, move the • Sony cannot be held liable in any way for system far away from the TV. damages or other loss resulting from information leaks during communication using Bluetooth technology.
-
Page 32: Specifications
Sampling frequencies • Bluetooth communication is not necessarily guaranteed with all Bluetooth devices that WMA: 44.1 kHz have the same profile as this system. AAC: 44.1 kHz • Bluetooth devices connected with this system Supported USB device must comply with the Bluetooth specification Mass Storage Class prescribed by the Bluetooth SIG, Inc., and Maximum current... - Page 33 Bluetooth section General Communication system Power requirements Bluetooth Standard version 3.1 Chilean and Bolivian models: Output AC 220 V – 240 V, 50 Hz Bluetooth Standard Power Class 2 Other models: Maximum communication range AC 120 V – 240 V, 50/60 Hz Line of sight approx.
- Page 36 ©2014 Sony Corporation Printed in Malaysia...
Need help?
Do you have a question about the MHC-V3 and is the answer not in the manual?
Questions and answers