Cisco SRP527W User Manual
Dot (digital office technology)
Hide thumbs
Also See for SRP527W:
- Administration manual (229 pages) ,
- Quick start manual (17 pages) ,
- User manual (21 pages)
Table of Contents
Advertisement
Advertisement
Table of Contents

Related Manuals for Cisco SRP527W


Summary of Contents for Cisco SRP527W
- Page 1 Cisco SRP527W Router DOT (Digital Office Technology)™ User Guide July 2013...
-
Page 2: Table Of Contents
Telstra Corporation Limited. Words mentioned in this book that are known to be trademarks, whether registered or unregistered, have been capitalised or use initial capitals. Terms identified as trademarks include Cisco®, Microsoft®, Microsoft Windows®, Apple®, AirPort®, Mac®, Linksys®. -
Page 3: Section 1. What's In The Box
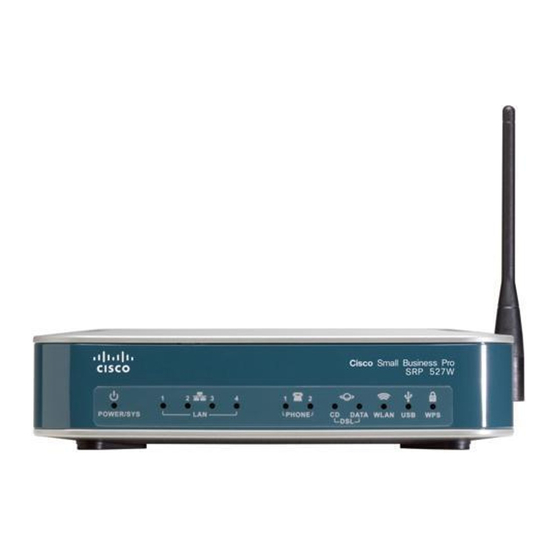
Section 1. What’s in the Box Router (Cisco® Small Business Pro – SRP527W) Figure 1 Cisco SRP52W Wi-Fi Router The router connects all your equipment (like phones, computers, etc.) to the Internet. Using cables or a wireless (Wi-Fi) connection, your equipment connects to the router, and then the router connects to the Internet. -
Page 4: Section 2. Setting Up Your System
Table 1. It should be noted that not all the lights will appear flashing or on at the same time. Table 1 Cisco Router function lights – S – F... -
Page 5: Using Wireless (Wi-Fi) Networking
– S – F ABEL IGHT OLID REEN IGHT LASHING DSL CD When the router is connected to the When an ADSL service is detected Telstra Broadband network DSL Data This light will either be flashing or OFF. When there is ADSL activity on the line If turned Off, there is no ADSL activity WLAN When the wireless transmitter is... -
Page 6: Adding Another Computer To The Wi-Fi Network
Adding another computer to the Wi-Fi network Once your Wi-Fi network is set up, you can add new computers to it. All computers on the Wi-Fi network will share Internet access without needing any cables. Note: To add a new computer to the Wi-Fi network, you’ll need your network name and password. -
Page 7: Finding Or Changing Your Network Name (Ssid) And Password (Wpa-Psk) Codes
5. Follow the on-screen instructions to finish setting up the computer. Follow steps 1-5 listed above for each computer you want to add to the Wi-Fi network. Finding or changing your network name (SSID) and password (WPA-PSK) codes Starting with a computer that is ALREADY on the Wi-Fi network, insert the Self-Install CD. The self- install software will begin automatically (if you’re using a Mac®, double-click the DOT icon on your desktop). -
Page 8: Section 3. Remote Working (Working Away From Your Office)
Section 3. Remote Working (working away from your office) Remote working allows users to connect to the organisation’s local area network from external locations, for example, from home. To enable this functionality a username and password must be created for the organisation and for each individual user. - Page 9 Figure 7 Installing Remote facilities 3. Select ‘Modify existing installation’ and press the Next button (Figure ). Figure 8 Modify Existing Installation 4. To set-up or disable Remote Working for your company, click on the ‘Set up or Disable Remote Working (VPN)’...
- Page 10 Figure 10 Confirm Selections 6. After selecting Start Installation you will see the following page (Figure ). This page has two intermediate steps. 7. First step is to create the company’s secure credentials. Complete the section Company Security by creating a unique Remote Working Group Name and Password. Figure 11 Remote Working (VPN) Setup - Company Credentials 8.
- Page 11 Figure 12 Remote Working (VPN) Setup - User Security 9. Repeat the steps for each additional user who requires remote access. NOTE: you must inform each user of the Username and Password that you have created for them. Press Next when you have created all user’s credentials.
-
Page 12: Set-Up Remote Working Client On Individual Pcs
Figure 14 Installation files link Now you are ready to install the remote working software on each user’s PC. Prior to doing so you must provide each user with the TelstraDB.PCF file, which is found in the “Digital Business” folder on your PC. Ask each user to save this file on the PC they will use to remotely access your company’s network. - Page 13 Figure 16 Setup Remote Working (VPN) Client on PC 4. Click Start Installation Figure 17 Select Options Figure 18 Confirm and start installation 5. When you see the following screen click Locate and select the “TelstraDB.PCF” file provided in the previous section (see Set-up Remote Working on the Router for your Business).
-
Page 14: For Mac® Users
Figure 19 Client Setup 6. Click Next. The Installation CD will start configuring the PC and installing required Cisco® Systems VPN Client application in the PC. You will see the following screen, if the installation was successful. Figure 20 Successful client installation 7. - Page 15 Figure 21 Apple Mac System Preferences 2. Click the “+” button in the Network window (Figure ) to create a new Remote Working connection. The small dialog box shown in Figure will be displayed. Figure 22 Clicking the '+' button Figure 23 The Network dialog Page 15 of 27...
- Page 16 3. Change the Interface to ‘VPN’, change the VPN Type to ‘Cisco IPSec’, and into Service Name enter a name of your choice (Figure ). Figure 24 Setting custom details 4. Click the Create button and the Service will appear in the left column (Figure ).
- Page 17 Figure 26 System details 2. Enter the following details in the Network dialog (Figure ): • Server Address: Use the Host IP address • Account Name: Use the username created for this user • Password: Use the password created for this user 3.
- Page 18 Figure 27 Final details 4. Complete the Machine Authentication form using the GroupName and GroupPwd Shared Secret: Use the GroupPwd from the TelstraDB.PCF file Group Name: Use the GroupName from the TelstraDB.PCF file 5. Click OK and click Apply. You are now ready to remotely access the router. Test your connection by doing the following: Click on Connect (Figure ).
-
Page 19: Using Remote Working
For Windows® Users To use Remote Working, do the following: Click the Windows Start button. Then select All Programs, and Cisco® System VPN Client, and VPN Client (Figure ). The VPN Client window shown in Figure will be displayed. Figure 31 Remote Working (VPN) Client icon 2. -
Page 20: For Mac® Users
Figure 32 Remote Working (VPN) Client UI 3. Enter your username and password, that was provided to you while setting up the Remote Working Client on your PC (see Set-up Remote Working Client on individual PCs). 4. You will now be connected to your company’s router from your remote location. For Mac®... -
Page 21: Section 4. Troubleshooting
Once you have access, you don’t need to continue with the remaining steps. Note: These steps are for computers that are physically connected to the router (the router is the device labelled CISCO®). If the computer without Internet is connected wirelessly, see Internet not working on a wireless computer below. - Page 22 “Digital Office Technology” when prompted. Issues with your Digital Phone Should you have any problems with your Cisco Digital Phone, rebooting your phone as the first step may resolve many common problems. To do this: Press the SETUP button on your phone, scroll down and select the Reboot option.
- Page 23 Section 9. Troubleshooting ROBLEM UGGESTED OLUTION will not be able to use your digital phones. If internet connectivity is not available, please switch OFF and ON the router. This may restore the internet connection. If the problem persists please contact 13 2000 and say “Digital Office Technology”...
- Page 24 Section 9. Troubleshooting ROBLEM UGGESTED OLUTION Phone doesn’t ring, however Check Ring Type is NOT set to “No Ring”. indicator light flashes •Press the SETUP button on the phone •Select Ring Tone (option 4) •Press the change soft key •Scroll onto another Ring type •Press the select soft key Phone rings once and when you Login into CommPilot, go to the Call Forwarding Always menu and...
- Page 25 Section 9. Troubleshooting ROBLEM UGGESTED OLUTION Integrated Access Device. The DOT Configuration email was sent to you before your DOT Service was activated. After following the steps above, check whether your machine has a connection. For a fax machine, check the dial tone. For EFTPOS, consult your machine’s documentation to find how to check the connection.
-
Page 26: Section 5. Acronyms, Abbreviations And Glossary
Section 5. Acronyms, Abbreviations and Glossary CRONYM BBREVIATION EANING ADSL Asymmetric Digital Subscriber Line Compact Disc Digital Subscriber Line EFTPOS Electronic Funds Transfer Point of Sale Facsimile Gigabyte Integrated Access Device Local Area Network Light Emitting Diode Mac® Macintosh Megabyte Personal Computer (in this instance refers to both Microsoft®... - Page 27 Section 9. Troubleshooting Need more support? If you have questions beyond this guide, we want to help. To learn more about your DOT tools and features, visit the DOT Support page at telstra.com/dot/support To speak with a DOT consultant, or set up a DOT training session, phone us on 13 2000 and say “Digital Office Technology”...
Need help?
Do you have a question about the SRP527W and is the answer not in the manual?
Questions and answers