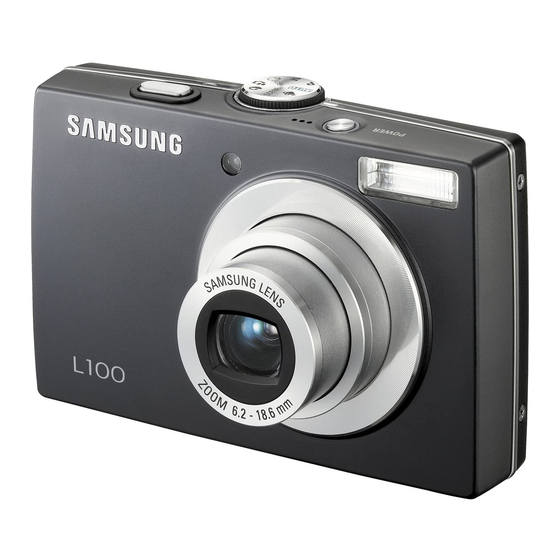
Samsung L100 User Manual
Digital camera
Hide thumbs
Also See for L100:
- Quick start manual (118 pages) ,
- User manual (102 pages) ,
- Brochure (4 pages)
Table of Contents
Advertisement
Quick Links
Advertisement
Table of Contents

Related Manuals for Samsung L100


Summary of Contents for Samsung L100
-
Page 2: Getting To Know Your Camera
(e.g. for a trip or an important event) to avoid disappointment. Take a picture. (p.20) Take a picture Samsung takes no responsibility for any loss or damage that may result from camera malfunction. Keep this manual in a safe place. - Page 3 Switch off the camera, and then disconnect the power source. You must Battery and camera may become hot during prolonged use and it may contact your dealer or Samsung Camera Service centre. Do not continue result in camera malfunction. Should this be the case, allow the camera to to use the camera as this may cause a fi...
-
Page 4: Table Of Contents
Caution Content CAUTION indicates a potentially hazardous situation which, if not avoided, READY System chart may result in a minor or moderate injury. Included items Leaking, overheating, or damaged battery could result in fi re or injury. Optional Items Identifi cation of features - Use battery with the correct specifi... - Page 5 Content How to use the SCENE modes Metering How to use the MOVIE mode Drive mode Recording the movie without sound Pausing while recording a movie White balance (Successive Recording) Exposure compensation 25 Things to Watch Out for When Taking Pictures 43 Setting up the recording function using the LCD 26 Setting up the recording function using the camera monitor...
- Page 6 Content Printer button 67 PictBridge : Print Setting Delete button 67 PictBridge : Reset E (Effect) button : Resize E (Effect) button : Rotating an image 68 Sound menu SETUP E (Effect) button : Colour 68 Sound E (Effect) button : Image editing Volume Start up sound Red eye Removal...
- Page 7 83 Removing the removable disk 84 Setting up the USB Driver for MAC 84 Using the USB Driver for MAC 85 Removing the USB Driver for Windows 98SE 85 Samsung Master 88 Specifi cations APPENDIX 91 Important notes 93 Warning indicator...
-
Page 8: System Chart
System chart Please check that you have the correct contents before using this product. The contents can vary depending on the sales region. To buy the optional equipment, contact your nearest Samsung dealer or Samsung service centre. Included items Rechargeable battery... -
Page 9: Identifi Cation Of Features
Identifi cation of features Front & Top Mode dial Power button Shutter button Microphone Speaker Flash AF sensor/Self-timer lamp USB / AV connection terminal Lens/ Lens cover... -
Page 10: Back
Identifi cation of features Back Camera status lamp Zoom T button (Digital zoom) Zoom W button (Thumbnail) E (Effect) button LCD monitor Eyelet for camera strap Fn/Delete button 5-function button FD (Face Detection) button Play mode/Print button... -
Page 11: Bottom
Identifi cation of features Bottom 5 Function button Battery holder Function Description / Battery chamber Information / Up button MENU/OK button www.samsungcamera.com Flash / Self-timer / Left button Right button Memory card slot Battery chamber cover Tripod socket Macro / Down button Play &... -
Page 12: Self-Timer Lamp
Identifi cation of features Self-timer lamp Mode icon Refer to page 20~24 for more information about the camera mode setting. Icon Status Description For the fi rst 8 seconds, the lamp blinks at 1 second MODE Auto Program Manual intervals. -
Page 13: Connecting To A Power Source
Using the fl ash on every second 30fps frame rate shot. Using the camera for 5 minutes and then Powering it off for 1 minute. These fi gures are measured under Samsung’s standard conditions and shooting conditions and may vary depending on the user’s methods. - Page 14 Connecting to a Power Source You can charge the rechargeable battery SLB-10A SLB-10A by using the SAC-47 KIT Important information about USB cable usage. which consists of the AC adapter (SAC-47) and the USB cable (SUC-C3). Use a USB cable (SUC-C3) with the correct specifi cation. When the SAC-47 and SUC-C3 are combined, they can be used as an AC If the camera is connected to the PC through a USB hub: connect cable.
- Page 15 Connecting to a Power Source How to charge the rechargeable battery (SLB-10A) Charging LED of the AC Adapter Charging LED Being Charged Red LED is on Charging is complete Green LED is on Charging error Red LED is off or blinking Being discharged Orange coloured LED is on - If you insert the fully discharged battery to charge it, do not turn on the...
-
Page 16: Inserting The Battery
Inserting the battery Inserting the memory card Insert the battery as shown Insert the memory card as shown. - If the camera does not turn on after - Turn off the camera’s power before you have inserted battery, please inserting the memory card. www.samsungcamera.com www.samsungcamera.com check whether the battery is inserted... -
Page 17: Instructions On How To Use The Memory Card
Turn off the camera power whenever the memory card is being inserted recording, deleting (formatting) or reading. or removed. Samsung cannot be held responsible for lost data. Repeated use of the memory card will eventually reduce the memory It is advisable to copy important data onto other media as back-up e.g. - Page 18 Instructions on how to use the memory card The camera can use SD/ SDHC Memory Cards and MMC (Multi Media When using a 256MB MMC memory, the specifi ed shooting capacity will Cards). be as follows. These fi gures are approximate as image capacities can be affected by variables such as subject matter and memory card type.
-
Page 19: When Using The Camera For The First Time
When Using the Camera for the First Time Charge the rechargeable battery fully before using the camera for the fi rst Setting up the date, time and date type time. 1. Select the [Date&Time] menu by pressing When the camera is turned on for the fi rst time, a menu will be displayed the UP/ DOWN button and press the to set date / time and language in the LCD monitor. -
Page 20: Lcd Monitor Indicator In Recording Mode
LCD monitor indicator in recording mode The LCD monitor displays information about the shooting functions and Description Icons Page selections. Sharpness p.37 Color / Saturation p.36/38 Auto Focus Frame p.44 ... -
Page 21: Starting The Recording Mode
Starting the recording mode How to use the AUTO mode ( How to use the PROGRAM mode ( ) Please select this mode for quick and easy picture taking with minimal Selecting the automatic mode will confi gure the camera with optimal user interaction. -
Page 22: How To Use The Manual Mode
Starting the recording mode How to use the MANUAL mode ( ) How to use the DIS mode ( You can manually confi gure all functions aperture value and shutter speed. This mode will reduce the effect of camera shake and help you get a well-exposed image in dim conditions. -
Page 23: Using The Photo Help Guide Mode
Starting the recording mode Available functions of the photo help guide Using the PHOTO HELP GUIDE mode ( Features to use when the image is out of focus Helps the user learn the correct picture taking method Features to counter camera shake and includes solutions for potential problems that may Features to use in low light conditions occur. -
Page 24: How To Use The Portrait Mode
Starting the recording mode The scene modes are listed below. How to use the PORTRAIT mode ( Please select this mode for quick and easy portraits. Mode Icon Description 1. Select the portrait mode by rotating the mode dial. Use this for shooting still images at night or ... -
Page 25: How To Use The Movie Mode
Starting the recording mode 5. Select the [RECORDING] menu by pressing the Left / Right button. How to use the MOVIE mode ( 6. Press the Down button to select the [Voice Mute] menu and press the A movie can be recorded for as long as the available recording time of the Right button. -
Page 26: Camera Shake Warning
Things to Watch Out for When Taking Pictures Pressing the shutter button down half way. Under certain conditions the auto focus system may not perform as expected. Lightly press the shutter button to confi rm focus and fl ash battery charge. Press the shutter button all way down to take the picture. -
Page 27: Setting Up The Recording Function Using The Camera Buttons
Setting up the recording function using the camera buttons The recording mode function can be set up by using the camera buttons. ZOOM W / T button POWER button If the menu is not displayed, this button works as the OPTICAL ZOOM or DIGITAL ZOOM button. Used for turning the camera’s power on / off. - Page 28 Setting up the recording function using the camera buttons WIDE Zoom Images taken using the digital zoom may take a little longer for the camera to process. Allow time for this to take place. Optical zoom WIDE : Pressing the ZOOM W button. This will zoom out If the Zoom buttons are being pressed during the Movie shots, the from the subject i.e.
-
Page 29: Function Description / Info / Up Button
Setting up the recording function using the camera buttons Function Description / Info () / Up button Macro () / Down button While the menu is showing, the Up button operates as a direction button. While the menu is showing, press the DOWN button to move from the main menu to a sub menu, or to move down the sub menu. - Page 30 Setting up the recording function using the camera buttons Types of focus mode and focus range (W : Wide, T : Tele) Available focusing method, by recording mode (Unit: cm) : Selectable, : Infi nity focus range) Auto ( Program ( Mode Auto macro...
-
Page 31: Focus Lock
Setting up the recording function using the camera buttons Flash ( ) / Left button Focus lock To focus on a subject not positioned in the centre of the picture, use the focus When the menu is displayed on the LCD monitor, lock function. - Page 32 Setting up the recording function using the camera buttons If you press the shutter button after selecting the Auto, Fill-in, Slow Flash mode indicator synchro fl ash, the fi rst fl ash fi res to check the shooting condition Icon Flash mode Description (Flash range and Power ratio of fl...
-
Page 33: Self-Timer / Right Button
Setting up the recording function using the camera buttons Available fl ash mode, by recording mode Self-timer () / Right button : Selectable) When the menu is displayed on the LCD monitor, pressing the Right button ... - Page 34 Setting up the recording function using the camera buttons Selecting the self-timer Motion Timer 1. Rotate the Mode dial to select a desired Motion Icon & Self-timer lamp RECORDING mode. Pressing the Shutter button after Blink (1 second interval) 2.
-
Page 35: Menu / Ok Button
Setting up the recording function using the camera buttons FD (Face Detection) ( ) button MENU / OK button MENU button This mode detects the face position of the subject automatically and then sets the focus and exposure. Select this mode for quick and easy face portraits. - When you press the MENU button, a menu related to each camera mode will be displayed on the LCD monitor. - Page 36 Setting up the recording function using the camera buttons This function can detect up to 9 people. Self Portrait When the camera recognises many people at the same time, it will When taking self-portraits, it automatically detects the location of the focus on the nearest person.
- Page 37 Setting up the recording function using the camera buttons E (Effect) button E (Effect) button : Colour It is possible to add special effects to your images by using this button. By using the camera’s digital processor, it is possible to add special effects to your images - Still image mode : You can select the colour and image adjust menu.
-
Page 38: Sharpness
Setting up the recording function using the camera buttons Custom colour : You can change the R (Red), E (Effect) button : Sharpness G (Green) and B (Blue) values Custom Color You can adjust the sharpness of the picture of the image. you are about to take. -
Page 39: Fn Button
Setting up the recording function using the camera buttons E (Effect) button : Saturation Fn button By using the camera’s digital processor, it is possible to add special effects You can use the Fn button to set the following menus. to your images : Selectable) 1. -
Page 40: How To Use The Fn Menu
Setting up the recording function using the camera buttons How to use the Fn menu Size 1. Press the Fn button in an available mode. You can select the image size appropriate for your application. 2. Select a desired menu by pressing the Up / Down button. And then a ... -
Page 41: Quality / Frame Rate
Setting up the recording function using the camera buttons Quality / Frame rate Metering If you cannot obtain suitable exposure conditions, you can change the You can select the compression ratio appropriate for your application of the captured images. The higher the compression ratio, the lower the metering method to take brighter pictures. -
Page 42: Drive Mode
Setting up the recording function using the camera buttons Drive mode You can select the ISO sensitivity when taking pictures. You can select continuous shot, and AEB (Auto Exposure Bracketing). The speed or specifi c light-sensitivity of a [Single] ( : Take one picture only. -
Page 43: White Balance
Setting up the recording function using the camera buttons White balance Using the Custom White Balance White balance settings may vary slightly depending on the shooting The white balance control allows you to adjust environment. You can select the most appropriate white balance setting for the colours to appear more natural. -
Page 44: Exposure Compensation
Setting up the recording function using the camera buttons Setting up the recording function using the LCD monitor Exposure compensation You can use the menu on the LCD monitor to set up recording functions. The items indicated by are default settings. This camera automatically adjusts the exposure according to the ambient lighting conditions. -
Page 45: Setting Up The Recording Function Using The Lcd Monitor
Setting up the recording function using the LCD monitor How to use the menu Focus Area 1. Turn on the camera and press the MENU button. A menu for each camera You can select your preferred Focus Area mode appears. according to the shooting conditions. -
Page 46: Acb
Setting up the recording function using the LCD monitor Voice Memo ACB(Auto Contrast Balance) is to adjust the You can add your voice-over to a stored still contrast automatically. When taking photos in an RECORDING image. (Max. 10 sec.) RECORDING Focus Area Focus Area environment with big exposure differences i.e. -
Page 47: Voice Recording
Setting up the recording function using the LCD monitor Voice Recording Pausing while recording a voice Using this function, you can record your favourite A voice can be recorded for as long as the voice clips into a voice recording fi le without having to available recording time (Max. -
Page 48: Scene Mode
Setting up the recording function using the LCD monitor Starting play mode SCENE mode Turn the camera on and select Play mode by pressing the play mode button ( ). The camera can now play back the images stored in the memory. Use the menu to easily confi... -
Page 49: Playing Back A Movie
Starting play mode Playing back a movie Movie capture function 1. Select the recorded movie that you want to You can capture still images from the movie. play back by using the Left/Right button. How to capture the movie 2. -
Page 50: Playing Back A Recorded Voice
Starting play mode Playing back a recorded voice Playing back a voice memo 1. Select the recorded voice that you want to 1. Select a still image that has the voice play back by using the Left/Right button. memo. ... -
Page 51: Lcd Monitor Indicator In Play Back Mode
LCD monitor Indicator in play back mode Setting up the play back function using the camera buttons The LCD monitor displays shooting information about the displayed image. In Play mode, you can use the buttons on the camera to conveniently set up the Play mode functions. -
Page 52: Setting Up The Play Back Function Using The Camera Buttons
Setting up the play back function using the camera buttons Image enlargement The maximum enlargement rate in proportion to the image size 1. Select an image that you want to enlarge and Image size press the enlargement button. -
Page 53: Info / Up Button
Setting up the play back function using the camera buttons Info ( ) / Up button Play & Pause ( ) / Down button When the menu is displayed on the LCD monitor, the UP button operates as In Play mode, the play &... -
Page 54: Left / Right / Menu / Ok Button
Setting up the play back function using the camera buttons Left / Right / Menu / OK button Delete () button LEFT / RIGHT / MENU / OK buttons activate the following. This deletes images stored on the memory card. - LEFT button : While the menu is showing, the LEFT button operates 1. - Page 55 Setting up the play back function using the camera buttons E (Effect) button : Resize - A large sized image can be resized to a smaller sized image, but not vice versa. Change the resolution (size) of pictures taken. Select [Start image] ( ) to - Only JPEG images can be resized.
-
Page 56: E (Effect) Button : Rotating An Image
Setting up the play back function using the camera buttons E (Effect) button : Rotating an image E (Effect) button : Colour You can rotate the stored images by various degrees. It is possible to add colour effects to your images by using this button. 1. -
Page 57: E (Effect) Button : Image Editing
Setting up the play back function using the camera buttons Custom colour You can change the R (Red), G (Green) and ACB(Auto Contrast Balance) is to adjust the B (Blue) values of the image. Custom Color contrast automatically. 1. Select () by pressing the Up/Down button and press the OK button. -
Page 58: Contrast Control
Setting up the play back function using the camera buttons Setting up the play back function using the LCD monitor Contrast control PLAY mode functions can be changed by using the LCD monitor. In the PLAY mode, pressing the MENU button displays the menu on the LCD You can change the contrast of the image. -
Page 59: Setting Up The Play Back Function Using The Lcd Monitor
Setting up the play back function using the LCD monitor This menu is available while the camera is connected to a PictBridge Menu Tab Main Menu Sub Menu Secondary Menu Page supporting printer (direct connection to the camera, sold separately) with a Auto USB cable. -
Page 60: Multi Slide Show
Multi slide show ( ) Images can be displayed continuously at pre-set intervals. You can view the Selecting Images slide show by connecting the camera to an external monitor. You can select image to view 1. Press the play mode button and press the menu button. 1. -
Page 61: Confi Gure Multi Slide Show Effects
Multi slide show ( ) Confi gure multi slide show effects Setting play interval Unique screen effects can be used for the multi slide show. Set the multi slide show play interval. 1. Select the [Effect] sub menu by pressing 1. -
Page 62: Playback
Playback ( ) Voice memo Protecting images You can add your voice to a stored still image. This is used to protect specifi c shots from being accidentally erased (Lock). It also unprotects images that have been previously protected (Unlock). 1. -
Page 63: Deleting Images
Playback ( ) Deleting images Of all the fi les stored in the memory card, the unprotected fi les in the DCIM subfolder will be deleted. Remember that this will This deletes images stored on the memory. If the memory card is inserted, permanently delete unprotected images. - Page 64 Playback ( ) Standard Index This function allows you to embed printing quantity information on a stored Images (except for movies and voice fi le) are printed as index type. image. 1. Press the Up / Down button and select 1.
-
Page 65: Copy To Card
Playback ( ) Print size Copy To Card You can specify the print size when printing images stored on the memory This enables you to copy image fi les, movies and voice recording fi les to the card. The [Size] menu is available only for DPOF 1.1 compatible printers. memory card. -
Page 66: Pictbridge
Playback ( ) PictBridge [Copy To Card] will not be selected without inserting a memory card. You can use the USB cable to connect this camera to a printer that supports PictBridge (sold separately) and print the stored images directly. If there is not enough space available in the memory card to copy Movies and voice fi... -
Page 67: Pictbridge : Picture Selection
PictBridge PictBridge : Picture Selection Easy printing You can select images you want to print. When you connect the camera to printer in the Setting the Number of Copies to Print Play back mode, you can print a picture easily. 1. -
Page 68: Pictbridge : Print Setting
PictBridge : Print Setting PictBridge : Reset You can select the Paper Size, Print Layout, Paper Type, Print Quality, Date Initialises user-changed confi gurations. Print, and File Name Print menus for printed pictures. 1. Use the Up / Down buttons to select the 1. -
Page 69: Sound Menu
Sound menu Sound () In this mode, you can set up sound settings. You can use the setup menu in Volume all camera modes, except Voice Recording mode. You can select a volume of start up sound, shutter sound, beep sound and The items indicated by are default settings. -
Page 70: Beep Sound
Sound () Setup menu In this mode, you can set up basic settings. You can use the setup menu in all Beep Sound camera modes, except Voice Recording mode. If you set sound to ON, various sounds will be activated for camera startup, The items indicated by are default settings. -
Page 71: Display Language
Setup menu DISPLAY ( ) LANGUAGE Menu tab Main menu Sub menu Page There is a choice of languages that can be displayed on the LCD monitor. Wel l i n gton, Auckl a nd Samoa, Midway Even if the battery is removed and inserted again, the language setting will Honolulu, Hawaii Alaska be preserved. -
Page 72: Start Up Image
DISPLAY ( ) World Time Start up image - Available cities You can select the image that is fi rst displayed on the LCD monitor whenever : London, Cape Verde, Mid-Atlantic, Buenos DISPLAY the camera is turned on. Aires, Newfoundland, Caracas, La Paz, - Sub menus : [Off], [LOGO], [User Image] NewYork, Miami, Chicago, Dallas, Denver, DISPLAY... -
Page 73: Quick View
SETTINGS ( ) DISPLAY ( ) Quick view Formatting a memory If you enable Quick View before capturing an image, you can view the image This is used for formatting the memory. If you run [Format] on the memory, all you just captured on the LCD monitor for the duration set in the [Quick View] images, including the protected images, will be deleted. -
Page 74: Initialisation
SETTINGS ( ) Initialisation File name All camera menu and function settings will be restored to their default values. This function allows the user to select the fi le naming format. However, values for DATE / TIME, LANGUAGE, and VIDEO OUT will not be [Reset] : After using the reset function, the next changed. -
Page 75: Imprinting The Recording Date
SETTINGS ( ) Imprinting the recording date Auto power off This function switches the camera off after a set amount of time in order to There is an option to include DATE / TIME on still images. prevent unnecessary battery drainage. - Sub menus - Sub menus [Off]... -
Page 76: Selecting Video Out Type
SETTINGS ( ) Selecting Video out type - NTSC : U.S.A, Canada, Japan, South Korea, Taiwan, Mexico. - PAL : Australia, Austria, Belgium, China, Denmark, Finland, The Movie output signal from the camera can be NTSC or PAL. Germany, U.K., Holland, Italy, Kuwait, Malaysia, New Zealand, Your choice of output will be governed by the type of device (monitor or TV, Singapore, Spain, Sweden, Switzerland, Thailand, Norway. -
Page 77: Auto Focus Lamp
- Using a Hand-made PC or a PC and OS that has not been guaranteed by the manufacturer is not covered by the Samsung warranty. - Before reading this manual, you should have a basic knowledge of... -
Page 78: System Requirements
Windows. A USB Driver for MAC is not included with the Application CD. You can use the camera with Mac OS 10.0~10.4. Samsung Master : This is the all-in-one multi media software solution. You can download, view, edit and save your digital images and movies... -
Page 79: Setting Up The Application Software
Click the [Samsung Digital Camera Installer] menu in the Auto run frame. 2. Install the camera driver, DirectX, Samsung Master and Adobe Reader by selecting a button shown on the monitor. If a latest version of DirectX was installed on your computer, DirectX may not be installed. - Page 80 Setting up the application software...
- Page 81 Before opening the PDF fi les, you must install the Adobe Reader image viewer program will open. included in the Software CD-ROM. If the download window of Samsung To install the Adobe Reader 6.0.1 correctly, Internet Explorer 5.01 Master opens after starting Samsung or later has to be installed.
-
Page 82: Starting Pc Mode
Starting PC mode If you connect the USB cable to a USB port on your PC and then turn on the Connecting the camera to a PC power, the camera will automatically switch to “computer connection mode”. In this mode, you can download stored images to your PC through the USB cable. - Page 83 Starting PC mode Downloading stored images 4. A pop-up menu will open. Click the [Cut] or [Copy] menu. You can download the still images stored on the camera to your PC’s hard - [Cut] : cuts a selected fi le. disk and print them or use a photo editing software to edit them.
-
Page 84: Removing The Removable Disk
Starting PC mode Removing the removable disk - By using [Samsung Master], you can see the stored images in the Windows 98SE memory directly on the PC monitor and you can copy or move the 1. Check whether the camera and PC are transferring a fi le. -
Page 85: Setting Up The Usb Driver For Mac
Removing the removable disk Setting up the USB Driver for MAC 5. A [Safe to Remove Hardware] window will 1. A USB Driver for MAC is not included with the software CD as MAC OS open. Click the [OK] button. supports the camera driver. -
Page 86: Removing The Usb Driver For Windows 98Se
Samsung 2. Check whether the Removable Disk is on the [My Computer]. Master Samsung Master]. 3. Remove the [Samsung Digital Camera] on the Device manager. Downloading images 1. Connect the camera to your PC. 2. A window for downloading images will be displayed after connecting the camera to your PC. - Page 87 5 Zoom bar : You can change preview size. 6 Folder display window : You can see the folder location of the selected image. 7 Image display window : Images of the selected folder are displayed. Refer to the [Help] menu in Samsung Master for further information.
- Page 88 4 Preview window : You can preview the changed image. * You can select AVI, Windows media (wmv) and A still image edited with Samsung Master can’t be played back on the Windows media (asf) fi le types. 2 Frame display window : You can insert multi media in this window.
-
Page 89: Specifi Cations
Some movies that were compressed with a codec that is not Image Sensor - Type : 1/2.5” CCD compatible with the Samsung Master can’t play back in the Samsung - Effective Pixel : Approx. 8.2 Mega-pixel Master. - Total Pixel : Approx. 8.3 Mega-pixel Refer to the [Help] menu in Samsung Master for further information. - Page 90 Specifi cations Flash - Modes : Auto, Auto & Red-eye reduction, Fill-in fl ash, - Movie Slow sync, Flash off, Red-eye Fix • With Audio or without Audio The maximum memory capacity of continuous - Range : Wide : 0.2m ~ 4.7m, movie is 2 hours.
- Page 91 Super Fine Fine Operating Temperature - 0 ~ 40°C Normal These fi gures are measured under Samsung standard conditions and Operating Humidity may vary depending on shooting conditions and camera settings. - 5 ~ 85% “E” Button - Effect : Color, Image Adjust (Sharpness, Contrast,...
-
Page 92: Important Notes
Important notes Be sure to observe the following precautions! Handling the camera - Never drop the camera or subject it to severe shocks or vibrations. This unit contains precision electronic components. Do not use or store - Protect the large size LCD monitor from an impact. When the camera this unit in the following locations. - Page 93 - Take care not to get fi ngerprints or foreign substances on the surface of the lens. - Samsung cannot be held responsible for camera malfunctions. If the digital camera is not used for a long period, an electric discharge can occur.
-
Page 94: Warning Indicator
Warning indicator There are several warnings that may appear on the LCD display. [ File Error! ] File error [ Card Error !] Delete the fi le. Memory card error Memory card error Turn off the camera power and turn it on again Contact a camera service centre. -
Page 95: Before Contacting A Service Centre
Before contacting a service centre Please check the following Camera does not take images when pressing the Shutter button There is insuffi cient memory capacity The camera doesn’t switch on Delete unnecessary image fi les There is low battery capacity The memory card has not been formatted Format the memory card (p.72) Insert fresh batteries. - Page 96 Before contacting a service centre The fl ash does not fi re Images are too bright Flash off mode has been selected Exposure is excessive Dis-engage fl ash off mode Reset exposure compensation The camera mode can’t use the fl ash No image on external monitor Refer to the FLASH instruction (p.30) The external monitor has not been connected properly with...
-
Page 97: Faq
Please check the following if the USB connection malfunctions. Case 6 When I open the Device Manager (by clicking Start (Settings) Control Panel (Performance and Maintenance) System (Hardware) Device Manager), there are Unknown Case 1 USB cable is not connected or it is not the supplied USB Devices or Other Devices entries with a yellow question cable. -
Page 98: Correct Disposal Of This Product
fi le transfer. It is Samsung’s own symbol mark is used to effectively → If you install only the Samsung Master, the problems mentioned above communicate Samsung’s environmental friendly product activities to the consumers. The mark represents occasionally happen. -
Page 99: Correct Disposal Of Batteries In This Product
Declaration of Conformity Trade Name : SAMSUNG DIGITAL IMAGING CO., LTD. Model No. : SAMSUNG L100 Responsible Party : SAMSUNG ELECTRONICS AMERICA INC. Address : 105 Challenger Road Ridgefi eld Park NJ Telephone No. : 1-800-SAMSUNG(726-7864) This device complies with Part 15 of the FCC Rules. Operation is... - Page 100 MEMO...
- Page 101 MEMO...
Need help?
Do you have a question about the L100 and is the answer not in the manual?
Questions and answers