Aiwa ADC-M65 YZ Operating Instructions Manual
Compact disc changer
Hide thumbs
Also See for ADC-M65 YZ:
- Operating instructions manual (12 pages) ,
- Service manual (10 pages) ,
- Operating instructions manual (12 pages)
Table of Contents
Advertisement
Quick Links
See also:
Service Manual
d
OPERATING INSTRUCTIONS
MANUAL DE INSTRUCCIONES
MODE D'EMPLOI
BEDIENUNGSANLEITUNG
ISTRUZIONI PER L'USO
GEBRUIKSAANWIJZING
INSTRUKCJA OBSŁUGI
KEZELÉSI ÚTMUTATÓ
NÁVOD K OBSLUZE
ADC-M65
COMPACT DISC CHANGER
CAMBIADOR DE DISCOS COMPACTOS
c
YZ
ENGLISH
ESPAÑOL
FRANÇAIS
DEUTSCH
ITALIANO
NEDERLANDS
POLSKI
MAGYAR
ČESKY
Advertisement
Chapters
Table of Contents

Related Manuals for Aiwa ADC-M65 YZ

Summary of Contents for Aiwa ADC-M65 YZ
- Page 1 OPERATING INSTRUCTIONS MANUAL DE INSTRUCCIONES MODE D’EMPLOI ADC-M65 BEDIENUNGSANLEITUNG ISTRUZIONI PER L’USO COMPACT DISC CHANGER GEBRUIKSAANWIJZING CAMBIADOR DE DISCOS COMPACTOS INSTRUKCJA OBSŁUGI KEZELÉSI ÚTMUTATÓ NÁVOD K OBSLUZE ENGLISH ESPAÑOL FRANÇAIS DEUTSCH ITALIANO NEDERLANDS POLSKI MAGYAR ČESKY...
- Page 2 8Z-KM4-908-01 991216ATM-OX...
-
Page 3: Table Of Contents
Welcome Thank you for your purchasing this AIWA product. To optimize the performance of this unit, please read through this manual carefully. TABLE OF CONTENTS FEATURES ............................1 PRECAUTIONS ........................... 2 UNPACKING ............................3 INSTALLATIONS ..........................4 CONNECTIONS ..........................8 HOW TO USE ............................ -
Page 4: Precautions
PRECAUTIONS • Do NOT install the unit in a location where it • Clean the discs before inserting them into the may be subjected to: disc magazine. Always clean a disc from the — Direct sunlight or other sources of excessive center outward with a cleaning cloth. -
Page 5: Unpacking
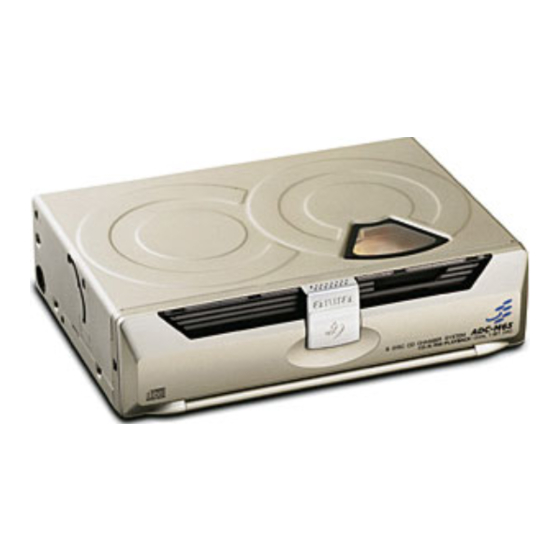
UNPACKING Compact disc changer Compact disc magazine Connecting cable Supplied mounting kit for the compact disc changer The letters are keyed to those in the instructions. Use only the supplied mounting hardware for safe and secure installation. a Brackets (1 pair) b Washer screws c Plate brackets d Nuts (4 ea.) -
Page 6: Installations
INSTALLATIONS Precautions Mounting angle setting levers Select the mounting location very carefully, Be sure to change the position of both mounting referring to the following points. angle setting levers according to the angle at which the unit is to be installed. •... - Page 7 INSTALLATIONS Horizontal installation Construction For details on abc..., see page 3. The effective angle of the unit. 30˚ 15˚ The position of the lever. Note If the mounting surface needs to be strengthened, secure the plate brackets c to the bottom surface of the car trunk, etc.
- Page 8 Vertical installation Construction For details on abc..., see page 3. The effective angle of The position of the unit. the lever. 15˚ 30˚ Notes • If the mounting surface needs to be strengthened, • If installation space is narrow, bend the plate bracket secure the plate brackets c to the bottom surface c back and forth along the perforated line to break off of the car trunk, etc.
- Page 9 INSTALLATIONS Suspended installation Caution Before drilling the holes, make sure that there is When installing the unit in the trunk below the nothing on the other side of the mounting surface. package tray, observe the following. • Select the mounting location carefully so that the unit does not hinder the movement of the torsion bars of the deck lid.
-
Page 10: Connections
CONNECTIONS This unit is designed only for AIWA brand car stereo. Therefore you cannot use the unit with other brand’s equipment. Connecting cable (supplied) to AIWA brand car stereo Compact disc changer Note Caution Use only the supplied connecting cable. Using an... -
Page 11: How To Use
HOW TO USE How to use a compact disc magazine With the label side up, insert a disc all the way. Labeled side 6 discs, one in each disc tray To remove a disc, pull part A in the direction Recorded side of the arrow as illustrated. -
Page 12: Specifications
SPECIFICATIONS Notes on the disc magazine Compact disc changer System Compact disc digital audio • Be sure to place a disc on the disc tray with the system label side up. If a disc is not set properly, it may Frequency response 5 Hz –... - Page 13 CT-R431M OPERATING INSTRUCTIONS CT-R421 MANUAL DE INSTRUCCIONES MODE D’EMPLOI CT-R411 BEDIENUNGSANLEITUNG ISTRUZIONI PER L’USO GEBRUIKSAANWIJZING INSTRUKCJA OBSŁUGI STEREO CAR CASSETTE RECEIVER RADIO-CASSETTE ESTEREOFONICO PARA AUTOMOVIL KEZELÉSI ÚTMUTATÓ NÁVOD K OBSLUZE ENGLISH ESPAÑOL FRANÇAIS DEUTSCH ITALIANO NEDERLANDS POLSKI MAGYAR ČESKY (CT-R431M, CT-R421) 8B-KTA-901-01 001030ATM-OX...
- Page 14 CT-R431M. NOTE • Some buttons are assigned two or more functions. AIWA CO. LTD. - JAPAN - DECLARES UNDER ITS For detailed descriptions, refer to the related pages. OWN RESPONSIBILITY THAT THE PRODUCT DESCRIBED IN THIS MANUAL IS IN COMPLIANCE...
-
Page 15: Theft Protection
THEFT PROTECTION BASIC OPERATION, AUDIO AND CLOCK Take the front panel with you when leaving the car, and keep it in the supplied carrying case. ADJUSTMENT Detaching the front panel Before detaching the front panel, remove the cassette to prevent possible damage to the unit. Press z to remove the cassette. -
Page 16: Radio Operation
Adjusting sound Muting button beep sounds You can select the following modes for adjusting sound Turn off the unit. depending on the music you listen to: BASS (low Press and hold SEL until “BEEP” appears in the frequencies), TRE (high frequencies), BAL (left/right), display. - Page 17 Press FNC repeatedly to select the desired band Checking the preset stations (Preset Scan) (F1, F2, F3, MW or LW). Press PS/A.ME briefly. Press TUNEi (to move to higher frequencies) or Each preset station will be tuned in for 5 seconds in TUNEk (to move to lower frequencies) to tune in to order.
- Page 18 Tuning in to Alternative Frequency (AF) Notes • During MW or LW reception, the unit will not stations automatically tune in to a traffic announcement program. Be sure to select “FM1/2/3,” “TAPE,” “CD-CH” There are programs transmitted at different frequencies (CT-R431M only), or “AUX IN”...
-
Page 19: Tape Playback
TAPE PLAYBACK Adjusting the clock by Clock Time (CT) service The unit adjusts the clock automatically according to the CT data sent from a currently tuned-in RDS station. Press and hold TA, and then press AF during FM reception. “CT” appears in the display. Turn Smart Jog to select “CT ON.”... -
Page 20: Auxiliary Equipment
AUXILIARY EQUIPMENT Direction indications Displayed when the upper side of the Listening to a CD/MD/MP3 portable cassette is being played. Displayed when the lower side of the player or other equipment cassette is being played. You can listen to equipment connected to the unit. Refer Tape transport display to the operating instructions for the corresponding equipment for more detailed information. -
Page 21: Cd Changer Operation (Ct-R431M Only)
Playing a CD One disc Repeat Play You can play all tracks on a disc repeatedly. You can play CDs from a connected AIWA CD Changer. For detailed information on installing a CD Changer, Press REP during CD Changer play. -
Page 22: Troubleshooting
TROUBLESHOOTING MAINTENANCE Error code (when using the optional AIWA CD Cleaning the front panel Changer) Wipe the surface with a soft, dry cloth. In the following cases the corresponding error code indication appears. Follow the suggestions below to Cleaning the connector solve the problem. -
Page 23: Specifications
SPECIFICATIONS GENERAL Power-Supply Voltage: 14.4 V (11 to 16 V RADIO SECTION allowable), DC, negative ground Load Impedance: 4 Ω (FM) Tone Control: Bass ± 10 dB at 100 Hz, Treble Frequency Range: 87.5 MHz – 108 MHz (50-kHz ± 10 dB at 10 kHz steps) Preamp Output Voltage (load impedance): 2.2 V Usable Sensitivity: 12.7 dBf...