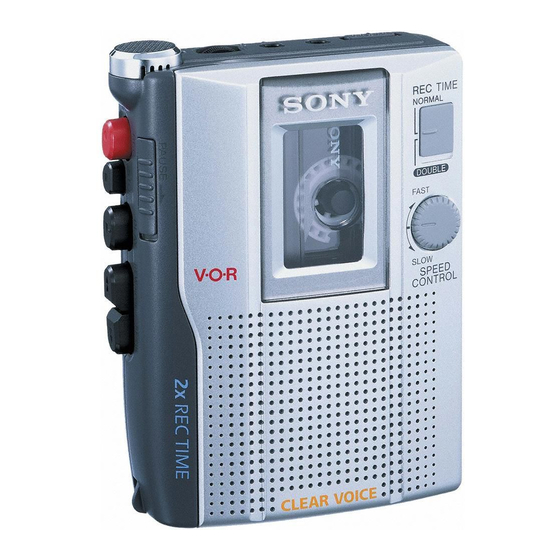
Sony TCM-200DV Operating Instructions
Cassette-corder
Hide thumbs
Also See for TCM-200DV:
- Service manual (20 pages) ,
- Operating instructions (2 pages) ,
- Specification sheet (2 pages)
Advertisement
Quick Links
Download this manual
See also:
Service Manual
3-245-602-91(2)
Cassette-Corder
Operating Instructions
TCM-200DV/150
Sony Corporation © 2002 Printed in Japan
Printed on 100 % recycled paper using
VOC (Volatile Organic Compound)-free
vegetable oil based ink.
A
A
B
C
D
BATT
E
AC power adaptor
DC IN 3V
B
A
B
MIC
VOR
(TCM-200DV only)
(TCM-200DV only)
TCM-200DV
TCM-200DV
EAR
Built-in microphone
REC TIME
/PLAY MODE
(TCM-200DV only)
TCM-200DV
z REC
x STOP
SPEED CONTROL
(TCM-200DV only)
TCM-200DV
m REW/
REVIEW
PAUSE .
DC IN 3V
C
Side A
A
A
Tab for side A
A
English
Battery life*
(approx. hours)
About this manual
Sony
Sony
alkaline
R6P
The instructions in this manual are
LR6 (SG)**
(SR)
for 2 models.
Playback
16
4
The TCM-200DV is the model used
Recording
25
6.5
for illustration purposes.
* Measured value by the standard of
JEITA (Japan Electronics and
TCM-
200DV
150
Information Technology Industries
VOR
a
–
Association). (Using a Sony HF
series cassette tape)
REC TIME
a
–
** When using a Sony LR6 (SG)
/PLAY MODE
"STAMINA" alkaline dry batteries
SPEED
a
–
(produced in Japan)
CONTROL
MIC jack
a
–
Note
a: provided or supplied
The battery life may shorten depending
–: not provided or not supplied
on the operation of the unit.
For maximum performance we
Note (TCM-200DV only)
recommend that you use alkaline
Tapes recorded with the REC TIME/
batteries.
PLAY MODE switch in the DOUBLE
position cannot be played properly on
a tape recorder without the REC
House Current
TIME/PLAY MODE switch function.
(see Fig. A-E)
BGetting Started
Connect the AC power adaptor to
DC IN 3V and to a wall outlet. Use
the AC-E30HG AC power adaptor
Preparing a Power
(not supplied). Do not use any other
Source
AC power adaptor.
Choose one of the following power
sources.
Polarity of
the plug
Dry Batteries
(see Fig. A-A)
Notes
Make sure that nothing is connected
• Specifications for AC-E30HG vary
to the DC IN 3V jack.
for each area. Check your local
voltage and the shape of the plug
1
Open the battery compartment
before purchasing.
lid.
• Do not touch the AC power adaptor
2
with wet hands.
Insert two R6 (size AA)
batteries with correct polarity
• Connect the AC power adaptor to an
easily accessible AC outlet. Should
and close the lid.
you notice an abnormality in the AC
Notes
power adaptor, disconnect it from
the AC outlet immediately.
• Do not charge a dry battery.
• Do not use a new battery with an old
one.
BOperating the Unit
• Do not use different types of
batteries.
• When you do not use the unit for a
Recording
long time, remove the batteries to
avoid any damage caused by battery
(see Fig.
-
)
B
,
A
B
leakage and subsequent corrosion.
• Dry batteries will not be drained
You can record right away with the
when another power source is
built-in microphone.
connected.
Make sure that nothing is connected
to the MIC jack (TCM-200DV only).
To take out the batteries
1
(see Fig. A-B)
Insert a normal (TYPE I) tape
with the side to be recorded
To attach the battery
facing the cassette holder.
compartment lid if it is
2
For TCM-200DV only:
accidentally detached (see
Set REC TIME/PLAY MODE to
Fig. A-C)
the desired mode.
NORMAL (4.8cm/s): for
When to replace the
optimum sound.
batteries (see Fig.A-D)
Recommended for normal
Replace the batteries with new ones
recordings.
when the BATT lamp dims.
DOUBLE (2.4cm/s): for double
Notes
recording time (for example,
• After the batteries have been used
120 minutes using both sides of
for a while, the BATT lamp may
a 60-minute cassette). Suitable
flicker with the playback sound
for recording conferences,
when you turn up the volume;
dictations, etc. Not
however this does not mean that
recommended for recording
you need to replace the batteries.
music.
• The unit will play back normally for
a while, even after the BATT lamp
3
For TCM-200DV only:
dims. However, replace the batteries
Set VOR to H or L to start and
as soon as you can. If you do not,
pause recording automatically,
subsequent recording will not be
depending on the recording
done correctly.
condition.
H (high) to record at
meetings or in a quiet and/
or spacious place.
L (low) to record for
dictation or in a noisy place.
4
Set VOR to OFF to start and
z REC
stop recording manually.
N PLAY
Note
When the sound to be recorded is
not loud enough, set the VOR
switch to OFF, or the unit may
not start recording.
4
Press z REC.
N PLAY is pressed
x STOP
simultaneously and recording
PAUSE .
starts.
At the end of the tape, recording
PAUSE .*
stops and the unit turns off
automatically.
m REW/REVIEW
To
Press or slide
Stop
x STOP
recording
x STOP
Pause
PAUSE . in the
recording
direction of the arrow
To release pause
PAUSE .
*
recording, release
x STOP
PAUSE .*.
Review the
Press and hold
portion just
m REW/REVIEW
recorded
during recording.
EAR
Release the button at
the point to start.
Eject a
Press x STOP and open
cassette
the cassette
compartment lid.
•
* PAUSE . will also be
(TYPE IV)
(TYPE II)
automatically released when
x STOP is pressed (stop-pause-
release function).
SPEED CONTROL
•
To monitor the sound
Connect an earphone (not supplied)
TCM-200DV
firmly to the EAR jack.
You cannot adjust the monitoring
VOR
volume.
TCM-200DV
VOR
•
Notes
• Do not use a High-position (TYPE II)
or metal (TYPE IV) tape. If you do
so, the sound may be distorted when
L
H
you play back the tape, or the
previous recording may not be
erased completely.
OFF
• The SPEED CONTROL switch (see
VOR
•
reverse side) works in Playback
mode only. Recording will be made
independent of this control. (TCM-
OFF
200DV only)
Notes on VOR (Voice Operated
C-B
Recording) (TCM-200DV only)
• The VOR system is affected by the
environmental recording conditions.
When you use the system in a noisy
place, the unit will stay in Recording
mode. If the sound is too soft, on the
contrary, the unit will not start
recording. Set it to H (high) or L
(low) so that the system will pick up
the necessary sound only.
If you cannot get the results you
want, set it to OFF.
• The VOR system may not record the
beginning of the sound you want to
record because it starts recording
only after it catches the sound. For
an important recording, set it to
OFF.
To prevent a tape from
being accidentally recorded
over (see Fig. B-C)
Break off and remove the cassette
tabs. To reuse the tape for
recording, cover the tab hole with
adhesive tape.
(turn over)
*
Sony
Sony
R6P (SR)
**LR6 (SG)
TCM-200DV
150
200DV
TCM-
*
–
a
JETTA (Japan Electronics and
Information Technology Industries
Association)
VOR
HF
–
a
Sony
**
REC TIME
LR6 (SG) "STAMINA"
/PLAY MODE
–
a
SPEED
CONTROL
–
a
MIC
a
–
TCM-200DV
E-A
REC TIME/PLAY MODE
DOUBLE
DC IN 3V
AC-E30HG
REC TIME/PLAY MODE
b
AC-E30HG
•
A-A
•
•
DC IN 3V
1
b
AA
R6
2
B
A-B
•
•
•
•
MIC
TCM-200DV
1
•
TYPE I
B-A
2
TCM-200DV
REC TIME/PLAY MODE
C-A
NORMAL
D-A
DOUBLE
BATT
•
BATT
3
TCM-200DV
L
H
VOR
•
BATT
H
L
.
OFF
VOR
OFF
VOR
Advertisement

Related Manuals for Sony TCM-200DV


Summary of Contents for Sony TCM-200DV
- Page 1 When the sound to be recorded is for 2 models. TCM-200DV Playback not loud enough, set the VOR The TCM-200DV is the model used Recording switch to OFF, or the unit may for illustration purposes. not start recording. * Measured value by the standard of...
- Page 2 To playback commercially • The AC power adaptor is not Power output Precautions available music tape, etc., select firmly connected. TCM-200DV: 350 mW (at 10 % SPEED CONTROL NORMAL. • The unit will not run on dry harmonic distortion) On power •...
Need help?
Do you have a question about the TCM-200DV and is the answer not in the manual?
Questions and answers