Friedrich MWM09Y1J Installation And Operation Manual
Air conditioner
Hide thumbs
Also See for MWM09Y1J:
- Service manual (79 pages) ,
- Service & parts manual (135 pages) ,
- Installation and operation manual (26 pages)
Table of Contents
Advertisement
Advertisement
Table of Contents

Related Manuals for Friedrich MWM09Y1J


Summary of Contents for Friedrich MWM09Y1J
- Page 1 Models Indoor Unit MWM09Y1J MWM12Y1J Outdoor Unit MRM09Y1J MRM12Y1J 960-910-05...
-
Page 3: Table Of Contents
Thank you for choosing Conditioning, please read this owner's manual Friedrich Air carefully before operating the unit and keep it carefully for consulation. This appliance is not intended for use by persons (including children) with reduced physical, sensory or mental capabilities or lack of experience and knowledge, unless they have been given supervision or instruction concerning use of the appliance by a person responsible for their safety. -
Page 4: General Instructions
Congratulations Thank you for your decision to purchase Friedrich. Your new Friedrich has been carefully engineered and manufactured to give you many years of dependable, efficient operation, maintaining a comfortable temperature and humidity level. Many extra features have been built into your unit to assure quiet operation, the greatest circulation of cool, dry air, and the most economic operation. -
Page 5: Notices For Use
Notices for use Working principle and special functions for cooling Principle: Air conditioner absorbs heat in the room and transmit to outdoor and discharged, so that indoor ambient temperature decreased, its cooling capacity will increase or decrease by outdoor ambient temperature. Anti-freezing function: If the unit is running in COOL mode and in low temperature, there will be frost formed on the heat exchanger, when indoor heat exchanger temperature decreased below 0... -
Page 6: Working Temperature Range
Notices for use Working temperature range Indoor side DB/WB(ºF) Outdoor side DB/WB(ºF) Maximum cooling 90/73 109/79 Maximum heating 75/64 81/--- The operating temperature range (outdoor) heat pump unit is 5ºF~ 109ºF. 115V Model... -
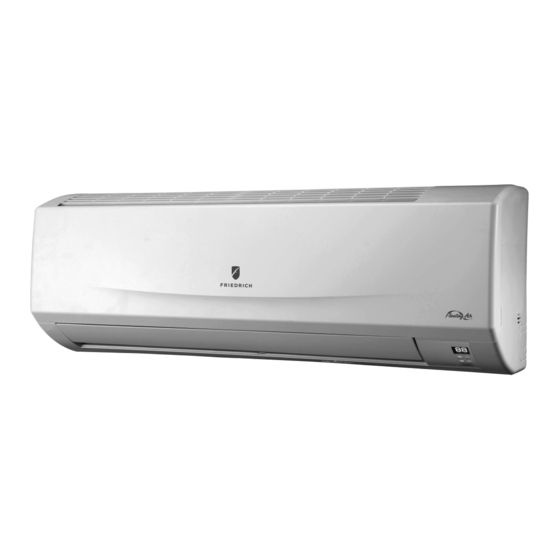
Page 7: Names And Functions Of Each Part
Names and functions of each part Indoor unit Air inlet Front panel Filter Wrapping Tape Wall Pipe Guide louver Air outlet SET TEMP Wireless remote control Cool Heat Receive ON/OFF Outdoor unit Air in Drainage pipe... -
Page 8: Operation Of Remote Controller
Operation of Remote Controller START / STOP Press to start or stop operation. : Press to decrease temperature setting. : Press to increase temperature setting. AUTO Press to set fan speed. MODE Press to select operation mode (AUTO/COOL/DRY/FAN/HEAT). SENSOR CLOCK Press it set clock. -
Page 9: Digital Display
Operation of Remote Controller 17 18 19 20 MODE icon: LIGHT icon: If MODE button is pressed, is displayed by pressing the current operation mode icon LIGHT button. Press LIGHT button again to clear the display. (AUTO), ( COOL), (DRY), (FAN) or (HEAT LOCK icon:... - Page 10 Operation of Remote Controller 17 18 19 20 icon: SENSOR icon: EXTEND is displayed when pressing the is displayed when pressing the button. Press this button button. Press this button SENSOR EXTEND again to clear the display. again to clear the display. FAN SPEED display: Press FAN button to select the desired fan speed setting (AUTO-...
-
Page 11: Remote Control Instructions
Remote Control Instructions Remote Controller Description START / STOP Press this button to turn on the unit .Press this button again to turn off the unit. Press this button to decrease set temperature. Hold it down for 2 seconds or more to rapidly decrease set temperature. - Page 12 Remote Control Instructions TIMER ON : Press this button to initiate the auto-ON timer. To cancel the auto-timer program, simply press this button again. After pressing this button, disappears and "ON "blinks . 00:00 is displayed for ON time setting. Within 5 seconds, press + or - button to adjust the time value. Every press of either button changes the time setting by 1 minute.
- Page 13 Remote Control Instructions SLEEP: Press this button to go into the SLEEP operation mode. Press it again to cancel this function. This function is available in COOL or DRY mode to maintain the most comfortable temperature for you. LIGHT: Press LIGHT button to turn on the display's light and press this button again to turn off the display's light.
-
Page 14: Emergency Operation
Front Panel Illumination On/Off Display indicator light control of indoor unit the light function,the icon will display To turn 'On' Display indicator light on: ● on the remote control screen by pressing the "Light" button. In which case,the display indicator light will be on if the unit receives this signal. -
Page 15: Routine Maintenance
Routine Maintenance Caution Turn power off and pull out the power plug before cleaning air conditioner, or it may cause electric ●● shock. Never spray water directly into indoor or outdoor components while power is connected as ● electrocution or shock can occur. Volatile liquid (e.g. -
Page 16: Basic Troubleshooting
Clean air filter. ● Clean air conditioner. ● Please contact an ● Authorized Friedrich Service Agency When the compressor ● starts or stops running The sound of water flow you may here a swoosh during operation. - Page 17 Cause Wireless Remote control Remove batteries and reinstall. Not in frequency range does not work. Replace batteries. Humid conditions in living space. There is water leaking into High humidity Condensate drain overflow. living space from indoor unit. Drain pipe to indoor unit is loose. Unit is running in cool mode Condensation may have formed on piping.
-
Page 18: Service & Assistance
You can find the name of your local Authorized Service Provider by visiting our website at www.friedrich.com. If you require further assistance please call Friedrich customer support at 1-800-541-6645. Before calling please make sure that you have the full model and serial number, as well as the date of purchase of you equipment available. -
Page 19: Installation Service Service & Assistance
Installation Important Notices Indoor Unit Placement Air inlet and discharge should be kept free of obstruction at all times. Ensure airflow through living space. Condensate should drain easily from unit. Keep system out of the reach of children and pets. Installation choice should be strong enough to handle the weight of the equipment and insulate against vibration noise from operation. -
Page 20: Notices For Installation
Notices for installation Outdoor Unit Installation Position Selection 1. Consideration should be made in location of outdoor unit as heat/cool is emitted, pets and neighbors could be affected by this. 2. Select a location where there should be sufficient ventilation. 3. -
Page 21: Installation Dimension Diagram
Installation dimension diagram Installation dimension diagram Space to the ceiling 6" or above Space to the wall above above 6" or 6" or Space to the wall 98" or above or above Air outlet side Space to the floor The dimensions of the space necessary for correct ●... -
Page 22: Install Indoor Unit
Install indoor unit Install the rear panel 1. Always mount the rear panel horizontally. Due to the condensate tray inside the indoor unit, the outlet side of the pan should have a slight tilt to assist in the gravity draining of the water in the pan. The angel between the evaporator and level should ne 0 or more. -
Page 23: Install Indoor Unit
Install indoor unit NOTE: Do not splice electrical wire together if too short, purchase new wire of correct length to install. otherwise communication errors can occur. The wiring must be correctly connected, improper wiring can cause malfunction. ● Tighten terminal firmly to ensure wiring will not come loose, but do not over tighen as ●... -
Page 24: Install Outdoor Unit
Install outdoor unit Electrical wiring Remove the cover on right side of outdoor unit. Take off wire clamp. Connect and fix the power connection cord to the terminal board. Wiring should be sized for indoor unit too. Cable Cross Plate Sub-assy 3.Fix the power connection cord with wire clamp. -
Page 25: Check After Installation And Test Operation
Check after installation and test operation Check after installation Items to be checked Possible malfunction Unit may fall, shake or create excessive noise. Is unit installed correctly? Leak of refrigerant can occur and Have you done the refrigerant leakage test? system will not cool. - Page 26 Friedrich Air Conditioning Co. 10001 Reunion Place, Suite 500 • San Antonio, Texas 78216 1.800.541.6645 www.friedrich.com...
Need help?
Do you have a question about the MWM09Y1J and is the answer not in the manual?
Questions and answers