Table of Contents
Advertisement
Advertisement
Table of Contents
Troubleshooting

Related Manuals for Asko TD70.C


Summary of Contents for Asko TD70.C
- Page 1 Service Manual Tumble Dryer - TD70.C...
-
Page 3: Table Of Contents
Components and measurement values ..................................9 Components and function description ..................................10 Control unit ..............................................14 Circuit diagram TD70.C ........................................14 Circuit diagram TD70.C Marin ......................................16 Circuit diagram TD70.C UL ....................................... 18 Circuit diagram TD70.C HWC ......................................20 Circuit diagram TD70.C HP ....................................... 22 Troubleshooting .............................................. -
Page 4: Updates
Service Manual TD70.C Updates Date Description Initials 2011-09-06 First version... -
Page 5: Introduction
Introduction You are holding the Service manual for the TD70 tumble dryer. The TD70 tumble dryers is available in several models, designated TD70.1, TD70.2, TD70.3. The TD70.C model, that this guide is focusing on, is designed for professional use. It should be easy to service a tumble dryer. It is important that you, as a service technician, are provided the necessary conditions to work in an efficient and satisfactory manner. -
Page 6: Troubleshooting Strategy
Service Manual TD70.C Troubleshooting strategy Troubleshooting is an important part of the service callout, and as such we have drawn up a troubleshooting strategy that describes, in broad terms and step by step, what you need to do to find and diagnose faults arising in our machines. -
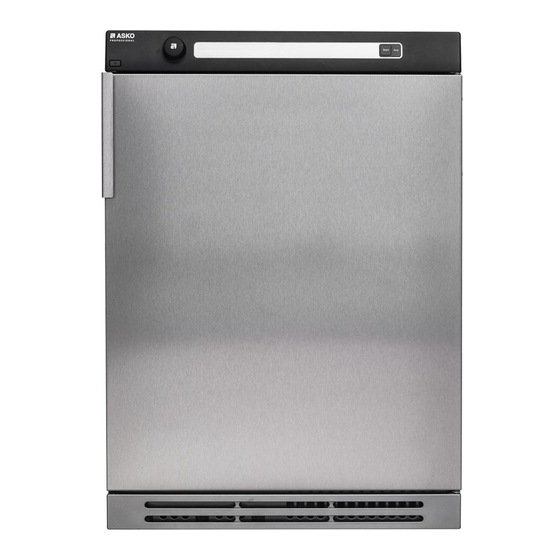
Page 7: Product Overview
Service Manual TD70.C Product overview TD70.C DISPLAY Programmes: A total of 7 programmes. Settings: 4 settings (Language, Child-safe, Buzzer, Heater 2) Knob and button descriptions Description Turn/Push Programme selector (J1) Turn clockwise or anti-clockwise to cycle through the different programmes and options in the various menus. -
Page 8: Technical Data
Service Manual TD70.C Technical data Technical information Height 850 mm Width 595 mm Depth 585 mm Weight 43 kg (Vented) 47 kg (Condenser) 55 kg (Heat pump) 44 kg (Heating Water Circuit) Cylinder volume 112 litres Capacity EU 7.0 kg US/AU 7.0 kg... -
Page 9: Component Description
Thermistor 61.4 kΩ Steam pump 2.15 MΩ 80 902 22 Reed switch steam tank 80 889 37 Control unit compl. TD70.C The control unit contains microprocessors for controlling programmes, the motor, the heating elements etc. 80 846 49 LED-light compl. -
Page 10: Components And Function Description
Service Manual TD70.C Component description Components and function description Here we describe the function and specification of the most important components. Certain components are found only in more highly specified machines or in Thermistors particular markets. See the Troubleshooting The thermistors are of the NTC type (Negative chapter for fault and information codes. - Page 11 Service Manual TD70.C Component description Reset Thermostat Overheating cut-out Thermostat and overheating cut-out EMC filter The thermostat is installed next to the heating The filter is installed next to the cable fasteners element and is used to reduce the element output...
- Page 12 Service Manual TD70.C Component description Door switch The door switch is located in a holder in the middle of the front support and is activated by a pin in the front door. The switch is normally open and closes when the door is closed. If the front door is opened during operation the CU stops the drying programme.
- Page 13 Service Manual TD70.C Component description Heat pump Heating element Certain types of machine are fitted with heat The heating element is located in the rear section pump systems. These systems are closed and consists of two separate heating coils. Each circuits that are replaced by replacing the heating coil is made from resistance wire.
-
Page 14: Control Unit
Service Manual TD70.C Control unit Circuit diagram TD70.C CABLE POSITIONS WIRES IN ALL MACHINES 1: THERMISTOR 2: COINMETER INTERNAL CONNECTION 4: MOTOR, DRAIN PUMP, FLO WIRES IN SOME MACHINES 5: DOOR SWITCH *A CONDENSE MACHINES 6: COMMUNICATIONS INTERF 8: POWER... - Page 15 Service Manual TD70.C RESISTANCES AT ROOM TEMPERATURE (CA. 20°C/68°F) VALUES WITH +/-10% ARE REGARDED AS NORMAL COMPONENT IN PUMP, FLOAT SWITCH F: RADIO INTERFERENCE SUPPRESSION FILTER 680K Ohm NTC 1: THERMISTOR 1 4 - 6 K Ohm TIONS INTERFACE NTC 2: THERMISTOR 2:...
-
Page 16: Circuit Diagram Td70.C Marin
Service Manual TD70.C Control unit Circuit diagram TD70.C Marine CABLE POSITIONS WIRES IN ALL MACHINES 1: THERMISTOR 4: MOTOR, DRAIN PUMP, F INTERNAL CONNECTION 5: DOOR SWITCH WIRES IN SOME MACHINES 6: COMMUNICATIONS INTE *A CONDENSE MACHINES 7: COINMETER 8: POWER... - Page 17 PRESS S3 5 TIMES TO ENTER MENU 2011-07-07 This document must not be copied without CIRCUIT DIAGRAM TD70.C 440 V our written pemission, and the contents thereof must not be imparted to a third party 80 902 59 - 00 nor be used for any unauthorized purpose.
-
Page 18: Circuit Diagram Td70.C Ul
Service Manual TD70.C Control unit Circuit diagram TD70.C UL CABLE POSITIONS WIRES IN ALL MACHINES 1: THERMISTOR 2: COINMETER INTERNAL CONNECTION 4: MOTOR, DRAIN PUMP, F WIRES IN SOME MACHINES 5: DOOR SWITCH *A CONDENSE MACHINES 6: COMMUNICATIONS INTE 8: POWER... - Page 19 M CONTROL UNIT This document must not be copied without CIRCUIT DIAGRAM TD70.C US/CA M CONTROL UNIT our written pemission, and the contents thereof must not be imparted to a third party 80 902 60 - 01 nor be used for any unauthorized purpose.
-
Page 20: Circuit Diagram Td70.C Hwc
Service Manual TD70.C Control unit Circuit diagram TD70.C HWC CABLE POSITIONS WIRES IN ALL MACHINES 1: THERMISTOR 2: COINMETER INTERNAL CONNECTION 4: MOTOR, DRAIN PUMP, FL WIRES IN SOME MACHINES 5: DOOR SWITCH 6: COMMUNICATIONS INTER 8: POWER 9: HEATING ELEMENT... - Page 21 M CONTROL UNIT This document must not be copied without CIRCUIT DIAGRAM TD70.C HWC M CONTROL UNIT our written pemission, and the contents thereof must not be imparted to a third party 80 902 89 - 00 nor be used for any unauthorized purpose.
-
Page 22: Circuit Diagram Td70.C Hp
Service Manual TD70.C Control unit Circuit diagram TD70.C HP CABLE POSITIONS WIRES IN ALL MACHINES 1: THERMISTOR 2: COINMETER INTERNAL CONNECTION 4: MOTOR, DRAIN PUMP, FLOA WIRES IN SOME MACHINES 5: DOOR SWITCH 6: COMMUNICATIONS INTERF 8: POWER 9: HEATING ELEMENT... - Page 23 M CONTROL UNIT This document must not be copied without CIRCUIT DIAGRAM TD70.C HP M CONTROL UNIT our written pemission, and the contents thereof must not be imparted to a third party 80 902 90 - 00 nor be used for any unauthorized purpose.
-
Page 24: Troubleshooting
Service Manual TD70.C Troubleshooting Fault indicators In the case of a fault the following fault indicators are shown on the display. DISPLAY Display Cause Action Over flow fault, Overflow The microswitch is opened when a full Check whether the customer has: Fault, Over flow fault, condensed water tank is detected. -
Page 25: Service Menu
Service Manual TD70.C Service menu DISPLAY Auto skåptorrt Auto normaltorrt Auto extratorrt Auto stryktorrt Opening the service menu Luftningsprogram Tidsprogram Check that the machine is switched off. Otherwise switch off the main power by pressing the main power switch (S1). - Page 26 Service Manual TD70.C Service menu cont. DISPLAY Turn/ Display Comments/instructions Push Test No component tested Test motor The motor runs at normal speed Test heater 1 The motor runs at normal speed. Heating element 1 is switched on and off by the CU depending on the values registered by thermistors 1 and 2.
- Page 27 Service Manual TD70.C Service menu cont. DISPLAY Turn/ Display Comments/instructions Push Filter Interval 2 Interval for indication ”Clean filter”, default setting (every 2nd cycle) Filter Interval 3 Interval for indication ”Clean filter” (every 3rd cycle) Filter Interval 4 Interval for indication ”Clean filter” (every 4th cycle) Filter Interval 5 Interval for indication ”Clean filter”...
- Page 28 Service Manual TD70.C Service menu cont. DISPLAY Turn/ Display Comments/instructions Push Condense Interval 0 Interval for indication ”Clean condense”, default setting (not shown) Condense Interval 1 Interval for indication ”Clean condense” (every 100th cycle) Condense Interval 2 Interval for indication ”Clean condense” (every 200th cycle) Condense Interval 3 Interval for indication ”Clean condense”...
-
Page 29: Service And Installation
Service Manual TD70.C Service and installation Replacing the panel and the control unit Instructions Illustration 1. Attach the anti-static wristband to a part of the machine that is earthed! NOTE! An anti-static wristband must be used, otherwise you risk destroying the control card. - Page 30 Service Manual TD70.C Service and installation Replacing the panel and the control unit Instructions Illustration 6. Carefully pull the programme selector from the panel. 7. Use a screwdriver to free the control card from the panel. NOTE! The control card must be placed in an ESD-safe bag.
-
Page 31: Transporting A Tumble Dryer With A Heat Pump
Service Manual TD70.C Service and installation Transporting a tumble dryer with a heat pump Machines with a heat pump must only be transported upright or placed on the left side when viewed from the front. In extreme cases, laying the machine on any other side, or transporting it in an incorrect manner, may result in making the machine unusable. -
Page 32: Personal Notes
Service Manual TD70.C Personal notes... - Page 33 We reserve the right to make changes.
Need help?
Do you have a question about the TD70.C and is the answer not in the manual?
Questions and answers