Table of Contents
Advertisement
USER'S GUIDE
93Z6 SERIES
2
Thank You
3
Safety Instructions
4
Product View
5
Assembly
6-9
Operations
10-15
Maintenance and Care
16-17
Troubleshooting
18
Replacement Parts
19
Warranty
20
Product Registration
20
Consumer Services
Earn BISSELL Rewards!
Earn BISSELL Rewards!
R
R
egister your
egister your
product today!
product today!
See details on
See details on
back page
back page
Advertisement
Table of Contents
Troubleshooting

Related Manuals for Bissell 93Z6 SERIES


Summary of Contents for Bissell 93Z6 SERIES
-
Page 1: Safety Instructions
Earn BISSELL Rewards! Earn BISSELL Rewards! egister your egister your product today! product today! See details on See details on back page back page USER'S GUIDE 93Z6 SERIES Thank You Safety Instructions Product View Assembly Operations 10-15 Maintenance and Care... - Page 2 My great-grandfather invented the floor sweeper in 1876. Today, BISSELL is a global leader in the design, manufacture, and service of high quality homecare products like your Heavy Duty Vacuum.
-
Page 3: Important Safety Instructions
MPORTANT SAFETY INSTRUCTIONS When using an electrical appliance, basic Turn off all controls before plugging or ■ precautions should be observed, including unplugging vacuum cleaner. the following: Use extra care when cleaning stairs. ■ Read all Unplug before attaching the TurboBrush. ■... -
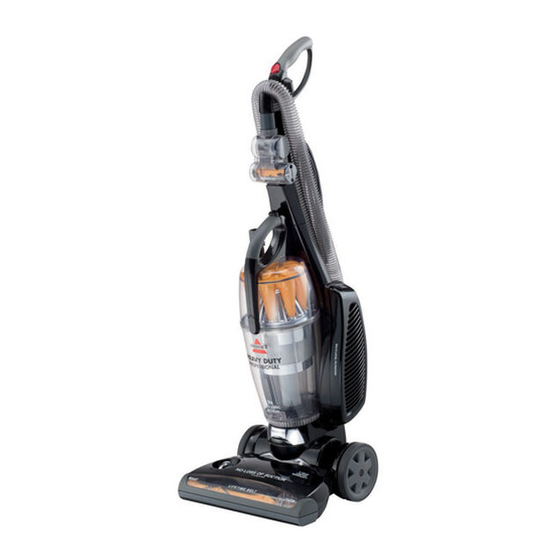
Page 4: Product View
roduct view Upper Handle Power Switch Hose Brush Switch Carrying TurboBrush ® Handle Power Cord Quick Release ™ Cord Wraps Crevice Tool Release Button Hose Wand Telescoping Extension Wand Filter Door Latch Wand Base Post-Motor Screen Filter (inside) Hose Collar Dirt Container Diverter Filter Tray... - Page 5 ssembly tool required: phillips screwdriver caution: Slide upper handle onto lower handle. Insert one screw into hole marked with Do not plug in your vacuum an arrow and tighten until snug. cleaner until you are familiar with all instructions and Attach hose by lining up the tabs on the operating procedures.
-
Page 6: Handle Positions
perations transporting your cleaner use the handle on the front to carry the cleaner or place the cleaner in the upright position and tip back to roll on the rear wheels. Releasing the power cord the upper and lower cord wraps rotate to allow for quick and easy removal of the power cord. - Page 7 perations fingertip brush switch the rotating brush is turned on or off using the switch located below the power switch on the top of the han- dle. the brush will start rotating when the unit is reclined. the brush should be on for most carpeted floors.
-
Page 8: Upholstery Tool
perations attention: using the tools Always place the vacuum 1. Make sure the cleaner is in the upright cleaner on the floor in its fully position. upright position when using 2. Remove the hose wand from the wand tools. Placing the vacuum in base. -
Page 9: Emptying The Dirt Container
perations emptying the dirt container caution: empty the dirt container as soon as the dirt reaches the “full” line on the side of Make sure vacuum cleaner the container. has been switched off 1. Press the release button on top of the and unplugged before carrying handle to remove the dirt removing dirt container. -
Page 10: Maintenance And Care
aintenance and care cleaning the dirt container WaRning: additional steps can be taken to clean the dirt container as necessary. To reduce the risk of 1. Ensure the dirt container has been electric shock, turn power emptied. switch OFF and disconnect polarized plug from electri- 2. - Page 11 aintenance and care Replacing the post-motor filter cartridge the post-motor filter cartridge should be replaced every six months or if suction is declining. More or less frequent replacing may be required based on individual vacuuming habits and types of debris picked up. 1.
-
Page 12: Clearing Clogs
aintenance and care clearing clogs WaRning: low suction or poor pickup may be due to a clog in the vacuum To reduce the risk of electric cleaner. if you notice a change in shock, turn power switch off the sound of the motor or a and disconnect polarized reduction in the spinning action in plug from electrical outlet... -
Page 13: Thermal Motor Protection
If the cleaner will not turn on or the ther- mal protector continues to activate, your cleaner may need servicing. Call BISSELL Consumer Services or visit the website. note: the thermal protector controls the main vacuum motor only, not the brush motor. -
Page 14: Brush Maintenance
belt. -
Page 15: Changing The Light Bulb
aintenance and care changing the light bulb 1. Turn power switch off. 2. Unplug cleaner from electrical outlet. 3. Recline handle for easier access to light bulb and remove screw to lift off lens. 4. Remove the bulb by grasping bulb and pulling straight out of the socket. -
Page 16: Troubleshooting
roubleshooting WaRning: To reduce the risk of electric shock, turn power OFF and disconnect polarized plug from electrical outlet before performing maintenance or troubleshooting. Vacuum cleaner won’t turn on possible causes Remedies Power cord not plugged in 1. Check electrical plug Blown fuse/tripped breaker 2. -
Page 17: Please Do Not Return This Product To The Store
1-800-237-7691. w w w . b i s s e l l . c o m... - Page 18 Upholstery Tool *Not all parts are included with every model. Other tools may be available. Contact BISSELL Consumer Services or visit our website for more detail. w w w . b i s s e l l . c o m...
-
Page 19: Limited Five Year Warranty
Subject to the *EXCEPTIONS AND EXCLUSIONS identified below, upon receipt of the product BISSELL Homecare, Inc. will repair or replace (with new or remanufactured components or products), at BISSELL’s option, free of charge from the date of purchase by the original purchaser, for five years any defective or malfunctioning part. - Page 20 Grand Rapids MI 49501 ATTN: Consumer Services Or visit the BISSELL website - www.bissell.com When contacting BISSELL, have model number of cleaner available. Please record your Model Number: ___________________ Please record your Purchase Date: ___________________ note: please keep your original sales receipt. it provides proof of purchase date in the event of a warranty claim.