Advertisement
Available languages
Available languages
Quick Links
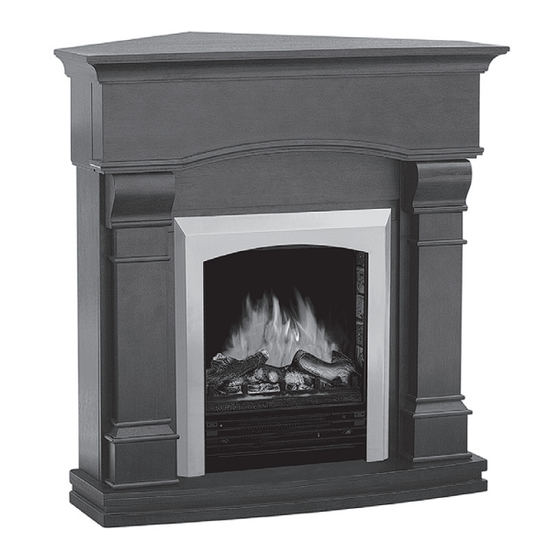
ELECTRIC FIREPLACE HEATER
Model: SQCM480ST-38CDC / SQCM480AT-38CACO
INSTRUCTION MANUAL
SAVE THESE INSTRUCTIONS FOR FUTURE USE.
ATTENTION:
1. Find a location for the fireplace heater that is protected from direct sunlight.
2. Do not plug the unit into the power outlet before reading all instructions.
IMPORTANT SAFETY INSTRUCTIONS
WHEN USING ELECTRICAL APPLIANCES, BASIC PRECAUTIONS SHOULD
ALWAYS BE FOLLOWED TO REDUCE THE RISK OF FIRE, ELECTRIC SHOCK,
AND INJURY TO PERSONS, INCLUDING THE FOLLOWING:
1. Read all instructions before using this electric fireplace heater.
2. This electric fireplace heater is hot when in use. To avoid burns, do not let bare
skin touch hot surfaces. The grill directly in front of the heater outlet becomes
hot during heater operation. Keep combustible materials, such as furniture,
pillows, bedding, papers, clothes, and curtains at least 3 feet (0.9 m) away from
the front of the unit and keep them away from the sides and rear.
3. Extreme caution is necessary when any heater is used by or near children or
invalids and whenever the fireplace is left operating and unattended.
4. Always unplug fireplace when not in use.
5. Do not operate any electric fireplace with a damaged cord or plug or after the
heater malfunctions, has been dropped or damaged in any manner. Return
fireplace heater to authorized service facility for examination, electrical or
mechanical adjustment, or repair.
6. Do not use outdoors.
7. This electric fireplace heater is not intended for use in bathrooms, laundry
areas and similar indoor locations. Never locate heater where it may fall into a
bathtub or other water container.
8. Do not run cord under carpeting. Do not cover cord with throw rugs, runners, or
similar coverings. Arrange cord away from traffic area and where it will not be
tripped over.
9. To disconnect fireplace, turn controls to off, then remove plug from outlet.
10. Connect to properly grounded outlets only.
11. Do not insert or allow foreign objects to enter any ventilation or exhaust open-
ing as this may cause an electric shock or fire, or damage the heater.
12. To prevent a possible fire, do not block air intakes or exhaust in any manner. Do
not use on soft surfaces, like a bed, where openings may become blocked.
13. A heater has hot and arcing or sparking parts inside. Do not use it in areas
where gasoline, paint, or flammable liquids are used or stored.
14. Use this fireplace heater only as described in this manual. Any other use not
recommended by the manufacturer may cause fire, electric shock, or injury to
persons.
15. Avoid the use of an extension cord because the extension cord may overheat
and cause a risk of fire. However, if you have to use an extension cord, the cord
shall be No.16AWG minimum size and rated not less than 1875 watts.
16. Do not plug this product into a receptacle controlled by a wall switch
or dimmer.
17. When storing or transporting the unit and cord, keep in a dry place, free from
excessive vibration and store so as to avoid damage.
CAUTION:
If you use this heater in conjunction with a thermal control, a program controller,
a timer or any other device that switches the heater on automatically, remember
to observe all safety warnings at all times. The fireplace heater has safety overheat
protection. If the overheat protection trips, switch off all switch buttons and wait ap-
proximately 5 -10 minutes. It should reset automatically once the unit cools down.
WARNING:
PROCEDURES AND TECHNIqUES IF NOT CAREFULLY FOLLOWED - WILL
RESULT IN DAmAGE TO THE EqUIPmENT. - WILL ExPOSE THE USER TO
THE RISK OF SERIOUS INJURY, ILLNESS OR DEATH.
This electric fireplace heater is for use on 120 volts. The cord has a plug as shown
at A in illustration below. An adapter as shown at C is available for connecting
three-blade grounding-type plugs to two-slot receptacles. The green grounding
plug extending from the adapter must be connected to a permanent ground such
as a properly grounded outlet box. The adapter should not be used if a three-slot
grounded receptacle is available.
A 15 AMP circuit is required to operate this heater. If the breaker trips when the
heater is used then you may need to move the heater to another location or unplug
other appliances that are on the same circuit. If you require an extension cord use
one that is rated at 1875 watts.
IMPORTANT:
Please note when you open the carton carefully check the unit and make sure there
are no damages. If you have any problems with the unit, with how the various
functions work or with hidden damages or missing parts please call 1-800-459-
4409 (EST) immediately for service. NOTE: DO NOT RETURN UNIT TO THE STORE
BEFORE CALLING THE TOLL FREE NUMBER. Do not dispose of your cartons until
you are completely satisfied with your new fireplace heater. Read all instructions
thoroughly before operating your new Electric Fireplace.
NOTE: Light bulbs may become loose during shipping. If the flame effect is
dim or does not work, please check that light bulb or bulbs are finger tight in
socket. See instructions for replacing bulb or bulbs. Please do not return the
sample to the store before checking light bulbs.
NOTE: The electric fireplace heater may emit a slight harmless odor when first
turned on. This is caused by activating the internal heater components for the
first time and should not occur again.
WARNING: DO NOT LOAD ARTICLES mORE THAN 40 LBS (18.2KG) ON
THE CORNER ATTACHmENT, WHICH mAY CAUSE PRODUCT DAmAGE OR
PERSONAL INJURY.
Advertisement

Related Manuals for Sylvania SQCM480ST-38CDC


Summary of Contents for Sylvania SQCM480ST-38CDC
-
Page 1: Important Safety Instructions
14. Use this fireplace heater only as described in this manual. Any other use not ELECTRIC FIREPLACE HEATER recommended by the manufacturer may cause fire, electric shock, or injury to Model: SQCM480ST-38CDC / SQCM480AT-38CACO persons. 15. Avoid the use of an extension cord because the extension cord may overheat and cause a risk of fire. -
Page 2: Y) Self Repair Set
ASSEMBLY INSTRUCTIONS V) Medium KD screws ..................... 57 W) Plastic connectors......................13 X) WALL ANCHOR SAFETY CABLE Wall anchor ...........................1 Screw for wall anchor ......................1 Screw for mantle ........................1 Safety cable ...........................1 Y) SELF REPAIR SET Touch-up repair paint (bottle) L shape bracket ........................8 Screws for L shape ...................... - Page 3 Step 3: Attach the PILLARS [P] and DECORATIVE BOXES [O] to the LEFT FRONT [E] and RIGHT FRONT [F] with 6 MEDIUM KD SCREWS [V] fig. 6 fig. 3 Step 7: Mount the LOWER FRONT [D and L] between the top of LEFT and RIGHT FRONT [E and F] with 2 MEDIUM KD SCREWS [V].
-
Page 4: Kd Screws
Step 1: Place the INSERT in FRONT of the mantle on the floor. Carefully lift the INSERT into the mantel until the trim is against to MANTEL. See fig. 12 fig. 9 fig. 12 Step 10: Connect the CORNER TOP PANEL [K] to the TOP [A] with 6 SMALL SCREWS [Q]. -
Page 5: Replacing The Light Bulbs
the desired flame intensity. The dimmer switch can only be used when the ON/OFF switch is in the on position. Note: When the ON/OFF switch is turned off, all other heater functions will stop even though the switches may be in the on position. fig. - Page 6 fig. B 2. Drill the holes with diameter 3/4 inches (10 mm) and depth 3/4 inches (10mm) on the mantel. Each Plastic Connector needs 3 holes. See fig. C. fig. C SELF REPAIR SET 3. Gently install the KD NUTS into the drilled-holes with hammer as shown in fig. D. Touch-up repair paint 1.
- Page 7 2. Drill the holes with diameter 1/16 inches (2 mm) and depth 5/16 inches (8mm) on the mantel. Each SMALL L-BRACKET needs 4 holes. See fig. G. SYLVANIA is a registered trademark of Osram Sylvania, used under License. Imported by quality Craft Ltd.
- Page 9 FOYER ÉLECTRIQUE de circulation et de tout endroit où il risquerait de faire trébucher quelqu’un. Modèle : SQCM480ST-38CDC / SQCM480AT-38CACO 9. Pour débrancher le poêle-foyer, mettez d’abord les commandes en position hors circuit (OFF), puis tirez sur la fiche du cordon pour l’extraire de la prise murale.
- Page 10 IMPORTANT : LISTE DES PIèCES Veuillez noter : Lorsque vous ouvrez le carton d’expédition du produit, vérifiez at- A) Panneau supérieur ......................1 tentivement l’appareil pour vous assurer qu’il n’est pas endommagé. Si vous avez des B) Panneau inférieur ......................1 problèmes avec l’unité ou de la difficulté à utiliser l’une ou l’autre de ses fonctions, C) Panneau supérieur avant ....................1 ou si vous notez des dommages non apparents ou qu’il manque des pièces, faites D) Centre avant........................1...
- Page 11 fig. 4 fig. 1 Étape 5 : Fixez le PANNEAU AVANT GAUCHE [E] au PANNEAU LATÉRAL GAUCHE [G] avec deux VIS KD MOYENNES [V]. Fixez le PANNEAU AVANT DROIT [F] au PANNEAU LATÉRAL DROIT [H] avec deux VIS KD MOYENNES [V]. Reportez-vous à la figure 5. Étape 2 : Fixez le PANNEAU AVANT INFÉRIEUR [L] au PANNEAU CENTRE AVANT[D] avec 2 VIS KD MOYENNES [V] tel qu’indiqué...
- Page 12 fig. 10 fig. 7 Étape 11 : Installez le HAUT [A] sur l’unité avec 3 VIS KD MOYENNES [V] tel qu’indiqué à la figure 11. Étape 8 : Placez le PANNEAU AVANT SUPÉRIEUR [C] entre le dessus du PANNEAU LATÉRAL GAUCHE et du PANNEAU LATÉRAL DROIT [G et H] et maintenez-le en place avec 2 VIS KD MOYENNES [V].
- Page 13 fig. 15 fig. 13 Étape 3 : Serrer toutes les vis. Étape 4 : Tirer l’unité assemblée vers l’endroit désiré. L’unité ne doit pas être placée 4. Utiliser la VIS DE MUR pour attacher l’autre extrémité du CÂBLE DE SÉCURITÉ dans un endroit exposé...
- Page 14 INSTRUCTION - TROUSSE D’AUTORÉPARATION ENTRETIEN NOTE : POUR ÉTEINDRE L’APPAREIL DE CHAUFFAGE EN TOUTE SÉCURITÉ, Peinture pour retouche IL EST RECOMMANDÉ DE TOURNER LA COMMANDE DE TEMPÉRATURE AU RÉGLAGE LE PLUS BAS ET DE PERMETTRE à L’APPAREIL DE CHAUFFAGE DE 1.
- Page 15 fig. B fig. F 2. Percez des trous de 3/4 po (10 mm) de diamètre et de 3/4 po (10 mm) de profondeur sur le manteau. 3 trous dans chaque raccord en plastique. Reportez- 2. Percez des trous de 1/16 po (2 mm) de diamètre et de 5/16 po (8mm) de profon- vous à...
- Page 16 Les ampoules ne sont pas couvertes par la présente garantie. La garantie couvre uniquement l‘usage résidentiel, non les usages commerciaux. SYLVANIA est une marque déposée de Osram Sylvania, utilisée sous license. Importé par Quality Craft Ltd.
- Page 17 él. CHIMENEA ELÉCTRICA — CALENTADOR 9. Para desconectar la chimenea, gire los controles a APAGADO y luego quite el Modelo: SQCM480ST-38CDC / SQCM480AT-38CACO enchufe del tomacorriente. 10. Enchufe únicamente en un tomacorriente con conexión a tierra.
- Page 18 IMPORTANTE LISTADO DE PIEZAS Después de abrir la caja, verifique muy bien la unidad y asegúrese de que no esté A) Panel superior ........................1 dañada. Si tiene problemas con la unidad, con el modo en que se utilizan las distintas B) Panel inferior ........................1 funciones o con daños ocultos o partes faltantes, comuníquese con nosotros de C) Panel frontal superior ....................1...
- Page 19 fig. 4 fig. 1 Paso 5: Sujete el PANEL DELANTERO IZQUIERDO [E] al PANEL LATERAL IZQUIERDO [G] con 2 TORNILLOS KD MEDIANOS [V]. Sujete el PANEL DELANTERO DERECHO [F] al PANEL LATERAL DERECHO [H] con 2 TORNILLOS KD MEDIANOS [V]. Vea la fig. 5. Paso 2: Sujete el PANEL DELANTERO INFERIOR [L] al PANEL DELANTERO MEDIO [D] con 2 TORNILLOS KD MEDIANOS [V], como se muestra en la fig.
- Page 20 fig. 10 fig. 7 Paso 11: Instale la CUBIERTA [A] en la unidad con 3 TORNILLOS KD MEDIANOS [V], como se muestra en la fig. 11. Paso 8: Coloque el PANEL DELANTERO SUPERIOR [C] entre la parte superior de los PANELES LATERALES IZQUIERDO y DERECHO [G y H] y asegúrelo en el lugar con 2 TORNILLOS KD MEDIANOS [V].
- Page 21 fig. 13 fig. 12 Paso 2: Sujete 4 SOPORTES MEDIANOS [U] a la parte inferior del inserto con 4 TOR- NILLOS KD MEDIANOS [V], como se muestra en la fig. 13. fig. 14 fig. 13 4. Use el TORNILLO PARA LA PARED para sujetar el otro extremo del CABLE DE SEGURIDAD a la pared.
- Page 22 Paso 2: Encontrará bombillas 1 X de tipo B-10 de 40 vatios debajo de los leños. perilla del termostato sólo puede utilizarse cuando los interruptores de ENCENDIDO/ APAGADO y los de 750W y 1500W están en la posición ENCENDIDO. Cuando el Paso 3: Afloje y quite la bombilla quemada y reemplácela(s) por bombilla nueva.
- Page 23 1. Coloque el CONECTOR PLÁSTICO en la repisa y marque los agujeros de perfo- ración, como se muestra en la fig. B. fig. F fig. B 2. En la repisa, perfore agujeros de 2 mm (1/16 in) de diámetro y de 8 mm (5/16 in) de profundidad.
- Page 24 Esta garantía tampoco cubre las bombillas. La garantía cubre única- mente el uso doméstico del aparato y no aquellos aparatos que se usen para fines comerciales. SYLVANIA es una marca registrada de Osram Sylvania, usada bajo licencia. Importado por quality Craft Ltd.
Need help?
Do you have a question about the SQCM480ST-38CDC and is the answer not in the manual?
Questions and answers