Yamaha CRX-N560 Owner's Manual
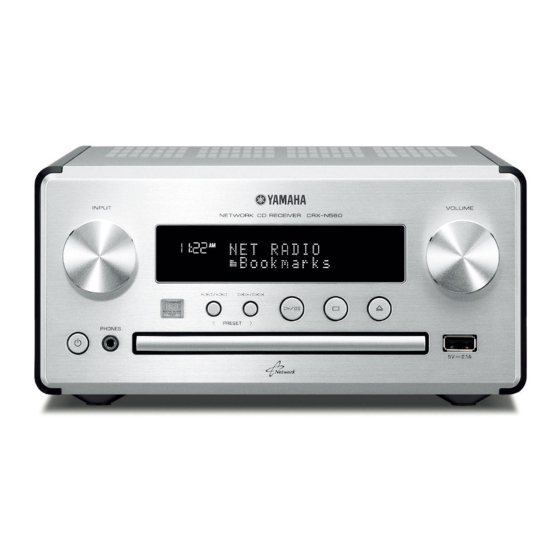
Network cd receiver
Hide thumbs
Also See for CRX-N560:
- Owner's manual (182 pages) ,
- Owner's manual (166 pages) ,
- Firmware update procedure (4 pages)
Table of Contents
Advertisement
Available languages
Available languages
Advertisement
Chapters
Table of Contents

Related Manuals for Yamaha CRX-N560


Summary of Contents for Yamaha CRX-N560
- Page 1 Net wor k CD R eceiver / Amp li-Tune r CD R ésea u OW NE R ’S MANUAL MODE D ’E MPLOI Read the suppl ied b o ok let “S afet y B ro chure” b efore u s ing t he u nit. L isez le l ivret fourni «B ro chure sur l a sécurité»...
-
Page 2: Table Of Contents
Contents Introduction Listening to external sources Troubleshooting ..4 ..19 ..33 Supplied accessories..4 General..33 More on playback About this manual..4 Network..34 ..20 iPod..35 Shuffle playback..20 Part name Disc..36 ..5 Repeat playback..20 USB devices..36 Playback information..21 Front panel..5 FM reception..37 Adjusting sound quality..22 Rear panel..6 Messages on the front panel display..38 Front panel display..7... - Page 3 Awesome! Great sound!! The sound from a PC is something else! ..17, 18 High-resolution sound is played back ..22 Anytime, anywhere, music! Convenient App! My smartphone as a remote control ..18 Songs in my iPhone from More on music speakers wirelessly..26 A variety of external devices (Blu-ray/ DVD/mobile music player etc.) can...
-
Page 4: Introduction
Introduction Confirm the package contents and useful points of this manual. Supplied accessories About this manual • How to operate this unit is described mainly using the remote control. • Illustrations may differ from actual item depicted. Batteries (× 2) •... -
Page 5: Part Name
Part name Familiarize yourself with all parts and these functions. Remote control receiver Front panel INPUT Turn left or right to change the audio source. (The source is shown on the front panel display.) P.14, 16, 18) PRESET</> ( P.24) A (Power) ( P.12) PHONES... -
Page 6: Rear Panel
Power cable ( P.12) Rear panel DC OUT terminal Supplies power to the Yamaha AV accessories from this terminal. When using this, set [Use Accessory] in [System Config] from the option setting, to [YES] ( P.31). For details, refer to the owner’s manual supplied with the accessory. -
Page 7: Front Panel Display
Part name Front panel display Clock Sleep timer indicator Adjusting display brightness Displays the time when the power is on. Lights up when the sleep timer is set ( P.29). You can adjust the brightness of the front panel display by pressing the DIMMER button on the TUNED indicator Shuffle/repeat indicator remote control (... -
Page 8: Remote Control
Part name Infrared signal transmitter (REPEAT) ( P.20) Remote control TIMER ( P.28) (Open/close the disc tray) ( P.14) SLEEP ( P.29) Source buttons Switch the audio source to be played. Numeric buttons ( P.14) HOME ( P.16, 18, 25) RETURN ( P.14, 16, 18, 25) Audio control, cursor control buttons... -
Page 9: Preparations
Preparations Connect speakers or antenna and turn the unit on. Do not connect the power cable of the unit until you have finished connecting all cables. Connecting the speakers Right speaker Remove the insulation from the end of Left speaker the speaker cable to expose the bare wires. -
Page 10: Connecting Antenna
Preparations Connecting antenna Supplied antenna Connect the supplied antenna to the unit. Install it with pins where the unit can obtain good reception. • Be sure to stretch out the antenna as the illustration shows. • If radio reception with the supplied antenna is not satisfactory, a commercially available outdoor antenna may improve reception. -
Page 11: Connecting To The Network
Preparations Connecting to the Mobile device This unit network You can play back music files stored on your PC, mobile devices, DLNA*-compatible NAS, or audio contents on the Internet, by connecting this unit to the network. You can also operate the unit with your mobile device. * Digital Living Network Alliance Connect the unit to the network as shown Broadband... -
Page 12: Turning On The Power
Preparations Status in standby/eco standby Turning on the power Standby Eco standby Charging of iPod/USB devices — Plug the power cable into the wall outlet Enable/disable the wake-up and press — timer* • The unit turns on. Operation of the source •... -
Page 13: Setting The Network Devices
Setting the network devices Configure your devices connected to the network to play back music files stored on your PC or NAS, or configure your mobile device to control this unit. Mobile devices Configure the media sharing setting of Configure the settings to access your NAS. Install the dedicated application your PC ( P.17). -
Page 14: Listening To Cd
Listening to CD This unit allows playback of audio CDs and data CDs in which the MP3/WMA files are recorded. For details on playable CDs, see “Supported devices/medias” (P.39). • Files on a data CD are played back in Turn INPUT to select [CD]. Or, press alphanumeric order. -
Page 15: Listening To Ipod/Usb Devices
Turn INPUT to select [USB] or press • Yamaha and suppliers do not accept any liability on the remote control. for the loss of data saved on an iPod or a USB device connected to the unit. - Page 16 Listening to iPod/USB devices Switching the information display of iPod Remote control operation for iPods/USB • When operating your iPod with Yamaha’s devices application “NETWORK PLAYER CONTROLLER,” the information display switches to the extended mode. Skip to the beginning of the song being...
-
Page 17: Listening To The Songs In The Computer
(Windows Media Player 11 or later). In Check the “Share my media to” box, select the here, setting with Windows Media Player 12 in Windows 7 “CRX-N560” icon, and click “Allow.” is taken as an example. Click “OK” to exit. -
Page 18: Playing Back Songs In The Pc
Listening to the songs in the computer • If playback is not possible, make sure this unit and Playing back songs in the PC (server) are connected to the same router P.11). the PC Operating from your mobile device Press repeatedly and select Once you install the app “NETWORK PLAYER CONTROLLER”... -
Page 19: Listening To External Sources
Listening to external sources This unit allows playback of external devices, such as a DVD player or mobile music player. Use the terminal (DIGITAL IN 1/2 or AUX 1/2) according to the device to be connected ( P.6). For the connection of each external device, refer to its supplied owner’s manual. Unplug the power cable of the unit and connect the external device to the unit. -
Page 20: More On Playback
More on playback You can enjoy music in varied song order or sound quality, and view music information during playback. Operations described in this section apply to all devices, such as PC (server), iPod, USB device, or CD. • Shuffle playback and repeat playback can be Shuffle playback performed at the same time (except Press... -
Page 21: Disc
More on playback • Characters shown on the front panel display are Playback information alphanumerics only. • Information is not displayed when the iPod display mode is the standard mode ( P.16). Song title, elapsed time, etc., can be shown on the front panel display. -
Page 22: Adjusting Sound Quality
More on playback Option menu regarding sound quality Adjusting sound quality (Setting value. Bold: default) Equalizer Use the option setting to adjust sound quality. Adjusts low frequency [EQ Low], middle frequency [EQ Mid], and high frequency [EQ High]. The setting is also Press applied when using headphones. -
Page 23: Listening To Fm Radio Stations
Listening to FM radio stations To listen to FM radio stations, connect the supplied antenna. See “Connecting antenna” (P.10) for connecting the antenna to the unit. • If station reception is weak, you can tune into a Tuning in FM stations station manually by pressing the TUNING button repeatedly. -
Page 24: Selecting Preset Fm Stations
Listening to FM radio stations • To cancel manual preset setting, press Manual preset OPTION Deleting a preset station Tune into a station you want to store Use the option setting to delete a preset station. P.23). Press when the source is FM. Press - Option menu is shown on the front panel display. -
Page 25: Listening To Internet Radio
Listening to Internet radio You can listen to world-wide radio stations via Internet. Make sure that the unit is connected to the Internet properly ( P.11). • Playback information can be shown by pressing Press repeatedly to select [Net the DISPLAY button while Internet radio is played Radio]. -
Page 26: Listening To The Music With Airplay
• The source automatically switches to [AirPlay] • Tap/click on the iPod/iTunes screen and (except in the eco standby mode). select a device other than CRX-N560 from the Play back songs with iTunes. speaker list. Or, change the source to other than AirPlay. -
Page 27: Using The Clock
Using the clock Once you set the clock, you can play your favorite song or radio program as an alarm. • The clock setting will be lost if you disconnect the Setting the clock power cable from the wall outlet for about a week. Set the clock again. -
Page 28: Setting The Wake-Up Timer
Using the clock • Set the clock before setting the wake-up timer. Setting the wake-up • Wake-up timer is not available when [Power saving] is set to [Eco]. Set it to [Normal] ( P.12). timer • You can also set the wake-up timer using the Music or beep will be started at the time you set. -
Page 29: Sleep Timer
Using the clock • When the setting completes, [Completed!] is • If the source is removed from the unit after the shown and lights up on the front panel wake-up timer is set, the unit will beep at the start- display. -
Page 30: Updating The Firmware
USB memory device. • Update starts. The firmware can be downloaded from the OPTION Yamaha Website. To update the firmware using a USB memory device • When update finishes, messages are shown in the following order: “Update success.”, “Please…”, and... -
Page 31: Option Settings
Option settings Option settings allow you to configure the unit to suit how you will use it. • To set [Advanced Setup] in the option menu, press Press the OPTION button on the remote control while pressing and holding (stop button) of the •... -
Page 32: Option Menu List
Timer 8H Sets the unit into standby mode automatically ( P.12). Status System MAC Address Shows MAC address. Config Selects whether or not to supply power to a Yamaha Network Use Accessory accessory connected through the DC OUT jack. Info System ID Shows the system ID. -
Page 33: Troubleshooting
Refer to the table below when the unit does not function properly. If your problem is not listed below or if the instruction below does not help, turn off the unit, disconnect the power cable, and contact the nearest authorized Yamaha dealer or service center. -
Page 34: Network
Troubleshooting Network Problem Cause Solution Enable the DHCP server function on your router and set [DHCP Enabled] of [Network Config] in the option menu to [YES] on the unit. If you want to The network feature does not function. The network parameters (IP address) have not been obtained properly. configure the network parameters manually, check that you are using an IP address which is not used by other network devices in your network P.32). -
Page 35: Ipod
Troubleshooting Problem Cause Solution In [Advanced Setup] in the option menu of the unit, set [MAC Add.Filter] to The MAC address filter is enabled on the unit. [OFF] or specify the MAC address of your mobile devices to allow it to access to the unit ( P.32). -
Page 36: Usb Devices
Troubleshooting Problem Cause Solution The iPod is not connected properly. Reconnect the iPod to the USB jack ( P.15). The iPod does not charge up. The iPod is not supported by this unit. Use a supported iPod ( P.39). The unit is in the eco standby mode. Set [Power Saving] to [Normal] with the option setting ( P.12). -
Page 37: Fm Reception
Troubleshooting FM reception Problem Cause Solution Make sure the antenna is connected properly and change the position of The antenna is not connected properly. the antenna ( P.10). FM stereo reception is noisy. The radio station you selected may be far from your area, or the antenna Use a commercially available outdoor antenna. -
Page 38: Messages On The Front Panel Display
Troubleshooting Messages on the front panel display Message Cause Solution There is a problem with the signal path from your iPod to this unit. Reconnect the iPod. The iPod/USB device being connected is not supported by the unit. Use a supported iPod/USB device ( P.39). -
Page 39: Supported Devices/Media And File Formats
Supported devices/media and file formats Note Handling discs Supported devices/ iPod is licensed on the condition that individuals perform • Do not touch the surface of the disc. privately duplication and playback of uncopyrighted Hold a disc by its edge or center hole. medias material or material legally approved of duplication and •... - Page 40 Supported devices/media and file formats File format File format the unit supporting is as follows. DLNA™ and DLNA CERTIFIED™ are trademarks or registered AirPlay works with iPhone, iPad, and iPod touch with iOS trademarks of Digital Living Network Alliance. All rights 4.3.3 or later, Mac with OS X Mountain Lion, and Mac and PC DLNA/USB reserved.
-
Page 41: Specifications
Specifications Player section Amplifier section Media CD, CD-R/RW Maximum output power 32 W + 32 W (6 Ω 1 kHz, 10% THD) Audio format Audio CD, MP3, WMA Total harmonic distortion AUX1 1 kHz/12.5 W 0.05% or less Type Semiconductor laser GaAs/GaAlAs EQ High (treble)/EQ Mid (middle)/EQ Low EQ control (bass): ±10 dB... -
Page 42: Information About Software
Information about software This product uses the following free software. For information (copyright, etc) about each software, read the original sentences stated below. About ASN.1 object dumping code Redistributions in binary form must reproduce the above Permission is hereby granted, free of charge, to any person copyright notice, this list of conditions and the following obtaining a copy of this software and associated ASN.1 object dumping code, copyright Peter Gutmann... - Page 43 Information about software This software is provided “AS IS”, and you, its user, assume the About JsonCpp Redistribution and use in source and binary forms, with or entire risk as to its quality and accuracy. without modification, are permitted provided that the Copyright ©...
- Page 44 Information about software Copyright © 1982, 1986 Regents of the University of Simon-Pierre Cadieux Paul Schmidt California. Eric S. Raymond Tim Wegner Gilles Vollant All rights reserved. The PNG Reference Library is supplied “AS IS”. The and with the following additions to the disclaimer: Contributing Authors and Group 42, Inc.
- Page 45 WARRANTIES, INCLUDING, BUT NOT LIMITED TO, THE IMPLIED Do not disassemble, decompile, or reverse engineer the WARRANTIES OF MERCHANTABILITY AND FITNESS FOR A software included in Yamaha AV products. PARTICULAR PURPOSE ARE DISCLAIMED. IN NO EVENT SHALL THE COPYRIGHT OWNER OR CONTRIBUTORS BE LIABLE FOR...
- Page 46 Table des matières Introduction Écoute des morceaux de Mise à jour du ..4 l’ordinateur microprogramme Accessoires fournis..4 ..17 ..30 Quelques mots sur ce mode d’emploi..4 Réglage du partage des fichiers multimédias pour les Réglage des options fichiers musicaux..17 ..31 Nom des pièces ..5 Lecture de morceaux sur le PC..18 Liste du menu des options..32...
- Page 47 Incroyable ! Un son extraordinaire ! Le son d’un PC est radicalement différent ! ..17, 18 Une qualité sonore haute résolution ..22 La musique où je veux, quand je veux ! Une application super pratique ! Mon smartphone me sert de télécommande ..18 En savoir plus J’écoute les morceaux de...
-
Page 48: Introduction
Introduction Vérifiez le contenu de l’emballage et les points utiles de ce manuel. Accessoires fournis Quelques mots sur ce mode d’emploi • Le fonctionnement de cet appareil est décrit principalement en utilisant la télécommande. Piles (× 2) (AA, R6, UM-3) •... -
Page 49: Nom Des Pièces
Nom des pièces Familiarisez-vous avec toutes les pièces et les fonctions suivantes. Récepteur de télécommande Panneau avant INPUT À tourner vers la gauche ou vers la droite pour changer de source audio. (La source apparaît sur l’afficheur du panneau avant.) P.14, 16, 18) PRESET</>... -
Page 50: Panneau Arrière
Câble d’alimentation ( P.12) Panneau arrière Borne DC OUT Pour alimenter les accessoires AV Yamaha à partir de cette borne. Lorsque vous l’utilisez, réglez [Use Accessory] (sous [System Config] dans le réglage des options) sur [YES] ( P.31). Pour plus d’informations, consultez le mode d’emploi de l’accessoire. -
Page 51: Afficheur Du Panneau Avant
Nom des pièces Afficheur du panneau avant Horloge Témoin de la minuterie de mise en veille Réglage de la luminosité de l’afficheur Affiche l’heure lorsque l’appareil est sous tension. S’allume lorsque la minuterie de mise en veille est réglée Vous pouvez régler la luminosité de l’afficheur du P.29). -
Page 52: Télécommande
Nom des pièces Émetteur de signaux infrarouges (REPEAT) ( P.20) Télécommande TIMER ( P.28) (Ouvrir/fermer le tiroir de disque) ( P.14) SLEEP ( P.29) Touches de sélection de la source Pour commuter la source audio à lire. Touches numériques ( P.14) HOME ( P.16, 18, 25) -
Page 53: Préparations
Préparations Pour raccorder les enceintes ou l’antenne et mettre l’appareil sous tension. Ne branchez pas le câble d’alimentation de l’appareil avant d’avoir fini de raccorder tous les câbles. Raccordement des Enceinte droite enceintes Enceinte gauche Retirez l’isolation de l’extrémité du câble d’enceinte pour révéler les fils dénudés. -
Page 54: Raccordement De L'antenne
Préparations Raccordement de Antenne fournie l’antenne Raccordez l’antenne fournie à l’appareil. Installez-la avec des broches à un emplacement où l’appareil peut obtenir une bonne réception. • Assurez-vous de déployer l’antenne comme illustré. • Si la réception de la radio avec l’antenne fournie n’est pas satisfaisante, une antenne extérieure disponible dans le commerce peut améliorer la réception. -
Page 55: Connexion Au Réseau
Préparations Connexion au réseau Périphérique mobile Cet appareil Vous pouvez lire des fichiers musicaux mémorisés sur votre PC, des périphériques mobiles, un NAS compatible DLNA* ou un contenu audio sur Internet en connectant cet appareil au réseau. Vous pouvez également utiliser l’appareil avec votre périphérique mobile. -
Page 56: Mise Sous Tension
Préparations Statut en veille/veille écologique Mise sous tension Veille Veille écologique Branchez le câble d’alimentation à la prise Charge des iPod/dispositifs — murale et appuyez sur Activation/désactivation du • L’appareil se met sous tension. — réveil* • Appuyez à nouveau sur pour le mettre hors tension 6 m maximum Fonctionnement des touches... -
Page 57: Réglage Des Périphériques Réseau
Réglage des périphériques réseau Configurez vos périphériques connectés au réseau pour lire les fichiers musicaux mémorisés sur votre PC ou NAS, ou configurez votre périphérique mobile pour commander cet appareil. Périphériques mobiles Configurez le réglage du partage des Configurez les réglages pour accéder à Installez l’application dédiée «... -
Page 58: Écoute De Cd
Écoute de CD Cet appareil permet de lire des CD audio et des CD de données sur lesquels sont enregistrés des fichiers MP3/WMA. Pour plus d’informations sur les CD lisibles, reportez-vous à la section « Périphériques/supports pris en charge » (P.39). •... -
Page 59: Écoute Des Ipod/Dispositifs Usb
USB ne soient pas Pour sélectionner [USB], tournez compatibles. INPUT ou appuyez sur la touche • Yamaha et ses fournisseurs déclinent toute la télécommande. responsabilité concernant la perte des données enregistrées sur un iPod ou un dispositif USB raccordé... - Page 60 Fonctionnement de la télécommande l’iPod pour les iPod/dispositifs USB • Lorsque vous utilisez votre iPod avec l’application « NETWORK PLAYER CONTROLLER » de Yamaha, le mode d’affichage des informations cède la place Passe directement au début du morceau en au mode étendu.
-
Page 61: Écoute Des Morceaux De L'ordinateur
(Lecteur Windows Media 11 ou ultérieur). Ici, on cite en multimédias dans », sélectionnez l’icône du exemple le réglage avec Lecteur Windows Media 12 dans « CRX-N560 », puis cliquez sur « Autorisé ». Windows 7. Cliquez sur « OK » pour quitter. -
Page 62: Lecture De Morceaux Sur Le Pc
Écoute des morceaux de l’ordinateur • Si la lecture n’est pas possible, vérifiez que cet Lecture de morceaux appareil et le PC (serveur) sont connectés au même routeur ( P.11). sur le PC Utiliser de l’appareil avec votre périphérique Appuyez à plusieurs reprises sur mobile Une fois que vous avez installé... -
Page 63: Écoute De Sources Externes
Écoute de sources externes Cet appareil permet de lire des périphériques externes, par exemple un lecteur DVD ou un lecteur de musique portable. Utilisez la borne (DIGITAL IN 1/2 ou AUX 1/2) en fonction du périphérique à raccorder ( P.6). Pour le raccordement de chaque périphérique externe, consultez le mode d’emploi qui l’accompagne. Débranchez le câble d’alimentation de l’appareil et raccordez le périphérique externe à... -
Page 64: En Savoir Plus Sur La Lecture
En savoir plus sur la lecture Vous pouvez écouter de la musique dans différents ordres ou qualités sonores, et afficher les informations de la musique pendant la lecture. Les opérations décrites dans cette section s’appliquent à tous les périphériques : PC (serveur), iPod, dispositif USB ou CD. •... -
Page 65: Informations De Lecture
En savoir plus sur la lecture • Le panneau avant prend en charge uniquement Informations de lecture l’affichage de caractères alphanumériques. • Les informations ne s’affichent pas lorsque le mode d’affichage de l’iPod est le mode standard Le titre du morceau, le temps écoulé, etc. peuvent P.16). -
Page 66: Réglage De La Qualité Sonore
En savoir plus sur la lecture Menu des options relatif à la qualité sonore Réglage de la qualité (Valeur de réglage. Gras : par défaut) sonore Equalizer Ajuste les basses fréquences [EQ Low], les moyennes fréquences [EQ Mid] et les hautes fréquences [EQ High]. Utilisez le réglage des options pour ajuster la qualité... -
Page 67: Écoute De Stations De Radio Fm
Écoute de stations de radio FM Pour écouter les stations de radio FM, raccordez l’antenne fournie. Reportez-vous à la section « Raccordement de l’antenne » (P.10) pour raccorder l’antenne à l’appareil. • Si la réception de la station est faible, vous pouvez Syntonisation de stations FM syntoniser une station manuellement en appuyant à... -
Page 68: Sélection Des Stations Fm Préréglées
Écoute de stations de radio FM • Pour annuler le préréglage manuel, appuyez sur Préréglage manuel OPTION Syntonisez une station que vous Suppression d’une station préréglée souhaitez mémoriser ( P.23). Utilisez le réglage des options pour supprimer une station préréglée. Appuyez sur Appuyez sur lorsque la source est FM. -
Page 69: Écoute De La Webradio
Écoute de la webradio Vous pouvez écouter les stations de radio du monde entier via Internet. Vérifiez que l’appareil est correctement connecté à Internet ( P.11). • Vous pouvez faire apparaître les informations de Appuyez à plusieurs reprises sur lecture en appuyant sur la touche DISPLAY pour sélectionner [Net Radio]. -
Page 70: Écoute De Musique Avec Airplay
• Tapez/cliquez sur sur l’écran de l’iPod ou [AirPlay] (sauf en mode veille écologique). d’iTunes, puis sélectionnez un périphérique autre que le CRX-N560 dans la liste des enceintes. Vous Lisez des morceaux avec iTunes. pouvez également sélectionner une source autre qu’AirPlay. -
Page 71: Utilisation De L'horloge
Utilisation de l’horloge Une fois l’horloge réglée, vous pouvez lire votre morceau ou programme de radio favori comme alarme. • Le réglage de l’horloge est perdu si vous Réglage de l’horloge débranchez le câble d’alimentation de la prise murale pendant au moins une semaine. Réglez à nouveau l’horloge. -
Page 72: Réglage Du Réveil
Utilisation de l’horloge • Réglez l’horloge avant de régler le réveil. Réglage du réveil • Le réveil n’est pas disponible lorsque vous réglez [Power saving] sur [Eco]. Réglez-le sur [Normal] P.12). De la musique ou un signal sonore retentit à l’heure que vous avez programmée. -
Page 73: Minuterie De Mise En Veille
Utilisation de l’horloge • Une fois le réglage terminé, [Completed!] apparaît • Si vous supprimez la source de l’appareil après le s’allume sur l’afficheur du panneau avant. réglage du réveil, l’appareil émet un signal sonore à l’heure de démarrage. • Si une source musicale est lue à l’heure de démarrage, clignote et la lecture continue. -
Page 74: Mise À Jour Du Microprogramme
à jour le microprogramme à l’aide d’un dispositif USB. Vous pouvez télécharger OPTION le microprogramme sur le site Web de Yamaha. Pour mettre à jour le microprogramme à l’aide • Une fois la mise à jour terminée, des messages d’un dispositif USB... -
Page 75: Réglage Des Options
Réglage des options Le réglage des options vous permet de configurer l’appareil pour l’adapter à votre façon de l’utiliser. • Pour régler [Advanced Setup] dans le menu des Appuyez sur options, appuyez sur la touche OPTION de la télécommande tout en maintenant la touche •... -
Page 76: Liste Du Menu Des Options
Auto Power Off Timer 8H Met automatiquement l’appareil en veille ( P.12). Affiche l’état de connexion de l’appareil et du réseau. Status System Définit s’il faut ou non alimenter l’accessoire Yamaha Config Use Accessory MAC Address Affiche l’adresse MAC. Network branché... -
Page 77: Guide De Dépannage
Reportez-vous au tableau suivant si l’appareil ne fonctionne pas convenablement. Si l’anomalie constatée n’est pas mentionnée ci-dessous, ou encore si l’action corrective suggérée est sans effet, mettez l’appareil hors tension, débranchez le câble d’alimentation et prenez contact avec le revendeur ou le centre d’entretien Yamaha agréé. -
Page 78: Réseau
Guide de dépannage Réseau Anomalies Causes possibles Solution Activez la fonction du serveur DHCP sur votre routeur et réglez [DHCP Enabled] sous [Network Config] dans le menu des options sur [YES] sur La fonction réseau ne fonctionne pas. Les paramètres réseau (adresse IP) n’ont pas été obtenus correctement. l’appareil. -
Page 79: Ipod
Guide de dépannage Anomalies Causes possibles Solution Sous [Advanced Setup] dans le menu des options de l’appareil, réglez [MAC Le filtre adresse MAC est activé sur l’appareil. Add.Filter] sur [OFF] ou spécifiez l’adresse MAC de votre périphérique mobile pour lui permettre d’accéder à l’appareil ( P.32). -
Page 80: Disque
Guide de dépannage Anomalies Causes possibles Solution Cette fonction est disponible uniquement avec un iPod convenablement L’iPod ne prend pas en charge l’affichage des informations de lecture. Les informations de lecture n’apparaissent pris en charge par cet appareil ( P.39). pas sur l’afficheur du panneau avant. -
Page 81: Réception Fm
Guide de dépannage Réception FM Anomalies Causes possibles Solution Vérifiez que l’antenne est correctement raccordée et changez la position de L’antenne n’est pas raccordée correctement. l’antenne ( P.10). La réception FM en stéréophonie est parasitée. La station de radio sélectionnée est trop éloignée de votre région ou le Utilisez une antenne extérieure disponible dans le commerce. -
Page 82: Messages Sur L'afficheur Du Panneau Avant
Guide de dépannage Messages sur l’afficheur du panneau avant Message Causes possibles Solution Il y a un obstacle entre votre iPod et l’appareil. Raccordez à nouveau l’iPod. Le dispositif USB ou l’iPod connecté n’est pas pris en charge par l’appareil. Utilisez un dispositif USB ou un iPod pris en charge ( P.39). -
Page 83: Périphériques/Supports Et Formats De Fichier Pris En Charge
Périphériques/supports et formats de fichier pris en charge Remarque • N’utilisez pas de disques comportant de nombreuses Périphériques/ rayures ou une fissure sur leur surface, ou des disques La licence de l’iPod est concédée à la condition que les déformés/collés. individus exécutent en privé... - Page 84 Périphériques/supports et formats de fichier pris en charge Format de fichier L’appareil prend en charge les formats de fichier suivants. DLNA™ et DLNA CERTIFIED™ sont des marques AirPlay fonctionne avec l’iPhone, l’iPad et l’iPod touch avec commerciales ou des marques déposées de Digital Living iOS 4.3.3 ou une version ultérieure, Mac avec OS X Mountain DLNA/USB Network Alliance.
-
Page 85: Caractéristiques Techniques
Caractéristiques techniques Lecteur Amplificateur Support CD, CD-R/RW Puissance de sortie maximale 32 W + 32 W (6 Ω 1 kHz, 10 % THD) Format audio CD audio, MP3, WMA Distorsion harmonique totale AUX1 1 kHz/12,5 W 0,05 % au maximum Type Laser semi-conducteur GaAs/GaAlAs EQ High (aigu)/EQ Mid (moyen)/EQ Low... -
Page 86: Information Sur Le Logiciel
Information sur le logiciel Ce produit utilise les logiciels gratuits ci-après. Pour plus d’informations sur chaque logiciel (droits d’auteur, etc.), lisez les déclarations ci-dessous. Le texte authentique est en anglais. Cette traduction sert à titre de référence seulement. À propos du code de vidage Les redistributions du code source doivent conserver le À... - Page 87 Information sur le logiciel À propos du logiciel JPEG non modifiée. Si vous utilisez notre produit, vous devez DANS LE CADRE D’UN CONTRAT, D’UN DLIT OU AUTRE, reconnaître qu’il représente notre propriété. RÉSULTANT DE OU EN RAPPORT AVEC LE LOGICIEL OU d’Independent JPEG Group L’UTILISATION OU AUTRES TRAITEMENTS DU LOGICIEL.
- Page 88 Information sur le logiciel (4) Ni le nom de l’Université, ni les noms de ses logiciel a été développé par l’Université de Californie, libpng versions 0.97, janvier 1998, à 1.0.6, 20 mars 2000, contributeurs ne peuvent être utilisés pour avaliser ou Berkeley.
- Page 89 Ne jamais démonter, décompiler ni rétroconcevoir le À propos de l’algorithme RC4 EXEMPLAIRES OU CONSÉCUTIFS (Y COMPRIS, MAIS SANS S’Y logiciel inclus dans les produits Yamaha AV. LIMITER, FOURNITURE DE MARCHANDISES OU SERVICES DE Copyright Mocana Corp 2003-2005. Tous droits réservés.
- Page 90 © 2013 Yamaha Corporation Printed in Malaysia ZH10720-1...
Need help?
Do you have a question about the CRX-N560 and is the answer not in the manual?
Questions and answers