
Related Manuals for Beyerdynamic DT 190


Summary of Contents for Beyerdynamic DT 190
-
Page 1: Operating Instructions
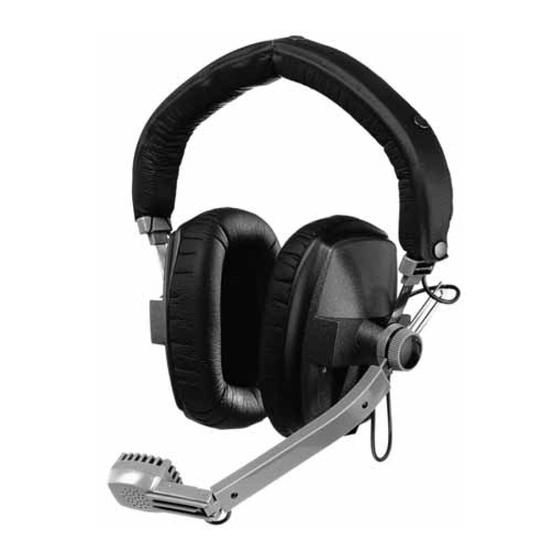
BEDIENUNGSANLEITUNG OPERATING INSTRUCTIONS NOTICE D’UTILISATION DT 150 Studiohörer Professional Headphone Casque de Studio DT 190 Hör-Sprechgarnitur Headset Micro-casque... -
Page 2: Table Of Contents
Technische Daten ..... . . Seite OPERATING INSTRUCTIONS DT 150 - DT 190 Design Features ......Page 10 Connection . -
Page 3: Bedienungsanleitung Dt 150 - Dt 190
Kommunikationseinheit an Fernsehkame ras oder in Intercom- systemen bei Konzertveranstaltungen einsetzen. Anschluss Der Studiohörer DT 150 und die Hör-Sprechgarnitur DT 190 werden standardmäßig ohne Anschlusskabel geliefert. Die lieferbaren Kabel sind unter „Optionales Zubehör “ Seite 7 aufgeführt. Wenn Sie bei dem Lahnleiterkabel K 100.00 die Stecker selbst montieren möchten, empfehlen wir, die Litzen mit Aderendhülsen... - Page 4 Das Anschlusskabel zum Mikrofon ist verdeckt im Kopfbügel geführt. Bei Bedarf können Sie die Mikrofonhalterung ummontieren, so dass Sie das Mikrofon auch rechts tragen können. DT 190 1. Kappe mit kleinem Schraubendreher abheben. 2. Schraube lösen. 3. Scheibe um 180° drehen. Nase der Scheibe zeigt zum oberen Ende des Schwenkarms.
-
Page 5: Pflege
BN 59-58/A Kopfpolster ....Best.-Nr. 377.163 EDT 150 S Ohrmuschelsatz, Softskin ..Best.-Nr. 931.532 Lieferzubehör BN 56-79/A Poppschutz (für DT 190)..Best.-Nr. 108.677... - Page 6 Enden... . Best.-Nr. 101.788 WK 100.07 wie WK 100.00, jedoch mit Stereo-Klinkenstecker ..Best.-Nr. 101.826 DT 190 K 190.00 - 1,5 M Anschlusskabel, 1,5 m, mit freien Enden.
-
Page 7: Technische Daten
Technische Daten DT 150 - DT 190 Hörer Wandlerprinzip ..Dynamisch Arbeitsprinzip ... Geschlossen Übertragungsbereich ..5 - 30.000 Hz Nennimpedanz . - Page 8 Schaltbild Richtdiagramm...
-
Page 9: Operating Instructions Dt 150 - Dt 190
OPERATING INSTRUCTIONS DT 150 - DT 190 Thank you for selecting the DT 150 professional studio head- phone or the DT 190 professional headset. They have been made in Germany from high-grade materials and assembled under stringent quality and performance tests to provide you with a professional communications tool. -
Page 10: Operation
Operation The DT 150 and DT 190 are of a professional standard. It is important that the external equipment they will be connected to are of good quality and of the correct impedance and power ratings to get the best performance from them. Please refer to the “Technical Specifications”... -
Page 11: Maintenance
Please take care that the pop-shield is completely dry when it is replaced. The fully modular design of the DT 150 and DT 190 allows for full, in-field serviceability without the need for specialists tools. -
Page 12: Accessories
Supplied Accessories BN 56-79/A Pop-shield (for DT 190) ..Order # 108.677 Optional Accessories DT 150 K 100.00 - 3,0 M Straight cable, 3 m long, free ends ....Order # 101.710 K 100.07 - 3,0 M... -
Page 13: Technical Specifications
Technical Specifications DT 150 - DT 190 Headphone Transducer type ... . . dynamic Operating principle ..closed Frequency response ..5 - 30.000 Hz Nominal output impedance . - Page 14 Wiring Diagram Polar Pattern...
-
Page 15: Notice D'utilisation Dt 150 - Dt 190
(La liste des câbles disponibles figure ci-après dans la rubrique accessoires). Branchements Le casque DT 150 et le micro-casque DT 190 sont livrés sans câble. La liste des câbles disponibles figure ci-après dans la rubrique accessoires. Si vous optez pour le câble K 190.00 à extrémités libres, nous vous conseillons de munir les fils d’un manchon à... -
Page 16: Entretien
DT 190 1. Soulevez le couvercle avec un petit tournevis. 2. Enlevez la vis 3. Retournez le disque 180°. La marque du disque est orienté vers le haut du bras de support. 4. Resserrez la vis et encliquetez le couvercle sur l’articulation. -
Page 17: Sécurité
Oreillettes par pair, softskin ..Art. N° 931.532 Accessoires fournis BN 56-79/A Mousse protection «POP» (pour DT 190) ....Art. N° 108.677 Accessoires en option DT 150 K 100.00 - 3,0 M... -
Page 18: Spécifications Techniques
....Art. N° 448.176 Spécifications techniques DT 150 - DT 190 Écouteurs Type de transducteur ..dynamique Fonctionnement acoustique. - Page 19 Diagramme de câblage DT 150 DT 190 Microphone Type de transducteur ..dynamique Bande passante ... . . 40 - 12.000 Hz Directivité...
- Page 20 Directivité...
- Page 21 Theresienstr. 8 | 74072 Heilbronn – Germany Tel. +49 (0) 7131 / 617 - 0 | Fax +49 (0) 7131 / 617 - 224 info@beyerdynamic.de | www.beyerdynamic.de Weitere Vertriebspartner weltweit finden Sie unter www.beyerdynamic.de For further distributors worldwide, please go to www.beyerdynamic.com...
Need help?
Do you have a question about the DT 190 and is the answer not in the manual?
Questions and answers