Table of Contents
Advertisement
Quick Links
INTRODUCTION
The Owners Manual for your new Airstream Motorhome is designed to respond
to the most frequent inquiries regarding the operation, function and care of the
many systems that make modern motor homing a joy.
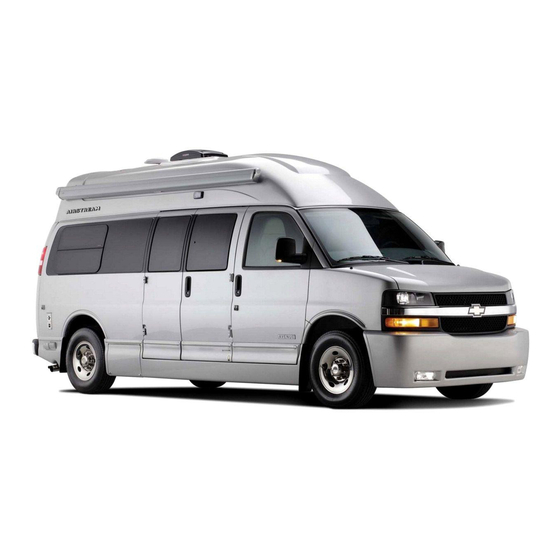
The Airstream Avenue Motorhome is integrated into a Express Van, designed
and manufactured by Chevrolet. Operation of the Express, its engine, power
train, and other related components are discussed in the Express Operator's
Manual and other literature provided by Chevrolet. As a point of reference,
those systems discussed in the Express literature are warranted by Chevrolet
or their suppliers.
Airstream realizes our customers possess varying degrees of expertise in the
area of repairing and maintaining the appliances in their motorhome. For this
reason, the service and trouble-shooting information found in this manual is
directed toward those with average mechanical skills. We also realize you
may be more familiar in one area than you are in another. Only you know your
capabilities and limitations.
We want you to use this manual, and hope you will find the information con-
tained in it helpful, however, should you ever feel you may be "getting in over
your head", please see your dealer to have the repairs made.
The operation and care of component parts such as, refrigerator, furnace, water
heater and others are briefly explained in this manual. However, you will also
Advertisement
Table of Contents

Related Manuals for Airstream Avenue 2011


Summary of Contents for Airstream Avenue 2011
- Page 1 INTRODUCTION The Owners Manual for your new Airstream Motorhome is designed to respond to the most frequent inquiries regarding the operation, function and care of the many systems that make modern motor homing a joy. The Airstream Avenue Motorhome is integrated into a Express Van, designed and manufactured by Chevrolet.
- Page 2 This denotes items that may be an option on all or particular models. Additionally, tion approval. Airstream reserves the right to make changes if and when new some optional items can only be included during the manufacturing phase and cannot be added.
- Page 3 INTRODUCTION manual. The recommendations on the next two pages are the ones we Appliances and Equipment (See LP section on G-1 and Appliances on consider to be the most important. Most are covered in depth in later sections page I-1) of this manual.
- Page 4 Formaldehyde is a naturally occurring substance. It is also a key industrial rapidly over time. Airstream strongly suggests that you take measures to chemical used in the manufacture of the numerous consumer products which properly ventilate your motorhome on a regular basis.
- Page 5 If you have any questions with respect to proper ventilation of your motorhome, please do not hesitate to contact your dealer or Airstream. Chemical gassing is not a “Defect” in your recreational vehicle and is not covered by the Limited Warranty.
-
Page 6: Table Of Contents
TABLE OF CONTENTS A. WARRANTY AND SERVICE Smoke/CO Alarm Interior Bulbs TV Antenna Warranty LP Gas Detector Curtains Entertainment Warranty Explanation Overnight Stop Solar Power G. PLUMBING Service Extended Stay I. APPLIANCES Reporting Safety Defects Winter Traveling LP (Liquid Petroleum) Gas Maintenance Schedule Water System Air Conditioner... -
Page 7: Warranty And Service
In order ranted by persons or entities other than Airstream. Please refer to the warran- to obtain coverage under this Limited Warranty, you must notify an authorized ties of component manufacturers for terms and conditions of coverage;... - Page 8 Airstream. other facilities. d. Acts of God or other environmental conditions, such as lightning, n. Acts or omissions of any person or entity other than Airstream. hail, salt, or other chemicals in the atmosphere. DISCLAIMER OF INCIDENTAL AND CONSEQUENTIAL DAMAGES e.
- Page 9 (1) Airstream’s receipt of a completed transfer application form; (2) the pay- 45334-0629 Attention: Owner Relations Department ment of a $250.00 processing fee to Airstream; and (3) the completion of an inspection of the condition of the motorhome, at the owner’s expense, by an...
- Page 10 Airstream dealer in accordance with Airstream’s required procedure fore claiming rights conferred by 15 USC section 2310 (Uniform Commercial and Airstream’s receipt of a written report as to the results of such inspection. Code) or Civil Code section 1793.22(b) (Song-Beverly Warranty Act). You are Transfer application forms are available from your dealer or Airstream’s Service...
-
Page 11: Warranty Explanation
Upon proof of purchase date to any Airstream Dealer Service Center, defects in Abuse materials or workmanship will be repaired or replaced without cost to the owner... -
Page 12: Chevrolet Van
Airstream Limited Warranty and should be Airstream, Inc., does not accept any responsibility in connection with any of brought to the attention of your Airstream dealer at the time of delivery and its motorhomes for the Chevrolet Van or its components. The Chevrolet Van during pre-delivery inspection. - Page 13 For this reason, it is suggested that you contact your local Other Exclusions dealer from time to time and bring your list up to date or go to www.airstream. com and use the dealer locator. Airstream customer relations can also supply Tires, batteries, and the generator are serviced by their respective manufac- you with an up to date list.
- Page 14 If you believe that your vehicle has a defect which could cause a crash or could cause injury or death, you should immediately inform the National Highway Traffic Safety Administration (NHTSA) in addition to notifying Airstream Inc.. If NHTSA receives similar complaints, it may open an investigation, and if it finds that a safety defect exists in a group of vehicles, it may order a recall and remedy campaign.
- Page 15 WARRANTy AND SERVICE MAINTENANCE SCHEDULE EVERY 12,000 MILES OR 1 YEAR LP Tank Clean, neutralize and coat terminals with Warning : FAILURE TO MAINTAIN YOUR COACH CAN CAUSE petroleum jelly. PREMATURE AND UNEXPECTED PARTS BREAKAGE AND/OR ERRATIC Sealer Check and reseal, windows, lights, and OPERATION THAT MAY BE HAZARDOUS.
- Page 16 WARRANTy AND SERVICE MAINTENANCE RECORDS DATE DEALER SERVICE PERFORMED DATE DEALER SERVICE PERFORMED A - 10...
- Page 17 To arrive at the “THE COMBINED WEIGHT OF OCCUPANTS AND CARGO within a safe range. Total all axle weights and make sure you are below the SHOULD NEVER EXCEED” number, Airstream weighs the vehicle as finished GVWR. If you are not overloaded, make sure your load is balanced. Do not and adds the weight of full tanks of liquid propane and chassis fuel.
- Page 18 DRIVINg • (GVW): comprises weight of vehicle including The “A full load of water equals” number is arrived at by multiplying the fresh Gross Vehicle Weight water tank and water heater capacities by 1Kg/L or 8.3 lb/gl. tools, spare tire, installed accessories, passengers, cargo, and trailer tongue weight.
- Page 19 DRIVINg Front Axle GAWR GVWR Rear Axle GAWR GCWR - GVW SCALE WEIGHT Optional Tow Weight ___________ ___________ ___________ ___________ STEP 3a STEP 1 STEP 2 STEP 3 Tow Weight minus Front Axle GAW Rear Axle GAW Weight of Trailer or Vehicle Towed GAWR = Gross Axle Weight Rating INDIVIDUAL WHEEL POSITION WEIGHT...
- Page 20 DRIVINg WEIGHT DISTRIBUTION safety belts firmly attached while the motorhome is in transit. The driver should adjust his seat so that he is able to reach all controls easily with the belt on, and Motorhomes have fresh water and wastewater tanks, a water heater, and stor- be able to use all the travel on the foot brake.
- Page 21 Follow the guidelines below carefully to assure safe trailer operation. Ask your authorized Chevrolet or Airstream CHILDREN HAVE LOVED ONES TOO. dealer if you require an explanation of information contained in the manu- IF YOU WON’T BUCKLE UP FOR YOURSELF, BUCKLE UP FOR THEM.
- Page 22 : It is important that the vehicle never exceed any of helps the engine and other parts of the vehicle wear in at the heavier loads. its weight ratings. These specifications are listed in both the Airstream Use the Tow/Haul button when necessary. Details are covered in the Chevrolet and Chevrolet Manuals.
- Page 23 DRIVINg The tongue weight (TW) at the hitch ball must be added to the GVW to prevent Attaching a Trailer exceeding the Chevrolet GVWR or rear GAWR. Please observe maximum permitted trailer dimensions (weight and length). When towing trailers, motorhome tires should be inflated to the highest pres- sures shown on the Chevrolet Tire Information Placard for cold tires.
- Page 24 Please consider using a trailer sway control system. For further information, see your authorized Chevrolet or Airstream Take into consideration that when towing a trailer, the handling characteristics dealer.
- Page 25 DRIVINg practice in a large empty supermarket lot will make pulling your trailer over the must also allow for the length of the trailer when returning to the right road much easier. Line out two corners for left and right turns. You may also use hand lane.
- Page 26 DRIVINg trailer back into a single line. Chains do not help trailer wheels. Practice this maneuver on a clear highway. Don’t wait for an emergency then grope for the controller. When driving in mud and sand let the momentum carry the rig through. Apply When towing at high altitude on steep uphill grades, consider the following: power gently and use as little as possible.
- Page 27 DRIVINg The Chevrolet Express Van will need service more often when pulling a trailer. ALWAYS TRY TO BACK TO YOUR LEFT BECAUSE THE VISIBILITY IS MUCH Things that are especially important in trailer operation are automatic transmis- BETTER. When you don’t make it on the first try it is usually much easier to pull sion fluid, engine oil, axle lubricant, belts, cooling system and brakes.
- Page 28 DRIVINg giving directions can save a lot of frustration when backing into a campsite. Passing Extreme care must be taken when passing another vehicle. A vehicle with a Warning : Take into consideration that when towing a trailer, trailer attached will require additional passing distance ahead than when driv- the handling characteristics are different and less stable from those with ing without a trailer.
- Page 29 Firmly depress parking brake pedal. • Your Airstream motorhome should be given a thorough safety check before Move gear selector lever to position "P". • a trip. Regular use of the following list will provide safe operation of your On inclines, turn wheels towards the road curb.
- Page 30 DRIVINg 4. Check that nothing heavy is stored in overhead or high cabinets, which Warning: Failure to heed the following items may cause could fall out and cause injury. Heavy items should be stored in lower damage to the vehicle or personal injury. cabinets.
-
Page 31: Component Identification
ChEVROLET ExPRESS VAN Fuel The Airstream Avenue Motorhome is integrated into an Express Van designed and manufactured by Chevrolet. Operation of the Express, its engine, power nOTiCE: train, and other related components are discussed in the Chevrolet Owner’s The Chevrolet Owner’s Manual contains important fuel requirement Manual and other literature provided by Chevrolet. - Page 32 Cab door windows and windshield Dash AC/Heater/Defroster Non-automotive electrical components including: Monitor panel and its system Generator and components. *Driver’s and Passenger’s Seats and Restraint systems. Airstream provides Inverter/Charger House battery (AGM - 2) the swivel pedestals and seat decorative skirting. Airstream recovers the...
- Page 33 Access doors and other living area electrical and plumbing components Tire inflation pressures should be checked at least monthly and when signifi- If you need further clarification or information, contact the Airstream Customer cantly changing the load you plan to carry in your motorhome. Set the correct Relations Department at 937-596-6111 before contacting a service center for tire pressure before loading the vehicle.
- Page 34 A MOTORHOME TIRE SAFETY ADDENDUM is included with your Airstream owner’s packet. Please take the time to read, understand, and Tire Pressure Monitor System follow the information contained in the booklet.
- Page 35 ChEVROLET ExPRESS VAN Manual for more information. coach's needs • Be safe - if a tire has been run 20% under inflated, it must be IMPORTANT: The Tire Pressure Monitor System (TPMS) can alert you to dismounted and inspected by a trained professional. It should not low tire pressure, but it does not replace normal monthly tire maintenance.
- Page 36 ChEVROLET ExPRESS VAN and signs of external damage. Additional information about tread depth is Warning : Always replace wheel nuts that are damaged or available in the Chevrolet Operator’s Manual. rusted. Never apply oil or grease to wheel nuts. Damaged wheel hub threads should be repaired immediately.
- Page 37 ChEVROLET ExPRESS VAN Tire Grip Trucks and SUVs are not much better with only 6-12 more inches of clearance. Creeks and rivers can rise very rapidly and the road bottom can also wash Tire grip is greatly reduced on a wet or icy road. Speed and driving style must away making the water much deeper than it appears.
- Page 38 ChEVROLET ExPRESS VAN any unnecessary risks. You could turn an inconvenience into a tragedy. ing vehicle with jack. Please find a safe area to park your unit, call a tire service center and • Do not disengage parking brake while vehicle is raised. supply them with the information in the Chevrolet Manual if you have any •...
- Page 39 ChEVROLET ExPRESS VAN grades. Do not crawl under the vehicle while raised with jack. Only raise tions (such as using a warning triangle). the vehicle high enough for the tire to clear the pavement when jacked up. • Prevent vehicle from rolling away by blocking wheels with wheel Otherwise, the vehicle may tip over and may cause serious injury or death chocks (not supplied with vehicle) or sizable woodblocks or stone.
-
Page 40: Wheel Simulator
NOTICE: For diagrams and additional information, see the original • Position the jack under the appropriate jack point and raise the manufacturer’s instructions provided in your Airstream Owners Packet. vehicle by pumping the lever. nOTiCE: After the first 100 miles check that the simulators are tight WHEEL SIMULATORS and secure to the wheels. - Page 41 ChEVROLET ExPRESS VAN Please read the additional warnings listed in your Chevrolet Operator’s 8. Remove tire and wheel assembly. Manual. NOTE: If the vehicle moves forwards or backwards while it is being jacked up, Warning Wheel nuts that are improperly or incorrectly lower it, stabilize the vehicle with chocks, and reposition the jack.
- Page 42 ChEVROLET ExPRESS VAN TIRE ROTATION SUPPORT Tires should be rotated every 5,000 to 8,000 miles. The purpose of tire rotation Since motorhomes may sit for long periods it is important to properly support is to achieve a uniform wear for all the tires on the vehicle. This will ensure that the tires if blocks are used for leveling.
- Page 43 ChEVROLET ExPRESS VAN The CORRECT methods are shown in Figure 1. A single tire or dual tires Warning are supporting the full load. Please note that the blocks are wider than the : Tires that are incorrectly supported may be dam- tread and longer than the tire’s footprint.
-
Page 44: Camping
CAMPINg SAFETY Warning : Read the directions carefully on the fire extinguisher. Emergency Exit If there is any doubt on the operation, you and your family should practice, then replace or recharge the extinguisher. Your local fire department will There are three avenues of escape from the motorhome in the event of an be happy to assist you. - Page 45 Manufacturer: First Alert reprint of the manual included with each device and provided to you in the Model SCO5RVA Airstream owner’s briefcase. Please read, understand, and follow all aspects of the complete manual before activating and operating the Smoke Alarm/Carbon UNITED STATES Monoxide Detector.
- Page 46 CAMPINg FIRE SAFETY TIPS BASIC SAFETY INFORMATION Follow safety rules and prevent hazardous situations: 1) Use smoking materials CaUTiOn: This combination Smoke/Carbon Monoxide Alarm properly. Never smoke in bed. 2) Keep matches or lighters away from children; has two separate alarms. The CO Alarm is not designed to detect fire or 3) Store flammable materials in proper containers;...
- Page 47 CAMPINg correctly, have it replaced immediately! If the alarm is not working prop- To return to the default horn pattern of 3 beeps, pause, 3 beeps; open the erly, it cannot alert you to a problem. battery drawer and then close the battery drawer. •...
- Page 48 CAMPINg Parts Of This Smoke/CO Alarm CaUTiOn: It is important to test this unit every week to make sure it is working properly. Using the test button is the recommended way Test/Silence Button to test this Smoke/CO Alarm. Battery Compartment Power/Smoke Alarm LED Test this Smoke/CO Alarm: Press and hold the Test/Silence button 3-5 sec- CO Alarm LED...
- Page 49 CAMPINg or grime, and cannot be cleaned to avoid unwanted alarms, replace the unit 3. Insert the new batteries, making sure they snap immediately. completely into the battery compartment. Match • Relocate the unit if it sounds frequent unwanted alarms. See “Where This the terminals on the ends of the batteries with the Alarm Should Not Be Installed”...
- Page 50 CAMPINg If The CO Alarm Sounds instructions, or contact the manufacturers directly, for more information about CO safety and this equipment. Make sure that motor vehicles are not, and have not, been operating in an attached garage or adjacent to the residence. Write dangEr: Actuation of your CO Alarm indicates the presence down the number of a qualified appliance technician here:...
- Page 51 CAMPINg Removing batteries disables the alarm so it cannot sense smoke, and DEVELOP AND PRACTICE A PLAN OF ESCAPE: removes your protection. Instead open a window or fan the smoke away from the unit. The alarm will reset automatically. • Make a floor plan indicating all doors used as escape routes If the unit alarms get everyone out of the motorhome immediately.
- Page 52 CAMPINg USING THE SILENCE FEATURES This silence feature can temporarily quiet the low battery warning “chirp” for up to 8 hours. You can silence the low battery warning “chirp”: press the Test/ Warning: Never remove the batteries to quiet an unwanted Silence Button on the alarm cover.
- Page 53 CAMPINg Important! Common appliances are often sources of CO. If they are not properly main- tained, are improperly ventilated, or malfunction, CO levels can rise quickly. CO is a real danger now that homes are more energy efficient. “Air-tight” homes This CO Alarm measures exposure to CO over time.
- Page 54 CAMPINg • Transient CO problem caused by special circumstances. • Negative pressure differential resulting from the use of exhaust POTENTIAL SOURCES OF CO IN THE RECREATIONAL VEHICLE fans. • Several appliances running at the same time competing for Fuel-burning appliances like: a portable heater, gas kitchen range or cook limited fresh air.
-
Page 55: Smoke/Co Alarm
CAMPINg A CO Alarm is not a substitute for proper maintenance of home appli- • Check the RV beside you at a campground. CO can come in an ances. open window or vent • Keep windows and doors open slightly. If you suspect that CO To help prevent CO problems and reduce the risk of CO poisoning: is escaping into your motorhome, open a window or a door. - Page 56 Smoke/CO Alarm warns against increasing CO levels or the presence of be present in other areas. Doors or other obstructions may affect the rate at smoke, Airstream Inc. and/or BRK Brands, Inc. does not warrant or imply in which CO or smoke reaches the sensors. Consider installing another alarm any way that they will protect lives.
-
Page 57: Lp Gas Detector
First Alert OPERATION manual please contact First Alert Consumer Affairs at 1 800.323.9005, M-F 7:30 AM to 5:00 PM (CST) or Airstream Customer relations 937.596.6111. Your LP gas detector is wired directly to your vehicle battery and incorporates LP GAS DETECTOR a 1-amp in-line fuse. -
Page 58: Overnight Stop
LED fault light and a short beep indicating failure. If this occurs, 1. Turn on LP gas supply and light appliance pilots if required. immediately contact your dealer or Airstream Customer Service for the name 2. Turn on water pump and open faucets until air is expelled from the system. -
Page 59: Extended Stay
When you stop for the night, your Airstream motorhome is built to be safely Plug the Electrical Cable into the City Power Service. Be sure you have the parked in any spot that is relatively level and where the ground is firm. Your facilities are with you. - Page 60 CAMPINg Turn on the gas supply. Lighting a top range burner to bleed any air from the ner than house walls. Estimates indicate that two adults can vaporize up to system will make it easier to start other appliances including the furnace. one and a half gallons of water daily through breathing, cooking, bathing, and washing.
- Page 61 CAMPINg Keep the bathroom door closed and the vent or window open when showering Minimize use of incandescent lights, which produce heat and contribute to or bathing and for a period of time after you have finished. condensation. Do not hang wet clothes in the motorhome to dry. In hot weather, start the air conditioner early as it removes excess humidity from the air while lowering the temperature.
- Page 62 CAMPINg ABOUT MOLDS How can mold growth be inhibited? What are molds? By controlling relative humidity, the growth of mold and mildew can be inhibited. In warm climates, use of the air conditioner will reduce the relative humidity. Molds are microscopic organisms that naturally occur in virtually every environ- Vents are located in the bathing and cooking areas and constant use is advised ment, indoors and out.
-
Page 63: Winter Traveling
CAMPINg WINTER TRAVELING 2. If your stay is longer than overnight, you should endeavor to have 120-volt electricity available. The house battery, fully charged, will not last more than Traveling in your motorhome during the cold winter months can be a most about 15 hours in freezing weather, less with the use of the tank heating exhilarating experience. - Page 64 CAMPINg zero degrees, and the wind velocity of 10 miles per hour, the equivalent chill temperature is minus 20° F. 7. Remember to remove and drain the exterior shower faucet to prevent freeze damage. D - 21...
-
Page 65: Exterior
ExTERIOR The exterior of your Airstream Avenue Motorhome, except for the cap and body in harsh environments. Clearcoats do not fade themselves, but appear to fade kit, has been painted by Chevrolet. The care of the paint is detailed in the or lose gloss as the surface becomes contaminated by the environment. - Page 66 ExTERIOR making sure the RV surface is at the specified temperature according to the 2. ROAD TAR/BUGS polish manufacturers recommendations. 3. BIRD DROPPINGS/TREE SAP 4. INDUSTRIAL FALLOUT/ACID RAIN/POLLUTION Due to the variations of polishes and waxes, incorporate the following sugges- 5.
- Page 67 The roof top cap and exterior body kit (excluding front bumper) provided by stains and will eventually dissolve using an ammonia based glass cleaner, warm Airstream is made from fiberglass. The front bumper is made from high impact soapy water and a little “elbow grease”. Once again, after removing stubborn plastic.
-
Page 68: Roadside Exterior Features
ExTERIOR Roadside Exterior Features 5. Cable/Satellite TV inlet is located inside the utility hatch and is pre-wired for cable/satellite TV. A portable satellite dish can be connected and used in the NOTE: This is a basic explanation of the location and function of exterior fea- cable connection. -
Page 69: Curbside Exterior Features
ExTERIOR Curbside Exterior Features the galley. NOTE: This is a basic explanation of the location and function of exterior fea- 6. MaxxAir Roof Vent, exhaust only, operating instructions are included in the tures. More in depth explanations of certain feature’s care and maintenance is manufacturer’s manual included with your owner’s packet. - Page 70 The Carefree Freedom Wall Mount Awning is a box awning that mounts to the water. This practice will help prevent dirt from becoming deeply imbedded in curbside of your Airstream Avenue motorhome. It opens and the arms unfold the fabric.
- Page 71 ExTERIOR HARDWARE MAINTENANCE: cause water to ‘pool’ on top of the fabric, it is recommended that you retract the awning in steps to dump the water. Sections should not exceed 8-12”. By retracting in smaller sections, this should help prevent the fabric from stretch- Periodically check all mounting hardware, screws, etc.
- Page 72 INTERIOR The interior of your Airstream motorhome has been designed to take a limited way. (clockwise for driver, counter clockwise for passenger) At half way, move amount of space and provide you with all the comfort, convenience, durability seat to the rear, then complete swivel. This will give adequate clearance for the and appearance possible.
- Page 73 INTERIOR Smoldering smoking material can cause upholstered furniture fires. nOTiCE : Seat backs on cab and 2nd row seats must be returned to full upright position and seat moved forward before seat is swiveled. Pedestal Table Failure to do so could result in damage to the seats upholstery, the wall panels, and the seat decorative skirt.
-
Page 74: Vinyl Floor
INTERIOR Vinyl Floor Wet Bath The vinyl floor in your unit can be cleaned and waxed with products recom- To clean your fiberglass shower stall unit, use warm water and one of the mended for vinyl floors. stronger liquid detergents. Do not use abrasive cleaners; they may scratch and dull the surface of your fiberglass unit. -
Page 75: Upholstery
If a substance is found on the coating that cannot be removed by normal wash- Counter Tops ing procedures, Airstream recommends using DX 330 Acryli-Clean made by PPG Industries. Follow all directions and warnings on the product container. Acryli-Clean should be used by trained personnel only, using the proper equip- The counter top is made of Corian and can be cleaned with soap and water, or ment under controlled conditions. - Page 76 INTERIOR Light Bulbs Privacy Curtain To change the bulb in the round ceiling light, first remove the lens assembly. Privacy curtains are provided for the front windshield and cab windows. The The lens assembly is spring loaded and pops out of the fixture at its chrome curtains have pockets sewn into them that slide over the sunvisors and attach ring.
- Page 77 INTERIOR Draperies NOTICE: All drapery materials must be professionally dry-cleaned. Unsnapping from the wall, removing a screw or pop rivet from the end of the curtain track, and sliding them out will remove the draperies. The pop rivets are removed by drilling through the head with a 1/8” drill bit. F - 6...
-
Page 78: Plumbing
PLUMBINg LPG SYSTEM batteries. Your motorhome is equipped with a permanently mounted tank for LPG (Liquid Warning : Only certified LP suppliers should fill the LP Tank. Petroleum Gas) with a remote fill and remote gas supply shut off switch. LPG Turn remote gas supply switch off before filling or refilling LP tank. - Page 79 LPG service center or Airstream DO NOT store LP containers within vehicle. LP containers are equipped Service Center.
- Page 80 PLUMBINg A Warning Label has been located near the LP gas container. This label in excessive gas pressure causing fire or explosion. reads: DO NOT FILL CONTAINER (S) TO MORE THAN 80% PERCENT OF CAPACITY. Overfilling the LP gas container can result in uncontrolled gas The regulator at the L.P.
-
Page 81: Water System
PLUMBINg LPG CONNECTIONS Before using a water system, check that the water heater by-pass valve is turned to the use position. The by-pass valve is located on the back of the A quick connect LPG connection is located to the left of the hitch receiver on water heater under the lounge on the roadside, accessed by opening the rear the rear of the vehicle. - Page 82 PLUMBINg nOTiCE galley roof locker or by connecting to an exterior city water source. Close the : Turn the water pump off when the motorhome is left unat- cold side of all faucets. For some time the open faucet will only sputter. This tended.
-
Page 83: Water Pump
PLUMBINg Water Pump And Strainer The inlet and outlet hoses and the strainer assembly are held in place by self sealing blue quick connect fittings. To disconnect a hose or the strainer, Manufacturer: grasp the blue tab on the female fitting by the grooved finger edges and Canada pull straight out on the tab. -
Page 84: City Water Hookup
PLUMBINg To operate the system using a city water source: Sanitizing CITY WATER HOOKUP Potable water systems require periodic maintenance to deliver a consistent flow of fresh water. Depending on use and the environment the system is sub- The city water inlet is a standard garden hose thread. Use a ject to, sanitizing is recommended prior to storing and before using the water high-pressure hose of at least ½... -
Page 85: Exterior Shower Hookup
PLUMBINg HEATED FRESH WATER TANK water and purge the plumbing of all sanitizing solution. 7. Remove, rinse and fush the galley in-line filter completely after santizing. The filter is located under the galley. It can be accessed by removing the The Avenue motorhome has 12-Volt heat pads installed with all holding tanks galley drawer and removing the false galley back panel. -
Page 86: Toilet
Vacuum breaker leaks while flushing: replace Vacuum Breaker or water module, depending on model. The RV toilet in your Airstream is a design that has been used for many years. c) Between closet flange and toilet: check flange nuts for tightness. - Page 87 PLUMBINg 4) Poor flush: Pedals or hand levers must be held fully open during flush. A tank. good flush should be obtained within 2 to 3 seconds. If problem persists, re- NOTE: Always replace flange seal when toilet has been removed. move the water supply line and check flow rate.
-
Page 88: Storage And Winterizing
3. Open the low point drain valves for the hot and cold water lines, the fresh into your Airstream dealer for a check-up and cleaning of the gas operated water tank drain valve, and water heater drain. There are four fresh water line appliances. - Page 89 PLUMBINg 4. Follow winterizing instructions for your toilet on the preceding page of this and recharge the battery as needed, at least weekly in severe weather. manual. 9. Remove any items (food, cosmetics, etc.) from the interior that might be 5.
- Page 90 PLUMBINg container. water clarity at all faucets. 4. Check that all interior water faucets are still open. Turn off water pump. 5. Insert hose length into container containing non-toxic RV antifreeze, turn the Hook up city water, open faucet valves, and recheck water clarity. pump on, and run the water pump until the antifreeze solution fills all water Replace water heater plug or close drain valve and reset water heater lines.
-
Page 91: Drainage/Waste System
PLUMBINg DRAIN AND WASTE SYSTEM liquefies all waste and tissue normally found in recreational vehicle waste systems and then passes it through an extra heavy duty 1” diameter discharge The drain and waste system of your motorhome includes separate grey and hose. - Page 92 PLUMBINg NAPKINS OR RAGS. Never put wet strength paper towels, tissues, or 3. Turn on macerator pump to liquefy and pump out the solids in the tank. sanitary napkins in your holding tank. They won’t dissolve and will jam the 4.
- Page 93 PLUMBINg Macerator Applications to an unpleasant cleaning job. Should solids accumulate, fill the tank about half full with water, then drive the motorhome for a few miles. Don’t wait until Aux. Tank the tank is packed solid. The turbulence and surging of the water will usually Macerator dissolve the solids into a suspension so the tank can be drained.
- Page 94 PLUMBINg tanks. The heat pads lighted switch is located in the curbside rear overhead detergent or abrasive cleaners. All products should be marked approved for locker. The switch lights up when the pads are on. Battery power will last about ABS drainage systems.
- Page 95 PLUMBINg NOTES G - 18...
-
Page 96: Energy Management System
ELECTRICAL SySTEMS 120-volt POWER ENERGY MANAGEMENT SYSTEM (EMS) IMPORTANT NOTE: MAKE SURE TO READ, UNDERSTAND, AND FOLLOW A complete, detailed EMS manual is included with your owner’s packet. ALL ELECTRICAL COMPONENT OWNER’S MANUALS PROVIDED IN THE OWNER’S PACKET BEFORE OPERATING THE MOTORHOME. Observe all Warning The ENERGY MANAGEMENT SYSTEM is a operating instructions and warnings as well as all recommended maintenance... - Page 97 Airstream. There are four positions available for 110 Volt Breaker Panel circuit breakers. These may be single or dual units. Airstream uses both single and dual breakers as needed according to the options ordered on a unit. One...
- Page 98 ELECTRICAL SySTEMS Circuit 3A. 15 Amp, goes through inverter to entertainment receptacles, and ceptacles. NOTE: There are also two breakers located on the inverter/charger. One breaker Circuit 3B. 15 Amp, microwave. Circuit 4A. 15 Amp. GFCI, Refrigerator, exterior, and galley receptacles. protects the charger while it is charging the batteries, the other breaker protects circuit 3A in conjunction with the distribution panel breaker.
- Page 99 ELECTRICAL SySTEMS GFCI Breaker milliamperes or more. Since most persons can feel as little as 2 milliamperes, a distinct shock may be felt if the need for protection exists. However, the shock should be of such short duration that the effects would be reduced to Perform this test on the GFI Breaker each month and less than the normally dangerous level.
- Page 100 ELECTRICAL SySTEMS GFCI Receptacle Energy Management with Three Hour Averaging To properly test GFCI receptacles: The current entering the main circuit breaker is routed through a sensor. This sensor measures the current flowing through the main breaker, which is the Push the “Reset”...
- Page 101 ELECTRICAL SySTEMS Display Panel Controlled Loads The system offers control of up to four 110 VAC powered loads. Loads that are controlled are connected to one of the relay circuits of the EMS. There are Service Status Power Control System five total control relays in the EMS.
-
Page 102: Generator
ELECTRICAL SySTEMS Status Press the “Select” button to switch to 20 amp service, it is necessary to use a 20 amp adapter such as the one pictured or The water heater, roof air conditioner, and microwave are set at the fac- you know the shoreline power is 20 amps. - Page 103 ELECTRICAL SySTEMS Know what the symptoms of carbon monoxide poisoning are: DO NOT operate the generator in an enclosed building or in a partly • Dizziness enclosed area such as a garage. • Vomiting Review the safety precautions for fuel and exhaust fumes in the •...
- Page 104 The major portion of electrical power in your Airstream is 12-volt. The 12-volt current powers just about every thing except for the roof air conditioner, water H - 9...
-
Page 105: 12-Volt Operation
ELECTRICAL SySTEMS 12-Volt Operation heater, 110 volt receptacles, and microwave oven. Even some of these appli- ances have electronic boards powered by 12 volt. All 12-volt current is routed to a 12 volt power stud mounted on the chassis The only thing you have to do is make sure the house battery does not run down. frame of the vehicle. -
Page 106: Battery Disconnect
ELECTRICAL SySTEMS Battery Disconnect Switch ing down simultaneously. They will connect through the Separator if charging from the engine, generator, or inverter/charger is detected. House Batteries The house batteries (2 AGM, standard) are located on the curbside of the vehicle in the battery storage compartment. All 12-volt current is routed to a Removable Knob Switch Off Switch On... - Page 107 ELECTRICAL SySTEMS Battery Separator The inverter/charger and the generator start are wired direct to the house bat- tery. Although they can be started and ran on this battery feed, the power they supply goes to the 12 volt stud and the battery disconnect switch must be on The Battery Separator is located under the lounge accessed by opening the for power to be supplied from these sources to the distribution panel.
- Page 108 120-Volt Power section earlier. Warning: AN EXTENSIVE OWNER’S MANUAL FOR THE INVERTER/CHARGER IS PROVIDED IN THE AIRSTREAM OWNER’S PACKET. MAKE SURE TO READ, UNDERSTAND, AND FOLLOW ALL INFORMATION, CAUTIONS, AND WARNINGS IN THE MANUAL BEFORE OPERATING THE INVERTER/CHARGER.
- Page 109 ELECTRICAL SySTEMS 12-Volt Distribution Panel Diagram CIRCUIT 3, 15 AMP, PINK CIRCUIT 7, 7.5 AMP, ORANGE TANK MONITOR ROADSIDE COMPARTMENT LIGHT 12 Volt Fuse Panel EMS CONTROL DISPLAY WATER HEATER CONTROL FRESH WATER TANK HEATER PAD LP DETECTOR WATER PUMP LP VALVE Cir.
- Page 110 ELECTRICAL SySTEMS REAR WARDROBE PANEL: POWER AWNING SWITCH is located on the forward end of the galley. The side Bath ceiling lights entry doors must be closed during deployment. SWITCHED INDIVIDUALLY: REAR VIEW CAMERA CONTROLS are on the add on rear view mirror/monitor. Ceiling vent The camera turns on automatically when in reverse or can be turned on manu- Reading lights...
- Page 111 BLACK GREY FRESH ometer to manually adjust the monitor panel reading of the LPG tank level, this is set at the Airstream factory for the tank on the Avenue motorhome touchsensor BATT AUX and needs no further adjustment. TouchSensor Technologies, LLC Phone: 630.221.9000...
-
Page 112: Entertainment
Use no solvents, alcohol, or cleaning fluids. The user guide for the television installed in your motorhome is included with your Airstream Avenue Owner’s Packet. Television is mounted on a tilt/swivel base to provide multiple viewing angles. - Page 113 ELECTRICAL SySTEMS Solar Panel Pre-Wire The Avenue Motorhome is pre-wired for the addition of a solar panel of your choice. Locations for solar panel pre-wire: A green and a yellow wire are located forward of the fan. These wires are fed up through the roof and connect to the solar panel. The green wire is run to the ground buss bar on the 12-volt distribu- tion panel.
-
Page 114: Appliances
Maintenance: Follow the instructions and warnings noted in the appliances operating and maintenance instructions. If the literature is misplaced please and equipment owner’s manuals as well as the ones listed below: contact the air conditioner manufacturer or your Airstream dealer for replace- ment. •... -
Page 115: Furnace
Owners Packet. If they should become misplaced, new literature can be or- Novakool service department can be reached at 604-523-6515 ext. 104, or at dered direct from the manufacturer or your Airstream dealer. The manufacturer support@novakool.com from 7:00 am to 5:00 pm PST. - Page 116 APPLIANCES Start-up: Review all refrigerator Literature supplied in your Owner’s Packet or stored in the refrigerator prior to operating. Turn the power on and set the thermostat between 3 and 4. You can make OPERATION further adjustments to suit your personal requirements after the box has cooled down.
-
Page 117: Cooktop
: The cook top operates on liquid propane gas and COOK TOP is designed to cook foods only. Any other use is considered incorrect and dangerous. Airstream Inc. and SMEV are not responsible for any personal injury or property damage due to improper, incorrect, or irresponsible Smev Series 8022 use. - Page 118 APPLIANCES IMPORTANT: IF THE BURNER DOES NOT IGNITE IMMEDIATELY, TURN THE Choose the burner suitable for the pan dimensions making sure the burner KNOB TO “MINIMUM RATE” POSITION AND REPEAT THE OPERATION. flame does not extend beyond the pan base (Fig. 2). Place the pan centrally on the burner so that it is stable on the pan support.
-
Page 119: Microwave Oven
It contains important operational, to service microwave ovens. If you have a microwave problem please contact maintenance, and safety information. your dealer or Airstream Customer Relations department. Warning : Hydrogen gas can be produced in a hot water sys- Warning : Do not cook while under way. - Page 120 APPLIANCES Water Heater Draining All models have a drain plug or pet cock on the water heater. Access is from the exterior. The plug or valve is usually located in the lower left corner, viewed as you face the exterior of the water heater. SAFETY If your water system is full and cold and the water heater is ignited, the system can produce pressures as high as 120 psi before the relief valve starts to open.
- Page 121 APPLIANCES NOTES: I - 8...
-
Page 122: Specifications
SPECIFICATIONS NOTE: The weights and measurements in this manual are derived from the GAWR-REAR (lbs.) 6,084 best information available at time of this manuals publishing. Please refer SCWR (lbs.) - Sleeping Capacity 2 (300 lbs.) to the Cargo Carrying Capacity tag placed on the inside of the door and Seating Capacity (Traveling) your Chevrolet Owner’s Manual for weights specific to your RV. - Page 123 SPECIFICATIONS vehicle or trailer and may cause an accident and serious injury. • GAWR): is the value specified as the load Gross Axle Weight Rating ( carrying capacity of a single axle system, as measured at the tire- Warning : READ AND FOLLOW ALL WARNINGS IN THE FUEL ground interfaces SECTION OF YOUR CHEVROLET’S OPERATOR’S MANUAL BEFORE •...
-
Page 124: Index
INDEx Air Conditioner ............ I-1 Condensation ..........D-17 Ground Fault Interrupter ........H-3 Alignment, ............Cook Top ............. I-4 GVWR ..........B-1, J-1, J-2 Antenna ............H-17 Counter Areas ............ F-4 GCWR ............J-1, J-2 Appliances ............I-1 Curtain, Front Privacy ......... F-5 Awning ..............E-6 Hitch Load ............B-6 Dimensions ............ - Page 125 Winter Traveling ..........D-20 Shower/Wet Bath........F-3, G-8 Toilet ..............G-9 Sink..............F-3 Towing A Trailer ..........B-5, B-8 Airstream Avenue Owner’s Manual Smoke/CO Alarm ..........D-2 Towing Your Motorhome ........B-13 © Airstream, Inc. 2010 Solar Panel Pre-Wire ........H-18 TV Antenna ............H-17 Specifications .............
Need help?
Do you have a question about the Avenue 2011 and is the answer not in the manual?
Questions and answers