Table of Contents
Advertisement
Advertisement
Table of Contents

Related Manuals for Digitus DA-70251


Summary of Contents for Digitus DA-70251
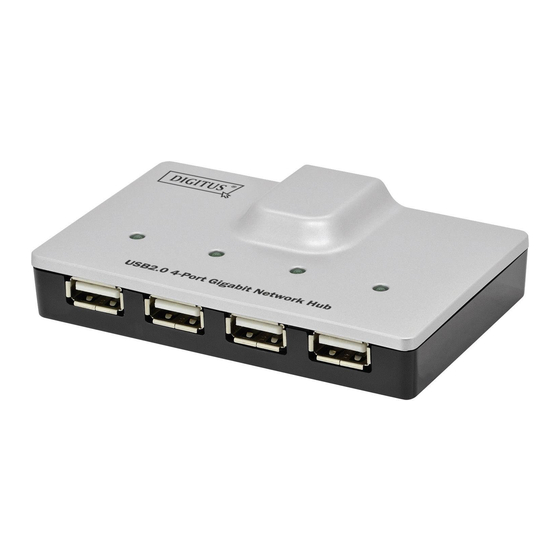
- Page 1 USB 2.0 4-PORT NETWORK HUB User Manual DA-70251 • DA-70252...
- Page 2 Copyright Notice ® Copyright DIGITUS 2010. All rights reserved. Disclaimer ® DIGITUS shall not be liable for technical or editorial errors or omissions contained herein; nor for incidental or consequential damages resulting from furnishing this material, or the performance or use of this product.
- Page 3 Introduction The revolutionary USB Server utilizes technologies that streamlines and enhances functionalities between USB devices and multiple PCs. Current solutions from other companies provide minimum functionalities at high costs. They use significant amounts of resources and effort to achieve the required features, whereas the USB Server utilizes significantly less resources for more features.
- Page 4 Installation To install the USB Server program, please double click the USB Server setup file. Then please follow the instructions of the wizard to complete the installation process. Please reboot the system as requested by the installer when the process ends, otherwise the software might not work properly.
-
Page 5: Running Program
Running Program To start the USB Server program, please double click the shortcut icon of the USB Server on the Desktop. This would bring up the main dialog box. -
Page 6: System Firewall
System Firewall When you start the program for the time, your Windows OS will prompt you for Firewall Access. Please make sure you unblock the software or grant it access, otherwise the program will not work correctly. Windows XP Firewall Access Alert Please make sure you “Unblock”... - Page 7 Windows Vista Firewall Alert If your system is running Windows Vista, please make sure you “Unblock” the program.
- Page 8 Windows 7 Firewall Alert If your system is running Windows 7, please make sure you check both of the network options and then click on “Allow access” when you see this alert. Once you have done this once, the system will remember your setting and will not prompt you again next time you run the software.
- Page 9 Main Dialog Box Once you have start up the program and grant it access through the firewall, you will see this main dialog box. The main dialog box is consisted of a Control Menu (File, Options, View and Help), a tree view in the middle that displays a list of all the server and devices discovered on the network, a Search button to get the current status of all USB Servers and devices, and a button that toggles between Open Web Page and Connect Device depending on the node...
- Page 10 Status of USB Servers and Devices The tree view also tells you the status of all the USB Servers and devices that are discovered on the network. An inaccessible USB Servers might or might now show up on the list. It is either disconnected from the network, powered off or suffering from other technical difficulties.
- Page 11 Occupied by Yourself When the device has been occupied, the icon and Status change to indicate so.
-
Page 12: Unsupported Device
Occupied By Other User This status icon indicates the device is occupied by another user on your network and you can not connect to that device at the moment. Device on Different Segment This icon with question mark indicates that the server’s IP address is on a different network segment from your PC. - Page 13 Accessing a Device To connect to a USB device, please select it on the tree view and click on Connect Device button or double-click on it. This process might take a few seconds up to a minute, depending on the complexity of the device. Then you can operate a connected USB device as if it is connected to your PC’s USB port directly.
- Page 14 If you select a connected device on the UI, you can see that the Connect Device button is changed to Disconnect Device: Clicking on this button releases the selected device for other users. Once you see the icon turns back, the device has been disconnected and other users will then be able to connect to it.
-
Page 15: Server Configuration
Server Configuration We allow the users to configure the settings of the USB Servers via the web-based UI. Select the target server on the tree view and then click on the Open Web Page button or the same option on the right-click menu of server icon, to bring up the web-based configuration UI. - Page 16 Configuration with Web-based UI Your default web browser will pop up and take you into the web-based UI of the server. This is the main page. You can see the important information about the USB Server and the device(s) connected to it. The 4 links at the left- hand side take you to different pages with other information about this server or functions you could perform.
-
Page 17: Network Information
Network Information This page displays the current network setting of the server, like the current IP setting and the MAC address. - Page 18 Server Reset Clicking on this link takes you the page shown below: Click on the Submit button with the correct password provided will reboot this USB Server. If no password has been set, then simply click on Submit button to perform this function.
-
Page 19: Change Password
Change Password Clicking on this link takes you to the password update page below: To change the password, you must enter current password, enter new password and enter it again for confirmation, and then click on Submit to set the new Password. If you are setting the password for the first time, you don’t have to provide current password. -
Page 20: Configuration With The Utility
Configuration with the Utility Another way to configure the server is via the configuration dialog of USB Server. To bring up the configuration dialog, please RIGHT-CLICK on the server icon to bring up this menu, and select Server Configurations... - Page 21 You might be prompted to enter password if a password has been set. If not, you will immediately see the above dialog. Sever Name: This field allows you change the Server name. Change it whatever you want. USE DHCP: When this field is checked, your server acquires IP address automatically.
- Page 22 NOTE: You can apply this function to a server under different network segment. HOWEVER, some router/switch hub does not allow communication between servers under different segment. In this case, you won’t even see the server on a different network segment. Connect Automatically By Port: This is a new function that, when enabled, any USB device plugged into the enabled port will be connected automatically.
-
Page 23: Featured Functions
Featured Functions Connect Automatically for Printing This is another one of our very convenient functions. What this function does it that when you send a printing task to this printer, it detects this printing task and AUTOMATICALLY connect this printer to print out the document. When the printing task is done, the printer will then be AUTOMATICALLY disconnected so that other users can use it. -
Page 24: Automatic Connection
Automatic Connection There two ways to automatically connects USB devices: automatic connection by device and automatic connection by USB port. Automatic Connection by Device Once enabled, THIS PARTICULAR DEVICE will be automatically connected when: The software starts up and the device is online and Free. The software is running and the device comes online. - Page 25 Automatic Connection by USB Port When this function is enabled for the port, the USB devices will be automatically connected when: The device is plugged into the port when the software is running. The device is plugged into the port and is Free when the software starts up.
- Page 26 Also, like automatic connection by device function, if the user disconnects the device manually, it will NOT be automatically connected again until the software has been restarted. Create a Shortcut on Your Desktop This function creates a shortcut on your Desktop that, when double clicked, starts up an application and connects a targeted device at the same time.
- Page 27 However, this shortcut function consolidates these steps into two quick double-click. Let’s see a sample use case. Take this EPSON MFP as an example...
- Page 28 Right click on it and select the “Create a Shortcut on Your Desktop” option.
- Page 29 Then you will see this setup dialog pops up. So, this EPSON MFP comes with a scanning application called EPSON Scan. You can see a shortcut of this EPSON Scan software being placed on your Desktop. Now you can either Drag-and-Drop the EPSON Scan shortcut into the highlighted text filed.
- Page 30 Or you can use the browse button to select the shortcut.
- Page 31 Either way, observe that the program path has been correctly captured and then click on the OK button.
- Page 32 Then you will see a new shortcut being created on the Desktop. The naming rule of the new shortcut is adding a “Network” prefix to the name of the original shortcut.
- Page 33 Now, when you double click the new “Network EPSON Scan” shortcut, the software runs and the EPSON MFP gets connected at the same time. You can then start your scanning task.
- Page 34 When you are finished, simply close the EPSON Scan utility and the EPSON MFP will be disconnected automatically. Now you can operate your MFP or Scanner with a shortcut on your Desktop and keep the USB Server software minimized at the system tray.
- Page 35 Auto Disconnect Printer/MFP/Storage Device These functions are there to prevent the case when one user connected a Printer or Storage device but forget to disconnect when he/she is done with the device.
- Page 36 When these two functions are enabled, you will see this message when you connect a Storage device or a printer:...
- Page 37 When the Idle time is up and the device has been disconnected, you get another notification: NOTE: This function might not work with Storage device such as pen driver/flash driver. These devices tend to periodically (on a millisecond base) communicate with the OS even when the user is not reading data from it or writing data to it.
-
Page 38: Device Property
Device Property Clicking on the Device Property to bring up the Device Property dialog box. - Page 39 Device Property dialog box displays information of the USB device. If the device is occupied, it also displays the occupying PC name and the IP of the PC occupying it. This dialog box provides a quite useful function. Check the Launch a program when this device connects checkbox and provide the path to that program/utility/application software, then the program/utility/application software would automatically starts up after...
- Page 40 File The Quit function exits the program.
- Page 41 Options Language You can change the utility’s language with this option. The default language would be the same as your system’s language.
- Page 42 Server Settings Setting Server: Same function as the Setting Server option on the server icon’s right click menu. Run USB Server When PC Starts Up: This utility automatically runs when your system starts up. Open Web Page: Brings up the server’s configuration web pages.
- Page 43 Device Settings Connect Device and Disconnect Device: Connects and disconnects the selected device. Request Disconnect Device: When you want to use a device occupied by other user, you can highlight that device and use this function. This sends a message to the occupying user with your request. The occupying user would either release the device or deny the request if s/he is still using the device.
- Page 44 Search When you are in need of knowing the status of all the servers and devices immediately, use the Search button. Clicking on the Search button triggers the program to immediately poll the network for the status of all the servers and devices. The result will be updated to the tree view.
- Page 45 View The tree view in the main dialog has two display modes: “Servers and Devices” mode and “Devices Only” mode. The default setting is “Devices Only” mode. You can toggle between these two display modes with the View option on the control menu:...
- Page 46 Servers and Devices view Device Only View...
- Page 47 Help About About option brings up a dialog box with legal and other relative information displayed:...
- Page 48 Enabling Log function allows the USB Server software to generate a log file that records data which might help software developers debug a problem. So if you want to report a bug, enable this function and repeat the steps to reproduce the bug. Once you have seen the bug happen again, you can use the Extract log file function to extract the file and send the file in for analysis.
- Page 49 Extract Log File Clicking on this option brings up the folder where the log file is kept.
- Page 50 FAQs General Questions Q. How come I don’t see any device on the utility? Besides the obvious reason that your PC or the USB Server might not be connected to the network correctly and or the product is not powered- on, using a personal firewall on your PC might block the program from accessing the network.
- Page 51 Q. How come I can’t see any USB device on the USB Server GUI? First of all, of course, check and if your USB device has been correctly connected to the product and powered on. Another possible reason is that, even though the USB server does support USB hub, the combination of a Full Speed Hub with a Low Speed Device (such as mouse, keyboard, etc), is NOT supported by this product.
- Page 52 Q. How come I don’t see the USB hub on the utility? By the product’s design, USB hub is not considered as a USB device in the common sense. The reason for this design is that, connecting to the USB Hub is quite meaningless since it provides no meaningful function as connecting the device behind the USB hub would, hence we simply do not show USB hub on the utility.
- Page 53 Q. How many USB printers can I connect to this product? Depending on the product design, you should be able to connect at least one and up to four USB printers. Please consult the supported device list for all the supported printers. Q.
- Page 54 Q. Does this product support USB web cam? This product supports only one USB web cam. Many web cams on the market today are what we called USB 2.0 device. USB 2.0 devices, by specification, could be transmitting data at 480 Mbps during operation. The bandwidth provided by this USB Server product is at most 320 Mbps.
Need help?
Do you have a question about the DA-70251 and is the answer not in the manual?
Questions and answers