Table of Contents
Advertisement
Available languages
Available languages
Quick Links
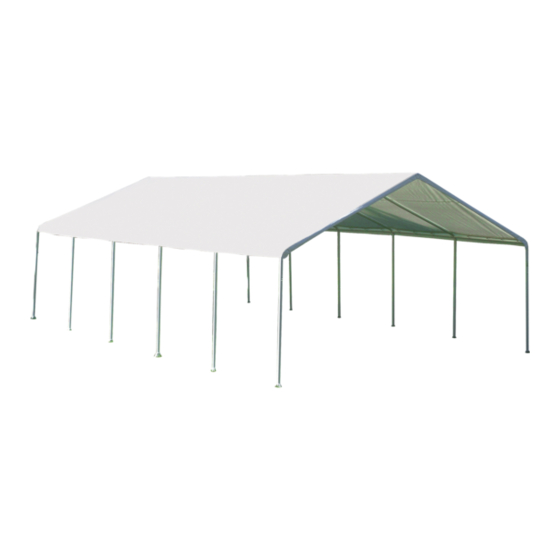
18' x 30'
SUPER MAX CANOPY
Assembly Instructions
DESCRIPTION
MODEl #
26767
18' x 30' Super Max Canopy - 12 Leg - White
RECOMMENDED TOOlS
Please read instructions COMPLETELY before assembly. This shelter MUST be securely anchored.
THIS IS A TEMPORARY STRUCTURE AND NOT RECOMMENDED AS A PERMANENT STRUCTURE.
Before you start: 2+ individual recommended for assembly, approximate time 2 hr.
1-800-524-9970
150 Callender Road
Canada:
Watertown, CT 06795
1-800-559-6175
www.shelterlogic.com
6/24/10
Page 1
05-26767-0E
Advertisement
Table of Contents

Related Manuals for ShelterLogic 26767


Summary of Contents for ShelterLogic 26767
- Page 1 SUPER MAX CANOPY Assembly Instructions DESCRIPTION MODEl # 26767 18' x 30' Super Max Canopy - 12 Leg - White RECOMMENDED TOOlS Please read instructions COMPLETELY before assembly. This shelter MUST be securely anchored. THIS IS A TEMPORARY STRUCTURE AND NOT RECOMMENDED AS A PERMANENT STRUCTURE.
-
Page 2: Care And Cleaning
ATTENTION: This shelter product is manufactured with quality materials. It is designed to fit the ShelterLogic custom fabric cover included. ® , LLC ShelterLogic Shelters offer storage and protection from damage caused by sun, light rain, tree sap and animal - bird excrement. - Page 3 18' x 30' Super Max Canopy - 12 Leg - Parts List - Model #26767 Quantity Part # Description of Parts: Swedged Rafter Poles 71.2 in. / 180,9 cm 802105 Swedged Rafter Poles 38.4 in. / 97,5 cm 802104 Swedged Leg Poles 75.9 in. / 192,8 cm 10043 Cross Rails 69.6 in.
- Page 4 802105 802104 802104 802105 10048 10047 10047 10244 10244 10244 802105 802104 802104 802105 10047 10047 10048 10244 10244 10244 802105 802104 802104 802105 10047 10047 10048 10244 10244 10244 802104 802104 10045 802105 802105 10045 10046 Page 4 05-26767-0E...
- Page 5 4. ATTACH lEGS TO FEET A. Connect a leg pole (10043), to each foot plate (10050). Align holes. B. Insert one long pin (10052) through all eight legs to secure base foot. Repeat with each leg. 10043 10050 Page 5 05-26767-0E...
- Page 6 Insert a short pin (10051) through this hole to secure leg. 7. SECURE CANOPY COVER Working from the inside, slide the bungee INSIDE vIEW OUTSIDE vIEW OF COvER fasteners (10066) through the grommets. OF COvER BUNgEE-BALL AND CORD HIDDEN UNDER vALANCE Page 6 05-26767-0E...
- Page 7 Select a hole in each base foot. Insert each anchor into the ground 10431 until the round head is touching the base foot. Insert one anchor into all eight base feet. This is a temporary spike anchor. Not intended for permanent use. Page 7 05-26767-0E...
-
Page 8: Outils Recommandés
TENTE SUPER MAX™ lES TRADUCTIONS FRANçAISES D'INSTRUCTION D'ASSEMBlAGE DESCRIPTION MODèlE Nº 26767 5,5 x 9,1m Tente Super Max™ - 12 Pied - Blanc OUTIlS RECOMMANDéS Lire TOUTES les instructions avant de monter. Cet abri DOIT être bien ancré. Ceci est une structure temporaire, il n'est pas recommandé d'en faire une structure permanente. -
Page 9: Entretien Et Nettoyage
® , LLC les excréments animaliers et une légère tomber de neige. S’il vous plait ancrez la structure ShelterLogic d’une manière cor- ®... - Page 10 5,5 x 9,1m Super Max Canopy ™ - 12 Pied - Liste de Pièces - Modèle nº 26767 Quantité Pièces : Description des Pièces : Poteau de Chevrons, Raffiné 71.2 po. / 180,9 cm 802105 Poteau de Chevrons, Raffiné 38.4 po. / 97,5 cm 802104 Poteau de Jambe, Raffiné...
- Page 11 802105 802104 802104 802105 10048 10047 10047 10244 10244 10244 802105 802104 802104 802105 10047 10047 10048 10244 10244 10244 802105 802104 802104 802105 10047 10047 10048 10244 10244 10244 802104 802104 10045 802105 802105 10045 10046 Page 11 05-26767-0E...
- Page 12 4. ATTACHEz lES jAMBES AUX PIEDS A. Connectez les poteaux de jambe (10043), à chaque pied (10050). Alignez les trous. B. Passez une broche (10052) dans chacune des huit jambes au pied de base. Répétez avec chaque jambe. 10043 10050 Page 12 05-26767-0E...
- Page 13 7. FIXEz lA COUVERTURE En travaillant de l'intérieur, glissez les INTéRIEUR, vUE vUE DU TOIT DE DE DESSOUS sandows (10066) daus les trous. L’ExTéRIEUR DU TOIT. BOULE DU SANDOW ET CORDON CACHéS SOUS LA CANTONNIèRE. Page 13 05-26767-0E...
- Page 14 Insérez chaque point d'attache dans le sol jusqu'à ce que la tête ronde touche le pied de base. Insérez un point d'attache dans chacun des huit pieds de base. C'est un point d'attache provisoire. Non destiné à l'utilisation permanente. Page 14 05-26767-0E...
Need help?
Do you have a question about the 26767 and is the answer not in the manual?
Questions and answers