Advertisement
Available languages
Available languages
Quick Links
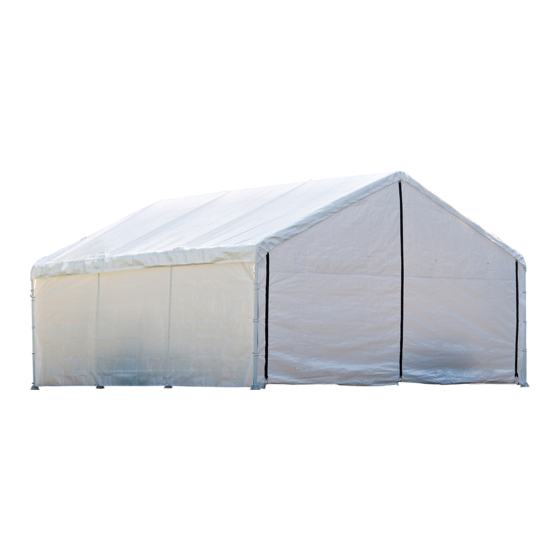
18' x 30'
SuperMax
Canopy
™
Assembly Instructions
DESCRIPTION
MODEl #
26767
SuperMax™ 18' x 30' Canopy - 12 Leg - White
RECOMMENDED TOOlS
OR
Please read instructions COMPLETELY before assembly. This shelter MUST be securely anchored.
THIS IS A TEMPORARY STRUCTURE AND NOT RECOMMENDED AS A PERMANENT STRUCTURE.
Before you start: 2 or more individuals recommended for assembly, approximate time 2 1
/
2 hours.
1-800-524-9970
150 Callender Road
Canada:
1-800-559-6175
Watertown, CT 06795
www.shelterlogic.com
1/17/12
Page 1
05_26767_0F
www.NorthlineExpress.com
NorthlineExpress.com
Toll-Free 1-866-667-8454
Advertisement

Related Manuals for ShelterLogic SuperMax 26767


Summary of Contents for ShelterLogic SuperMax 26767
- Page 1 THIS IS A TEMPORARY STRUCTURE AND NOT RECOMMENDED AS A PERMANENT STRUCTURE. Before you start: 2 or more individuals recommended for assembly, approximate time 2 1 2 hours. 1-800-524-9970 150 Callender Road Canada: 1-800-559-6175 Watertown, CT 06795 www.shelterlogic.com 1/17/12 Page 1 05_26767_0F www.NorthlineExpress.com NorthlineExpress.com Toll-Free 1-866-667-8454...
-
Page 2: Care And Cleaning
ATTENTION: This shelter product is manufactured with quality materials. It is designed to fit the ShelterLogic custom fabric cover included. ® Corp. Shelters offer storage and protection from damage caused by sun, light rain, tree sap and animal - bird excrement. - Page 3 SuperMax 18' x 30' Canopy - Parts List - Model #26767 ™ Quantity Part # Description of Parts: Swedged Rafter Poles in. / 181,3 cm 802105 Swedged Rafter Poles 802104 97,8 cm Swedged Leg Poles 76 in. / 192,8 cm 10043 Cross Rails in.
- Page 4 1. PlOT THE lOCATION 18 ft. W Before building your canopy, choose a flat area and plot your location. A. With enclosed Spikes (10431), stake out the area for the canopy in the desired spot. The width (W) of the area should be at least equal to the width of the canopy (18 FT.) 30 ft.
- Page 5 3. CONNECT ROOF FRAME 10114 10114 10017 10017 01010 01010 01010 10017 10017 10114 01010 truss 01010 Install all carriage bolts with the nut toward the center of the frame. NOTE: Page 5 05_26767_0F www.NorthlineExpress.com NorthlineExpress.com Toll-Free 1-866-667-8454...
- Page 6 4. PlACE COVER OVER ROOF FRAME Place cover over frame so the side with grommets is facing down. The valance will cover the frame eaves. 5. ATTACH lEGS TO FEET Leg Pole Assembly A. Connect a leg pole (10043), to each foot plate (10050). Align holes. B.
- Page 7 6. ATTACH lEGS TO ROOF FRAME A. Lift one side of roof frame. Attach 4 legs to the middle ribs of one side, letting the other side rest on the ground. B. Attach legs to the 2 corners of the same side. C.
- Page 8 9. TIGHTEN THE COVER A. Use 4 Ratchets (10040) to tighten down the corners of the cover. Adjust the cover so there is equal overhang on all sides. While the ratchet is in the closed position, thread the cover's webbing through the ratchet as shown. B.
- Page 9 This canopy includes 4 temporary ShelterAuger Earth Anchors. For best results, ShelterLogic recommends additional anchors, one for each foot of your frame. A. Anchors must be placed inside canopy at the corner legs. Insert a ¾-inch pipe or steel rod, through the eyelet of the auger and turn the anchor clockwise until the eyelet is sticking out of the ground 1 to 2 inches allowing room to be anchored to the legs.
-
Page 10: Guide D'assemblage
Ceci est une structure temporaire, il n'est pas recommandé d'en faire une structure permanente. Avant de commencer: Il faut 2 personnes ou plus pour le montage qui prend environ 2 1 2 heures. 1-800-524-9970 150 Callender Road Canada: 1-800-559-6175 Watertown, CT 06795 www.shelterlogic.com 1/17/12 Page 10 05_26767_0F www.NorthlineExpress.com NorthlineExpress.com Toll-Free 1-866-667-8454... -
Page 11: Garantie
® Corp. des arbres, les excréments animaliers et une légère tomber de neige. S’il vous plait ancrez la structure ShelterLogic d’une ® Corp. - Page 12 SuperMax 5,5 x 9,1 m Canopée - Liste des Pièces - Modèle nº 26767 ™ Description des Pièces : Quantité Pièces : Poteau de Chevrons, Raffiné po. / 181,3 cm 802105 Poteau de Chevrons, Raffiné 802104 97,8 cm Poteau de Jambe, Raffiné 76 po.
- Page 13 1. PlAN DE l'EMPlACEMENT 18 pi. W Avant de construire votre voile, choisissez un endroit plat et plan de votre emplacement. A. Avec Piquets fermés (10431), jalonner la zone de la canopée à l'endroit souhaité. La largeur (W) de la zone devrait être au moins égale à la largeur de l'auvent (18 PI.) Et la longueur doit être au moins égale à...
- Page 14 3. CONNECTER l’ARMATURE DU TOIT 10114 10114 10017 10017 01010 01010 01010 10017 10017 10114 01010 Support Contre Vent 01010 REMARqUE : La tête des boulons aux nervures d’extrémité doit être orientée vers l’extérieur pour éviter d’endommager la couverture. Page 14 05_26767_0F www.NorthlineExpress.com NorthlineExpress.com...
- Page 15 4. PlACEz lE COUVERTURE SUR lE CHARPENTE DE TOIT Placer le toit sur le cadre pour que la partie avec les œillets soit tournée vers le bas. La valence couvrira les rebords de l’armature. 5. ATTACHEz lES jAMBES AUx PIEDS Assemblage des jambes A.
- Page 16 6. FIxEz jAMBES lES à l’ARMATURE DU TOIT A. Soulever un côté du l’armature du toit. Commencez par fixer 4 les montants d’un même côté. Laissez l’autre côté de l’armature du toit reposer sur le sol. B. Attacher les jambes pour les 2 coins du même côté. C.
- Page 17 9. SERREz lA COUVERTURE A. Utilisez quatre cliquets (10040) pour serrer les coins de la toile. Ajustez la toile pour qu’elle dépasse de façon égale de tous les côtés. 2 po. Avec le cliquet en position fermée, faites-y passer la 24.13 cm courroie de la toile comme le montre l’illustration.
- Page 18 This canopy includes 4 temporary ShelterAuger Earth Anchors. For best results, ShelterLogic recommends additional anchors, one for each foot of your frame. A. Les ancrages doivent être placés à l’intérieur, dans les coins de l’abri. Insérez un tuyau ou une tige en acier de ¾...
-
Page 19: Instrucciones De Ensamble
ESTA ES UNA ESTRUCTURA TEMPORAL Y NO SE RECOMIENDA COMO ESTRUCTURA PERMANENTE. Antes de empezar: se recomiendan 2 o más personas para ensamblar, el tiempo aproximado de ensamble son 2 1 2 horas. 1-800-524-9970 150 Callender Road Canada: 1-800-559-6175 Watertown, CT 06795 www.shelterlogic.com Página 19 1/17/12 05_26767_0F www.NorthlineExpress.com NorthlineExpress.com Toll-Free 1-866-667-8454... -
Page 20: Cuidado Y Limpieza
(por favor guarde su copia del recibo de compra). Si se encuentra que este producto o cualquiera de sus partes asociadas tienen algún defecto o faltan partes al momento de recibir el producto, Shelterlogic ®... - Page 21 SuperMax 5,5 x 9,1m Toldo - Lista de Partes - Modelo 26767 ™ Descripción de las Partes: Cantidad Parte # Poste de Viga, Swedge pu. / 181,3 cm 802105 Poste de Viga, Swedge 97,8 cm 802104 Poste de Pierna, Swedge 76 pu.
- Page 22 18 ft. W 1. TRAzAR lA UBICACIÓN Antes de la construcción de su toldo, elija un área plana y trazar su ubicación. A. Con picos cerrados (10431), la participación de la zona de la cubierta en el lugar deseado. El ancho (W) de la zona debe ser al menos igual a la anchura de la 30 ft.
- Page 23 3. ENSAMBlE El TECHO 10114 10114 10017 10017 01010 01010 10017 01010 10017 10114 Barra de 01010 Braguero 01010 NOTA: La cabeza de los pernos en las costillas del extremo debe estar orientada hacia el exterior para evitar daños en su cubierta. Página 23 05_26767_0F www.NorthlineExpress.com...
- Page 24 4. COlOqUE lA CUBIERTA SOBRE El MARCO DEl TECHO Coloque la cubierta sobre el marco del techo con la porción de los ojales hacia abajo. La doselera cubrirá los aleros del marco. 5. ADjUNTAR PIES A lAS PIERNAS Poste de Pierna Asamblea A.
- Page 25 6. ADjUNTAR A lA PIERNAS ESTRUCTURA DEl TECHO A. Levantar un lado del marco del techo. Ensamble 4 patas en medio de uno de los lados, permitiendo que el otro lado repose en el piso. B. Adjuntar 2 patas en las esquinas del mismo lado. C.
- Page 26 9. APRETAR lA CUBIERTA A. Usar 4 trinquetes (10040) para apretar las esquinas de la cubierta. Ajuste la cubierta para que haya un sobresaliente equitativo en todos los lados. 2 pu. Mientras la trinquete está en la posición cerrada, 24.13 cm enrosque la red de la cubierta a traves de la trinquete como se muestra.
- Page 27 NOTA: Anclajes de Esquina Pierna Los taladros de 15" pulgadas están para el uso temporal solamente! Para los mejores resultados ShelterLogic recomienda el usar nuestros Ganchos Fáciles (#10036 4-paquetes, #10035 6-paquetes, o #10038 8-paquetes) para una instalación más fuerte y más segura.
Need help?
Do you have a question about the SuperMax 26767 and is the answer not in the manual?
Questions and answers