
Subscribe to Our Youtube Channel
Related Manuals for Integra DPS-6.7


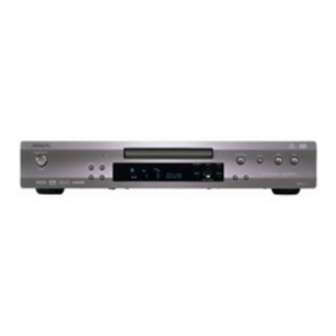
Summary of Contents for Integra DPS-6.7
- Page 1 DPS-6.7_En.book Page 1 Monday, July 31, 2006 3:12 PM Super Audio CD & DVD Audio/Video Player DPS-6.7 Instruction Manual...
-
Page 2: Important Safety Instructions
DPS-6.7_En.book Page 2 Monday, July 31, 2006 3:12 PM WARNING: TO REDUCE THE RISK OF FIRE OR ELECTRIC SHOCK, DO NOT EXPOSE THIS APPARATUS TO RAIN OR MOISTURE. CAUTION: TO REDUCE THE RISK OF ELECTRIC SHOCK, DO NOT REMOVE COVER (OR BACK). NO USER-SERVICEABLE PARTS INSIDE. -
Page 3: Precautions
5. Never Touch this Unit with Wet Hands —Never handle this unit or its power cord while your hands are wet or damp. If water or any other liquid gets inside this unit, have it checked by your Integra/ Onkyo dealer. 6. Handling Notes •... - Page 4 DPS-6.7_En.book Page 4 Monday, July 31, 2006 3:12 PM Precautions —Continued 10. Region Numbers —The DVD standard uses region numbers to control how discs can be played around the world, the world being divided into six regions. This unit will only play DVD discs that match its region number, which can be found on its rear panel (e.g., 11.
-
Page 5: Supplied Accessories
To use , in addition to an connection, you must make an analog audio connection (RCA) between the DVD player and your Integra/Onkyo AV receiver. Power cord (2 m) Power-plug adapter Only supplied in certain countries. Use this adapter if your AC outlet does not match with the plug on the DVD player’s power cord. -
Page 6: Table Of Contents
Important Safety Instructions...2 Precautions ...3 Supplied Accessories ...5 Introduction...8 Features ...8 Disc Notes ...9 Before Using the DVD player ...12 Installing the Batteries ...12 Using the Remote Controller ...12 Front & Rear Panels ...13 Front Panel ...13 Display...14 Rear Panel...15 Remote Controller ...16... - Page 7 DPS-6.7_En.book Page 7 Monday, July 31, 2006 3:12 PM Contents —Continued Thank you for purchasing the Integra/ Onkyo DPS-6.7 Super Audio CD & DVD Audio/Video player. Read this manual care- fully before using your new DVD player. A good understanding of its features and oper- ation will allow you to achieve optimum performance and enjoyment.
-
Page 8: Introduction
DPS-6.7_En.book Page 8 Monday, July 31, 2006 3:12 PM Introduction Features Highlights • Dolby Digital, DTS • DVD-Video, Video CD, audio CD ®*4 • MP3, WMA, JPEG, DivX ican model) • DVD-Audio and Super Audio CD • CD-R/RW, DVD-R/RW, and DVD+R/RW com- patible •... -
Page 9: Disc Notes
• Discs recorded in ISO 9660 Level 2 or Joliet for- mat containing MP3, WMA, or JPEG files. *1 The DVD player’s region number is printed on the rear panel. If you attempt to play a disc intended for another region, the message appears onscreen. -
Page 10: About Divx
(excluding the filename extension) are displayed. • The folder numbered “001” appears as “ROOT” in the Disc Navigator. • The DVD player supports up to 255 folders and up to 255 files per folder. • If you try to play an incompatible file, the message “This format cannot be played”... -
Page 11: Handling Discs
DPS-6.7_En.book Page 11 Monday, July 31, 2006 3:12 PM Introduction —Continued Handling Discs • Never touch the underside of a disc. Always hold discs by the edge, as shown. • Never attach adhesive tape or sticky labels to discs. Cleaning Discs •... -
Page 12: Before Using The Dvd Player
• Flat batteries should be removed as soon as possible to prevent possible leakage and corrosion. Using the Remote Controller To use the remote controller, point it at the DVD player’s remote control sensor, as shown below. Remote control sensor DVD player 30˚... -
Page 13: Front & Rear Panels
For detailed information, refer to the pages in brackets. Front Panel 3 4 5 S R Q Standby/On button [26] This button is used to set the DVD player to On or Standby. Standby indicator [26] This indicator lights up when the DVD player is in Standby. -
Page 14: Display
Display D PRO LOGIC indicator D indicator appears when playing Dolby Digital material. The PRO LOGIC indicator appears when the DVD player’s Dolby Pro Logic decoder is Disc type indicators These indicators show the type of disc loaded. TITLE indicator While stopped, the total number of titles on the cur- rent DVD-Video disc is displayed here. -
Page 15: Rear Panel
A commercially available IR receiver can be con- nected to the IR IN jack, allowing you to control the DVD player when it's out of sight, for example, installed in a cabinet. A commercially available IR emitter can be con- nected to the IR OUT jack to pass IR (infrared) remote control signals along to other components. -
Page 16: Connections
DPS-6.7_En.book Page 16 Monday, July 31, 2006 3:12 PM Front & Rear Panels —Continued Remote Controller Standby button [26] This button is used to set the DVD player to Standby. On button [26] This button is used to turn on the DVD player. - Page 17 DPS-6.7_En.book Page 17 Monday, July 31, 2006 3:12 PM Front & Rear Panels —Continued Open/Close button [28] This button is used to open and close the disc tray. Search button [34, 35] This button is used to search for titles, chapters, groups, folders, tracks, and specific points in time.
-
Page 18: Connections
Component video separates the luminance (Y) and color difference signals (P picture quality. Some TV manufacturers label their component video inputs differently. The DVD player has RCA/phono and BNC compo- nent video outputs. S-Video provides better picture quality than com- posite video. -
Page 19: Video Output/Video Setting Matrix
DPS-6.7_En.book Page 19 Monday, July 31, 2006 3:12 PM Connecting the DVD player —Continued Video Output/Video Setting Matrix The following matrix shows how the video outputs work in relation to the various video settings. Setting Video output Auto ✓ HDMI ✓... -
Page 20: Before Making Any Connections
• Don’t connect the power cord until you’ve completed all audio and video connections. Optical Digital Outputs The DVD player’s optical digital connectors have a shut- ter-type cover that opens when an optical plug is inserted, and closes when it’s removed. Push the plug in all the way. -
Page 21: Connecting Your Tv (Video Only)
DPS-6.7_En.book Page 21 Monday, July 31, 2006 3:12 PM Connecting the DVD player —Continued Connecting Your TV (video only) • Connect the DVD player directly to your TV. If you connect the DVD player through a VCR, TV/VCR combination, or video selector, the picture may be dis- torted because DVD-Video discs are usually copy pro- tected. -
Page 22: Connecting To An Av Receiver
Connecting the DVD player —Continued Connecting to an AV Receiver Step 1: Audio Connection You can connect the DVD player to your AV receiver using the multichannel analog audio output or one of the digital audio outputs. In addition, you should also connect a 2-channel analog audio output for compati- bility all certain discs. -
Page 23: Connecting -Compatible Components
Connecting Components FRONT CENTER SURR • The remote controller supplied with Integra/Onkyo AV receiver or amplifiers can be used to control the DVD player. • The function of the upper and lower are the same. Connect to either one. • To use... -
Page 24: Connecting Your Hdtv Or Av Receiver With An Hdmi Input
Connecting the DVD player —Continued Connecting your HDTV or AV receiver with an HDMI Input This section shows how to connect the DVD player to a AV receiver, HDTV, or projector that has an HDMI input socket. What is HDMI? HDMI (High Definition Multimedia Interface) is a new... -
Page 25: Using The Multiroom Control Kits
Using the Multiroom Control Kits To control the DVD player with the remote controller when DVD player is located in a cabinet, you’ll need a commercially available multiroom remote control kit. • Multiroom kits are made by Niles and Xantech. -
Page 26: Connecting The Power/Turning On The Dvd Player
The DVD player turns on and the Remote controller Standby indicator turns off. • To put the DVD player in the standby • While the Standby indicator lights up, • Setting the [Standby/On] button to Note: • This player features a screen saver and an auto power off function. -
Page 27: Initial Setup
This chapter explains the settings you need to make the very first time the DVD player is turned on. Enter First Time Setup The very first time you turn on the DVD player, the Ini- tial Setup menu appears onscreen. Initial Setup TV Shape ✔... -
Page 28: Basic Playback
• For details on playing JPEG picture discs, see “Viewing a Slideshow of JPEG Images” on page 33. Note: • Only load discs that are supported by the DVD player. See pages 9 to 11. Open/ Close Starting, Pausing & Stopping... -
Page 29: Select Next & Previous Track/Chapter
Stop [ ] but- ton when you’ve finished playing a DVD-Video disc or VCD. The DVD player features a screen saver to protect your TV from the effects of burn-in (see page 52). -
Page 30: Fast Forward & Reverse
DPS-6.7_En.book Page 30 Monday, July 31, 2006 3:12 PM Playing Discs —Continued Slow Fast Forward & Reverse DVD-V DVD-A SACD DVD-VR The North American model does not support DivX. This section explains how to fast forward and reverse. ■ Fast During playback, press the FF forward ] button to start fast forward. -
Page 31: Navigating Dvd & Vcd Disc Menus
DPS-6.7_En.book Page 31 Monday, July 31, 2006 3:12 PM Playing Discs —Continued Top Menu Menu Number buttons Down Enter Tep Menu Navigating DVD & VCD Disc Menus DVD-V DVD-A DVD-Video discs usually have a menu from which you can select titles, chapters, and other options, including soundtracks, subtitles, and audio formats (e.g., Dolby Digital or DTS). -
Page 32: Navigating Mp3, Wma & Divx Discs
004. Track04 005. Track05 Initially, the folders in the root direc- tory are displayed. The DVD player numbers folders and tracks in hierarchical order. You can use these numbers to select folders and tracks directly with the Search function (see page 34). -
Page 33: Viewing A Slideshow Of Jpeg Images
002. 002 003. 003 Initially, the folders in the root direc- tory are displayed. The DVD player numbers folders and files in hierarchical order. You can use these numbers to select folders and files directly with the Search function (see page 34). -
Page 34: Advanced Playback
DPS-6.7_En.book Page 34 Monday, July 31, 2006 3:12 PM Advanced Playback Number buttons Enter Selecting Chapters/Titles/Tracks/ Folders by Number DVD-A SACD DVD-V DVD-VR The North American model does not support DivX. With the Search function you can select chapters, titles, and tracks by number. -
Page 35: Searching By Time
DPS-6.7_En.book Page 35 Monday, July 31, 2006 3:12 PM Advanced Playback —Continued Number buttons Enter Searching by Time DVD-V DVD-A SACD DVD-VR With the Search function you can search by time. During playback, press the [Search] button twice. Remote controller The Search window appears onscreen. -
Page 36: Repeat Playback
DPS-6.7_En.book Page 36 Monday, July 31, 2006 3:12 PM Advanced Playback —Continued Repeat Playback DVD-V DVD-A SACD DVD-VR The North American model does not support DivX. With the Repeat function you can play a disc, title, chap- ter, group, track, or folder over-and-over again. Press the [Repeat] button repeat- edly to select a repeat option. -
Page 37: Random Playback
DPS-6.7_En.book Page 37 Monday, July 31, 2006 3:12 PM Advanced Playback —Continued Random Random Playback DVD-V DVD-A DVD-VR SACD With the Random function you can enjoy a random selection of titles, chapters, groups, tracks, or folders. Press the [Random] button repeatedly to select a random Remote option. -
Page 38: Memory Playback
DPS-6.7_En.book Page 38 Monday, July 31, 2006 3:12 PM Advanced Playback —Continued Play Enter Memory Playback DVD-V SACD DVD-VR The North American model does not support DivX. With the Memory Playback function you can create your own memory list of titles, chapters, and tracks. Press the [Memory] button. -
Page 39: Editing Steps
• To close the Memory List window, press the [Return] button. • The memory list will be deleted when the DVD player is set to Standby or the disc tray is opened. • To use this function with a VCD that supports PBC, you must first turn off PBC. -
Page 40: Zooming
DPS-6.7_En.book Page 40 Monday, July 31, 2006 3:12 PM Advanced Playback —Continued Play Zoom Zooming DVD-V DVD-VR JPEG With the Zoom function you can enlarge any part of the picture. During playback or while play- back is paused, press and hold Remote the [Zoom] button for 2 seconds. -
Page 41: Selecting Soundtracks
DPS-6.7_En.book Page 41 Monday, July 31, 2006 3:12 PM Advanced Playback —Continued Audio Selecting Soundtracks DVD-V DVD-A SACD Some DVD-Video discs feature soundtracks in several languages or audio formats (e.g., Dolby Digital or DTS). Music DVD-Video discs and DVD-Audio discs some- times feature audio in several formats, such as PCM, Dolby Digital, or DTS. -
Page 42: Displaying Information
DPS-6.7_En.book Page 42 Monday, July 31, 2006 3:12 PM Advanced Playback —Continued Displaying Information You can display various information about the current disc, title, chapter, or track as follows. During playback, press the [Dis- play] button repeatedly to cycle though the information. Various information appears onscreen. -
Page 43: Hdmi And Progressive Settings
The resolution is automatically set to the native resolu- tion of the TV connected to the HDMI OUT. If the DVD player does not support the TV’s native res- olution setting, the resolution 480p/576p will be used. 480p (480p/576p) (default): The setting displayed depends on the country in which you purchased the DVD player. -
Page 44: Configuring The Dvd Player
Convert the disc’s video format to NTSC or PAL. Settings for the digital signal output by the optical, coaxial, and HDMI digital audio outputs. Select whether or not the DVD player down samples digital audio. Configure the speakers settings for the multichannel analog audio output. -
Page 45: Using The Onscreen Setup Menus
Sets the Auto power off function. Displays your DivX VOD registration code This menu appears automatically the very first time you turn on your DVD player. (These settings are available in other menus.) Press the [Setup] button. The onscreen setup menu appears, as shown. -
Page 46: Picture Menu
DPS-6.7_En.book Page 46 Monday, July 31, 2006 3:12 PM Configuring the DVD player —Continued Picture Menu TV Shape With this setting you can select a picture format to match the aspect ratio of your TV. Choose 4:3 Letter box (default): this option if you have a standard TV (4:3 aspect ratio). -
Page 47: Video Black Level
[Resolution] button on the front panel (see page 43). Note: • Initially, the DVD player is configured to output both HDMI and analog video. However, if after changing the resolution settings there’s no picture, with the ana-... -
Page 48: Audio Menu
• MPEG is output as PCM regardless of this setting. Linear PCM Out With this setting you can configure the DVD player to output digital audio with higher sampling rates (e.g., 88.2 kHz, 96 kHz) as it is or to down sample it to 48 kHz or below. -
Page 49: Dolby Pro Logic Setting
Dolby Digital material that you are playing and with some material there will be little or no effect. • When the DVD player is set to Standby, this function is automatically set to Off. • Depending on the Speaker Configuration settings, this setting may be fixed. -
Page 50: Language Menu
DPS-6.7_En.book Page 50 Monday, July 31, 2006 3:12 PM Configuring the DVD player —Continued Downmix Setting With this setting you can configure the FRONT/D.MIX AUDIO OUT jacks and AV CONNECTOR for use with a 2-channel stereo amp or an amp with a built-in Dolby Pro Logic decoder. -
Page 51: Selecting Other Languages
DPS-6.7_En.book Page 51 Monday, July 31, 2006 3:12 PM Configuring the DVD player —Continued ■ Selecting Other Languages This section explains how to select other languages for disc menus, audio, and subtitles. Select “Others” from the Disc Menu Language, Audio Lan-... -
Page 52: Display Menu
Pearl Amethyst Garnet Background With this setting you can select the color of the back- ground that’s displayed when the DVD player is stopped. Blue Gray The theme picture specified for the On- Graphic: Screen Display Color setting is used. -
Page 53: Operation Setting Menu
DPS-6.7_En.book Page 53 Monday, July 31, 2006 3:12 PM Configuring the DVD player —Continued Operation Setting Menu Setting the Parental Lock With the Parental Lock function you can block access to certain scenes that the authors have flagged as being unsuitable for children. -
Page 54: Divx ® Registration
Registration To play DivX VOD (video on demand) content on this DVD player, you first need to register it with your DivX VOD content provider. You do this by generating a DivX VOD registration code, which you then submit to your provider. -
Page 55: Additional Information
All DVD-Video discs carry a region mark on the case somewhere that indicates which region(s) of the world the disc is compatible with. Your DVD player also has a region mark, which you can find on the rear panel. Discs from incompatible regions will not play in this player. -
Page 56: Glossary
Dolby Laborato- ries. ■ MP3, WMA & JPEG Files MP3, WMA, and JPEG files are typically organized into folders. The DVD player handles MP3, WMA, and Track 4 Track 5 JPEG files as tracks. - Page 57 DPS-6.7_En.book Page 57 Monday, July 31, 2006 3:12 PM Glossary —Continued HDMI HDMI (High-Definition Multimedia Interface) is a high- speed digital interface which has the capability to sup- port standard, enhanced, or high-definition video plus standard to multichannel surround-sound audio on a sin- gle digital connection.
-
Page 58: Troubleshooting
On your hi-fi amp or AV receiver, select the input to which the DVD player is connected. Check the audio cable and correct as necessary. Turn on your hi-fi amp or AV receiver. See page 19 for details on how the DVD player out- puts audio from each output. - Page 59 The picture distorts occa- You’re using the Fast Forward or Fast Reverse sionally? function. The DVD player is connected to your TV via a Picture instability or VCR or other video equipment whose copy noise? protection system is affecting the picture.
- Page 60 The DVD player contains a microcomputer for signal processing and control functions. In very rare situa- tions, severe interference, noise from an external source, or static electricity may cause it to lockup. In the unlikely even that this should happen, unplug the power cord from the wall outlet, wait at least five seconds,...
- Page 61 If you’re using an HDMI connection and there’s no picture or sound, you can check the status of the HDMI connection by pressing and holding down the DVD player’s [Display] button for 10 seconds until a message ID appears on the display.
-
Page 62: Specifications
DPS-6.7_En.book Page 62 Monday, July 31, 2006 3:12 PM Specifications Signal System Composite Video Output/Impedance S-Video Output/Impedance Component Video Output/Impedance Component Video Frequency Response DVD Audio Super Audio CD Frequency response DVD Linear Sound Audio CD S/N Ratio Audio Dynamic Range THD (Total Harmonic Distortion) Wow and Flutter Audio Output (Digital/Optical) - Page 63 DPS-6.7_En.book Page 63 Monday, July 31, 2006 3:12 PM...
- Page 64 DPS-6.7_En.book Page 64 Monday, July 31, 2006 3:12 PM Integra Division of ONKYO U.S.A. CORPORATION 18 park Way, Upper Saddle River, N.J. 07458, U.S.A. Tel: 201-785-2600 Fax: 201-785-2650 http://www.integrahometheater.com Integra Division of ONKYO CORPORATION I0608-1 Sales & Product Planning Div.: 2-1, Nisshin-cho, Neyagawa-shi, OSAKA 572-8540, JAPAN...
Need help?
Do you have a question about the DPS-6.7 and is the answer not in the manual?
Questions and answers