Table of Contents
Advertisement
Advertisement
Table of Contents

Summary of Contents for Philips Kala
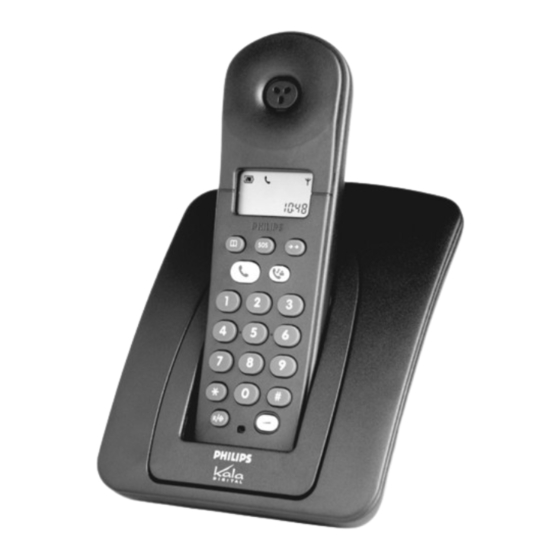
- Page 2 ILLUSTRATION Base station Green mains power Earpiece supply/line LED Red messages LED Display Answering machine key Memory key Redial key On/Off line key Internal call / music on Dialling keypad hold key Recall and Programming Loudspeaker key Microphone Colour clip 2 extra colour clips Mains adapter Telephone cable...
-
Page 3: Safety Information
Your telephone has been manufactured at a site certified ISO 14001 - the international standard for environmental management systems. Your telephone has also benefited from the Philips EcoDesign program - Environmental Conscious Product Design - which considers the environmental impact of a product during its... -
Page 4: Installing Your Telephone
Only use the cables supplied with the product. FITTING THE COLOUR CLIP 1 ðInsert the clip from the top first. 2 ðFirmly press on the clips (in the arrow direction) until they lock. 3 ðTo remove the colour clip, pull it out from the “Philips “ marking. -
Page 5: Handset Display
DESCRIPTION HANDSET DISPLAY Numerical Telephone characters icons ICON STATE DESCRIPTION Displayed Batteries charged. Batteries low. Blinking Handset being charged. Displayed Programming activated. Waiting for an answer from the base station (in the Blinking context of registration). Memories in use Displayed (consultation, programming). -
Page 6: Telephone Leds
DESCRIPTION TELEPHONE LEDS The base station has a red/green LED. Green LED - Lit, when the base station is powered. - Blinking, when: . receiving a call . the line is connected or the answering machine is replying. - Unlit, when the base station is not connected to the power supply. Red LED - Lit, when the answering machine is ready to receive calls (ON). -
Page 7: Using Your Telephone
USING YOUR TELEPHONE Your Philips telephone is GAP certified, nevertheless we cannot guarantee its use with DECT products made by other manufacturers. You can register 4 handsets with 1 base station and 1 handset with 2 base stations. TO MAKE A CALL ð... - Page 8 USING YOUR TELEPHONE TO PUT ON HOLD OR TRANSFER AN EXTERNAL CALL During an external call: If you have no additional handset, when you press the call is put on hold with music. ð ð Press Caller on hold Call resumed listening to music If you have several handsets registered to the same base station, when you press you can...
-
Page 9: To Record A 'Memo'
USING YOUR TELEPHONE TO RECORD THE ANSWERING MACHINE OUTGOING MESSAGE Dictate your ð ð ð ð message Answering machine Record Message * Stop *If you wish to play back your outgoing message, press TO SWITCH THE ANSWERING MACHINE ON OR OFF Beeps in ð... - Page 10 USING YOUR TELEPHONE TO SCREEN CALLS Call screening allows you to listen to messages being left on you answering machine. You may then choose to intercept the call or not by pressing To start call screening, press You can hear the caller through the earpiece of your handset. To stop call screening, press For permanent adjustment, refer to the call screening section in the chapter concerning programming the answering machine on page 11.
-
Page 11: Programming Your Telephone
PROGRAMMING YOUR TELEPHONE Your telephone has programmable functions. To change the settings, refer to the table below. The options you choose will be saved even if there is a power cut. A beep confirms programming changes. FUNCTIONS COMMENTS COMBINATIONS ACOUSTIC FUNCTIONS Option no. -
Page 12: Key Combinations
PROGRAMMING YOUR TELEPHONE FUNCTIONS COMMENTS COMBINATIONS ANSWERING MACHINE - Answering only Select mode - Answering and recording Number of rings before the - 2 rings machine intercepts the call - 3 rings - 4 rings - 5 rings - Toll saver * digit personal Record the answering machine... - Page 13 PROGRAMMING YOUR TELEPHONE FUNCTIONS COMMENTS COMBINATIONS ADAVANCED FUNCTIONS Select type of network Residential network PABX 1* For selecting the network when your PABX 2* telephone is connected to a PABX PABX 3* Change type of flash ** Short flash (for use behind a PABX) Long flash Insert an automatic pause No pause...
-
Page 14: Dialling Mode
PROGRAMMING YOUR TELEPHONE FUNCTIONS COMMENTS COMBINATIONS DIALLING MODE Tone Only for U.K. Pulse REGISTERING/UN-REGISTERING A HANDSET TO A BASE STATION Before registering a handset, unplug the base station mains adapter and then plug it in again. + Code ∆ + Register this handset The ∆... - Page 15 PROBLEMS YOU MAY ENCOUNTER WITH YOUR TELEPHONE The table below lists the problems you may encounter when using your Philips telephone. CAUSE PROBLEM SOLUTION The LED on the base station is The base station has not been Check the connections.


Need help?
Do you have a question about the Kala and is the answer not in the manual?
Questions and answers