Table of Contents
Advertisement
Available languages
Available languages
Safe Operation Practices • Set-Up • Operation • Maintenance • Service • Troubleshooting • Warranty
O
'
M
peratOr
s
anual
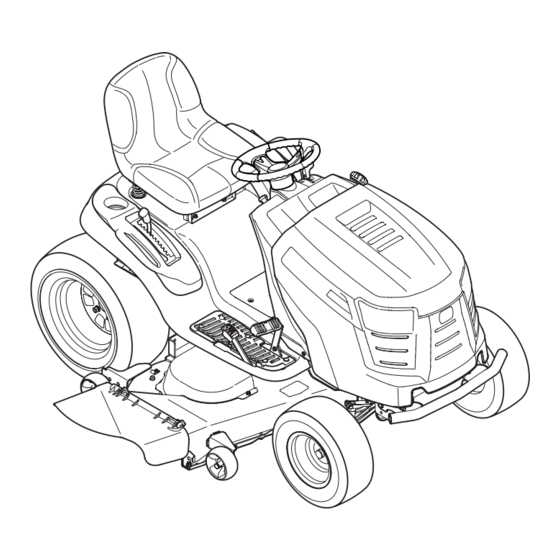
Hydrostatic Lawn Tractor
LGT1050, LGTX1050, LGT1054 & LGTX1054
WARNING
READ AND FOLLOW ALL SAFETY RULES AND INSTRUCTIONS IN THIS MANUAL
BEFORE ATTEMPTING TO OPERATE THIS MACHINE.
FAILURE TO COMPLY WITH THESE INSTRUCTIONS MAY RESULT IN PERSONAL INJURY.
CUB CADET LLC, P.O. BOX 361131 CLEVELAND, OHIO 44136-0019
Printed In USA
Form No. 769-09229
(November 1, 2013)
Advertisement
Chapters
Table of Contents

Related Manuals for Cub Cadet LGTX1050


Summary of Contents for Cub Cadet LGTX1050
- Page 1 READ AND FOLLOW ALL SAFETY RULES AND INSTRUCTIONS IN THIS MANUAL BEFORE ATTEMPTING TO OPERATE THIS MACHINE. FAILURE TO COMPLY WITH THESE INSTRUCTIONS MAY RESULT IN PERSONAL INJURY. CUB CADET LLC, P.O. BOX 361131 CLEVELAND, OHIO 44136-0019 Printed In USA Form No. 769-09229...
-
Page 2: Table Of Contents
See How-to Maintenance and Parts Installation Videos at www.cubcadet.com/tutorials ◊ Call a Customer Support Representative at (800) 965-4CUB ◊ Locate your nearest Cub Cadet Dealer at (877) 282-8684 ◊ Write to Cub Cadet LLC • P.O. Box 361131 • Cleveland, OH • 44136-0019... -
Page 3: Safe Operation Practices
Important Safe Operation Practices WARNING! This symbol points out important safety instructions which, if not followed, could endanger the personal safety and/or property of yourself and others. Read and follow all instructions in this manual before attempting to operate this machine. Failure to comply with these instructions may result in personal injury. - Page 4 Slope Operation A missing or damaged discharge cover can cause blade contact or thrown object injuries. Slopes are a major factor related to loss of control and tip-over Stop the blade(s) when crossing gravel drives, walks, or accidents which can result in severe injury or death. All slopes roads and while not cutting grass.
- Page 5 Service Children Tragic accidents can occur if the operator is not alert to the Safe Handling of Gasoline: presence of children. Children are often attracted to the machine and the mowing activity. They do not understand To avoid personal injury or property damage use extreme the dangers.
-
Page 6: Spark Arrestor
Do not modify engine Periodically check to make sure the blades come to complete stop within approximately (5) five seconds after To avoid serious injury or death, do not modify engine in any operating the blade disengagement control. If the blades way. -
Page 7: Safety Symbols
Safety Symbols This page depicts and describes safety symbols that may appear on this product. Read, understand, and follow all instructions on the machine before attempting to assemble and operate. Symbol Description READ THE OPERATOR’S MANUAL(S) Read, understand, and follow all instructions in the manual(s) before attempting to assemble and operate DANGER—... - Page 8 2 — i ection mportant peration racticeS...
-
Page 9: Assembly & Set-Up
Assembly & Set-Up Contents of Crate • One Lawn Tractor • One Oil Drain Tube • One Deck Wash Hose Coupler • One Lawn Tractor Operator’s Manual • One Engine Operator’s Manual Tractor Set-Up CAUTION: Never attempt to move the tractor manually without first opening the hydrostatic relief Moving The Tractor Manually valve. - Page 10 Connecting the Battery Cables Checking Tire Pressure WARNING! CALIFORNIA PROPOSITION 65 WARNING Do not overinflate tires. Check sidewall of tires for maximum psi. Equal tire pressure should Battery posts, terminals, and related accessories be maintained at all times. contain lead and lead compounds, chemicals known to the State of California to cause cancer and The tires on your tractor may be over inflated for shipping reproductive harm.
- Page 11 Adjusting the Seat Gas and Oil To adjust the position of the seat, pull up and hold the seat The fuel tank is located under the hood. Remove the fuel cap by adjustment lever. Slide the seat forward or rearward to the turning it counterclockwise.
-
Page 12: Controls & Features
Controls and Features LCD Service Minder & Hour Meter Fuel Tank Cap Ignition Switch Module Throttle/Choke Control Electric PTO Knob Fuel Level Indicator Drive Pedal Brake Pedal Reverse Pedal Parking Brake/ Cargo Net Cruise Control Lever Deck Lift Lever Seat Adjustment Lever Storage Bin Cup Holder Figure 4-1... - Page 13 Deck Lift Lever LCD Service Minder & Hour Meter When the ignition key is rotated Found on your tractor’s right fender, out of the STOP position but the deck lift lever is used to change not into the START position, the the height of the cutting deck.
- Page 14 Fuel Level Indicator Parking Brake/Cruise Control Lever The Fuel Level Indicator is located on the left side of the tractor’s dash and indicates the amount of fuel in the gas tank. Located in the center of the tractor’s dash panel below the steering wheel, the Parking Brake/Cruise Control lever is used to engage the parking brake and the cruise control.
-
Page 15: Operation
This tractor is equipped with a safety interlock system for the Stopping the Engine protection of the operator. If the interlock system should ever malfunction, do not operate the tractor. Contact your Cub Cadet WARNING! dealer. If you strike a foreign object, stop the engine and disconnect the spark plug wire(s). -
Page 16: Driving The Tractor
Driving The Tractor Note: While on pavement, operating the power steering with the engine running and the tractor at a stand-still, may cause the WARNING! Avoid sudden starts, excessive speed front wheels to stutter. This is considered normal and will operate and sudden stops. -
Page 17: Engaging The Parking Brake
Driving On Slopes Cruise Control WARNING! Never engage the cruise control lever Refer to the SLOPE GAUGE on page 8 to help determine slopes while traveling in reverse. where you may operate the tractor safely. WARNING! Do not mow on inclines with a slope in excess of 15 degrees (a rise of approximately 2-1⁄2 To set the cruise control: feet every 10 feet). - Page 18 Engaging the PTO Mowing Engaging the PTO transfers power to the cutting deck or other WARNING! To help avoid blade contact or a (separately available) attachments. To engage the PTO: thrown object injury, keep bystanders, helpers, children and pets at least 75 feet from the machine Move the throttle control lever to the FAST (rabbit) while it is in operation.
-
Page 19: Maintenance & Adjustment
Maintenance & Adjustments Maintenance Schedule Before Every Every Every Every Prior Each use 10 Hours 25 Hours 50 Hours 100 Hours to Storing Clean Hood/Dash Louvers Check Engine Oil Level Check Air Filter for Dirty, Loose or Damaged Parts Clean and Re-oil Air Filter’s Foam Precleaner Replace Air Filter Element Change Engine Oil and Replace Oil Filter Clean Battery Terminals... -
Page 20: Cleaning
Hydrostatic Transmission Pop open the protective cap on the end of the oil drain valve to expose the drain port. See Figure 6-1. The hydrostatic transmission is sealed at the factory and is maintenance-free. The fluid level cannot be checked and the fluid cannot be changed. - Page 21 Lubrication Attach the hose coupler to the water port on your decks surface. See Figure 6-2. WARNING! Before lubricating, repairing, or inspecting, always disengage PTO, set parking brake, stop engine and remove key to prevent unintended starting. Front Wheels Each of the front wheel axles and rims is equipped with a grease fitting.
- Page 22 Adjustments Leveling the Deck (Side to Side) If the cutting deck appears to be mowing unevenly, a side to side WARNING! Shut the engine off, remove the adjustment can be performed. Adjust if necessary as follows: ignition key and engage the parking brake before With the tractor parked on a firm, level surface, place the making adjustments.
- Page 23 Off-Season Storage Steering Adjustment If the tractor turns tighter in one direction than the other, or if Before storing the machine for an extended period: the ball joints are being replaced due to damage or wear, the • Refer to the Maintenance Schedule earlier in this section steering drag links may need to be adjusted.
-
Page 24: Service
Service Cutting Deck Removal 50” Decks To remove the cutting deck, proceed as follows: Place the PTO/Blade Engage knob in the disengaged (OFF) position and engage the parking brake. Lower the deck by moving the deck lift lever into the bottom notch on the right fender. -
Page 25: Cutting Blades
Cutting Blades Pull the deck support pin outward to release the deck from the deck lift arm. See Figure 7-3. WARNING! Shut the engine off and remove ignition key before removing the cutting blade(s) for sharpening or replacement. Protect your hands by using heavy gloves when grasping the blade. - Page 26 Make the final connection on the engine block of the tractor, away from the battery. Attach to an unpainted part to assure a good connection. CAUTION: If the jumper battery is installed on a vehicle (i.e. car, truck), do NOT start the vehicle’s engine when jump starting your tractor.
-
Page 27: Dealer
Changing the Transmission Drive Belt Several components must be removed and special tools used in order to change the tractor’s transmission drive belt. See your Cub Cadet dealer to have the transmission drive belt replaced. Changing the Deck Belt on 50” Decks WARNING! - Page 28 Changing the Deck Belt on 54” Decks WARNING! Shut the engine off and remove Front Spindle ignition key before removing the cutting blade(s) for Pulley Deck Idler sharpening or replacement. Protect your hands by Pulleys using heavy gloves when grasping blades and pulleys.
-
Page 29: Troubleshooting
Troubleshooting Problem Cause Remedy Engine fails to start 1. PTO/Blade Engage knob engaged. 1. Place knob in disengaged (OFF) position. 2. Parking brake not engaged. 2. Engage parking brake. 3. Spark plug wire(s) disconnected. 3. Connect wire(s) to spark plug(s). 4. -
Page 30: Replacement Parts
Replacement Parts Component Part Number and Description 759-3336 Spark Plug KH-32-883-03-S1 Air Filter & Pre-cleaner (Kohler Coutrage) KH-32-883-09-S1 Air Filter & Pre-cleaner ( Kohler 7000) KH-12-050-01-S Oil Filter KH-25-050-22-S1 Fuel Filter 954-04077 Deck Drive Belt (50” Deck) 954-0642 Deck Drive Belt (54” Deck) 942-04053C 2-in-1 Deck Blade (50”... - Page 31 Component Part Number and Description 734-04155 Deck Wheel 734-0973 Deck Wheel (Rear 50” Decks) 925-1707D Battery 951-12179B Fuel Tank Cap 946-04556 Throttle/Choke Control Cable 625-05000 Ignition Key 631-04070C Discharge Chute Assembly Phone (800) 965-4CUB to order replacement parts or a complete Parts Manual (have your full model number and serial number ready).
-
Page 32: Attachments & Accessories
Attachments & Accessories The following attachments and accessories are compatible for Cub Cadet LGT1050, LGTX1050, LGT1054 and LGTX1054. Call (800) 965-4CUB or see your Cub Cadet dealer or the retailer from which you purchased your tractor for information regarding price and availability. - Page 33 Notes...
- Page 34 FEDERAL and/or CALIFORNIA EMISSION CONTROL WARRANTY STATEMENT YOUR WARRANTY RIGHTS AND OBLIGATIONS MTD Consumer Group Inc, the United States Environmental Protection Agency (EPA), and for those products certified for sale in the state of California, the California Air Resources Board (CARB) are pleased to explain the evaporative emission control system (ECS) warranty on your 2013-2014 small off-road equipment (outdoor equipment).
- Page 35 WARRANTED PARTS: The repair or replacement of any warranted part otherwise eligible for warranty coverage may be excluded from such warranty coverage if MTD Consumer Group Inc demonstrates that the outdoor equipment has been abused, neglected, or improperly maintained, and that such abuse, neglect, or improper maintenance was the direct cause of the need for repair or replacement of the part.
-
Page 36: Warranty
Cub Cadet shall not be liable for any incidental or consequential Frame and Front Axle — Cub Cadet warrants the frame, and front cast iron loss or damage including, without limitation, expenses incurred for... -
Page 37: Spanish
LEA Y SIGA TODAS LAS INSTRUCCIONES DE ESTE MANUAL ANTES DE PONER EN FUNCIONAMIENTO ESTA MÁQUINA. SI NO RESPETA ESTAS INSTRUCCIONES PUEDE PROVOCAR LESIONES PERSONALES. CUB CADET LLC, P.O. BOX 361131 CLEVELAND, OHIO 44136-0019 Impreso en Estados Unidos de América... - Page 38 Visite nuestro sitio web en www.cubcadet.com Ver Vídeos demostrativos de instalación de mantenimiento y piezas en www.cubcadet.com/Tutorials ◊ Llame a un representante de Asistencia al Cliente al (800) 965-4CUB ◊ Escríbanos a Cub Cadet LLC • P.O. Box 361131 • Cleveland, OH • 44136-0019...
-
Page 39: Medidas Importantes De Seguridad
Medidas importantes de seguridad ADVERTENCIA: La presencia de este símbolo indica que se trata de instrucciones importantes de seguridad que se deben respetar para evitar poner en peligro su seguridad personal y/o material y la de otras personas. Lea y siga todas las instrucciones de este manual antes de poner en funcionamiento esta máquina. - Page 40 Esté atento a la cortadora y a la dirección de la descarga Los datos estadísticos muestran que los operadores de 60 de los aditamentos y no apunte a nadie. Nunca opere la años y mayores se ven involucrados en un alto porcentaje cortadora de césped sin que estén en su lugar apropiado la de lesiones relacionadas con tractores corta césped.
- Page 41 Servicio No cambie a transmisión neutral para descender. El exceso de velocidad puede hacer que el operador pierda el control de la máquina, ocasionando lesiones graves e incluso la muerte. Manejo seguro de la gasolina: No remolque cargas pesadas detrás de los aditamentos Para evitar lesiones personales o daños materiales sea (carrito de basura cargado, podadora de rodillos, etc) en sumamente cuidadoso al manipular la gasolina.
- Page 42 Antes de limpiar, reparar o inspeccionar la máquina, Según la Comisión de Seguridad de Productos para el compruebe que la(s) cuchilla(s) y todas las partes en Consumidor de los Estados Unidos (CPSC) y la Agencia movimiento se hayan detenido. Desconecte el cable de la de Protección Ambiental de los Estados Unidos (EPA), bujía y póngalo haciendo masa contra el motor para evitar este producto tiene una vida útil media de siete (7) años,...
- Page 43 Símbolos De Seguridad Esta página representa y describe la seguridad los símbolos que pueden parecer en este producto. Lea, comprenda, y siga todas instrucciones de la máquina antes de intentar ensamblar y operar. Symbol Description LEA EL MANUAL(S) DEL OPERADOR leído, entienda, y siga todas las instrucciones en el manual(s) antes de procurar montar y funcionar PELIGRO—...
- Page 44 2 — M ection edidaS iMportanteS de Seguridad...
-
Page 45: Montaje Y Configuración
Montaje y Configuración Contenido del cajón • Un tractor corta césped • Un tubo de drenaje de aceite • Un acoplador de manguera para lavado de plataforma • Un Manual del operador del tractor • Un Manual del operador del motor corta césped Configuración del tractor Extracción de la traba de seguridad utilizada en el envío... - Page 46 Instalación del cable de la baterías Control de la presión de los neumáticos PROPUESTA 65 DE CALIFORNIA ¡ADVERTENCIA! La presión máxima de los ADVERTENCIA! neumáticos en cualquier circunstancia es de 30 psi. Los postes de la batería, Se debe mantener una presión uniforme para todos terminales y accesorios relacionados contienen los neumáticos en todo momento.
- Page 47 Gasolina y aceite Coloque la palanca de elevación de la plataforma en el ajuste de altura de corte deseado. El depósito de combustible se encuentra bajo el capó. Retire Vuelva a insertar el tornillo con reborde (con la tapa del combustible girando hacia la izquierda. Utilice sólo cada rueda de calibración) dentro del orificio de limpia y fresca (no más de 30 días de edad), la gasolina sin plomo.
-
Page 48: Controles Y Características
Controles y Características Servicio LCD Minder y cronómetro Módulo del Tapón del tanque de combustible interruptor de encendido Interruptor de Control del regulador/cebador la potencia de arranque (PTO) Indicador de nivel de combustible Pedal de la transmisión Pedal de freno Pedal de la marcha atrás Freno de mano /... - Page 49 Palanca de elevación de la plataforma Servicio LCD Minder y cronómetro Ubicada en el guardabarros derecho del Cuando la llave de encendido se rota fuera de la posición de tractor, la palanca de elevación de la parada, pero no a la posición plataforma se utiliza para cambiar la altura START, el Minder Servicio LCD y de la plataforma de corte.
- Page 50 Cargo Neto Freno de mano / palanca de control de crucero La carga neta se encuentra en la mitad inferior de la raya y puede utilizarse para el almacenamiento. Manija de potencia de arranque (PTO)/enganche de cuchilla Al conectar la potencia de arranque (PTO) se suministra alimentación a la plataforma de corte o a otros accesorios (disponibles por separado).
-
Page 51: Funcionamiento
NOTA: NO deje el control del obturador activado mientras funciona mal, no se debe hacer funcionar el tractor. Póngase en opera el tractor. Si lo hace, se generará una mezcla “rica” de contacto con su distribuidor Cub Cadet. combustibles, lo cual hará que el motor pierda intensidad. •... - Page 52 Conducción del tractor Modo de precaución en marcha atrás ¡ADVERTENCIA! La posición MODO DE PRECAUCIÓN EN MARCHA ATRÁS del Evite arrancar súbitamente, módulo del interruptor de llave permite operar el tractor desarrollar excesiva velocidad y detenerse de en marcha atrás con las cuchillas (toma de fuerza - PTO) repente.
- Page 53 El MODO DE PRECAUCIÓN EN MARCHA ATRÁS permanece activado hasta que: Se coloque la llave en la posición CORTE NORMAL o en la posición STOP (detención) o El operador abandona el asiento. Operación en pendientes Consulte la sección INDICADOR DE PENDIENTE en la página 8 para determinar en qué...
- Page 54 Utilización de la palanca de elevación de la Para desenganchar el freno de mano, presione levemente el pedal de freno. plataforma ¡ADVERTENCIA! Nunca deje la máquina en Para elevar la plataforma de corte, mueva la palanca de elevación funcionamiento sin vigilancia. Siempre desconecte de la plataforma hacia la izquierda y colóquela en la muesca que la potencia de arranque (PTO), coloque el freno de mejor se adapte a la aplicación deseada.
-
Page 55: Mantenimiento Y Ajustes
Tenga cuidado y evite quemarse con o individuo especializado en reparaciones de motores. Las reparaciones cubiertas por la garantía deben ser llevadas a el aceite caliente. cabo por un distribuidor de Cub Cadet. - Page 56 Abra el capó del tractor y ubique el puerto de drenaje de Cuando termine de drenar el aceite, empuje el extremo de aceite del lado izquierdo del motor. Vea la Figura 6-1. la válvula de drenaje de aceite hacia adentro, hasta que las lengüetas calcen en su lugar.
- Page 57 Smart Jet™ Mueva la potencia de arranque (enganche de cuchilla) del tractor a la posición OFF (desconectada). La plataforma de su tractor está equipada con un puerto de Gire la llave de encendido a la posición STOP (detención) agua sobre su superficie como parte del sistema de lavado de la para apagar el motor del tractor.
- Page 58 Ajustes Para bajar la parte delantera de la plataforma, afloje (rosca hacia afuera) la tuerca hexagonal, alejándola de la ménsula ¡ADVERTENCIA! Apague el motor, retire la llave de suspensión frontal. Véase la Figura 6-4. de encendido y coloque el freno de mano antes de Nivelación de la plataforma (lado a lado) realizar ajustes.
- Page 59 (y la válvula de descarga hidrostática abierta) el freno necesita ajustes. Consulte Delante del eje, mida la distancia horizontal desde con su distribuidor Cub Cadet para realizar un ajuste correcto del el interior de la llanta izquierda hasta el interior de la freno.
-
Page 60: Servicio
Servicio Extracción de la plataforma de corte 50” Decks Para extraer la plataforma de corte, proceda de la siguiente manera: Coloque la perilla de la potencia de arranque (PTO) (enganche de cuchilla) en la posición OFF (desconectada) y coloque el freno de mano. Baje la plataforma colocando la palanca de elevación de la plataforma dentro de la muesca inferior en el guardabarros derecho. - Page 61 extraño. No opere la máquina hasta después de haber reemplazado los componentes dañados. Para retirar las cuchillas, haga lo siguiente. Extraiga la plataforma de la parte inferior del tractor, (consulte la sección Extracción de la plataforma en partes anteriores de esta sección); luego voltee con delicadeza la plataforma para dejar al descubierto su parte inferior.
- Page 62 PRECAUCIÓN: Si la batería con el puente conector está instalada en el vehículo (es decir automóvil, camión) NO ponga en marcha el motor del vehículo cuando arranque su tractor con el conector puente. Arranque el tractor (según las instrucciones de la sección Funcionamiento de este manual).
- Page 63 Para cambiar la correa de transmisión del tractor, se deben retirar varios componentes y se requieren herramientas especiales. Solicite a su distribuidor Cub Cadet que realice el reemplazo de la correa de transmisión. Cambio de la correa de la plataforma de 50“ Decks ¡ADVERTENCIA!
- Page 64 Vuelva a montar los protectores de la correa extraídos anteriormente. Cambio de la correa de la plataforma de 54“ Decks eje delantero polea poleas ¡ADVERTENCIA! Apague el motor y extraiga la locas llave de contacto antes de retirar las cuchillas de corte para afilado o reemplazo.
-
Page 65: Solución De Problemas
Solución de Problemas Problem Cause Remedy 1. Palanca de potencia de arranque (PTO) / 1. Coloque la perilla en la posición de El motor no arranca enganche de cuchilla conectada. desconexión (OFF). 2. No está colocado el freno de mano. 2. - Page 66 Problem Cause Remedy El motor vacila a altas 1. La separación de la bujía es muy pequeña. 1. Retire la bujía y reajuste la separación. revoluciones El motor funciona con 1. Bujía sucia, averiada o exceso de separación. 1. Reemplace la bujía. Ajuste la separación de dificultad en ralentí...
-
Page 67: De Piezas De Repuesto
Piezas de reemplazo Componente Número de pieza y Descripción 759-3336 Bujía KH-32-883-03-S1 Limpiador de Aire Elemento con Pre-Filtro (Kohler Courage) KH-32-883-09-S1 Limpiador de Aire Elemento con Pre-Filtro (Kohler 7000) KH-12-050-01-S Filtro de Aceite KH-25-050-22-S1 Filtro de Combustible 954-04077 Cubierta de la correa de transmisión (50 “de la cubierta) 954-0642 Cubierta de la correa de transmisión (54... - Page 68 Componente Número de pieza y Descripción 918-04125B Husilla de Plataforma (50” Decks) 918-04608A Husilla de Plataforma (54” Decks) 734-04155 Rueda de Plataforma (Frente) 734-0973 Rueda de Plataforma (Trasero 50” Decks) 925-1707D Batería 951-12179B Tapa del Tanque de Combustible 946-04556 Cable de Control de Regulador/ Cebador 625-05000 Llave de Encendido...
-
Page 69: Archivos Adjuntos Y Accesorios
PRECAUCIÓN: Cub Cadet tractores del césped de la serie 1000 no están diseñados para su uso con cualquier tipo de acoplamiento de tierra adjuntos(por ejemplo, caña o arado de vertedera). El uso de este tipo de equipo se anulará la garantía del tractor. - Page 70 DECLARACIÓN FEDERAL y/o DE CALIFORNIA SOBRE GARANTÍAS EN EL CONTROL DE EMISIONES SUS DERECHOS Y OBLIGACIONES EN CUANTO A LA GARANTÍA MTD Consumer Group Inc, la Agencia de Protección Medioambiental de los Estados Unidos (EPA), y para aquellos productos certificados para su venta en el estado de California, el Departamento de los Recursos del Aire de California (CARB) se complacen en explicar la garantía que evaporativo sistema de control de emisiones (ECS) de su equipo (equipos de exteriores) de encendido por chispa para todo terreno, pequeño, de exteriores del año 2013-2014.
- Page 71 Durante la totalidad del período de garantía del motor y equipo para todo terreno arriba mencionado, MTD Consumer Group Inc mantendrá un suministro de piezas bajo garantía suficiente para satisfacer la demanda esperada de tales piezas. Cualquier pieza de reemplazo se podrá usar para el cumplimiento del mantenimiento o las reparaciones bajo garantía y se suministrarán sin cargo para el propietario.
-
Page 72: Garantía
Bastidor y eje frontal — Cub Cadet garantiza el bastidor, y eje de pivote de jurídicas, incluidos los distribuidores o los minoristas, con respecto a hierro fundido frontal contra defectos en los materiales y mano de obra los productos, obligará...
Need help?
Do you have a question about the LGTX1050 and is the answer not in the manual?
Questions and answers
Does not go forward or in reverse
A Cub Cadet LGTX1050 may not go forward or in reverse due to the following possible causes:
1. The parking brake is engaged.
2. The operator is not seated in the seat, which disables movement.
3. The drive pedal or reverse pedal is not being pressed.
4. The transmission bypass lever may be engaged, disabling drive function.
5. A mechanical failure or issue in the drive system, such as a broken drive belt.
Check these areas to identify and correct the issue.
This answer is automatically generated
What does blinking H mean on cub cadet LGTX1050 mean
Electric power steering doesn’t work sometimes. I have to turn ignition off once started then switch off and back on quickly before it shuts off completely,then power steering works. Do l need a new switch?