InFocus LP 850 User Manual
Infocus user's guide projector lp 840 lp 850 lp 860
Hide thumbs
Also See for LP 850:
- User manual (55 pages) ,
- Command manual (6 pages) ,
- Specifications (4 pages)
Table of Contents
Advertisement
Advertisement
Table of Contents
Troubleshooting

Subscribe to Our Youtube Channel
Related Manuals for InFocus LP 850


Summary of Contents for InFocus LP 850
- Page 1 840/ 850/ ® ® ® INSTALLATION & INTEGRATION PROJECTOR. USER’S GUIDE...
- Page 2 WARNING: The power cord and cables associated with this product contain lead, a chemical known to the state of California to cause birth defects or other reproductive harm. Wash hands after handling. WARNING: This product has a lamp which contains a very small amount of mercury. Dispose of it as required by local, state, or federal ordinances and regulations.
- Page 3 Данное руководство пользователя в полном объеме представлено на прилагаемом компакт-диске в виде pdf-файла Adobe Acrobat на следующих языках: английском, голландском, французском, немецком, итальянском, норвежском, португальском, испанском, русском, японском, корейском, традиционном и упрощенном китайском. Перед использованием проектора, прочитайте данные инструкции. ^ÇçÄÉ=^ÅêçÄ~í...
- Page 4 EN 60 825-1: 1994 +A11. Do not look into laser beam emitted from the front of the remote control Location of laser beam warning labels on remote InFocus reserves the right to alter product offerings and specifications at any time without notice.
-
Page 5: Table Of Contents
If you are experienced in setting up presentation systems, use the included Quick Set Up card. For complete details on connecting and operating the projector, refer to this User’s Guide. Electronic versions of this User’s Guide in multiple languages are available on the included CD and on our website. - Page 6 2 ft (.6m) 2 ft (.6m) 2 ft (.6m) Do not place objects in the areas along the left, back and front sides of the projector For ceiling mount applications, this area should be 5 feet (1.5m). 5 ft (1.5m)
-
Page 7: Introduction
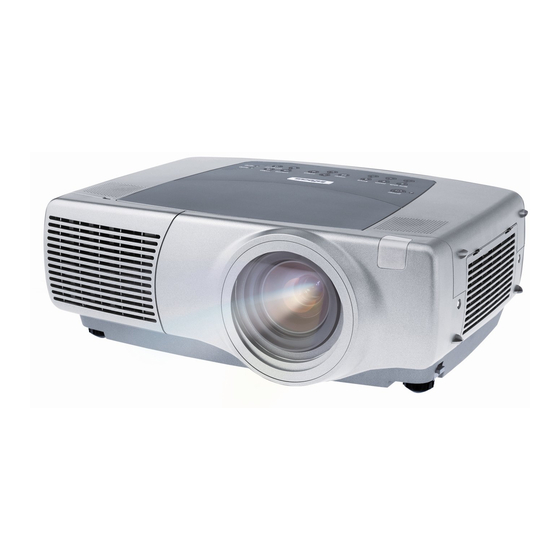
Your new multimedia projector provides three computer, three video, and two audio inputs, one audio output, and RS-232 control. The LP840 and LP850 have XGA 1024x768 resolution while the LP860 has SXGA+ 1400x1050 resolution. Optional user-changeable short, fixed short, long and super long throw lenses make this a flexible product suitable for many dif- ferent uses. -
Page 8: Connector Panel
LP840-850-860 User's Guide-02.fm Page 6 Friday, February 25, 2005 12:58 PM Connector Panel The projector provides three computer and three video connection options: • one M1-D (DVI with USB) • one VESA computer • one BNC (RGBHV and Pr, Pb, Y) •... -
Page 9: Positioning The Projector
Here are some general guide- lines: • Position the projector on a flat surface at a right angle to the screen. The projector (with the standard lens) must be at least 3 feet (0.9m) from the projection screen. -
Page 10: Connecting A Computer
If your projector cannot receive the remote’s signal due to IR interference, connect wired remote you can connect directly to the projector via a remote cable. To do so, plug the remote cable into the wired remote connector on the projector. Plug the... - Page 11 You can also connect to your computer using a BNC cable. Connect the BNC connectors on the BNC cable to the appropriate Computer 3 connectors on the projector. Connect the other end to the video port on your computer. If you are using a desktop computer, you first need to disconnect the monitor cable from the computer’s video port.
-
Page 12: Displaying A Computer Image
Displaying a computer image Remove the lens cap. Press the power switch on the back of the projector to the on position, then press the Power button on the top of the projector or the remote. The LED flashes green and the fans start to run. When the lamp comes on, the startup screen is displayed and the LED is steady green. -
Page 13: First-Time Projector Use With Windows 98
LP840-850-860 User's Guide-02.fm Page 11 Friday, February 25, 2005 12:58 PM First-time projector use with Windows 98 The first time you connect a computer running Windows 98 to the projector, the computer recognizes the projector as “new hardware” and the Add New Hardware Wizard appears. - Page 14 LP840-850-860 User's Guide-02.fm Page 12 Friday, February 25, 2005 12:58 PM Skip this page if you did not connect a USB mouse cable For Windows 98: • If you connected the USB cable, the Add New Hardware Wizard appears again. Drivers must be installed to use the USB functionality. •...
-
Page 15: Adjusting The Image
LP840-850-860 User's Guide-02.fm Page 13 Friday, February 25, 2005 12:58 PM Adjusting the image Adjust the height of the projector, if necessary, by pressing the release but- tons on each side of the projector’s front to extend the elevator feet. -
Page 16: Connecting A Video Device
Plug the other yellow connector into the yel- low Video 3 connector on the projector. Plug a white connector into the left audio out connector on the video device and plug a red connector into the right audio out connector on the video device. - Page 17 You can also connect to your video device using a BNC cable. Connect the BNC connectors of the BNC cable to the appropriate Computer 3 connec- tors on the projector. Connect the other end to the video port on your video device. Use the A/V cable’s audio connectors as described on the previous page (the yellow connectors on the A/V cable are not used).
-
Page 18: Displaying A Video Image
Displaying a video image Remove the lens cap. Press the power switch on the back of the projector to the on position, then press the Power button on the top of the projector. The LED flashes green and the fans start to run. When the lamp comes on, the startup screen is displayed and the LED is steady green. - Page 19 LP840-850-860 User's Guide-02.fm Page 17 Friday, February 25, 2005 12:58 PM Adjust the zoom or focus by pressing the power Zoom or power Focus buttons on the keypad until the desired image size and focus are produced. You can also adjust the zoom and focus via the menus. See page 32 If the image is not on the screen or viewing area, adjust it by pressing the lens shift button on the keypad.
-
Page 20: Shutting Down The Projector
When Power Save is enabled, Screen Save is disabled. See page 36. Turning off the projector To turn off the projector, press the power button and verify that you want to turn the projector off by pressing the power button again within 3 seconds. - Page 21 LP840-850-860 User's Guide-02.fm Page 19 Friday, February 25, 2005 12:58 PM Source Troubleshooting Problem No startup screen Only startup screen appears Solution Plug power cable in, press power switch, press power button. Remove lens cap. Press the Computer button Activate laptop’s external port or restart laptop Result...
- Page 22 LP840-850-860 User's Guide-02.fm Page 20 Friday, February 25, 2005 12:58 PM No computer image, just the words “Signal out of range” Adjust computer refresh rate in Control Computer image projected Panel>Display>Settings>Advanced> Adapter (location varies by operating system) You may also need to set a different resolution on your computer, as shown in the following problem, “Image fuzzy or cropped”...
- Page 23 Image fuzzy or cropped Remote control navigation buttons not working with my computer Set your computer’s display resolution to Image clear and not cropped the native resolution of the projector (Start>Settings>Control Panel>Display>Settings tab, select1024x768 for LP840/850, 1400x1050 for LP860) For a laptop,...
- Page 24 LP840-850-860 User's Guide-02.fm Page 22 Friday, February 25, 2005 12:58 PM Projector troubleshooting Problem Image not square Image not sharp Image does not fit 16:9 screen Solution Result Square image Adjust keystone the Picture menu Adjust the focus on the keypad or Correct image Sharpness in the Picture>Advanced menu...
- Page 25 LP840-850-860 User's Guide-02.fm Page 23 Friday, February 25, 2005 12:58 PM Image upside down Image reversed left to right Projected colors don’t match source COLOR Turn on/off Ceiling in Settings>System Correct image menu Turn on/off Rear in Settings>System menu Correct image Correct image Adjust color, tint, color temperature, brightness, contrast in the menus...
- Page 26 Make sure vents aren’t blocked; allow Unplug projector; wait one minute; plug in projector to cool for one minute projector and turn it on: lamp lights Lamp may need to be replaced (page 40) Lamp turns on...
-
Page 27: Still Having Problems
This product is backed by a limited two-year warranty. An extended war- ranty plan may be purchased from your dealer. When sending the projector in for repair, we recommend shipping the unit in its original packing mate- rial, or having a professional packaging company pack the unit. -
Page 28: Using The Keypad Buttons
Most buttons are described in detail in other sections, but here is an over- view of their functions: power–turns the projector on (page 10) and off (page 16). lens shift–shifts the projected image up or down zoom–moves the projected image closer or further away. -
Page 29: Using The Remote Control
Select button to select features and adjust values in the menus. The remote also has a power button to turn the projector on and off, volume buttons and a mute button to control the sound, a backlight button to light the remote's buttons in the dark, and a video and computer button to switch between those two sources. -
Page 30: Using The Audio
LP840-850-860 User's Guide-02.fm Page 28 Friday, February 25, 2005 12:58 PM Using the audio To play sound from the projector, connect your source to the Audio In con- nector on the projector. To adjust the volume, use the buttons on the keypad or remote. -
Page 31: Optimizing Computer Images
See page 36. • Two menu options, Power Save and Screen Save, are provided to auto- matically shut down the projector after several minutes of inactivity or display a blank screen. This helps preserve lamp life. See page 35 and page 36. -
Page 32: Optimizing Video Images
See the inside back cover of this User’s Guide for ordering information. • Gain control of your projector from your laptop with InFocus ProjectorManager ™ , a free application that turns any PC into an advanced projector remote control. -
Page 33: Using The Menus
• The About menu provides a read-only display of information about the projector and source. Certain menu items may be grayed out until a particular source is con- nected. For example, Sharpness is only available for video sources and will be hidden when a computer source is active. -
Page 34: Picture Menu
LP840-850-860 User's Guide-02.fm Page 32 Friday, February 25, 2005 12:58 PM Picture menu To adjust the following six settings, highlight the setting, press Select, use Keystone Vertical the up and down arrows to adjust the values, then press select to confirm the changes. - Page 35 LP840-850-860 User's Guide-02.fm Page 33 Friday, February 25, 2005 12:58 PM Presets: The provided Presets optimize the projector for displaying com- puter presentations, photographs, film images, and video images. (Film input is material originally captured on a film camera, like a movie; video...
-
Page 36: Advanced Settings
(The video standard options may vary depending on your region of the world.) If the projector is unable to detect the correct standard, the colors may not look right or the image may appear “torn.” If this happens, manually select a... -
Page 37: Settings Menu
When Autosource is checked, Powerup Source deter- mines which source the projector defaults to at power-up. If no signal is present, the projector checks the sources in order until a source is found or until power down. - Page 38 Capture Position X and Capture Position Y adjustments to frame the logo to be captured. Press Capture Start in the Logo Capture menu. The projector will let you know if the capture was a success or a failure.
- Page 39 LP840-850-860 User's Guide-02.fm Page 37 Friday, February 25, 2005 12:58 PM PiP: (Picture in Picture) allows you to overlay a smaller window showing the video source on top of the larger computer source window. Only video sources 2 and 3 (composite and S-video) support PiP. You must have both a computer and video source connected to use PiP.
- Page 40 LP840-850-860 User's Guide-02.fm Page 38 Friday, February 25, 2005 12:58 PM Network: The projector has an RJ45 Ethernet connector that supports net- work connections and TCP/IP protocols. This will allow for the control and management of the projector over a corporate network. The following fields are accessible when DHCP is not checked and available for manual entry of data.
-
Page 41: Maintenance
Long throw and short throw lenses are available with your projector. Turn off the projector and unplug the power cable. Turn the projector upright with the lens facing upward and use a screw- driver to remove the two screws from the front bezel release holes on the bottom of the projector. -
Page 42: Replacing The Projection Lamp
Turn clockwise until you feel the lens click into place. Tighten the captive screw to the lens housing door. Place the front bezel back onto the projector and replace the two screws on the bottom of the projector. Replace the cover that protects the lens and the lamp housing on top of the projector. -
Page 43: Resetting The Lamp Timer
LP840-850-860 User's Guide-02.fm Page 41 Friday, February 25, 2005 12:58 PM WARNINGS: • To avoid burns, allow the projector to cool for at least 60 minutes before you replace the lamp. • Do not drop the lamp module. The glass may shatter and cause injury. -
Page 44: Cleaning The Dust Filter
Replace the dust filter and the dust filter grill. Using the security lock The projector has a security lock for use with a cable lock system. See the Accessories catalog that came with the projector, or visit our website, for ordering information. -
Page 45: Appendix
LP840-850-860 User's Guide-02.fm Page 43 Friday, February 25, 2005 12:58 PM Appendix Projected image size NOTE: Visit the Service section of our website for interactive image size cal- culators for the standard and optional lenses. Table 1: Projection sizes: Standard lens (1.5 - 2.2:1 throw ratio) Minimum Image Diagonal Image... -
Page 46: Led Behavior
(blinks two times) Lamp has failed (blinks three times) Lamp door is open (blinks four times) Turn off the projector and wait one minute, then turn the projector on again. If the projector has exceeded its lamp life limit, replace the lamp and reset the lamp timer. -
Page 47: Rs-232 Commands
RS-232 commands Communication Configuration Visit our website for additional RS-232 settings and information. To control this projector via RS-232, connect a null modem cable and set the control system serial port settings to match the following communication configuration: RS-232 Port Settings... - Page 48 ‘?’ character will be returned indicating the command was not understood. Limitations The projector cannot respond to commands coming in at a high-rate. There- fore, a delay must occur between commands to ensure that the command gets properly executed. To assure the projector can process a command, wait 3 seconds before entering the next command.
- Page 49 LP840-850-860 User's Guide-02.fm Page 47 Friday, February 25, 2005 12:58 PM Brightness BRT at RW Ceiling CEL at RW 0: disable 1: enable Chime ACE at RW 0: disable 1: enable Color CLR at RW Color Space CSM at RW 0: RGB 1: SMPTE240 2: REC709...
- Page 50 LP840-850-860 User's Guide-02.fm Page 48 Friday, February 25, 2005 12:58 PM IR Receiver rear IRR at RW 0: disable 1: enable IR Receiver top IRT at RW 0: disable 1: enable Language LAN at RW 0 = English 1 = French 2 = German 3 = Spanish 4 = Traditional Chinese...
- Page 51 LP840-850-860 User's Guide-02.fm Page 49 Friday, February 25, 2005 12:58 PM Motorized Focus Near MFN at W Motorized Vertical MVD at W Down Motorized Vertical Up MVU at W Motorized Zoom In MZI at W Motorized Zoom Out MZO at W Mute MTE at RW 0: disable...
- Page 52 LP840-850-860 User's Guide-02.fm Page 50 Friday, February 25, 2005 12:58 PM Save User 1 US1 at W 0: not saved 1: saved Save User 2 US2 at W 0: not saved 1: saved Save User 3 US3 at W 0: not saved 1: saved Screen Save SSV at RW...
- Page 53 LP840-850-860 User's Guide-02.fm Page 51 Friday, February 25, 2005 12:58 PM Tint TNT at RW Tracking MTS at RW def: def: -128 +128 Unit Total Time On ONL at R 214748 3646 Vertical Keystone DKC at RW Vertical Position VPS at RW def: auto x 2 Video Standard...
- Page 54 9 computer connections optional 8 required 8 computer image optimize 29 troubleshooting 19 connector panel 6 contacting InFocus 25 Contrast 13, 17 custom logo startup screen 36 Default gateway 38 DHCP 38 Display Messages 35 displaying computer image 10...
- Page 55 8, 14 Power Save 35 Power-up Source 35 presentation features 29 projection distance 7 projector connector panel 6 customizing 30 positioning 7 setting up 7 shutdown 18 troubleshooting problems 18 projector height 13, 16 projector positioning 13, 16...
- Page 56 6 security lock 42 Serial connection 9 serial connection 6 Service 38 Service Code 38 Settings menu 35 shutdown projector 18 solid red 44 Source 37 Source troubleshooting 19 Sources 35 Subnet mask 38 S-video connector 14 Tint 17...
- Page 57 Product found to be defective within the Limited Warranty period and to repair or replace defective parts with new parts or, at the option of InFocus, serviceable used parts that are equivalent or superior to new parts performance. Lim- ited Warranty periods are as follows: •...
- Page 58 To Obtain Warranty Service During the Limited Warranty period, to exercise this Limited Warranty, the purchaser must first contact 1) InFocus, 2) a service facility authorized by InFocus or 3) the place of original purchase. InFocus Customer Service in the Americas 1-800-799-9911 or 503-685-8888 or www.infocus.com/service, In Europe, Middle East, and Africa +31 (0) 20 579 2820,...
-
Page 59: If You Need Assistance
IF YOU NEED ASSISTANCE... For all types of Service and Support information on InFocus products and services please go to our web site at www.infocus.com/service. Many resources are available on our website. Some examples are: • Frequently Asked Questions about general projector usage and technical issues •... - Page 60 InFocus International BV Strawinskylaan 585 1077 XX Amsterdam The Netherlands Phone: +31 20 579 2000 Fax: +31 20 579 2999 In Asia: InFocus Systems Asia Pte Ltd. 238A Thomson Road #18-01/04 Novena Square Singapore 307684 Telephone: (65) 6334-9005 Fax: (65) 6333-4525...
Need help?
Do you have a question about the LP 850 and is the answer not in the manual?
Questions and answers