Table of Contents
Advertisement
IMPORTANT
Your new tool has been engineered and manufactured to WEN's
dependability, ease of operation, and operator safety. Properly cared for, it will give you
years of rugged, trouble-free performance.
Pay close attention to the Rules for Safe Operation, Warnings, and Cautions. If you use your
tool properly and only for what it is intended, you will enjoy years of safe, reliable service.
We Got Your Back
It's not how, it's WEN the project get's done!
Got product questions or need technical support? Please feel free to contact us!
OPERATOR'S MANUAL
WenProducts.com
800- 232-1195
techsupport@wenproducts.com
M–F 8-5 CST
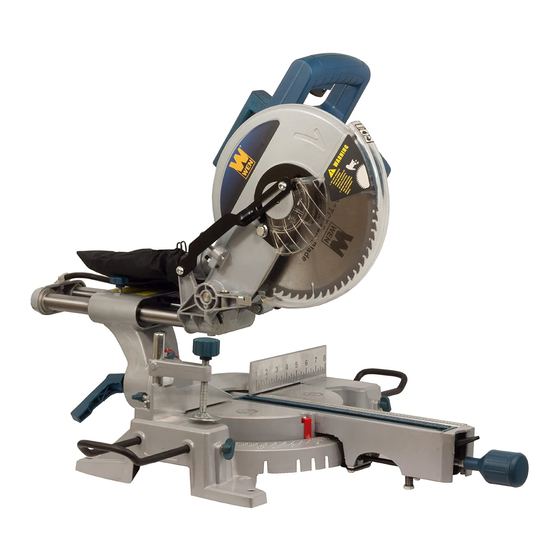
10" Sliding
Compound
Miter Saw
Model # 70711
high standards for
®
Advertisement
Table of Contents

Related Manuals for Wen 70711


Summary of Contents for Wen 70711
- Page 1 Compound Miter Saw Model # 70711 IMPORTANT Your new tool has been engineered and manufactured to WEN’s high standards for ® dependability, ease of operation, and operator safety. Properly cared for, it will give you years of rugged, trouble-free performance.
-
Page 2: Table Of Contents
Table Of Contents SECTION PAGE SpeCiFiCaTionS . . . . . . . . . . . . . . . . . . . . . . . . . . . . . . . . . . . . . . . . . . . . . . . . . . . . . . 3 RuleS FoR SaFe opeRaTion . -
Page 3: Specifications
10" Sliding Miter Saw Specifications SPECIFICATIONS Model number: 70711 Rating 120V aC ~ 60Hz input 15 amps Speed 5300 RpM arbor diameter 5/8" Blade Type General purpose with Carbide Tips Blade diameter 10" at 90°: 2-3/4" deep x 12" wide Cutting Capacity at 45° 1-9/16" deep x 8-1/4" wide positive Table Stops 0°, 15°, 22 .5°, 30° and 45° Right and left positive Bevel Stops 0° and 45° left only Blade Tilt Range 0° - 45° Right and left Miter 0° - 45° left Scale 1° per scale mark Package Contents: Sliding Compound Sliding Miter Saw, Carbide Tipped Blade, 2 pc Table extensions, dust Collection Bag, 1–Miter lock Handle, 1 Hold down Clamp, instruction Manual and wrench . -
Page 4: Rules For Safe Operation
. The instructions or warnings they give are not substitutes for proper accident prevention measures . SYMBOL MEANING Safety Alert Symbol: indicated danger, warning, or caution, may be used in conjunction with other symbols or pictographs . always follow the safety precautions to reduce the risk of fire, electric shock and personal injury . NOTE: advising you of information or instructions is vital to the operation or maintenance of the equipment IMPORTANT Servicing requires extreme care and knowledge and should be performed only by a qualified service technician . For service, we suggest you return the tool to wen pRoduCTS a division of Great lakes Technologies, llC . for repair . when servicing, use only identical wen replacement ® parts . WARNING - do not attempt to operate this tool until you have read thoroughly and understand completely all instructions, safety rules, etc…contained in this manual . Failure to comply can result in accidents involving fire, electric shock, or serious personal injury . Save this operator’s manual and review frequently for continuing safe operation and instructing others who may use this tool . Safe operation of this power tool requires that you read and understand this operator’s manual and all labels affixed to the tool . Safety is a combination of common sense, staying alert, and knowing... -
Page 5: General Instructions For All Power Tools
General Instructions for all Power Tools READ ALL INSTRUCTIONS!!! • k now your power tool . Read the operator’s manual carefully . learn the application and limitations as well as specific potential hazards related to this tool . • k eep guards in place and in working order . never operate the tool with any guard or cover removed . Make sure all guards are operating properly before each use . • R emove adjusting keys & wrenches . Form a habit of checking to see keys and adjusting wrenches are removed from tool before turning it on . • keep work area clean . Cluttered work areas and work benches invite accidents . • d o not use in dangerous environments . do not use power tools near gasoline or other flammable liquids, in damp or wet locations or expose them to rain . keep work area well lighted . • k eep children and visitors away . all visitors should wear anSi-Z87 .1 approved safety glasses and be kept a safe distance from work area . - Page 6 • u se recommended accessories . Consult the operator’s manual for recommended accessories . The use of improper accessories may cause risk of injury . • n ever stand on tool . Serious injury could occur if the tool is tipped or if the blade is unintentionally contacted . • d irection of feed . Feed work into a blade or cutter against the direction or rotation of the blade or cutter only . • n ever leave tool running unattended . Turn power off . don’t leave tool until it comes to a complete stop . • C heck damaged parts . Before further use of the tool, a guard or other part that is damaged should be carefully checked to determine that it will operate properly and perform its intended function . Check for alignment of moving parts, binding or moving parts, breakage of parts, mounting and any other condition that may affect its operation . a guard or other part that is damaged must be properly repaired or replaced by an authorized service center to avoid risk of personal injury . • protect your hearing . wear hearing protection during extended periods of operation . • k eep tools dry, clean, and free from oil and grease . always use a clean cloth when cleaning .
- Page 7 • a void awkward operations and hand positions where a sudden slip could cause your hand to move into the blade . alwaYS make sure you have good balance . • allow the motor to come up to full speed before starting a cut to avoid binding or stalling • d o not use tool if switch does not turn it on and off . Have defective switches replaced by an authorized service center . • R eplacement parts . all repairs, whether electrical or mechanical, should be made by a qualified service technician at an authorized service center . WARNING - when servicing use only identical wen® replacement parts . use of any other part may create a hazard or cause product damage . • k eep hands away from cutting area . do not hand hold pieces so small that your fingers go under the blade guard . do not reach underneath work or in blade cutting path with your hands and fingers for any reason . • Before making a cut, be sure all adjustments are secure . • a lways support large work pieces while cutting to minimize risk of blade pinching and kickback . Saw may slip, walk or slide while cutting large or heavy boards .
-
Page 8: Extension Cords
• S tay alert and exercise control . watch what you are doing and use common sense . do noT operate tool when you are tired . do noT RuSH! • M ake sure work area has ample lighting to see the work and that no obstructions will interfere with safe operation BeFoRe performing any work by using your saw . • S ave these instructions . Refer to them frequently and use them to instruct other users . if you loan someone this tool, loan them these instructions also . • u se the proper extension cord . Make sure your extension cord is in good condition . when using an extension cord, be sure to use one heavy enough to carry the current your product will draw . an undersized cord will cause a drop in line voltage resulting in loss of power and overheating . a wire gauge size (a .w .G .) of at least 16 is recommended for an extension cord 25 feet or less in length . if in doubt, use the next heavier gauge . The smaller the gauge number is, the heavier the cord is . • d on’t abuse cord . never carry tool by the cord or yank it to disconnect from receptacle . keep cord from heat, oil, and sharp edges . -
Page 9: Grounding Instructions
GROUNDING INSTRUCTIONS Tool with three (3) wire grounding plugs (a-in illustration on page 10) is intended for use on a circuit that has an outlet that looks like the one illustrated in Sketch (B) . an adapter (d) may be used to connect this plug to a two (2) pole outlet (C) if a properly grounded outlet is not available . The temporary adapter should be used only until a properly grounded outlet can be installed by a qualified electrician . The green colored rigid ear or wire extending from the adapter must be connected to a permanent ground such as a properly grounded outlet box . UNPACKING WARNING - to prevent accidental starting that could cause possible serious personal injury, assemble all parts to your saw before connecting it to power sup- ply . Saw should never be connected to power supply when you are assembling parts, making adjustments, installing or removing blades, or when not in use . WARNING - if any parts are missing, do not operate this tool until the missing parts are replaced . Failure to do so could result in possible serious personal injury . • d o not discard the packing materials until you have carefully inspected the saw, identified all parts, and satisfactorily operated your new saw NOTE: if any parts are damaged or missing, do not attempt to plug in the power cord and turn the switch on until the damaged or missing parts are obtained and are installed correctly . -
Page 10: Specific Safety Rules For Miter Saw
Specific Safety Instructions for the 10" Miter Saw WARNING - do not operate your saw until it is assembled, and you have read and understand the following instructions and the warning labels on the saw . Before Operating Your Miter Saw Check for proper assembly and proper alignment of moving parts . understand the function and proper use of: • Trigger switch/start button • lower blade guard • Miter locks • Bevel lock knob • Handle latch • arbor lock Read, understand and follow all operating instructions and safety warnings in this manual . Read and understand warning labels on the miter saw . know the condition of your miter saw . if any part is missing, bent or does not operate properly, replace the component before you continue to use your saw . determine the type of work you are going to be doing before you operate your saw . properly pro- tect your body including your eyes, hands, face and ears . Only wear safety goggles that apply with ANSI Z87.1 • w hen operating power tools, foreign objects can be thrown into your eyes . - Page 11 • Make sure the blade flanges are properly installed . • Be sure the arbor bolt and washer are properly installed and tightened . • ensure all clamps and locks are tight . Verify there is no excessive play in any parts . • allow the blade to reach full speed before cutting . Do not cut freehand • T he workpiece should be tight against the fence . Verify the workpiece will not rock or twist when it’s being cut . The area between the workpiece and the saw must be free from debris . • M ake sure there is no gap between the workpiece, fence and base of the saw . a gap could allow the workpiece to move when it’s being cut . • use clamps, fixtures or other devices to hold an unstable workpiece . Do not cut more than one workpiece at a time • a llow room so the cut-off workpiece can move after it’s cut . it could create a hazard by becoming wedged against the blade .
- Page 12 • install or remove the blade . • perform maintenance or make adjustments . To avoid injury from electrical shock • d o not touch the metal blades on the power cord plug when removing or installing the plug into an electrical outlet . To avoid injury from a fire hazard • do not operate the saw near flammable liquids, vapors or gases . When Operating Your Miter Saw To avoid injury from unexpected saw movement • u se the saw on a firm level surface with adequate space for handling and supporting the work- piece . • B e sure the saw cannot move when operated . Secure the saw to a workbench or table with wood screws, or bolts, washers and nuts . Before moving the saw • unplug the power cord from the electrical outlet .
-
Page 13: Motor Safety Protection
Allow movement of the waste portion of the workpiece • d o not hold it, clamp it, touch it or use a length stop against it . The cut-off waste portion must be free to move . it could become wedged against the blade causing a hazard . Avoid awkward hand position • it is important to position your hand no closer than 4 inches from the blade . • do not cross your arms in front of the blade while operating the saw . Do not force the blade through the workpiece • l ower the blade through the workpiece fast enough to allow the blade to cut without binding or bogging down . Before removing obstructed material • R elease the trigger switch/start button, wait for the blade to stop moving and unplug the power cord from the electrical outlet . - Page 14 Your miter saw is wired at the factory for 120V operation . Connect to a 120V, 15 aMp time delay fuse or circuit breaker . To avoid shock or fire, replace power cord immediately if it is worn, cut or damaged in any way . Use a separate electrical circuit for your tools. This circuit must not be less than a #12 wire and should be protected with a 15 amp time delay fuse . Before connecting the motor to the power line, make sure the switch is in the oFF position and the electric current is rated the same as the current stamped on the motor nameplate . Running at a lower voltage will damage the motor . when operating a power tool outside, use an outdoor extension cord marked "w-a" or "w" . These cords are rated for outdoor use and reduce the risk of electric shock . This tool is intended for use on a circuit that has a receptacle like the one illustrated: a 3-prong electrical plug (1) and receptacle (2) that has a grounding conductor . if a properly grounded receptacle is not available, have a certified electrician check the receptacle . WARNING - This miter saw is for indoor use only . do not expose to rain or use in damp location . This tool must be grounded while in use to protect the operator from electrical shock . This tool has an equipped grounding conductor and a grounding plug . The plug must be used with a matching electrical outlet that is properly installed in accor- dance with all local codes and ordinances .
-
Page 15: Components Of The Miter Saw
Components of a Miter Saw Handle Latch Arbor Lock ASSEMBLY Attaching the Extension Supports and Miter Lock Handle 1 . i nsert the ends of the extension Supports into the holes in the sides of the Base . Tighten the wing Screws to hold the extensions in place . The upper edge of the extensions will be level with the surface of the saw . This provides a wider base for the work material to rest on . 2 . T hread the Miter lock Handle into the opening of the miter handle until securely in place . Attaching the Dust Collection Bag 3 . T he dust Collection Bag slips over the dust outlet behind the Blade Housing assembly . Sawdust created by cutting is captured in the bag . -
Page 16: Operation Instructions
Operating Instructions WORK PIECE AND WORK AREA SET UP 1 . d esignate a work area that is clean and well-lit . The work area must not allow access by children or pets to prevent injury and distraction . 2 . R oute the power cord along a safe route to reach the work area without creating a tripping hazard or exposing the power cord to possible damage . The power cord must reach the work area with enough extra length to allow free movement while working . 3 . u se a saw table, saw stand or other means to support the work piece . The Miter Saw must be mounted in such a way that the surface is level to the ground, and supports used must provide a surface on the same level as the saw table . if the work surface and any work materials supports are not level, and on the same level, unwanted bevel angles will appear in the cuts resulting in poor joinery . 4 . w ork pieces may be secured to the saw table using the Hold down Clamp or other clamping devices (not included) . Securing the work piece will provide safety by preventing kick back and by removing the need to hold work pieces near the blade by hand . Clamping the work piece will also improve cutting accuracy by preventing the work piece from moving during the cutting operation . -
Page 17: Using The Work Piece Extension Supports
blade does not contact the kerf Board during normal operation, including bevel cuts . adjustment of the kerf Board and techniques to prevent tear-out are discussed later in this manual . 7 . B efore starting work, check the accuracy of the Guide Fence, miter angle and bevel angle . instructions for checking and adjusting these angles are discussed later in this manual . 8 . i t is very important that the work material be properly supported before making a cut . The material must be level on the Table . The material must be supported on both ends . using the work piece extension Supports is discussed in the next section . USING THE WORK PIECE EXTENSION SUPPORTS 1 . T he work piece extension Supports are inserted into each side of the table, and locked in place using the wing screws . 2 . w hen properly installed, the upper face of the work piece extension supports are level with the Table, and provide a wider support surface for the work piece . 3 . a lways support the work piece to be level with the table, and so that after the cut is made the cut off pieces will not fall . You may need to use saw horses or other supports (not included) to support the work piece . -
Page 18: Using The Depth Stop
4 . M ake a sample cut in a piece of scrap and check to be sure the bevel angle is correct . if it is not, correct the angle before cutting your work material . USING THE DEPTH STOP 1 . i f you want to make a kerfing or rabbet cut which does not cut through the work piece, you can use the depth Stop Screw to control the depth of the cut . 2 . T o limit blade assembly travel, turn the depth Stop Screw clockwise . The further you screw down the depth Stop Screw, the shallower the cut will be . 3 . a fter the desired cut has been made, return the depth Stop Screw to its open position by turning it counterclockwise . MAKING A CUT 1 . o bserve all safety and planning items discussed in this manual . detailed instructions on each of the following steps are discussed in this manual . do not make any cuts until you have read this entire manual and are familiar with the operation of this tool . -
Page 19: Maintenance And Servicing
Maintenance and Servicing CLEANING, MAINTENANCE, AND LUBRICATION 1 . B EFORE EACH USE, inspect the general condition of the tool . Check for loose screws, misalign- ment or binding of moving parts, cracked or broken parts, damaged electrical wiring, and any other condition that may affect its safe operation . 2 . a fter use clean external surfaces of the tool with clean, moist cloth . To prevent accidents, turn off the tool and disconnect its power supply after use . Clean, then store the tool indoors out of children’s reach . 3 . i f the blade has become dirty, use a blade cleaner (not included) to clean it . dirty blades will bind more easily, and will more often overheat and burn the wood as it cuts . overheated blades dull more easily . 4 . i f the Blade has become dull, replace it . dull blades will cause increased tear-out and ragged edges on the cuts . -
Page 20: Adjusting The Fence
5 . Raise the Blade Guard and Center Cover . (See Figure 4 .) 6 . w hile holding in the arbor lock Button, use the wrench to loosen the arbor Bolt by turning it clockwise . (See Figure 5 .) note: T he arbor Bolt has a left hand thread, so it loosens by turning clockwise . 7 . R emove the arbor Bolt, outer Flange and Saw Blade by pulling them straight off the arbor . 8 . R einstall a new Blade on the arbor . (See Figure 6 .) Be sure to Figure 4 match the direction marked on the new blade with the direction marked on the saw Blade Housing . 9 . R eplace the outer Flange and arbor Bolt . Tighten the arbor Bolt securely using the wrench by turning it counterclockwise . 10 . R otate the Center Cover back into place and tighten the Center Cover Fixing Bolt using the wrench by turning it clockwise . -
Page 21: Adjusting The Miter Table Indicator
ADJUSTING THE MITER TABLE INDICATOR 1 . a fter you have checked or adjusted the fence to be sure it is at 90º to the Blade, you must check the accuracy of the Miter Table angle indicator . 2 . l oosen the screw holding the angle indicator in place . Rotate it until the pointer is exactly on 90º . Retighten the screw . ADJUSTING THE BEVEL ANGLE 1 . F or making accurate cuts, the Saw Blade must be adjusted to be exactly vertical to the Table . 2 . T o check the angle, have the blade assembly in its normal upright position . Make a cut on a piece of flat sided, fairly thick scrap material . 3 . C heck the cut with an accurate square . The cut should be at exactly 90º . You can also check by rotating one cut-off piece 180º and hold the cut ends together . if the cut is not exactly vertical, the two pieces will form a slight angle . -
Page 22: Troubleshooting
Troubleshooting PROBLEM POSSIBLE CAUSES LIKELY SOLUTIONS Tool will not start 1 . no power at outlet . 1 . Check power at outlet . 2 . Cord not connected . 2 . Check that cord is plugged in . Tool operates spo- 1 . l ow power supply or 1 . C heck power supply and radically or at low improper power cords . power 2 . extension cords . - Page 23 Troubleshooting PROBLEM POSSIBLE CAUSES LIKELY SOLUTIONS Blade binds, slowing 1 . M aterial is misaligned 1 . M aterial must be flat on table, flush against or stopping saw. on the saw or ends the fence and supported on both ends . are not supported . 2 . C heck condition of material and check com- 2 . M aterial is wet, con- patibility of blade to material . taminated or inappro- priate blade is being used . Follow all safety precautions whenever diagnosing or servicing the tool. Disconnect power supply before service.
-
Page 24: Parts List
Parts List Part No. Stock No. Description Part No. Stock No. Description 70711-001 Bolt M6x25 70711-038 Spring 70711-002 Base 70711-039 Bend arm 70711-003 extension Support 70711-040 Flat washer 70711-004 wing Screw 70711-041 lock nut 70711-005 Rubber Feet 70711-042 washer 70711-006 Bolt M8x50 70711-043 Bolt 70711-007 Bolt M5x10 70711-044 Bevel lock lever... - Page 25 Parts List Part No. Stock No. Description Part No. Stock No. Description 70711-076 Screw 70711-103 inner Flange 70711-077 Block Circle 70711-104 Blade 70711-078 Bearing 70711-105 outer Flange 70711-079 Rotor 70711-106 arbor Bolt (leFT) 70711-080 Bearing 70711-107 lock nut 70711-081 arbor lock 70711-108 Small Cover 70711-082 lock Button Spring 70711-109 large Cover...
- Page 26 Assembly Diagram...
-
Page 27: Assembly Diagram
Assembly Diagram... -
Page 28: Warranty
Warranty WARRANTY wen products is committed to build tools that are dependable for years . our warranties are consistent with this commitment and our dedication to quality liMiTed waRRanTY oF wen ConSuMeR poweR ToolS pRoduCTS FoR HoMe uSe GReaT lakeS TeCHnoloGieS, llC ("Seller") warrants to the original purchaser only, that all wen consumer power tools will be free from defects in material or workmanship for a period of one year from date of purchase . ninety days for all wen products, if the tool is used for professional use . SelleR'S Sole oBliGaTion and YouR exCluSiVe ReMedY under this limited warranty and, to the extent permitted by law, any warranty or condition implied by law, shall be the repair or replacement of parts, without charge, which are defective in material or workmanship and which have not been misused, carelessly handled, or misrepaired by persons other than Seller or authorized Service Center . To make a claim under this limited warranty, you must return the complete power tool product; transportation prepaid, to Great lakes Technologies, llC – 501 davis Road – elgin, il . 60123 with a copy of the original receipt which is legible and clearly defines date of purchase including month and year and place of purchase . THiS liMiTed waRRanTY doeS noT applY To aCCeSSoRY iTeMS SuCH aS CiRCulaR Saw BladeS, dRill BiTS, RouTeR BiTS, JiGSaw BladeS, SandinG BelTS, GRindinG wHeelS and oTHeR RelaTed iTeMS . anY iMplied waRRanTieS SHall Be liMiTed in duRaTion To one YeaR FRoM daTe oF puR- CHaSe . SoMe STaTeS in THe u .S ., SoMe Canadian pRoVinCeS do noT allow liMiTaTionS on How lonG an iMplied waRRanTY laSTS, So THe aBoVe liMiTaTion MaY noT applY To You . in no eVenT SHall SelleR Be liaBle FoR anY inCidenTal oR ConSeQuenTial daMaGeS (inCludinG BuT noT liMiTed To liaBiliTY FoR loSS oF pRoFiTS) aRiSinG FRoM THe Sale oR uSe oF THiS pRoduCT . SoMe STaTeS in THe u .S . and SoMe Canadian pRoVinCeS do noT allow THe exCluSion oR liMiTaTion oF inCidenTal oR ConSeQuenTial daMaGeS, So THe aBoVe liMiTaTion oR exCluSion MaY noT applY To You .
Need help?
Do you have a question about the 70711 and is the answer not in the manual?
Questions and answers
I need help placing the spring for the safety cover for my wen 70711 10” Dual sliding miter saw