Table of Contents
Advertisement
Quick Links
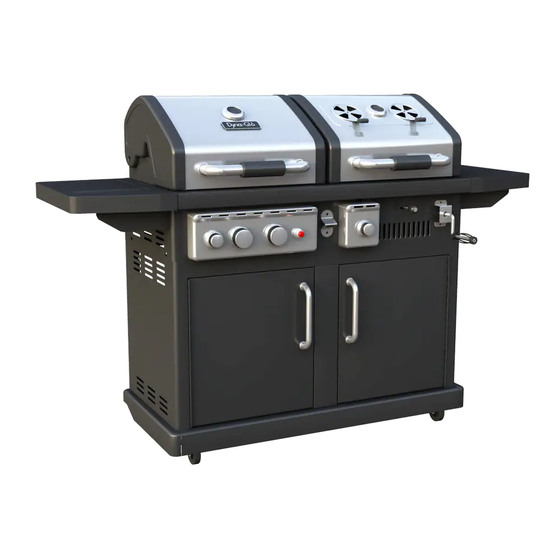
Dual Fuel Grill
Model #DGP700SSB/DGP700SSB-D
ANS Z21.58a-2008 CSA1.6a-2008
Questions, problems, missing parts? Before returning to your retailer, call our customer
service department at 1-877-447-4768, 8:30 a.m. – 4:30 p.m., CST, Monday – Friday
or e-mail us at customerservice@ghpgroupinc.com.
201-06-001
Advertisement
Table of Contents

Related Manuals for Dyna-Glo DGP700SSB


Summary of Contents for Dyna-Glo DGP700SSB
- Page 1 Dual Fuel Grill Model #DGP700SSB/DGP700SSB-D ANS Z21.58a-2008 CSA1.6a-2008 Questions, problems, missing parts? Before returning to your retailer, call our customer service department at 1-877-447-4768, 8:30 a.m. – 4:30 p.m., CST, Monday – Friday or e-mail us at customerservice@ghpgroupinc.com. 201-06-001...
- Page 2 Dual Fuel Grill STOP!
- Page 3 Dual Fuel Grill...
-
Page 4: Safety Information
Dual Fuel Grill SAFETY INFORMATION Please read and understand this entire manual before attempting to assemble, operate or install the product. If you have any questions regarding the product, please call customer service at: 1-800-963- 0211, 8:00 a.m. – 6:00 p.m. EST, Monday – Thursday, 8:00 a.m. – 5:00 p.m. EST, Friday. •... - Page 5 Dual Fuel Grill SAFETY INFORMATION • Do not use in an explosive atmosphere. Keep grill area clear and free from combustible materials, gasoline and other flammable vapors and liquids. • Do not touch metal parts of grill until it has completely cooled (about 45 minutes) to avoid burns, unless you are wearing protective gear (pot holders, gloves, BBQ mittens, etc…).
- Page 6 Dual Fuel Grill SAFETY INFORMATION All of the above noted clearances are with respect to combustible wood structures or construction. Greater clearances are recommended for vinyl structures or construction. CARBON MONOXIDE HAZARD Burning charcoal inside can kill you. It gives off carbon monoxide, which has no odor. NEVER burn charcoal inside homes, garages, vehicles, or tents.
-
Page 7: Table Of Contents
Dual Fuel Grill PACKAGE CONTENTS BEFORE STARTING ASSEMBLY, UNPACK CARTON AND VERIFY CONTENTS. COMPARE ENCLOSED PARTS WITH PACKAGE CONTENTS LIST AND DIAGRAM. IF ANY PART IS MISSING OR DAMAGED, DO NOT ATTEMPT TO ASSEMBLE THE PRODUCT. CONTACT CUSTOMER SERVICE FOR REPLACEMENT PARTS. 1-877-447-4768 8:30 a.m. - Page 8 Dual Fuel Grill PACKAGE CONTENTS Work Gloves Phillips Screwdriver (optional) Spray Bottle Estimated Assembly Time: 30-45 minutes...
-
Page 9: Grease Cup
Dual Fuel Grill ILLUSTRATED PARTS LIST bottom shelf locking caster caster cart left side panel cart right side panel cart rear panel upper front door brace left door assembly right door assembly cabinet door handle cabinet door handle bezel cabinet door handle sleeve grill body left side burner assembly side burner grate... -
Page 10: Illustrated Parts List
Dual Fuel Grill ILLUSTRATED PARTS LIST charcoal tray ash tray handle ash tray LP cylinder exclusion cart front vertical beam cart rear vertical beam LP cylinder heat shield cart middle cross beam battery charcoal tray adjustment handle HARDWARE CONTENTS Part Description M6x12 Screw 6mm Flat Washer... -
Page 11: Assembly Instructions
Dual Fuel Grill ASSEMBLY INSTRUCTIONS NOTE: Use caution when assembling and operating this unit to avoid cuts and scrapes from edges. Step 1: Assemble the locking casters (2) and casters (3). Secure the locking casters (2) with four screws each (A), four spring washers each (C) and four flat washers each (B) to the rear side (side with cut-outs for accessing locking mechanism) of the cart bottom shelf (1). - Page 12 Dual Fuel Grill ASSEMBLY INSTRUCTIONS Step 4: Assemble cart rear vertical beam (30) and rear panels (6). A. Using 2 screws (A) attach the cart rear vertical beam (30) to the cart bottom shelf (1). Tighten the screws. B. Partially insert 1 screw (A) to the cart left side panel (4) and 1 screw (A) to the cart right side panel (5) and 2 screws (A) to the cart vertical beam (30).
- Page 13 Dual Fuel Grill ASSEMBLY INSTRUCTIONS Step 6: Assemble the LP cylinder heat shield (31). Install the LP cylinder heat shield (31) by placing it between the cart middle cross beam (32) and the cart rear vertical beam (30). Slide the LP cylinder heat shield (31) up to meet the cart middle cross beam (32) so the screw holes are aligned.
-
Page 14: Lid Handle Bezel
Dual Fuel Grill ASSEMBLY INSTRUCTIONS Step 8: Attach the door assemblies. Align the holes in the hinge of the left door assembly (8) to the holes in the cart left side panel (4). Insert 4 screws (D) and tighten. Attach the right door assembly (9) the same way. If interference occurs between either the left or right cabinet doors and the cart front vertical beam (29) when closing the doors, adjustment may be needed. - Page 15 Dual Fuel Grill ASSEMBLY INSTRUCTIONS Step 10: Attach grill body (13). NOTE: 2 people are recommended for this step. Lock the back 2 casters to ensure the cart does not move while installing the grill body (13). Carefully place the grill body (13) on to the cart, making sure the LP gas hose is inside the cart.
- Page 16 Dual Fuel Grill ASSEMBLY INSTRUCTIONS Step 12: Assemble the left side burner assembly (14). Fig. A A. Partially insert 3 screws (F) to the grill body (13) as shown in Fig. A (leave approximately 4-6mm between the screw head and the surface of the grill body (13).
-
Page 17: Warming Rack
Dual Fuel Grill ASSEMBLY INSTRUCTIONS Step 13: Attach right side shelf assembly (16). Partially insert 3 screws (F) to the grill body (13) as illustrated (leave approximately 4-6mm between the screw head and the surface of the grill body (13). Align the keyholes in the right side shelf assembly (16) with the 3 screws just installed in the grill body (13). - Page 18 Dual Fuel Grill ASSEMBLY INSTRUCTIONS Step 16: Install the grease pan (17) and grease cup (18). Install the grease pan (17) and grease cup (18) in the gas grill body from the rear as illustrated. Step 17: Assemble the ash collection frame (24). From the rear, slide the ash collection frame onto the guides of the charcoal grill body and into position.
- Page 19 Dual Fuel Grill ASSEMBLY INSTRUCTIONS Step 19: Install the ignition battery (33). Remove the ignition cap by turning counterclockwise. Insert the AA ignition battery (33) with the positive end facing out. Reinstall ignition cap. Step 20: Install LP gas cylinder (sold separately). Open left side cart door and insert the LP gas cylinder (sold separately) into the nesting hole located in the cart bottom shelf.
- Page 20 Dual Fuel Grill ASSEMBLY INSTRUCTIONS Fully Assembled Grill Front View Rear View...
- Page 21 Dual Fuel Grill OPERATION INSTRUCTIONS FOR GAS BURNERS Use only 20-pound cylinders (Height 17.75 in./450.85mm, Diameter tank 12 in./304.80mm, Diameter foot 8 in./203.20mm) equipped with a cylinder connection device compatible with the connection for outdoor cooking appliances. The cylinder must include a collar to protect the cylinder valve. The gas cylinder should not be dropped or handled roughly!
- Page 22 Dual Fuel Grill OPERATION INSTRUCTIONS FOR GAS BURNERS To Disconnect: Fully close the tank valve by turning clockwise Turn the coupling nut counterclockwise until the regulator assembly detaches.
- Page 23 Dual Fuel Grill OPERATION INSTRUCTIONS FOR GAS BURNERS Lighting the Gas Grill BEFORE FIRST USE Remove all hangings or plastic straps, if present. Before you cook on your new gas grill, it is important to clean your grill with heat. To do this, operate the grill for approximately 15 minutes with the lid closed and all main burner control knobs in the highest position.
- Page 24 Dual Fuel Grill OPERATION INSTRUCTIONS FOR GAS GRILL GAS GRILL LIGHTING INSTRUCTIONS - FOR ALL BURNERS INCLUDING SIDE BURNER Warning: Do not lean over grill when lighting. Read instructions before lighting. 1. Check that the ignition control knobs are in the OFF position. 2.
- Page 25 Dual Fuel Grill OPERATION INSTRUCTIONS FOR GAS GRILL LIGHTING THE GAS GRILL WITH A MATCH Warning: Do not lean over grill when lighting. Read instructions before lighting. Main Burners: 1. Insert a match in the end of the match holder that is installed on the inside of the cabinet door. 2.
- Page 26 Dual Fuel Grill OPERATION INSTRUCTIONS FOR CHARCOAL GRILL Lighting the Charcoal Grill CARBON MONOXIDE HAZARD Burning charcoal inside can kill you. It gives off carbon monoxide, which has no odor. NEVER burn charcoal inside homes, garages, vehicles, or tents. LIGHTING INSTRUCTIONS FOR CHARCOAL IGNITION BURNER NOTE: Refer to pages 19-21 for complete LP tank installation, valve opening or closing, and leak checking.
-
Page 27: Cooking Grate
Dual Fuel Grill OPERATION INSTRUCTIONS FOR CHARCOAL GRILL you are cooking and the temperature you want to cook at. It also allows easy cleaning of the interior of the firebox after the unit has cooled down completely. It is not recommended to raise a fully loaded charcoal tray higher than the middle height setting. -
Page 28: Care And Maintenance
Dual Fuel Grill CARE AND MAINTENANCE NOTE: “Burn Off” is NOT necessary for side burner or charcoal burner. The porcelain grates have an enamel finish (similar to glass) and should be handled with care not to chip. The electronic ignition requires one “AA” alkaline battery, which is included. -
Page 29: Cooking Grates
Dual Fuel Grill CARE AND MAINTENANCE Burner Assembly Removing the Gas Burner Assembly 1. Make sure all control knobs Warming Rack are in the OFF position, LP tank valve is closed, and the tank is disconnected from regulator and removed from grill. Heat Tents 2. - Page 30 Dual Fuel Grill CARE AND MAINTENANCE Burner Assembly Removing the Charcoal Ignition Burner Warming Rack 1. Open lid and remove warming rack, cooking grates, and charcoal tray. Cooking Grates Charcoal Tray 2. Remove 2 attachment screws on charcoal ignition burners, take out the charcoal ignition burner.
- Page 31 Dual Fuel Grill CARE AND MAINTENANCE Burner Assembly Cleaning the Burner Assembly - Make sure the grill is cool 1. Turn gas off at the control knobs and propane tank. 2. Disconnect LP-Gas cylinder from hose and regulator. 3. Remove warming rack, cooking grates, and heat tents. 4.
- Page 32 Dual Fuel Grill CARE AND MAINTENANCE Checking The Flame (main burner only) (main burner only)
-
Page 33: Troubleshooting
Dual Fuel Grill TROUBLESHOOTING Problem Possible Causes Possible Solutions • Fully open tank valve by turning • Tank valve not on or fully opened. No gas flow or an counterclockwise obstructed gas flow. • Check fuel level and replace • Empty tank. fuel if necessary. - Page 34 Dual Fuel Grill TROUBLESHOOTING Problem Possible Causes Possible Solutions • Use match holder found in • Match not reaching burners The burner will not cabinet door. (when holding match with hand). light with a match. • Check fuel level and refill tank if •...
- Page 35 Dual Fuel Grill TROUBLESHOOTING Problem Possible Causes Possible Solutions • Clean the grill components. • Grease and/or residue build-up Excessive flare-ups. on heat tents or in firebox. • Trim the fat from meat and use • Excessive dripping of fat or non-oil based marinades.
-
Page 36: Replacement Parts
Dual Fuel Grill REPLACEMENT PARTS For replacement parts, call our customer service department at 1-877-447-4768, 8:30 a.m. – 4:30 p.m., CST, Monday – Friday 48 48... -
Page 37: Lp Cylinder Exclusion
REPLACEMENT PARTS For replacement parts, call our customer service department at 1-877-447-4768, 8:30 a.m. – 4:30 p.m., CST, Monday – Friday 22 Complete Sub-Assembly 50 Complete Sub-Assembly DYNA-GLO DUAL FUEL GRILL - MODEL #DGP700SSB/DGP700SSB-D Diag. Warranty Ref #: Part Description... - Page 38 Dual Fuel Grill REPLACEMENT PARTS DYNA-GLO DUAL FUEL GRILL - MODEL #DGP700SSB/DGP700SSB-D - Continued...
-
Page 39: Cart Front Vertical Beam
Dual Fuel Grill REPLACEMENT PARTS DYNA-GLO DUAL FUEL GRILL - MODEL #DGP700SSB/DGP700SSB-D - Continued 58 Left Door Hinge – package of 1 201-05002 59 Door Stopper – package of 1 201-05003 60 Cart Front Door Assembly - Left – does not include door handle 201-05004 61 Cart Front Door Assembly –... -
Page 40: Limited Warranty
Dual Fuel Grill LIMITED WARRANTY Item Name: Dual Fuel Grill Model #: DGP700SSB/DGP700SSB-D Rated BTU: 54,000 BTU/Hr Product Dimension Assembled: L 66.8" x W 28" x H 46" or L 1698mm x W 710mm x H 1170mm Product Weight: 168.98bs. or 76.8kg This Dual Fuel Grill is warranted against broken or damaged parts at the time of purchase.
Need help?
Do you have a question about the DGP700SSB and is the answer not in the manual?
Questions and answers