Table of Contents
Advertisement
Quick Links
Advertisement
Table of Contents

Related Manuals for Avision Sheet-fed typePhoto Scanner


Summary of Contents for Avision Sheet-fed typePhoto Scanner
- Page 1 Sheet-fed type Photo Scanner User Manual Regulatory model: FS-0913B...
- Page 2 Warranty The information contained in this document is subject to change without notice. Avision makes no warranty of any kind with regard to this material, including, but not limited to, the implied warranties of fitness for a particular purpose. Avision shall not be liable for errors contained herein or for incidental or consequential...
- Page 3 FCC Radio Frequency Interference Statement This product has been tested and found to comply with the limits for a class B digital device, pursuant to Part 15 of the FCC rules. Operation is subject to the following two conditions: (1) this device may not cause harmful interference, and (2) this device must accept any interference received, including interference that may cause undesired operation.
- Page 4 System Requirements IBM compatible PC 586, Pentium or higher Microsoft Windows 2000, Windows XP, Windows Vista/Windows 7 At least 100 MB of free hard disk space (500 MB is recommended) At least 128 MB of system memory (512 MB of RAM is recommended) At least 1 GB of RAM for Windows Vista/7 USB port 2.0 (compatible with USB 1.0)
-
Page 5: Table Of Contents
Table of Contents Introduction ......................1-1 Scanner Overview..................... 2-1 Scanner View ...................2-1 Installation & Operation.................. 3-1 Initial setup..................3-2 Scan an original ................3-3 Using Plastic sheaths .................3-4 Scan dark or night pictures..............3-5 Power off the scanner ................3-6 Connecting to a Computer ................4-1 How to connect to a computer ............4-1 Disconnecting the scanner from a computer..........4-3 Scanning To PC Manager................. -
Page 6: Introduction
Introduction Congratulations on your purchase of the scanner. Now you can scan and store your printed photos directly to your memory card or flash disk without connecting to any computer. Simply insert a memory card or flash disk into the scanner, and power it on. When the scanner is ready, feed your printed photo into the scanner and your images will be stored in the memory card or flash disk. - Page 7 1. Scanner 2. Sensor Cleaning Swab 3. Roller Cleaning Tool 4. Calibration Chart 5. Power Adapter 6. USB Cable 7. Black Plastic Sheath/White Plastic Sheath Note: 1. Only use the AC adapter DSA-12PFA-05 FUS 050200 (DEE VAN) included in the machine. Using other AC adapters may damage the machine and void the warranty.
-
Page 8: Scanner Overview
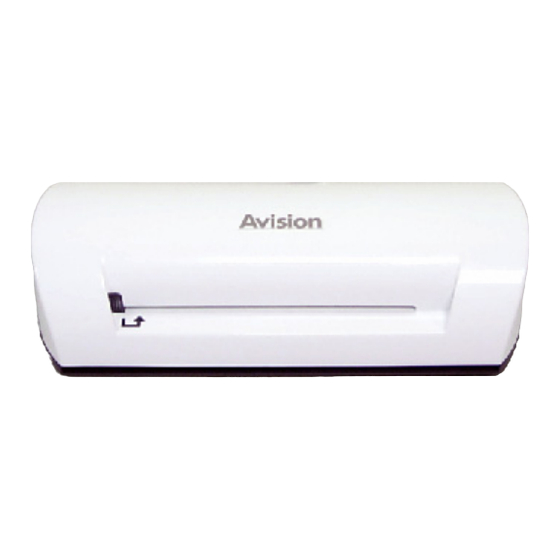
2. Scanner Overview Scanner View Name Function/ Description Indicates the operating status of the Indicator light scanner. Feeding Slot Insert an original to begin scanning. - Page 9 Name Function/ Description To power on the scanner, connect the supplied power adapter to the scanner. Power connector To power off the scanner, disconnect the supplied power adapter from the scanner. Mini USB For connecting to a computer via a USB connector cable.
-
Page 10: Installation & Operation
Installation & Operation Precautions Keep the product out of direct sunlight. Direct exposure to the sun or excessive heat may cause damage to the unit. Do not install the product in a humid or dusty place. Be sure to use the proper AC power source. Place the product securely on an even, flat surface. -
Page 11: Initial Setup
Initial setup Connect the plug on the power adapter cable to the power connector on the scanner. Plug the power adapter into a power outlet. Wait until the indicator light on the scanner stops blinking and stays on steady, indicating the scanner is ready. -
Page 12: Scan An Original
Scan an original Insert your photo into the plastic sheath supplied with the scanner. (The detailed usage of the plastic sheath is described in the next page.) With the side to be scanned facing upward and in correct orientation, place the left edge of the original against the left edge of the feeding slot. Simply let go the original when it begins to feed into the slot. -
Page 13: Using Plastic Sheaths
Using Plastic sheaths Always use the clear plastic sheath (included) when scanning photos to ensure the best scanning results. The sheath helps eliminate the possibility of de- focusing due to the uneven surface of curled photos. Curled photo Insert the photo into the plastic sheath as shown below. Insert the plastic sheath, flat and level, into the scanner’s feeding slot, folded side first, image facing up. -
Page 14: Scan Dark Or Night Pictures
Scan dark or night pictures When you need to scan dark or night pictures, be sure to insert your photo into the white plastic sheath to avoid an incomplete scanned image. However, using the white plastic sheath will disable the auto crop (automatic crop your image according to your photo size) and deskew (auto straighten) functions. -
Page 15: Power Off The Scanner
Power off the scanner After all originals are scanned, disconnect the supplied power adapter from the scanner. Now the scanner has been safely powered off. Important: Insert only one photo at a time, and insert the next one only when the previous one is done. - Page 16 The scanner has a built-in cropping function that is capable to detect and crop the edges of an original. The max cropping size is 1.5mm per edge, as illustrated below: Max. 1.5mm Max. 1.5mm If the photo is incautiously skew in the feeding slot, the four edges of the scanned image will become dark as illustrated.
-
Page 17: Connecting To A Computer
Connecting to a Computer By connecting the scanner to a computer, you can access the scanned images on the memory card directly, or use the scanner as a memory card reader, so that you can freely copy, paste or delete files to and from the memory card using the computer. - Page 18 Connect the mini end of the USB cable (included with scanner) to the Mini USB connector on the scanner. Power on your PC, and then connect the large end of the USB cable to a USB port on your PC. 6.
-
Page 19: Disconnecting The Scanner From A Computer
Disconnecting the scanner from a computer On the Windows System Tray, click the hardware removal icon. Click the ‘Safely remove USB mass Storage device’ message with the corresponding Drive. When the ‘Safe to Remove Hardware’ message appears, you can safely remove the scanner’s USB cable. -
Page 20: Scanning To Pc Manager
Scanning To PC Manager With the Scan To PC Manager, you can easily scan photos and save the scanned images directly to the connected PC. You can also choose the location where the scanned images will be saved. Starting the Scan To PC Manager 1. -
Page 21: Uninstalling The Scan To Pc Manager
5. Click the Browse button to save your scanned images to a specified location. (Default is C:\temp\) 6. Click Apply to save the settings or Cancel to leave the Setting screen without saving the changes. Note the Scan to PC Utility icon is still running in your system tray. -
Page 22: Maintenance
Maintenance Cleaning the roller Clean the scanner roller on the following conditions: • The scanned images have streaks or scratches. • The scanner does not feed document smoothly. Clean the scanner’s outer casing first using a soft, lintless cloth. Connect the power supply to the scanner. Press the Function button. -
Page 23: Calibrating The Scanner
Calibrating the scanner If the scanned image looks fuzzy or there are strange stripes on it, the scanner may need calibrating in order for the sensor to resume its original precision. To calibrate the scanner: Follow the instructions of Cleaning the Roller on the preceding section to clean the roller. -
Page 24: Cleaning The Image Sensor
Cleaning the image sensor Clean the scanner’s outer casing first using a soft, lintless cloth. Make sure the scanner is disconnected from the power supply. With one hand pressing the product, insert the sensor cleaning swab into one end of the feeding slot with the other hand, as shown below: The Sensor Cleaning Swab... -
Page 25: Troubleshooting
Troubleshooting If you have problems with the operation of the product, please check the following troubleshooting hints. Frequently asked questions Question: There are strange lines on the scanned image, or the image is not clear. Answer: Check the following: Are there scratches on the original, or is the original clean? Remove ... -
Page 26: The Indicator Light Pattern
Question: The scanned image is cut off when I scan dark or night pictures. Answer: Please insert your photo to the white plastic sheath to get a complete image. Question: The scanner feels warm to the touch. Answer: It is normal for the scanner to emit a small amount of heat (around 30-45 Celsius) after prolonged use. -
Page 27: Specifications
Specifications All specifications are subject to change without notice. Sheet-fed type Specification Photo Scanner Acceptable paper size 2”x 2” ~ 4” x 6” Output image formats JPEG with compression Flash 512KB Memory Internal 64MB (DDRI) Scanned Resolution 300 dpi (dots per inch) image Scan color...
Need help?
Do you have a question about the Sheet-fed typePhoto Scanner and is the answer not in the manual?
Questions and answers