Table of Contents
Advertisement
Quick Links
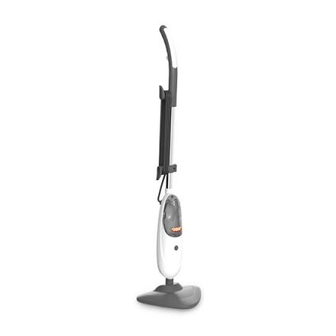
Stick Steam Cleaner
S t e a m
C l e an e r
Get Cleaning...
What's your Vax model number?
What's your serial number?
Note these down in case you need them in future. Please keep instructions for further use.
vax.co.uk
(Located on the flap of the packaging)
e.g. S 8 7- C X
(Located on the base of the machine)
User Guide
S87-CX series
Advertisement
Chapters
Table of Contents

Related Manuals for Vax S87-CX series


Summary of Contents for Vax S87-CX series
- Page 1 Stick Steam Cleaner S t e a m C l e an e r Get Cleaning... What’s your Vax model number? (Located on the flap of the packaging) e.g. S 8 7- C X What’s your serial number? (Located on the base of the machine) Note these down in case you need them in future.
-
Page 2: Table Of Contents
Machine Overview 1 Handle Unit 2 Upper cord clip 3 Lower cord clip 4 Power cord 5 Clean water tank 6 LED indicator a) Water heating/power on (orange LED) b) Steam ready (orange LED) (green LED) 7 Floor head 8 Steam release trigger 9 Microfibre cleaning pad Accessories 10 Carpet glider (dependant on model) -
Page 3: Power Cord
If repair is the voltage marked on the rating label of the appliance. needed contact the Vax Careline. Do not use the stick steam cleaner if it has been dropped, This stick steam cleaner is intended for household use only and damaged, left outdoors or dropped into water. -
Page 4: Clean Water Tank
Operation Assembling your stick steam cleaner Remove clean water tank. Insert handle into main body. Line Secure the handle in place with up the screw holes on the handle one of the screws provided. and the main body. Before you begin cleaning IMPORTANT: Please refer to floor manufacturer’s care recommendations before use and test the steamer on a discrete area of flooring to begin with. -
Page 5: Orange Led
WARNING: To reduce the risk of personal injury, unplug the steamer when assembling the accessories. IMPORTANT: Never use the stick steam cleaner without the microfibre cleaning pad correctly attached to the floor head. Place microfibre Tighten the cleaning pad over drawstring so the the floor head. microfibre cleaning pad is fitted securely. vax.co.uk... -
Page 6: Floor Head
Operation Steam cleaning hard floors IMPORTANT: Please refer to floor manufacturer’s care recommendations before use and test the steamer on a discrete area of flooring to begin with. WARNING: Never leave the stick steam cleaner in one spot on any surface for an extended period of time with a damp or wet microfibre cleaning pad attached as this may damage the floor surface. -
Page 7: Empty The Water Tank
Maintenance (Keep your Vax as good as new) Empty the water tank IMPORTANT: Allow the unit to fully cool down before performing any maintenance or troubleshooting checks. Remove the clean water tank. Twist the cap anti-clockwise Empty any excess water over the to remove. -
Page 8: Replacing The Hard Water Filter
Maintenance (Keep your Vax as good as new) Replacing the hard water filter IMPORTANT: The condition of the filter affects the performance of your machine. Check and change filter (depending on level of use). Your machine is fitted with a hard water filter. If you live in an area of hard water the filter will discolour/darken over time (2). - Page 9 • vaxireland.ie or broken? or call: • Visit vax.co.uk for parts and spares (UK) 0844 412 8455 (ROI) 1-800 928 308 • Please call our Careline to purchase new spares or order This does not a ect your statutory rights.
-
Page 10: Microfibre Cleaning Pad
Any queries or concerns about using your Vax, simply visit; vax.co.uk/support – vaxireland.ie or call the Vax Careline. Calls are charged at the UK local rate. Please make a note of the serial number and model number of the vacuum cleaner before calling. - Page 11 Notes vax.co.uk...
- Page 12 Vax Ltd, Kingswood Road, Hampton Lovett, Droitwich, Worcestershire, WR9 OQH, UK email: info@vax.co.uk - website: vax.co.uk Version 1.0...
- Page 13 Window Vac Window Cleaner Range Let’s get started H87-WV-B vax.co.uk /VRS1WV...
-
Page 14: Let's Talk Safety
When using the Window Vac basic safety precautions should Cleaning and user maintenance shall not be made by always be observed, including the following: children without supervision. • Keep fingers, hair and loose clothing from moving parts and • Only Vax recommend charger, accessories and solution openings whilst using the Window Vac. should be used with this Window Vac. Please keep instructions for future reference and use the • This appliance can be used by children aged 8 years and Window Vac only as instructed in this guide. - Page 15 Monday-Friday 8.30am to 6.30pm, Saturday 9.00am to 5.00pm Calls are charged at the UK local rate. Please make a note of the serial number and model number of the Window Vac before calling. Alternatively, you can write to us at: Vax Ltd., Kingswood Road, Hampton Lovett, Droitwich, Worcestershire, WR9 0QH, UK @VaxUK Let us know what you think...
- Page 16 Let’s talk safety Charger Getting to know your machine Getting started Microfibre pad Using your machine Scrub pad Taking care of your machine Vax window Let’s talk technical cleaning solution What to do if it goes wrong Getting in touch...
-
Page 17: Getting To Know Your Machine
Cleaning pad holder Spray trigger Power On/Off button Water tank Water tank cap/ water tank filter (unseen) Power charger connector Technical Specification Accessories & Consumables Name Window Vac Microfibre pads (Type 1)* 1-1-133091-00 Voltage 3.7V Weight 0.75kg Scrub pads (Type 2)* 1-1-133092-00 Subject to technical change without notice. *To purchase consumables and accessories, please visit vax.co.uk... -
Page 18: Getting Started
To fill the water tank lift the mains and insert the show red while the change to green when water tank cap. charger cable into the back machine is charging. fully charged. of the Window Vac. Remove foam filter. Pour in 40ml Vax Window Cleaner solution. Top up with water (max 40°C) to max level. Replace filter and push the water tank cap back into the machine. When fitting the water tank cap back into the machine ensure the tab is facing downwards to prevent leaking. -
Page 19: Using Your Machine
Using your machine Using your Window Vac Pull the trigger to spray Wipe the surface with the Whilst pulling the trigger to spray solution, solution onto the surface microfibre or scrub pad on you may need to press the trigger a few to be cleaned. the back of the machine. times first before solution is dispensed, this clears air from the Window Vac. Move the Window Vac in a zig-zag To turn the Window Vac on, Vacuum up water using pattern to avoid over-saturating a press the power button. You slow, straight strokes. -
Page 20: Taking Care Of Your Machine
Taking care of your machine Note: The Window Vac must be emptied after each use – DON’T store water/solution in the machine between uses. After use, open the water tank, Rinse filter under running remove the filter and empty water warm water (Max 40’C). into the sink. Squeeze any excess water To remove the cleaning pad grasp one end from filter before replacing of the cleaning pad and gently pull, this... -
Page 21: Let's Talk Technical
Let’s talk technical Note: Fitting the squeegee incorrectly will result in poor pick up. If the squeegee blade becomes dirty it Rinse under running water (Max 40’C). can be removed and washed. Grip the blade and gently pull from the machine. To refit, push the squeegee blade back The squeegee needs to be pushed firmly into the machine. Making sure the down into the machine so there is no gap. suction holes are facing the same side as the water tank. Important: Remove the battery from the appliance before recycling. For further information please contact your local waste management centre. -
Page 22: What To Do If It Goes Wrong
What to do if it goes wrong Problem Solution • The battery may not be charged. Connect the charger, the indicator light will turn green when fully charged. The initial charge should Why won’t my Window be for 3 hours. • The unit might be plugged in. The Window Vac will not run when Vac turn on? the charge is plugged in. • The squeegee blade may be blocked. Remove from the machine, rinse and clear any dirt/debris. Go to the ‘Let’s talk technical’ page. • The filter may be clogged or dirty, clean the filter. Go to the ‘Taking Why won’t the care of your machine’ pages. -
Page 23: Getting In Touch
Getting in touch * Calls are charged at the UK local rate. Please make a note of the serial number and model number of the Window Vac before calling. - Page 24 @VaxUK Vax Ltd., Kingswood Road, Hampton Lovett, Droitwich, Worcestershire, WR9 0QH, UK email: info@vax.co.uk website: vax.co.uk Version 1.0 EEC Statement of Compliance: Manufacturer/EEC importer: Vax Limited, hereby on our own responsibility, declare that the H87-WV/VRS1WV series is manufactured in compliance with the following Directives: Safety: 2006/95/EC Low Voltage Directive. EMC: 2004/108/EC Electromagnetic Compatibility Directive. Waste electrical products should not be disposed of with household waste. Please recycle where facilities exist. Check with your Local Authority or retailer for recycling advice.
Need help?
Do you have a question about the S87-CX series and is the answer not in the manual?
Questions and answers