Table of Contents
Advertisement
Advertisement
Table of Contents

Related Manuals for Fisher & Paykel OB60DDEX2


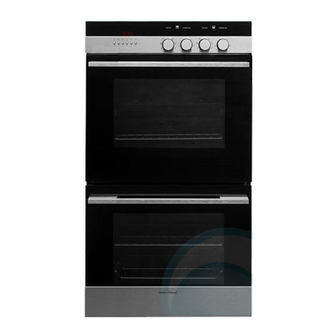
Summary of Contents for Fisher & Paykel OB60DDEX2
-
Page 1: Installation Instructions
Installation instructions User guide Built-in oven OB60DDEX2 models... -
Page 3: Table Of Contents
Contents Safety and warnings Installation instructions Oven controls and setting the clock First use Using your oven Oven functions Baking charts Using the timer Automatic cooking Care and cleaning Warranty and service Important! SAVE THESE INSTRUCTIONS The models shown in this user guide may not be available in all markets and are subject to change at any time. -
Page 4: Safety And Warnings
Safety and warnings Installation WARNING! Electrical Shock Hazard Always disconnect the appliance from the mains power supply before carrying out any maintenance or repairs. Connection to a good earth wiring system is essential and mandatory. Alterations to the domestic wiring system must only be made by a qualified electrician. - Page 5 Safety and warnings Operation and maintenance Your built-in oven has been carefully designed to operate safely during normal cooking procedures. Please keep the following guidelines in mind when you are using your oven: WARNING! Electrical Shock Hazard Disconnect the oven from the power supply before any cleaning or maintenance.
-
Page 6: Installation Instructions
Installation instructions OB60DDEX2 16-20 mm 2.5 mm Fig. 1 OB60DDEX2 product and cabinetry dimensions Product and cabinetry dimensions (mm) overall height* of product 1077 overall width of product overall depth of product (excluding handle and knobs) height of chassis 1057... - Page 7 Installation instructions Before you install the oven, make sure that the cabinets and oven cavity are square and level, and are the required dimensions the installation will comply with all clearance requirements and applicable standards and regulations a suitable isolating switch providing full disconnection from the mains power supply is incorporated in the permanent wiring, mounted and positioned to comply with the local wiring rules and regulations.
- Page 8 H05RR-F or H05RN-F and has a cross-sectional area of 3 x 4 mm Model code Power Voltage OB60DDEX2 5600 W 220 V~ 230-240 V~ 2350-2550W 230-240 V~ 3095-3370W Unscrew to...
- Page 9 Installation instructions Wiring diagram...
- Page 10 Installation instructions Securing the oven to the cabinetry Position the oven in the prepared cavity. Important! Do not lift the oven by the door handle. Open the oven doors fully. Use the supplied screws to secure the oven to the cabinetry. Important! Do not over-tighten the screws.
- Page 11 Installation instructions Final checklist TO BE COMPLETED BY THE INSTALLER Make sure the oven is level and securely fitted to the cabinetry. Check the lower trim is still undamaged. Open the lower oven door slowly to its fully open position and check if there is adequate clearance between the bottom of the door and the lower trim.
-
Page 12: Oven Controls And Setting The Clock
Oven controls and setting the clock Fig. 4 Control panel Control buttons Lower oven temperature knob Upper oven function knob Lower oven temperature indicator light Upper oven temperature knob Upper oven temperature indicator light Lower oven function knob Clock display Buttons sets the timer sets the cooking time for automatic cooking... -
Page 13: First Use
First use Before using your new oven, please: Read this user guide, taking special note of the ‘Safety and warnings’ section. Remove all accessories and packaging. Make sure you peel the protective film off all surfaces. Set the clock. The oven will not work until the clock has been set. See ‘Oven controls and setting the clock’... -
Page 14: Using Your Oven
Using your oven To start cooking Select the function. The oven lights will come on. Set the temperature. The temperature indicator light will come on. It will go out when the oven has reached the set temperature. The temperature indicator light may come on and go out again during cooking as the oven maintains the temperature. -
Page 15: Oven Functions
Oven functions OVEN LAMP Only the oven light comes on. It remains on in all the functions. BAKE This is the traditional method of baking. It is best to bake on only one shelf at a time in this function. Ideal for large cakes and dishes that bake for several hours. GRILL Use with the oven door closed and the temperature set no higher than 225°C. - Page 16 Oven functions Important! Safe food handling: leave food in the oven for as short a time as possible before and after cooking or defrosting. This is to avoid contamination by organisms which may cause food poisoning. Take particular care during warmer weather. Notes on baking: Preheat the oven before baking.
-
Page 17: Baking Charts
Baking charts Please note: The settings in the following charts are guidelines only. Follow the instructions in your recipe or on packaging and be prepared to adjust the oven settings and baking times to achieve the best possible results for you. Shelf positions are counted from the base up (1 is the lowest, 4 the highest). - Page 18 Baking charts Baking chart FAN BAKE Food Shelf position Temperature ( Time (mins) single shelf 150-170 13-17 Small cakes multi shelf not recommended single shelf 200-220 8-12 Scones multi shelf not recommended two small (20 cm), 160-175 20-30 staggered on shelf Sponge one large (26 cm) 30-40...
-
Page 19: Using The Timer
Using the timer You can use the timer at any time, even when the oven is not in use. Important! The timer does NOT turn the oven off. To set the timer Press will show and the symbol will start flashing. Fig. -
Page 20: Automatic Cooking
Automatic cooking Important! Only the upper oven can be set for automatic cooking. To set the oven for automatic cooking Set the oven: Check the clock shows the correct time (eg 12:07). Select the function and set the temperature. The oven will turn on. Fig. -
Page 21: Care And Cleaning
Care and cleaning Important! Always disconnect the oven from the power supply before any cleaning or maintenance. When you switch the power back on after cleaning, you will have to set the clock. Do not use abrasive cleaners, cloths or pads to clean any part of your oven. Some nylon scourers may also scratch. - Page 22 Care and cleaning Important! What? How? These panels are normally ‘self- Side catalytic If you roast or grill a lot of meat cleaning’ because their special panels and hardly ever bake, heating enamel breaks down greasy an empty oven for 60-90 mins splatters when the oven is used for C on BAKE from time...
- Page 23 Care and cleaning Removing and refitting the side racks and catalytic panels Fig.12 Side rack and catalytic panel in full oven cavity When refitting the side racks, make sure they are the right way up, as in the illustrations. When refitting the catalytic panels, make sure that: the arrows are pointing upwards the panel with the hole is on the left oven wall.
- Page 24 Care and cleaning Removing and refitting the sliding shelf supports Important! Remove the side racks first to make removing the sliding shelf supports easier. When refitting the sliding shelf supports, make sure that you fit: the side racks first the slides to the top wire of a shelf position. They do not fit on the lower wire both sides of each pair of slides both slides on the same level.
- Page 25 Care and cleaning Removing and refitting the glass panes of the oven door Important! The outer pane is not removable. Take care, the glass panes are heavy. Place the removed glass panes on a safe, soft surface. To remove the glass panes Open the levers.
- Page 26 Care and cleaning Slide out the inner pane. Slide the middle pane up slightly to unhook it from the bottom clamps. Lift out the bottom edge and remove.
- Page 27 Care and cleaning To refit the glass panes Make sure the open levers firmly Check the rubber pads are in place. hook to the door. Rubber pads Insert the pane into top clamps then Check the pane is the right way up. lower and slide into bottom clamps.
- Page 28 Care and cleaning Insert the pane into the slide guides Replace the seal and slide it to the bottom retainers. (upper oven door only). Slide guides Bottom retainers Seal Open the door fully and close the levers. Lever...
- Page 29 Care and cleaning Removing and refitting the oven door Important! Take care, the oven door is heavy! To remove the door Open the levers. Open the door fully. Lever Hook into Close the door until the levers Hold the door. hook to it.
-
Page 30: Replacing The Oven Lamp
Care and cleaning Replacing the oven lamp Note: oven bulb replacement is not covered by your warranty. Let the oven cavity and the grill element cool down. Important! Disconnect the oven from the power supply before continuing. LEFT LAMP (Fig.16) Remove the left side rack and catalytic panel. -
Page 31: Warranty And Service
Warranty and service Before you call for service or assistance... Check the things you can do yourself. Refer to the installation instructions and your user guide and check that: your product is correctly installed. you are familiar with its normal operation. If after checking these points you still need assistance or parts, please refer to the Service &... - Page 36 Copyright © Fisher & Paykel 2009. All rights reserved. The product specifications in this booklet apply to the specific products and models described at the date of issue. Under our policy of continuous product improvement, these specifications may change at any time.
Need help?
Do you have a question about the OB60DDEX2 and is the answer not in the manual?
Questions and answers