
Subscribe to Our Youtube Channel
Related Manuals for Westwood S150H


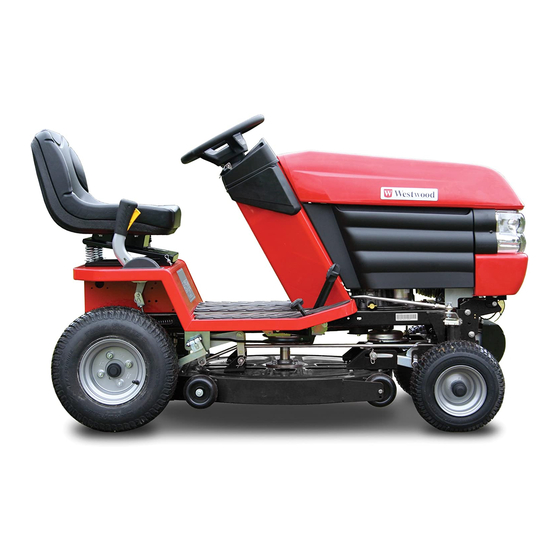
Summary of Contents for Westwood S150H
- Page 1 Operator’s Manual Garden Tractors S, T and V Series Models S150H, S1500H, T1600H, T1800H, T1600-4WD, T25-4WD and V25-50HE 366007300 B...
-
Page 2: Table Of Contents
5. Replace faulty silencers. the following pages is given on the 6. Before using, always inspect to see that the blades, bolts and understanding that Westwood accepts cutter assembly are not worn or damaged. no responsibility for work carried out by a 7. -
Page 3: Operating Instructions
Operating Instructions Safety • Stop the engine and remove the ignition key. 13. Always disengage drive to attachments, stop the engine and 1. Read the instructions carefully. Be familiar with controls and the remove the ignition key before: use of equipment. • Cleaning blockages. -
Page 4: Controls
Operating Instructions, Controls Seat Adjustment (Fig. 1) fig. 1 The seat on your tractor is adjustable forward and backward to suit the operator. Simply lift the seat Seat Lever latch at the side of the seat and slide the seat forward or backward as appropriate. - Page 5 Operating Instructions, Controls Engine Speed Control (Fig. 4) fig. 4 The lever is pushed up for FAST ( ) and down for SLOW ( ). On some models the choke control is above the fast setting, a cold engine is started on the Choke setting, a warm one on the FAST setting.
- Page 6 Operating Instructions, Controls Drive Controls (Fig. 6) fig. 6 The forward speed of the tractor is controlled by foot pedal ‘A’. Reversing is controlled by foot pedal ‘B’. Moving Off / Reversing (Figs. 6 & 7) To move off, ensure your feet are off pedals ‘A’ and ‘B’ and then release the parking brake by pushing the hand lever ‘C’...
- Page 7 Operating Instructions, Controls Cutter On/Off Switch (Figs. 10 & 11) fig. 10 The cutter switch controls the electromagnetic blade Cutter On/Off clutch. To switch the cutter on, push the switch and Electric Deck Lift then release it, this will engage the cutter deck. To indicate that the Cutter Deck is engaged, the Cutter Deck Height Indicator will flash (Fig. 11).
- Page 8 Operating Instructions, Controls Auxiliary Lift Switch Auxiliary Lift Switch (where fitted) (where fitted) (Fig. 15) (Fig. 15) Raising the Auxiliary (Grass Collector) Lift is achieved Raising the Auxiliary (Grass Collector) Lift is achieved by pressing a switch (Fig. 15) on the dashboard – UP by pressing a switch (Fig.
- Page 9 Operating Instructions, Controls Electronic Slope Alert (ESA) fig. 18a (not applicable to Mini tractor) (Figure 18a) Should your tractor be fitted with 4WD it will have ESA. This is set to an angle of 25° at the factory. If this angle is exceeded then the display will flash 25° and a warning siren will sound.
-
Page 10: Powered Grass Collector
Collector Operating Instructions, Powered Grass Fitting the Net Position X (Mini, S & T Series) (Fig. 18c) Fit the Net as shown in Figure 18c with the net rod in position ‘X’. To remove the net, release the net rod and secure in the removal position ‘Y’. - Page 11 Collector Operating Instructions, Powered Grass Removing and fitting the Net Locking Tube (S & T Series fitted with Electric Net) (Fig. 21) Securing Pin First turn off the engine. When removing the net, we Pivot spacer suggest you employ the assistance of another person. Net Rod 1.
-
Page 12: Using Your Tractor
Using your Garden Tractor Adjusting the sweeper height (Fig. 24) Use the sweeper height lever to select the position appropriate to the conditions and the height of cut. TO GET THE BEST SWEEPING PERFORMANCE AND TO PRESERVE THE BRUSHES SELECT THE HIGHEST SETTING THAT WORKS –... -
Page 13: Cutter Decks
Cutter decks Combi decks (Fig. 25) fig. 25 To switch from a mulch deck to a rear discharge, lift the deck to its highest position and undo the handwheel in the centre of the deck. Once undone the top stiffener assembly is pulled out to make the deck a rear discharge. -
Page 14: Mulch Mowing
Cutter decks Mulching fig. 27 The Mulching cutter deck has three mulching compartments. Grass cuttings are lifted and cut several times. The small grass particles release nutrients back into the soil for healthy growth. Mulch Mowing Mulching can save time, avoids creating piles of rotting cuttings and feeds your lawn. -
Page 15: Routine Maintenance
Routine Maintenance Engine Maintenance Connections & Please refer to the engine manufacturer’s handbook Terminals enclosed with this manual. Battery Maintenance (Fig. 30) The battery fitted to your tractor is a low maintenance unit. Should your battery require charging for any reason the maximum charge rate is 1.5 amps. -
Page 16: Transmission Drive Belt
Routine Maintenance Engine to Cutter Drive Belt Tension The correct tension of the Cutter Drive Belt is critical. If incorrectly set it can lead to engine damage and invalidate the warranty. To check the tension put the deck in position 5 on the electric lift display. - Page 17 Routine Maintenance PTO Main Drive Belt The PTO drive belt is self-tensioning when the drive is engaged. If this belt does require any adjustment it should be carried out by your dealer; anyone not familiar with this setting may cause serious damage or even injury when using a machine with badly adjusted belts.
-
Page 18: Troubleshooting: Cutting
Troubleshooting (Cutting) Cutter fails to start or cuts out when The Cutter seems to lose power and the switched on Belt slips and overheats CHECK: CHECK: Are you on the tractor? – Unless you sit on the That the Tensioner Rod is correctly applied seat, the safety switch cuts out the Cutter Deck. -
Page 19: Cutter Levelling
Troubleshooting (Cutter Levelling) The Cutter Deck should be set so that it is parallel to the surface it is cutting with a maximum variation from side to side or front to back of 3 mm. Levelling front to back Check tyre pressure is correct first. If not inflate tyres. You need two people to level the deck –... - Page 20 Troubleshooting (Cutter Levelling) Levelling Side to Side Manual Deck Lift – V Series and old S & T Series This adjustment is best done with the deck in a position three up from its lowest cut – check the level both sides and levelling is then achieved by adjusting the left side (as you are sat on the tractor) of the deck at 2 points.
-
Page 21: Grass Collecting
Troubleshooting (Grass Collecting) Grass Collection (Fig. 45) fig. 45 If your Collector is not picking up satisfactorily, check the following: The PTO lever is engaged. That the PTO pulley beneath the seat is turning – if not, call your dealer. That the Collector Belt is not reversed (if it is correct, the brush revolves against the forward direction of the tractor (Fig. -
Page 22: Tyres & Wheels
Troubleshooting (Tyres & Wheels) Persistent flat tyres fig. 46 Like all garden machinery, the most common cause of punctures are THORNS! Blackthorn, Hawthorn and Rose are usually at the bottom of the problem and will puncture any tyre not fitted with very expensive guards. There are less expensive ways to overcome this problem and it is advisable to check and avoid these possible causes: The rim of the wheel has been damaged causing the seal... -
Page 23: Starting & Running
Troubleshooting (Starting & Running) If the engine fails to turn over: CHECK: That the handbrake is on and that you are sitting on the seat. That the battery terminals are connected (Page 11). That fuse 2 (yellow 20amp ignition fuse) has not blown or been dislodged (Pages 22/23). -
Page 24: Electrics
Troubleshooting (Electrical) If the Headlights fail to operate Tractors with manual deck lift CHECK: The bulbs. Fuse 4 has not blown. (Red 10amp fuse) IF THIS IS NOT THE CASE CONTACT YOUR TRACTOR DEALER. 20 AMP CHARGE If the electric deck lift fails to operate: 20 AMP IGNITION SPARE CHECK:... - Page 25 Troubleshooting (Electrical) (not applicable to Mini tractor) If a C appears in the Park Brake fig. 52 window for more than a couple of minutes: (Fig. 52) CHECK: This indicates you may have a charging problem. Check that main charge fuse 1 has not blown, (Yellow 20amp fuse).
-
Page 26: Specifications
Specifications – S150H Mini, S Series and T Series Weight PGC Capacity Forward Speeds S150H Mini 209.7 kg 255 litre (S150H Mini only) 0-6 mph S1500H 229.3 kg 300 litres Tyre Pressures T1600H 239.1 kg Transmission S150H Mini T1800H 241.2 kg Tuff Torq K46 Hydrostatic or Front: 0.7-1.0 KGF/cm (10-14 psi) - Page 27 Specifications – V Series Weight Turning Radius V25-50HE 278.8 kg 99cm V25-50HE PGC 55 kg Forward Speeds Fuel Tank Capacity 0-7 mph 7 litres (1.5 gallons) Tyre Pressures V25HE PGC Capacity Front: 0.8-1.1 KGF/cm (12-16 psi) 390 litres Rear: 0.43-0.7 KGF/cm (6-10 psi) Transmission Tuff Torq K62 Hydrostatic V25HE: 2.87m...
-
Page 28: Personal Service Record
Personal Service Record Use this page as a personal record of the service history of your garden tractor. Model ................Name of Dealer .............. Date of Purchase ............Serial Number..............Date of Registration ............Fourth Service (48 months) First Service (12 months) DEALER NAME &... -
Page 29: Certificate Of Conformity
Certificate of Conformity Manufacturer: COUNTAX Ltd. Address: Countax House, Haseley Trading Estate, Great Haseley, Oxon, OX44 7PF Model: S150H Mini S1500H T1600H T1800H T1600-4WD T25-4WD V25-50HE 10.81 10.81 11.93 13.42 11.93 19.4 19.4 Power (kW) Engine operating speed 2600rpm 2900rpm... - Page 30 Page 29...
- Page 31 Page 30...
- Page 32 Westwood Tractors, Freepost SCE11744, Admail 3376, Plymouth, Devon, PL7 5ZY Tel: 0800 0720127 • Fax: 0800 0720132...
Need help?
Do you have a question about the S150H and is the answer not in the manual?
Questions and answers
The hand break is very stiff to operate and it does not stop the S1500H from rolling on slight incline
The hand brake on the Westwood S150H could be stiff and ineffective due to lack of routine maintenance, such as infrequent lubrication or adjustment. It may also be affected by wear in the brake components or buildup of debris around the mechanism. Regular servicing, as outlined in scheduled service intervals, is necessary to maintain proper brake function.
This answer is automatically generated
I cannot push my tractor, what should I do?
If you cannot push your Westwood S150H tractor, follow these steps:
1. Ensure the machine is on a flat, even surface.
2. Release the parking brake by moving lever 'C' (Neutral Valve) forward.
3. Locate the Neutral Valve near the towing bracket on the back plate.
4. Pull out the Neutral Valve lever to engage it.
5. You can now push the tractor at a speed not exceeding 2 mph.
6. Before starting the tractor, push the Neutral Valve lever back to disengage it.
This answer is automatically generated