Table of Contents
Advertisement
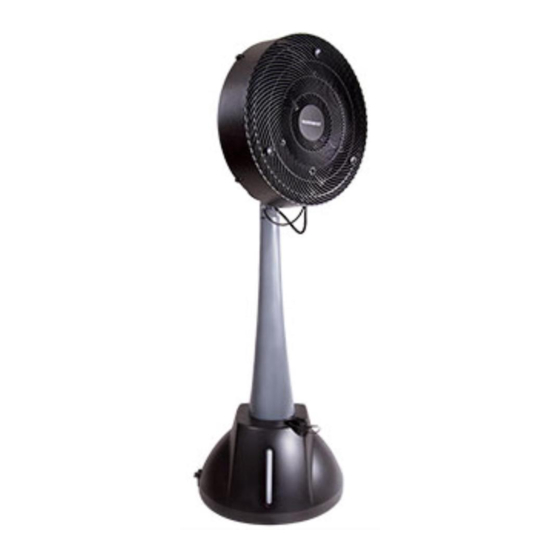
18" Misting / Oscillating Fan
Model Number:
AM12MF18-1
Owner's Manual
READ AND SAVE THESE INSTRUCTIONS
CAUTION:
Before using this product, read this manual and follow all safety rules and operating instructions.
Failure to comply with instructions could result in personal injury and/or property damage.
IMPORTANT:
or call 1-‐800-‐320-‐6478 .
For replacement parts or assembly questions go to
www.auramist.com
AM12MF18-1
Rev. 2/13
1
Advertisement
Table of Contents

Related Manuals for AuraMist AM12MF18-1


Summary of Contents for AuraMist AM12MF18-1
- Page 1 18” Misting / Oscillating Fan Model Number: AM12MF18-1 Owner’s Manual READ AND SAVE THESE INSTRUCTIONS CAUTION: Before using this product, read this manual and follow all safety rules and operating instructions. Failure to comply with instructions could result in personal injury and/or property damage.
-
Page 2: Table Of Contents
If safety information is not followed, someone will be seriously injured or killed. WARNING: If safety information is not followed, someone could be seriously injured or killed. CAUTION: If safety information is not followed someone may be injured. AM12MF18-1 Rev. 2/13... - Page 3 Turn off the misting fan before unplugging. 18. Do not operate the misting fan with a damaged power cord, plug, fuse or if the misting fan is damaged in any manner. Call an authorized service center for evaluation, adjustment or repair. AM12MF18-1 Rev. 2/13...
- Page 4 29. Risk of fire. Do not replace attachment plug. Contains a safety device (fuse) that should not be removed. Discard product if the attachment plug is damaged. CAUTION: DO NOT USE IN A WINDOW. FAILURE TO DO SO COULD RESULT IN THE PRODUCT COMING APART DURING OPERATION AND/OR PERSONAL INJURY. AM12MF18-1 Rev. 2/13...
-
Page 5: Carton Contents
4. Fan motor head assembly 5. Fan Pole 6. Water filter assembly 7. Air filter assembly 8. Power base assembly 9. Junction box cover 10. Filter Access Door 11. Power base pole 12. Screws ST3.9x16 13. Screws M5x16 AM12MF18-1 Rev. 2/13... -
Page 6: General Assembly Instructions
(fig. 5). 7. Install filter access door to the fan pole assembly (fig 6). 8. Align the rear fan guard alignment hole to the alignment pin on the motor housing, and fasten the rear AM12MF18-1 Rev. 2/13... -
Page 7: Operation Instructions
(fig. 3). • To operate the misting mist fan, plug the power cord into a 120 VAC, 60Hz outlet. CAUTION: MISTING FAN AND/OR MISTING SYSTEM MAY START UP WHEN THE UNIT IS INITIALLY PLUGGED INTO THE POWER OUTLET AM12MF18-1 Rev. 2/13... - Page 8 3. Press the rocker switch to the ON position (fig 5). 4. Once mist is visible, slowly close the mist control valve until desired mist is achieved, (refer to ADJUSTING MIST DENSITY section, to get optimal mist performance) (fig. 6). AM12MF18-1 Rev. 2/13...
-
Page 9: Maintenance
DO NOT IMMERSE THE MISTING MIST FAN IN WATER! REPLACING FILTERS WARNING: ANY SERVICING OF THIS UNIT, EXCEPT FOR GENERAL MAINTENANCE DESCRIBED IN THIS SECTION, SHOULD BE PERFORMED BY AN AUTHORIZED SERVICE REPRESENTATIVE. CAUTION: The filters have been designed to provide optimal system AM12MF18-1 Rev. 2/13... -
Page 10: Storage
• Clean the unit with a soft cloth and mild soap solution. • Dry all parts completely. • Store the misting fan in a clean and dry place. EMPTYING WATER TANK • Place misting fan on surface safe for to be water drained. AM12MF18-1 Rev. 2/13... -
Page 11: Troubleshooting
1. Air pump is not working 1. Turn on the mist ON/OFF switch from nozzle 2. Air flow is low 2. Possible kinked air hose. Check assembly to ensure hoses are routed and installed correctly. Change the intake filter of air pump. AM12MF18-1 Rev. 2/13... -
Page 12: Exploded View
1. Adjust the water flow control valve on three nozzle 2. Water hose leaks 2. Turn off mist fan motor, and feel any air leaks on hoses 3. Kinked water hose 3. Check assembly to ensure hoses are routed installed correctly. Exploded View AM12MF18-1 Rev. 2/13... -
Page 13: Parts List
AM12MF18R-1-024 Power Base Fan Pole AM12MF18R-1-025 Water Tank Fill Cap AM12MF18R-1-026 Water Tank Filter Basket AM12MF18R-1-027 Filter Access Door AMMF16R-1-004 Water Flow Control Valve AM12MF18R-1-029 Junction Box Cover AM12MF18R-1-101 Screws ST2.9×12C AM12MF18R-1-102 Screws ST3.9x16 AM12MF18R-1-103 Screws M5x16 AM12MF18-1 Rev. 2/13... -
Page 14: Warranty
In either case, a copy of your proof of purchase will be required. In case that any mechanical or electrical repairs are required during the warranty period, send your complete product, postage or freight prepaid to the AURAMIST service center near you. Call the number below to get the nearest service center.
Need help?
Do you have a question about the AM12MF18-1 and is the answer not in the manual?
Questions and answers