Table of Contents
Advertisement
www.GEAppliances.ca
Safety Information
. . . . . . . . . . . 2-5
Operating Instructions
Clock, Timer and
Convenience Outlet . . . . . . . . . . . . . . 6, 17
Controls . . . . . . . . . . . . . . . . . . . . . . . . . . 9, 10
Cookware . . . . . . . . . . . . . . . . . . . . . . . . . . . .7
Sabbath Feature . . . . . . . . . . . . . . . . 26, 27
Self-Cleaning . . . . . . . . . . . . . . . . . . . . 22, 23
Special Features . . . . . . . . . . . . . . . . 24, 25
Surface Units . . . . . . . . . . . . . . . . . . . . . . . . 6
Temperature Conversions . . . . . . . . . . 10
Thermostat . . . . . . . . . . . . . . . . . . . . . . . . .20
Timed Baking and Roasting . . . . . . . .13
Using the surface units . . . . . . . . . . . . . . 8
Care and Cleaning
. . . . . . . . . 28-34
. . . . . . . . . . . . . . . . . . . . . . 40
Consumer Support
Consumer Support . . . . . . . . . . . . . . . . .44
Product Registration . . . . . . . . . . . . 41, 42
Warranty . . . . . . . . . . . . . . . . . . . . . . . . . . 43
Write the model and serial
numbers here:
Model # __________________
Serial # __________________
You can find them on a label,
behind the storage drawer
on the oven frame.
. . . . . . 35-39
183D6379P073
Owner's Manual
Coil Top and
Radiant Top Models
Self-Clean
Models
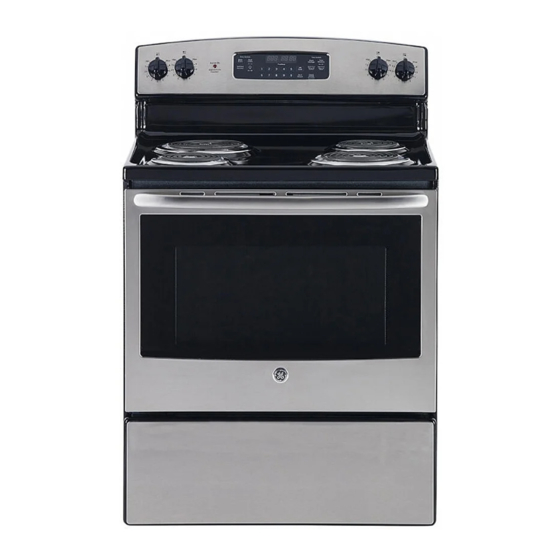
JCB530
JCB730
29-5851
Advertisement
Table of Contents

Related Manuals for GE JCB530


Summary of Contents for GE JCB530
-
Page 1: Table Of Contents
Oven ......11, 12 JCB530 Sabbath Feature ....26, 27 JCB730 Self-Cleaning . -
Page 2: Important Safety Information
IMPORTANT SAFETY INFORMATION. READ ALL INSTRUCTIONS BEFORE USING. WARNING Read all safety instructions before using the product Failure to follow these instructions may result in fire, electric shock,serious injury or death ANTI-TIP DEVICE To reduce the risk of tipping the range, the range must be secured by a properly installed anti-tip bracket See installation instructions shipped with the bracket for complete details before attempting to install... - Page 3 GEAppliances.ca WARNING GENERAL SAFETY INSTRUCTIONS Use this appliance for its intended purpose as described Do not touch the surface units, the heating elements in this Owner’s Manual or the interior surface of the oven These surfaces may be hot enough to burn even though they are dark in .
- Page 4 IMPORTANT SAFETY INFORMATION. READ ALL INSTRUCTIONS BEFORE USING. WARNING IN THE EVENT OF A FIRE, TAKE THE FOLLOWING STEPS TO PREVENT THE FIRE FROM SPREADING: Do not use water on grease fires Never pick up a If there is a fire in the oven during self-clean, turn the flaming pan Turn the controls off Smother a flaming oven off and wait for the fire to go out Do not force pan on a surface unit by overing the pan completely...
- Page 5 IMPORTANT SAFETY INFORMATION. READ ALL INSTRUCTIONS BEFORE USING. GEAppliances.ca WARNING RADIANT COOKTOP SAFETY INSTRUCTIONS (Some models) Use care when touching the cooktop The glass surface Use CERAMA BRYTE ceramic.Cooktop Cleaner and ® of the cooktop will retain heat after the controls have CERAMA BRYTE Cleaning Pad to clean the cooktop ®...
-
Page 6: Temperature Limiter
Using the radiant surface units. (on some models) NOTE: Throughout this manual, features and appearance may vary from your model. About the Radiant Surface Units SURFACE WARNING: NOTE: On models with light-colored glass COOKING The surface cooktops, it is normal for the cooking zones to units are automatically disabled during change color when hot or cooling down. -
Page 7: Selecting Types Of Cookware
Selecting types of cookware. GEAppliances.ca The following information will help you choose cookware which will give good performance on glass cooktops. Stainless Steel: Glass-Ceramic: recommended usable, but not recommended Poor performance. May scratch the surface. Aluminum: Stoneware: heavy weight recommended Good conductivity. - Page 8 Using the surface units. Throughout this manual, features and appearance may vary from your model. How to Set Push the knob in and turn in either direction At both OFF and Max the control clicks into to the setting you want. position.
-
Page 9: Using The Oven Controls
Using the oven controls. NOTE: Throughout this manual, features and appearance may vary from your model. Features and appearance may vary. Control graphics for All models. Oven Control, Clock and Timer Features and Settings BAKE Pad Touch to select the bake function. BROIL Pad Touch to select the broil function. - Page 10 Using the oven controls. Oven Control, Clock and Timer Features and Settings LIGHT Pad Touch to turn the oven light on or off. START TIME Pad Use along with COOK TIME or CLEAN pads to set the oven to start and stop automatically at a time you set.
-
Page 11: Using The Oven
Using the oven. www.GEAppliances.ca Before you begin… The racks have stops, so that when placed CAUTION: correctly on the supports, they will stop When you are using before coming completely out, and will a rack in the lowest position (A), you will need not tilt. -
Page 12: Broiling Guide
Using the oven. How to Set the Oven for Broiling NOTE: Close the door before start any Touch the BROIL HI/LO pad once for HI Broil. broiling function. To change to LO Broil, touch Use LO Broil to cook foods such as poultry the BROIL HI/LO pad again. -
Page 13: Using The Timed Baking And Roasting Features
Using the timed baking and roasting features. www.GEAppliances.ca NOTE: Foods that spoil easily such as milk, eggs, fish, stuffings, poultry and pork should not be allowed to sit for more than 1 hour before or after cooking. Room temperature promotes the growth of harmful bacteria. Be sure that the oven light is off because heat from the bulb will speed harmful bacteria growth. -
Page 14: Using The Warming Drawer
Using the warming drawer. (on some models) The warming drawer will keep hot, cooked foods at serving temperature. Always start with hot food. Do not use to heat cold food other than crisping crackers, chips or dry cereal. To Use the Warming Drawer ON / OFF ARMING Touch the WARMING DRAWER pad. - Page 15 www.GEAppliances.ca Temperature Selection Chart To keep several different foods hot, FoodType Control Set ting set the control to the food needing the Bacon highest setting. Breads The temperature, type and amount Casserole of food, and the time held will affect Chicken, fried the quality of the food.
-
Page 16: Convenience Outlet
Using the clock, timer and convenience outlet. To Set the Clock LOCK The clock must be set to the correct time Touch the CLOCK pad. ORLOGE of day for the automatic oven timing Touch the number pads. functions to work properly. The time of day cannot be changed during a timed Touch the START pad. -
Page 17: Cookware
Using the convection oven. (on some models) www.GEAppliances.ca The convection oven fan shuts off when the oven door is opened. DO NOT leave the door open for long periods of time while using convection cooking or you mayshorten the life of the convection heating element. To help you understand the difference Convection Roast between convection bake and roast and... - Page 18 Using the convection oven. (On some models) How to Set the Oven for Convection Baking or Roasting Convection Touch the CONVECTION BAKE temperature in convection bake mode. Auto Recipe Conversion Roast Bake pad once for multi-rack convection See Auto Recipe Conversion in the Special ™...
- Page 19 Using the timed features for convection baking. You will hear a fan while cooking with these features. The fan will stop when the door is opened, but the heat You will hear a fan while cooking with these features. The fan will stop when the door is opened, but the heat will not turn off.
- Page 20 You may find that your new oven cooks differently than the one it replaced. Use your new oven for a few weeks to become more familiar with it. If you still think your new oven is too hot or too cold, you can adjust the thermostat yourself. Do not use thermometers, such as those found in grocery stores, to check the temperature setting of your oven.
- Page 21 Using the proofing feature. (on some models) www.GEAppliances.ca The proofing feature maintains a warm environment useful for rising yeast-leavened products. How to Set the Oven For Proofing (on some models) Place the covered dough in a dish When proofing is finished, touch ROOF the OFF pad.
- Page 22 Using theself-cleaning oven. The oven door must be closed and all controls set correctly for the cycle to work properly. Before a Clean Cycle We recommend venting your kitchen Do not clean the gasket. The fiberglass with an open window or using a material of the oven door gasket cannot ventilation fan or hood during the withstand abrasion.
- Page 23 www.GEAppliances.ca How to Delay the Start of Cleaning LEAN Touch the CLEAN pad. Touch the START TIME pad. ETTOYAGE Using the number pads, enter the Using the number pads, enter the desired clean time, if a time other time of day you want the clean cycle than 4 hours, 20 minutes is needed.
-
Page 24: Special Features Of Your Oven Control
Special features of your oven control. Your new touch pad control has additional features that you may choose to use. The following are the features and how you may activate them. The special feature modes can only be activated while the display is showing the time of day. They remain in the control’... - Page 25 www.GEAppliances.ca 12-Hour, 24-Hour or Clock Blackout ROIL Your control is set to use a 12-hour clock. Touch the CLOCK pad again to UIRE change to the 24 hour military time If you would prefer to have a 24-hour clock. The display will show 24 hr. LOCK military time clock or black out the clock ORLOGE...
- Page 26 Using the Sabbath feature. (on some models) (Designed for use on the Jewish Sabbath and Holidays) The Sabbath feature can be used for baking/roasting only. It cannot be used for convection, broiling, self-cleaning or Delay Start cooking. NOTE: The oven light comes on automatically (on some models) when the door is opened and goes off when the door is closed.
- Page 27 www.GEAppliances.ca How to Set for Timed Start and Automatic Stop ROIL UIRE Make sure the clock shows the correct time Using the number pads, enter the of day and the oven is off. desired temperature. No signal or TART TIME temperature will be given.
-
Page 28: Cleaning The Oven Door
Care and cleaning of the range. Be sure electrical power is off and all surfaces are cool before cleaning any part of the range. If your range is removed for cleaning, when the range is replaced. Failure servicing or any reason, be sure the to take this precaution could result in anti-tip device is re-engaged properly tipping of the range and cause injury. - Page 29 GEAppliances.ca GEAppliances.ca Lift-Off Oven Door (on some models) The door is very heavy. Be careful when With the Bottom Hinge arm removing and lifting the door. door at the edge of slot same angle Do not lift the door by the handle. as the removal position, seat the To remove the door:...
-
Page 30: Oven Heating Elements
Care and cleaning of the range. Oven Heating Elements Do not clean the bake element or the broil On some models, the bake element is not element. Any soil will burn off when the exposed and is under the oven floor. If spillover elements are heated. - Page 31 GEAppliances.ca Porcelain Enamel Cooktop (on radiant models) The porcelain enamel finish is sturdy If acids spill on the cooktop while it is hot, use but breakable if misused. This finish is a dry paper towel or cloth to wipe it up right acid-resistant.
-
Page 32: Care And Cleaning Of The Range
Care and cleaning of the range. Oven Vent (on coil models) On glass cooktop models, the oven is vented Never cover the opening with aluminum foil through an opening at the rear of the or any other material. cooktop. On coil cooktop models, the oven is vented through an opening under the right rear surface unit. -
Page 33: Cleaning The Glass Cooktop
Cleaning the glass cooktop. (on radiant models) GEAppliances.ca Normal Daily Use Cleaning ONLY use Ceramic Cooktop Cleaner on Shake the cleaning cream well. the glass cooktop. Other types of cleaners Apply a few drops of Ceramic Cooktop may not be as effective. Cleaner directly to the cooktop. - Page 34 Cleaning the glass cooktop. (on radiant models) Metal Marks and Scratches Be careful not to slide pots and pans If pots with a thin overlay of aluminum across your cooktop. It will leave metal or copper are allowed to boil dry, the markings on the cooktop surface.
-
Page 35: Troubleshooting Tips
Before you call for service… GEAppliances.ca Troubleshooting Tips Save time and money! Review the charts on the following pages first and you may not need to call for service. Problem Possible Causes What To Do Radiant Cooktops Surface units will not Improper cookware Use pans which are flat and match the diameter maintain a rolling boil... - Page 36 Before you call for service… Troubleshooting Tips Problem Possible Causes What To Do Coil Cooktops Surface units The surface units are not • With the controls off, check to make sure the surface not functioning plugged in solidly. unit is plugged completely into the receptacle. properly The surface unit controls •...
- Page 37 GEAppliances.ca Problem Possible Causes What To Do Food does not broil properly Improper rack position • See the Broiling guide. being used. Food being cooked in a hot pan. • Use the broiling pan and grid that came with your range. Make sure it is cool.
- Page 38 Before you call for service… Troubleshooting Tips Problem Possible Causes What To Do Oven temperature too Oven thermostat • See the Adjust the oven thermostat―Easy to do hot or too cold needs adjustment. yourself! section. Clock and timer do Plug on range is not completely •...
- Page 39 GEAppliances.ca Problem Possible Causes What To Do “Burning” or “oily” This is normal in a new oven • To speed the process, set a self-clean cycle for a odor emitting from and will disappear in time. minimum of 3 hours. See the Using the self-cleaning the oven vent oven section.
-
Page 40: Accessories
Cleaning Pads Scraper Tired of discolored racks? Wishing you had extra-heavy-duty oven racks? NOW AVAILABLE for your range: GE’s innovative, self-cleanable porcelain-coated oven racks! • Heavy Duty • Durable • Able to be cleaned in a self-cleaning oven Visit www.GEAppliances.ca for more information. - Page 41 Please place in envelope and mail to: Veuillez mettre dans une enveloppe et envoyez à : OWNERSHIP REGISTRATION P.O. BOX 1780 MISSISSAUGA, ONTARIO L4Y 4G1 (FOR CANADIAN CONSUMERS ONLY)
- Page 43 GE Electric Range Warranty. All warranty service provided by our Factory Service Centers, Staple your receipt here. or an authorized Customer Care technician. To schedule ® Proof of the original purchase service, call 1.800.561.3344. Please have serial number date is needed to obtain service and model number available when calling for service.
-
Page 44: Consumer Support
1.800.561.3344 GE repair service is close to you. To arrange service for your GE appliance, all you have to do is call. Parts and Accessories Individuals qualified to service their own appliances can have parts or accessories sent directly to their homes (VISA, MasterCard and Discover cards are accepted).
Need help?
Do you have a question about the JCB530 and is the answer not in the manual?
Questions and answers