
Summary of Contents for M3T MC-6700S
-
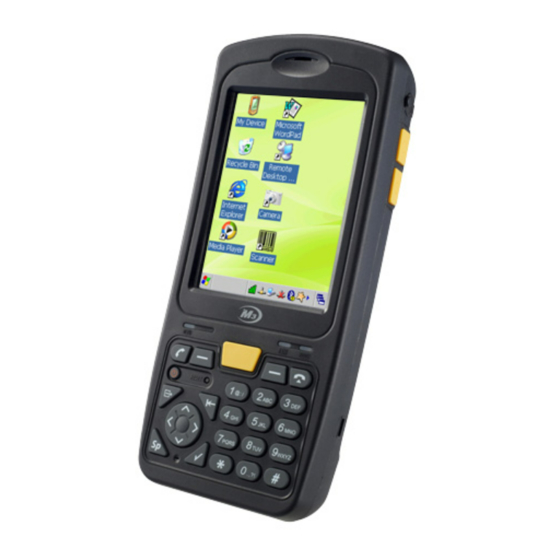
Page 1: User Manual
User Manual Please be sure to read the “Warnings and Safety Precautions” in order to use the product safely and correctly. -
Page 2: Notice
• Among the contents of this manual, the optional devices (WLAN, Bluetooth, Scanner, Camera, etc.) that are not installed in the M3T for users cannot be used. • This user manual only includes contents that users need to understand to use this product. -
Page 3: Copyright And Agreement On Usage
Software Copyright Law. • M3T is a trademark of M3 Mobile. • Microsoft, Windows, MS Office, Outlook, ActiveSync, Internet Explorer, Windows Logo, and Windows CE 5.0 Logo are registered trade marks or trademarks of Microsoft in the USA or other countries. -
Page 4: Warnings And Cautions For Safety
Warnings and Cautions for Safety Customer Cautions • If the device is lost or stolen, then immediately report the incident to the service provider. • Do not lend the device to other people. • Refrain from using the device while driving. •... - Page 5 Do not modify the product • Do not try to modify the product by any means. • Modifications may cause fire, injury, electric shock, or serious damage to the equipment and users. • The warranty service is not provided for troubles due to unauthorized modification. User Manual...
-
Page 6: Specification And Characteristics
Specification and Characteristics Dimensions 77 x 168.8 x 28mm (Width x Length x Height) Weight 378g Transmit Power Maximum 0.3W Main Unit -10 ˚C ~ +50 ˚C Operating Temperature Adapter -10 ˚C ~ +50 ˚C Relative Humidity 5% ~ 80% Input: AC 100 ~ 250V, 50 ~ 60Hz Adapter Power Supply Output: DC +5.2V, 5.0A... -
Page 7: Table Of Contents
Bluetooth Communication ......27 Table of Contents ..........7 Button Setting ..........31 Transcriber / Keyboard ........32 M3T Introduction ......9 Using Internet ........35 Product Configuration ........10 Name and Function of Each Part ....11 Connecting Wireless LAN ......36 LED Information .......... - Page 8 Table of Contents Using Camera ........45 Using Camera ..........46 Using Personal Schedule Program .49 Today ............50 Schedule Manager ........51 Picture Memo ..........56 Voice Memo ..........59 Using Application / Utility Program ....61 Calculator /Image Viewer ....... 62 Backup............
-
Page 9: M3T Introduction
M3T Introduction Product Configuration Name and Function of Each Part LED Information Button information Touch Screen Button Information and Using the Stylus Inserting and Removing the Battery Charging Extending Battery Usage Time Inserting and Removing T-Flash (Micro SD Memory Card) -
Page 10: Product Configuration
Product Configuration • Check if all following items are included when you open the box for the first time. M3T Main Unit One Standard Battery + One Cradle USB Cable Portable Adapter High Capacity Battery Earphone Two Stylus Pens Manual CD +... -
Page 11: Name And Function Of Each Part
Name and Function of Each Part M3T Main Unit Volume Button Barcode Scanner Window Stylus Pen Receiver Camera Earphone Connector Back Speaker Camera Button Scanner Button Scanner Button Battery Detachment Button LCD Touch Screen Battery Status Display LED Button Charging and... - Page 12 Name and Function of Each Part Cradle Aux. Battery Power Supply Charging Slot USB Client: PC Connection (ActiveSync) Main Unit Charging Slot USB Host: For USB host use (keyboard, memory, etc) Cradle Charging LED (When Charging Aux. Battery) USB to Serial: USB to Serial function (External serial connection, etc)
-
Page 13: Led Information
LED Information Classification LED Status Description Charging Charging LED Green Charging completed Scanner LED Green Scanner read barcode successfully Charging LED Scanner LED User Manual... -
Page 14: Button Information
Button Information Button Name Function Button Name Function Mode Toggle between lower case/upper Short Press: Displays the input panel Button case/number input mode Long Press: Opens explorer Backspace Toggle between lower case/upper Delete Button case/number input mode Space Tab input Space input Button Touch lock/release... -
Page 15: Touch Screen Button Information And Using The Stylus
Touch Screen Button Information and Using the Stylus Click Double Click Long Press Drag Press the stylus pen without Same as double click function Select a group or move icons like Item selection / Click releasing, and select the menu. in PCs dragging a mouse in PC (Copy, Cut, Paste) -
Page 16: Inserting And Removing The Battery
Inserting and Removing the Battery Inserting Battery • Insert the battery to the battery pack position in the back of PDA as shown in the picture. • Completely attach the battery by pushing the lock switch to the left as shown in the picture. -
Page 17: Charging
Charging • Connect the provided adapter plug to the charging jack of the cradle, and place the Main Unit or battery to be charged on the cradle. • The charging status of the battery attached to the Main Unit can be checked through the LED on the upper left part of the Main Unit. -
Page 18: Extending Battery Usage Time
Extending Battery Usage Time • When you are working outside of the workplace or home and you cannot charge the device as often as you need, you can extend the battery usage time through the following methods. • Turn off the LCD by pressing the power button when you aren’t use the device. The device is turned off automatically if there is no activity on the keyboard or LCD touch screen for more than three minutes when battery power is used. -
Page 19: Inserting And Removing T-Flash (Micro Sd Memory Card)
Inserting and Removing T-Flash (Micro SD Memory Card) Inserting T-Flash • Remove the battery from the back of the PDA. • Insert the Micro SD Memory Card device with the metal terminals facing downward until you hear a clicking sound. Removing T-Flash •... -
Page 20: Connecting With Pc
Connecting with PC • The cradle supports both charging and USB port connection. • Follow the procedures described below to connect the cradle. Connect the adapter of the device to the cradle. Connect the power plug of the adapter to the wall outlet. Connect the USB cable to the USB port of the cradle and connect the cable to the PC’s USB port. -
Page 21: Soft/Hard Reset
Soft/Hard Reset Soft Reset Press the reset groove as shown in the picture. Click the Reset Button when one of installed software programs causes unexpected problems while you use the device. All currently running software will be terminated upon software reset and working files or data might be lost, but the existing stored data of files are not affected. - Page 22 MEMO User Manual...
-
Page 23: Basic Instructions
Basic Instructions Calibration Main Windows Bluetooth Communication Button Setting Transcriber/Keyboard... -
Page 24: Calibration
Calibration • Select Recalibration from Start > Control Panel > Stylus > Calibration. • The screen setting wizard for aligning the touch screen will be displayed. • When you press the (+) marking for more than one second with the stylus pen and release it, the (+) marking will move to another position. -
Page 25: Main Window
Main Window • The Main Window consists of a background screen and taskbar. Background screen • You will see the followings shortcut icons on the background screen. The descriptions of the icons are as followings. Icon Description My Computer: You can view the folders and files. Recycle Bin: Recover deleted files and data or completely remove them. - Page 26 Main Window • Taskbar status display / Quick Launch Icon Taskbar • The taskbar is configured to be simple and easy to use. Icon Description • The start icon ( ) is the start point for programs. Low battery Charging - Indicates that AC power is being used When you press the Start icon with a stylus pen, All Programs, Double Click: Power properties Bookmarks, Documents, Setting, Help, and Run menu...
-
Page 27: Bluetooth Communication
Bluetooth Communication Turning Bluetooth On/Off Turning Bluetooth On/Off • Select the Bluetooth (hereafter referred to as BT) icon from the taskbar, select Enable Bluetooth/ Disable Bluetooth from the popup menu, and then set the BT states to ON )/OFF( ) mode. Opening BT Explorer •... -
Page 28: View Menu
Bluetooth Communication View Menu • Explorer Mode: To switch to the screen that shows the list of detected other BT devices and the available services • Wizard Mode: To switch to the screen showing BT service shortcut link • Status Bar: To remove or generate the status bar •... - Page 29 Bluetooth Communication • Services: Register/clear the services that my device can support as a server. • Depending on the registration status, other devices can or cannot see the services provided by my device. • Services that can be provided as a server include A2DP, Audio Video remote control, File transfer, PAN connection, and serial port.
-
Page 30: Serial Device Connection
Bluetooth Communication Serial Device Connection • BT serial devices can be connected to the serial port using Bluetooth. • Two ports are supported for Bluetooth serial communication. Outbound Ports: COM9, COM10 or COM11 Inbound Port: COM4 • COM port connection can be set for the outbound port for Bluetooth serial communication. -
Page 31: Button Setting
Button Setting Button Setting • Adjust the settings for the PDA buttons from the Config tab of Start > Programs > Utility > Key Mapping. • Select the button to configure from the list, and select the function to execute from the Function Assignment items or press the Program... -
Page 32: Transcriber / Keyboard
Transcriber / Keyboard Transcriber • This program recognizes handwriting and automatically converts it into computer text when you write text using the stylus pen when entering text for documents or settings. • You can execute the Transcriber by executing the Transcriber program icon in the Input Selection (Long Press) standby screen or selecting Transcriber from the pop-up menu by using a long press on the input pad in the taskbar. - Page 33 Transcriber / Keyboard Keyboard • Select the keyboard from the pop-up menu shown with a long press on the input pad icon on the taskbar and a short press on the input pad icon on the taskbar whenever you want to display the keyboard input pad on the screen. •...
- Page 34 MEMO User Manual...
-
Page 35: Using Internet
Using Internet Connecting Wireless LAN Setting Wireless LAN Connecting USB... -
Page 36: Connecting Wireless Lan
Connecting Wireless LAN • You can access the internet with the wireless LAN. Wireless LAN support IEEE 802.11 a.b.g. To Connect Wireless LAN • Turn on the AP device that supports IEEE 802.11 a.b.g. • Select Quick connection icon ( ) >... -
Page 37: Setting Wireless Lan
Setting Wireless LAN • Select in the taskbar, and then open the Manager. • Select Admin Login from the Main tab, enter SUMMT, and select the OK button. • Select Scan from the Profile tab, select the AP to connect to, and select Configure to configure the proper settings for the selected •... -
Page 38: Connecting Usb
Connecting USB Using the internet through the USB connect to PC directly This connection is used in the “PC Connection” method for the Control Panel, and you can use the internet through the USB ActiveSync once both devices are properly configured through a Partnership. -
Page 39: Activesync
ActiveSync ActiveSync Introduction Installing ActiveSync Synchronizing Data ActiveSync Troubleshooting... -
Page 40: Activesync Introduction
ActiveSync Introduction • Sync is an abbreviation of Synchronization. In our case, it means to sync data between the PDA and PC by connecting them so that the data on both devices is the same. When the data is modified in either the PDA or PC, the Sync function conveniently updates the data on the other device with the latest data between two of them. -
Page 41: Installing Activesync
Installing ActiveSync To install ActiveSync • Insert the CD included with this product, and select ActiveSync from the Auto-run screen to install the program. • Select the Next button, and select the Cancel button when you see the [Your device was not detected] screen. •... -
Page 42: Synchronizing Data
Synchronizing Data • There is an Option icon if you see the Microsoft ActiveSync window on your PC. When you click this Option icon, the “Sync option,” “Sync mode,” “Sync mode”and“Rules” tabs will appear. • “Sync option” is the menu for selecting the items to synchronize. Contact, schedule, work, files, and channel can be selected. -
Page 43: Troubleshooting Activesync
Troubleshooting ActiveSync When ActiveSync does not work • Check whether the USB cable is properly connected to the cradle and the PC’s USB port. • Check whether the power of the M3 and LCD is on. • Select File > Connection Setting from the ActiveSync program, and then open the window. Check whether the [Allow USB connection with this desktop computer] item is checked. - Page 44 MEMO User Manual...
-
Page 45: Using Camera
Using Camera Using Camera... -
Page 46: Using Camera
Using Camera Running Camera program Program Close Photo Viewer • You can quickly launch the camera program with the camera program shortcut icon on the background screen. Flash On /Off • Or you can run the camera program by clicking on the Camera menu from Start > Program. -
Page 47: Camera Menu
Using Camera Camera menu • Press the menu button while the camera is off. • Photo option You can select one of various photo effects including Normal, Sepia, Black and White, Negative, UVRed, UVBlue, and UVGreen. Select the image size of the photo from among 2048X1536, 1600X1200, 1280X1024, 640X480, or 320X240. - Page 48 Using Camera Album view • You can see the photos taken with the camera using the navigation buttons. • Press the Delete button to delete the selected photos. Photo Album User Manual...
-
Page 49: Using Personal Schedule Program
Using Personal Schedule Program Today Schedule Manager Picture Memo Voice Memo... -
Page 50: Today
Today • Select [Start] > [Program] > [Personal Schedule Manager] > [Today] to display the Today screen. The Today window displays the user’s simple personal schedule information for the day. This window consists of user sounds, time, date, schedule, task, user information, and management items. -
Page 51: Schedule Manager
Schedule Manager • You can manage the Schedule, Task, and Contacts with one program—Schedule Manager. Schedule Manager supports entry, modification, and deletion of schedule, anniversary, task, and contact information. You can see the list of schedule, anniversary, and task by date, week, and month with the Schedule Manager program. - Page 52 Schedule Manager Create /Edit /Delete Task • Create /Edit Task After launching the Schedule Manager program, select New Task from the InfoBox at the lower left corner, or long press on each list and select New Task. Select the ( ) icon from the View List at the bottom and select ( ) icon from the Task List at the top of the screen to create a New Task.
- Page 53 Schedule Manager Create /Edit /Delete Contacts • Create /Edit Contacts After launching the Schedule Manager program, select the InfoBox at the lower left corner and select New Contacts. Select the ( ) icon, and then select ( ) icon from the Contacts List at the upper left corner of the screen to enter information for new contacts.
- Page 54 Schedule Manager Toolbar Anniversary Display Display/Move Month Display by Category Display/Move Year Schedule Display Go Back to Today Task Display Page Mode • Display/Move Year • Task Display • Display by Category Select the Year display and choose a When Task Display is selected, tasks When the Display by Category is year, and then the calendar will move to registered in the list for that day/week/...
-
Page 55: Day View
Schedule Manager Day View When [Day View] is selected, you can check the schedule, anniversaries, and tasks registered on the selected date. Schedules, anniversaries, and tasks are respectively shown on white, grey, and blue backgrounds. Week View When [Week View] is selected, you can check the schedule, anniversaries, and tasks registered on the selected date. -
Page 56: Picture Memo
Picture Memo Setting • Category After launching the Picture Memo, you can create, edit, or delete the category from the Category menu located on the top. Select the upper left corner to move to the upper level category, and select [New Folder...] to Category Setting Menu and View create a new folder in the upper category. - Page 57 Picture Memo • Mode Change Select the pen icon ( ) at the lower left, and then select Change pen, Delete, Page delete, or Exit menu. Mode Change Menu Icon Description Opaque pen, Semi-transparent pen Erase selected area, Erase all Delete current page Delete current page Delete entire memo...
- Page 58 Picture Memo Creating Memo • Creating a new memo Select new note and draw with the stylus pen to add a drawing or notes to create the memo. • Memo list You can check the saved date and number of pages in the memo list. Long press on the memo to move, delete, or copy the corresponding memo.
-
Page 59: Voice Memo
Voice Memo Setting • Toolbar Pause Status Display Play Stop Time Display Record Option Menu Progress Bar Fast Forward /Fast Rewind Option Menu Screen You can run various voice memo functions including play, pause, record, fast forward, fast rewind, and shortcut by using the toolbar buttons, and also you can set the recording channel and sampling rate by selecting the Option Menu. - Page 60 Voice Memo • Save /Sorting Files can be saved to My Documents, Flash Disk, or Micro SD Card, and the recorded files will be placed under the Voice_Memo folder in the corresponding location in the .wav file format. You can select the location to store the files by selecting the upper left corner of the screen. Files can be sorted by name, date, and file size, and sorting parameters can be chosen by selecting from the upper right corner of the screen.
-
Page 61: Using Application / Utility Program
Using Application / Utility Program Calculator /Image Viewer Backup Using GPS... -
Page 62: Calculator /Image Viewer
Calculator /Image Viewer Calculator • M3 provides a calculator capable of performing the four fundamental arithmetic operations. • Select [Start] > [Programs] > [Tools] > [Calculator] to use the calculator. Image Viewer • You can see the image file using the image viewer. •... -
Page 63: Backup
Backup Backup • Setting backup path /Changing backup name You can set the backup location to Flash Disk or Micro SD Card from the Backup tab after launching the backup program. Enter the name of the backup in Name field, and the backup files will be saved with the entered name. -
Page 64: Using Gps
Using GPS • The GPS function uses COM3 Port/9600 rate. • Set “Com Port: COM3, Baud Rate: 9600,” and then click Open GPS. • Refer to the manual of the GPS program for more details. Initialization time may take longer than usual after a hard reset because the GPS will also reset ※...
Need help?
Do you have a question about the MC-6700S and is the answer not in the manual?
Questions and answers