
Subscribe to Our Youtube Channel
Related Manuals for Prem-I-Air ACS16E


Summary of Contents for Prem-I-Air ACS16E
- Page 1 IMPORTANT Please read these instructions carefully before use.
- Page 2 Important safety instructions BS Plug Wiring Instruction Technical Specification Energy Saving Advice Component Layout Control Panel Operation Use Of Control Panel Control of Airflow Direction Disconnecting The Refrigerant Line Mounting The Outdoor Unit Installing The Carbon Filters Maintenance End Of Season Storage Troubleshooting Service &...
- Page 3 1. Transport & store the unit in an upright position only. Leave it in an upright position for at least 3 hours before first use. 2. Always place the unit on an even, level surface. 3. An opening in a window or wall is required to accommodate the exhaust hose to expel the hot air.
- Page 4 22. ALWAYS turn the unit off and remove the mains plug before cleaning, carrying out maintenance or moving location. 23. Avoid the use of adapter plugs, multiple sockets and /or extension leads. If their use is necessary, ensure they conform to current safety standards.
- Page 5 Wiring Instructions: Should it be necessary to change the plug please note the wires in the mains lead are coloured in accordance with the following code: BLUE - NEUTRAL BROWN - LIVE GREEN AND YELLOW - EARTH As the colours of the wires in the mains lead of this appliance may not correspond with the coloured markings identifying the terminals in your plug, proceed as follows: 1.
- Page 6 Model no. ACS16E Power supply 220-240V/ 50Hz / 1 phase 16000BTU/hr, 4039Kcal/hr, Cooling capacity 4689watts Heating capacity 16000BTU/hr, 4039Kcal/hr, 4689watts Power / Ampere consumption for 1750W/ 7.5A cooling Power / Ampere consumption for 1280W/ 5.8A heating Max. airflow volume (indoor unit)
- Page 7 1. Do not locate the air conditioner where furniture or other objects can obstruct the airflow. 2. Keep blinds/curtains closed during the warmest part of the day. 3. Close the fireplace damper, floor and/or wall grilles, so cool air does not escape through the chimney or ductwork.
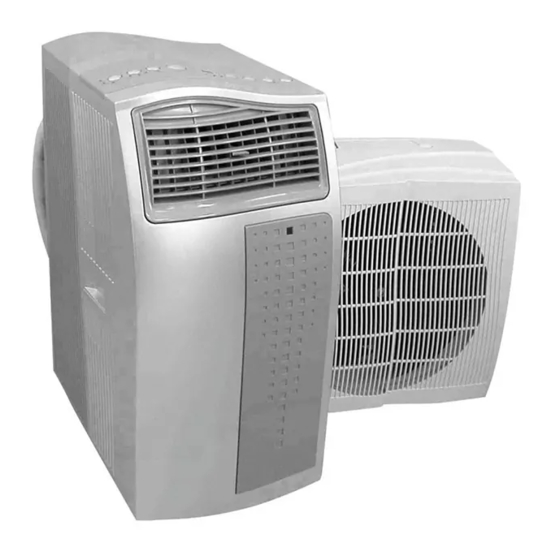
- Page 8 1. Cool air outlet 2. Control panel 3. Connection tube 4. Handle 5. Casters 6. Outdoor unit handle 7. Exhaust air outlet 9. Cable storage 10. Power cable compartment 11. Power cable 12. Filter Filter 14. Active Carbon filter 15. Outdoor unit mounting bracket 16.
- Page 9 1. Auto mode indicator 2. Cooling mode indicator 3. Fan mode indicator 4. Heating mode indicator* 5. Low fan speed indicator 6. Medium fan speed indicator 7. High fan speed indicator 8. Timer operation indicator 9. Room temperature indicator 10. Water FULL indicator 11.
- Page 10 All function below can be carried out using the infrared remote control Turning ON/OFF 1. Press the ON/OFF button and the unit will start automatically. If the ambient temperature is: - higher than 23 C, the unit will work in cooling mode. higher than 20 C but below or equal to 23 C, the unit will work in...
- Page 11 Setting ventilation speed 1. Press SPEED button to choose the fan speed you require (high, medium or low). The indicator of high or low ventilation will illuminate at the same time. If the unit is in AUTO mode, it will choose the fan speed automatically according to the ambient temperature (the related indicators will illuminate), at this time the speed switch is invalid.
-
Page 12: Control Of Airflow Direction
Control of Airflow Direction Turn the roller in the horizontal direction to control the airflow distribution. Page 12... - Page 13 If you need to disconnect the indoor unit from the outdoor unit (to place it in a more suitable position), please follow the steps below: 1. Open the tube connection box situated at the back of the indoor unit. (FIG.9) 2.
- Page 14 Fig. 13 Fig. 11 Fig. 12 Firmly screw the bracket to the wall. The maximum height from the floor to the outdoor unit should be no more than 1.5m Locate the outdoor unit bracket onto wall- mounted bracket. Page 14...
- Page 15 Installing The Carbon Filters 1. Remove the filter frame from the unit. 2. Separate the filter frames. 3. Remove the active carbon filter from its plastic bag. 4. Insert the active carbon filter into the filter frame. 5. Fix the filter by reassembling the filter frames.
- Page 16 Drainage (outdoor unit) This unit is equipped with automatic drainage function. The condensed water will be discharged from the hole placed at the bottom of the outdoor unit. Do not locate the unit above doorways. You may also connect the discharge hole with a water tube (Diameter 12.5 mm) to channel the water to a proper place.
- Page 17 Drain any water in the unit before operating the unit on ventilation only mode for a few hours, to thoroughly dry the inside. Clean or replace the filters. Unplug and store the power cord as shown. Replace in the original carton or cover for storage.
- Page 18 Is the air conditioner plugged in? Is there a power failure? The air conditioner does not Is the room temperature below the set temperature? Is there direct sunlight? (Close curtain & blinds.) Are too many windows or doors open? The machine seems to do Are there too many people in the little room?
-
Page 19: One (1) Year Limited Warranty
Do not operate the unit with a damaged cord or plug, after the unit malfunctions, has been dropped or damaged. For your convenience, record the complete model number and product name (located on the Product Identification Plate), the date you purchased the product, and attach your purchase receipt as proof of purchase.
Need help?
Do you have a question about the ACS16E and is the answer not in the manual?
Questions and answers