
Related Manuals for iHome iH9


Summary of Contents for iHome iH9
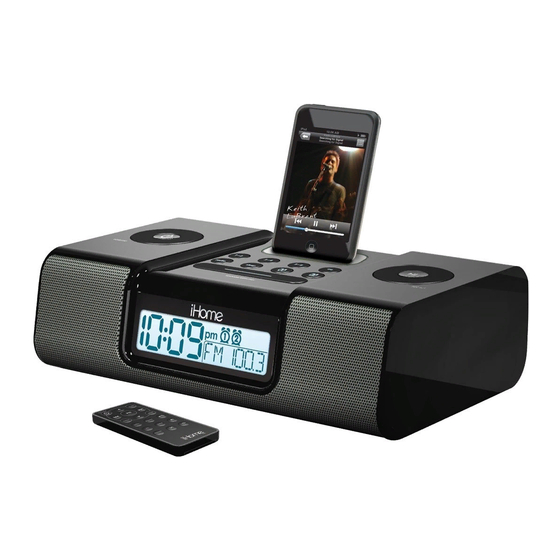
- Page 1 Model iH9 The Home System ® For Your iPod NOTE: THIS UNIT WILL NOT CONTROL OR CHARGE 3G iPod Questions? Visit www.ihomeaudio.com...
-
Page 2: Table Of Contents
Quick Start ...1 Controls and Indicators / iH9 Display ...2 Using the iH9 ...3-4 Replacing iH9 Backup Batteries...4 Using the Remote Control Unit...5 A Consumer Guide to Product Safety...6 Troubleshooting ...7-8 Solucionando problemas ...9-10 Warranty Information ...11 This device complies with part 15 of the FCC Rules. Operation is subject to the condition that this device does not cause harmful interference. -
Page 3: Quick Start
1:power Attach AC adaptor cable to jack on back of the iH9 and plug the other end into a wall socket. NOTE: If you do not have an insert for your iPod, please visit an Apple store, www.ihomeaudio.com, or call iHome toll free at 800-288-2792 to purchase one. -
Page 4: Controls And Indicators / Ih9 Display
Time Zone Button AC Adaptor Jack Line Out Jack DST switch Line-in Jack FM Antenna AM Loop Antenna socket iH9 Display Sleep Indicator Alarm 1, Alarm 2 Indicators Time Display PM Indicator Wake-to Indicator Battery Low Indicator Radio / Alarm Time / iPod Display... -
Page 5: Setting The Clock
Set Wheel to adjust snooze time from 1 to 29 minutes. Sure Alarm The iH9 has a sure alarm feature so the buzzer alarm will still sound in the event of power failure, if backup batteries are installed. iPod Playing and charging your iPod a) Place proper insert for your iPod (see insert table under Quick Start) in will charge until fully charged. -
Page 6: Using The Ih9
An audio patch cord comes with the iH9. Use it to play nondocking iPods or other audio devices through the iH9 (connect one end in the device’s line out or headphones jack, the other in the iH9 line-in jack). Make sure there is no iPod docked in the iH9 when using the line-in jack. -
Page 7: Using The Remote Control Unit
Random Button: Press for random play Repeat Button: Press for repeat play (press again to repeat all) Sleep Button: Press to select an amount of time before the iH9 shuts off: 120, 90, 60, 30 or 15 minutes Volume – Button: Lowers volume level... -
Page 8: A Consumer Guide To Product Safety
When used in the directed manner, this unit has been designed and manufactured to ensure your personal safety. However, improper use can result in potential electrical shock or fire hazards. Please read all safety and operating instructions carefully before installation and use, and keep these instructions handy for future reference. Take special note of all warnings listed in these instructions and on the unit. -
Page 9: Troubleshooting
Using 1 or 2 other devices. Remote Control didn’t Battery weak work Remote Control is out of range of the iH9 remote sensor iH9/iPod performance is The iH9 is reacting to external interference erratic No sound from iH9 Volume is set too low on iH9 iPod didn’t charge up... - Page 10 Press and hold Snooze button then turn set wheel to adjust Sync iPod to iTunes and manually label playlist iHome. Make sure to add songs to your playlist. For help in creating a playlist, please see the Help tab in iTunes or visit www.apple.com...
-
Page 11: Solucionando Problemas
El iH9 no puede controlar estos otros aparatos Reemplace las baterías por nuevas Apunte el control remoto hacia el iH9 y manténgase a una distancia máxima de 10 pies de la unidad. Aleje la unidad de Fuentes potenciales de interferencia externa como computadoras, modems, ruteadores inalámbricos, luz... - Page 12 Sincronice su iPod a iTunes y manualmente ingrese el nombre de la lista bajo “iHome”. Asegúrese de agregar las canciones a su lista. Ajuste la alarma según deseé que suene en hora AM o después del mediodía PM.
-
Page 13: Warranty Information
Limited 90-Day Warranty Information iHome Products, a division of SDI Technologies Inc. (hereafter referred to as SDI Technologies), warrants this product to be free from defects in workmanship and materials, under normal use and conditions, for a period of 90 days from the date of original purchase.
Need help?
Do you have a question about the iH9 and is the answer not in the manual?
Questions and answers