Table of Contents
Advertisement
Quick Links
Advertisement
Table of Contents

Related Manuals for iHome iH5


Summary of Contents for iHome iH5
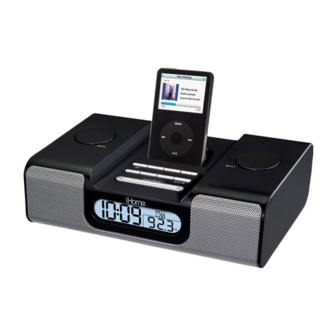
- Page 1 Model iH5 The Home System ® For Your iPod Questions? Visit www.ihomeaudio.com...
-
Page 2: Table Of Contents
Table of Contents Quick Start ..................................1 Controls and Indicators / iH5Display ..........................2 Using the iH5 .................................3-4 Replacing iH5 Backup Batteries............................5 Install/Replace Backup Battery Batteries information Using the Remote Control Unit............................5 A Consumer Guide to Product Safety..........................6 Troubleshooting ................................7 Solucionando problemas ..............................9 Warranty Information ..............................11... -
Page 3: Quick Start
1:power 2:antenna 3:inserts 4:time 5:iPod 6:radio... -
Page 4: Controls And Indicators / Ih5Display
DC 15V 1100mA line out time zone clock adj. line in am antenna AM Loop Antenna socket FM Antenna iH5 Display Battery Low Indicator Sleep Display Time/Alarm Display PM Indicator Wake To Indicator: Alarm Armed iPod, Radio, Buzzer, iPod Indicator... -
Page 5: Using The Ih5
1 hour alarm cycle. Sure Alarm The iH5 has a sure alarm feature so the buzzer alarm will still sound in the event of power failure, if backup batteries are installed. iPod Playing and charging your iPod a) Place proper insert for your iPod (see insert table on page 1) in Dock, then gently dock iPod. -
Page 6: Using The Ih5
Line-in Jack (one end in the device’s line out or headphones jack, the other in the IH5 line in jack). Make sure there is no iPod docked in the iH5 when using the line-in jack. Press the Ipod Button until AUX appears on the display. -
Page 7: Replacing Ih5 Backup Batteries
Install/Replace Backup Battery The iH5 uses a backup battery system to provide continuous alarm operation and clock settings in the event of a power failure. If the Battery Low Icon located on the left of the display is flashing, it is time to replace the backup batteries. -
Page 8: A Consumer Guide To Product Safety
A Consumer Guide to Product Safety When used in the directed manner, this unit has been designed and manufactured to ensure your personal safety. However, improper use can result in potential electrical shock or fire hazards. Please read all safety and operating instructions carefully before installation and use, and keep these instructions handy for future reference. -
Page 9: Troubleshooting
Replace current battery with new battery work Remote Control is not pointed toward the Point the Remote Control toward the iH5 remote sensor (to right of clock iH5 remote sensor display), move within 10 feet of the unit. iH5/iPod performance is... - Page 10 Troubleshooting Possible Problem Solution Symptom Sound is distorted Volume level is set too high Decrease the volume Sound source is distorted If the iPod original sound source (MP3) is old or of poor quality, distortion and noise are easily noticed with high-power speakers. Try a different audio source such as a music CD.
-
Page 11: Solucionando Problemas
El control remoto Las baterías están gastadas Reemplace las baterías por nuevas no funciona No está apuntando el control remoto hacia el Apunte el control remoto hacia el iH5 y manténgase a una distancia máxima de 10 pies de la unidad. - Page 12 “line out” El funcionamiento El iH5 está reaccionando a interferencias Aleje la unidad de Fuentes potenciales de interferencia externa del iH5/iPod es externas. como computadoras, modems, ruteadores inalámbricos, luz errático.
-
Page 13: Warranty Information
Limited 90-Day Warranty Information Home Products, a division of SDI Technologies Inc. (hereafter referred to as SDI Technologies), warrants this product to be free from defects in workmanship and materials, under normal use and conditions, for a period of 90 days from the date of original purchase. Should this product fail to function in a satisfactory manner, it is best to first return it to the store where it was originally purchased.
Need help?
Do you have a question about the iH5 and is the answer not in the manual?
Questions and answers